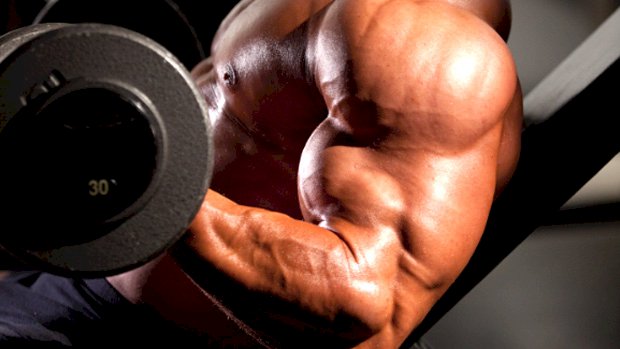
 Want to take advantage of muscular tension, isometric potentiation, unilateral-enhanced neural drive, and other big words and phrases? Then check out this “new” way to curl. The Constant-Tension Alternating Curl Start with both arms in the fully flexed position – the “top” of the curl. Lower the working arm while keeping the non-working arm flexed near the top. Curl up the working arm until both arms are once again flexed. Then switch arms and do the same thing. You keep on alternating this way until the set is completed. The benefits, according to Coach Christian Thibaudeau, are: The biceps are under constant tension. While the non-lifting arm is “waiting its turn,” it’s still contracted isometrically. You’re performing a unilateral dynamic movement. You’re preceding the dynamic action by an isometric one. The downside is that you can’t use as much weight, so you won’t create as much muscle damage. This is why it’s important to use this exercise as a secondary biceps movement, after a heavier exercise. The technique can be used with dumbbell preacher curls. Give it a
Origin: Tip: Do the Constant-Tension Curl
Tag: Tip:
Tip: Tap Out to Win
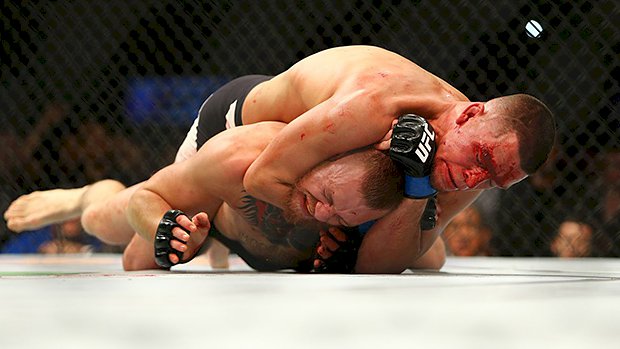 The phrase “tap out” has slid into the mainstream over the last 25 years or so, but its original meaning has been forgotten, or at least misinterpreted. When you’re training Brazilian Jiu Jitsu, one of the most important things you can do is tap. It’s a fundamental part of the learning experience. In class, you’ll tap over and over again as you figure out what not to do. Tapping out isn’t seen as quitting and it’s not a sign of admitting defeat. It’s a way of saying, “Yep, you got me. Let’s go again and see what happens.” Tapping is also an ego-check. Think you’re “too hardcore” to tap when you end up in a bad position? It’s amazing how much humble pie you’re able to eat when someone’s radius is crushing your carotid artery. Okay, buddy, enjoy your nap. When you wake up, go research “Judo Gene LeBell and Steven Seagal”, see what kind of company you’re in, and then come back to class with a better attitude (and maybe a new pair of pants). Show me an elite fighter who’s never tapped. They simply don’t exist. The most dangerous bad-asses on the planet tap out regularly in training because they know that’s how you get better. If you’re practicing and never need to tap, it doesn’t mean you’re an indomitable beast. It means you’re surrounded by less-skilled weaklings who don’t challenge you and you’ll end up a paper tiger. This ties back to mental toughness. People with real grit understand that true success only comes from repeatedly recognizing when you’ve made a wrong turn, owning up to the situation, and then doggedly getting back to work again and again and again. The (unacceptable) alternative is to be the type of person who hits one obstacle, sees it as insurmountable, and decides reaching the goal isn’t worth a little bit of uncomfortable
Origin: Tip: Tap Out to Win
Tip: Sit a Lot? Do These 4 Exercises
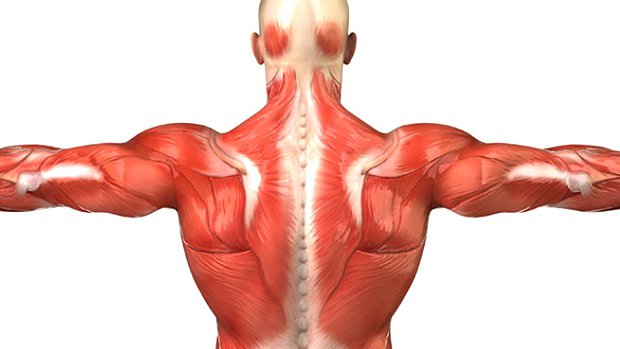 Slouchers, Do the T-W-A-Y Circuit Many lifters experience shoulder pain. This is often due to faulty biomechanics or weakness/inactivity of the scapular stabilizers (serratus anterior, rhomboids, levator scapulae and trapezius). Most commonly, anterior shoulder pain (in the front of the shoulder) will be due to difficulty fully retracting the scapulae. Much like the glute amnesia caused by prolonged sitting, scapular retractors can be hard to properly recruit after we sit slouched for hours. Because our shoulder blades tend to move into protraction (up and forward) when posture is less than ideal, you need to retrain your retractors to pull your shoulder blades down and back. The challenge is finding scapular retraction exercises in which the bigger, stronger muscles of the shoulder girdle won’t overpower their smaller counterparts. These exercises will help to combat the problem. Not only will they help lifters with shoulder stability for pain-free benching and overhead pressing, they’re also of great benefit for injury prevention in overhead movement athletes. All four exercises will be performed in a prone lying position. Take a breath to expand and stabilize the rib cage, lifting the sternum and head to achieve proper cervical and thoracic alignment. The range of motion will be minimal, which allows you to better target the scapular retractors. Maintain constant tension on the target muscles throughout the movement and between reps for maximum time under tension – don’t put your arms back down until all the reps are done. These movements are much more challenging than appear, so you’ll perform them with absolutely no load at first. Focus on movement control, squeezing the shoulder blades for a good strong peak contraction. The T Start with your arms straight out beside you in external rotation, thumbs up, forming a T-shape. Your upper arms should form a perfect 90 degree angle with your torso. Keeping your arms straight, lift your arms straight up while squeezing your shoulder blades together as hard as you can. Hold for a 3-second peak contraction. Repeat for 8-12 reps. The W Begin by extending your arms (palms down) up to 10 and 2 o’clock. Bend your elbows down and back as if you were trying to put your elbows in your back pockets (W-shape), focusing on a maximal contraction of the scapulae. Hold for a 3-second peak contraction. Repeat for 8-12 reps. The A Put your arms down alongside your torso (palms up) at about 5 and 7 o’clock (A-shape). Leading with the shoulder blades, lift your straight arms up and back as if you were trying to push off from a wall. Squeeze your scapulae hard and hold for 3 seconds. Repeat for 8-12 reps. The Y Extend your arms up (palms down) to about 10 and 2 o’clock (Y-shape). Leading with the hands, lift your straight arms up, while squeezing the shoulder blades back and down. Hold for 3 seconds and repeat 8-12 times. Programming Notes Perform all four exercises as a circuit at least two or three times per week. You can do them as a warm-up, at the end of an upper body workout, or even at home on the living room floor. In week 1, one set of each exercise will suffice. You’ll be surprised how tough they are. If the exercises seem too easy, you’re not trying. Focus on the squeeze. Add a second circuit in week 2 or 3 and then a third in week 3 or 4. Rest only 30 seconds or so between circuits. Resist the temptation to add load initially. You need to focus on maximally contracting the target muscles that drive full scapular retraction. You could easily cheat the movement up under load, but you won’t develop the proper mind-muscle connection you need to get the retractors firing. Once you’ve mastered recruiting the proper musculature, you can add a small load. Start with a 2.5 pound plate in each hand. If you go too heavy, other muscles will take over the movement and then you’re wasting your time. For the W, gravity is pulling in the wrong direction. Instead of using weights, anchor a low-resistance band to something stable a little way from your head, grab both ends and perform the movement as described above.
Origin: Tip: Sit a Lot? Do These 4 Exercises
Tip: Apple Cider Vinegar, Omega-3s, and C3G
 One of the most effective things you can do to optimize body composition is improve insulin sensitivity. If you’re more insulin sensitive, it’ll be easier to build muscle and lose fat. Insulin is a storage/anabolic hormone. Anabolic means “to add.” It’s released mostly in response to an increase in blood sugar. We could say that insulin is triggered by the need to lower blood glucose back down to normal levels, and it does so by favoring the entry of glucose (and other nutrients) into the “storage facilities” like muscle cells, fat cells, the liver, and brain. As such, if you’re more insulin sensitive, you won’t need to produce as much insulin in response to an increase in blood sugar levels, and if you’re resistant any increase in blood glucose can really jack up insulin release. This is important because the more of a hormone you produce or release, the longer it’ll take for that hormone to go back down to baseline levels. Insulin being a storage hormone directly increases storage of nutrients into the various reserves, including fat cells. So if insulin is high and there’s a lot of fat present at the same time, you’ll increase fat storage. The other part of the equation is that elevated insulin reduces fat mobilization. As long as insulin stays elevated, you’ll be inefficient at losing fat. If you’re more sensitive to insulin, you don’t need to produce as much to get the job done, which means it doesn’t stay high for as long and you can spend more time being in a fat loss state. One simple thing to do to optimize insulin sensitivity is to take apple cider vinegar and omega-3 fatty acids about 15-20 minutes before your meals. You don’t need much. A tablespoon of vinegar and half a dose of Flameout® prior to any meal containing carbs is all you need. If you want your body to do an even better job at improving insulin sensitivity, take Indigo-3G® in the morning. This supplement significantly and rapidly increases insulin sensitivity. And even more interesting, it improves insulin sensitivity selectively in muscle cells, meaning that your body will more easily store nutrients in the muscles rather than fat
Origin: Tip: Apple Cider Vinegar, Omega-3s, and C3G
Tip: A New Exercise for Big Shoulders
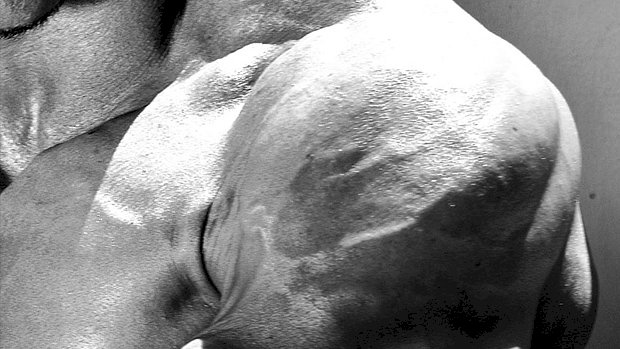 The delts are one of the most difficult muscle groups to develop. They’re also the most vulnerable to injury. The glenohumeral joint is the primary joint in almost all upper body functions. If you’re looking to press and pull heavy weight, you better have shoulders that are up for the challenge. There are two factors that need to be taken into consideration: You have to use movements that protect the health of the shoulder joint. You have to maximize the muscle recruitment to get them to grow This is often a difficult combination, except in this case. The Neutral-Grip Shoulder Press You’ve used the neutral-grip lat bar for pulldowns. Now try it for shoulder presses. Note that the cable is attached at the bottom of the handle, so you’ll be pushing up, not pulling down. The pulley should be set at about the belly or lower chest level. It’s a great pressing grip: elbows roughly 45 degrees from the body and hands in neutral grip (facing one another). The position of the arm alleviates unnecessary joint pressure to extend shoulder integrity. Begin with 25% of your normal barbell military press for 4 sets of 10. The video shows Musclemania Heavyweight Pro, Fred Shaka, who normally presses 225 pounds for reps, but trains this exercise at 60
Origin: Tip: A New Exercise for Big Shoulders
Tip: Do the Kettlebell Curl
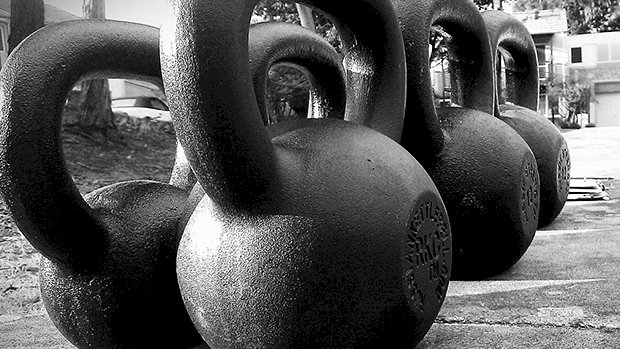 Use An “Open” Grip Fat-bar training increases grip and overall strength. You can buy training tools to create a fatter/open grip or you can just use kettlebells, just not in the traditional manner. Instead of using the handles, grasp the cannonball part of the kettlebell and curl away. You can only perform palms-up curls with this method, but what a burn! Try them standing, seated, in an incline position, or on a preacher bench. A Word of Caution Always implement thick-grip work slowly and gradually. Guys often buy fat-grip attachments and then rush to the gym to try them out on anything they can get their hands on. And what happens only days later? Tendonitis, and it takes a while to heal. Don’t be overzealous. Be a tortoise with these things and you’ll win the race over
Origin: Tip: Do the Kettlebell Curl
Tip: Trigger Biceps Growth With Spider Curls
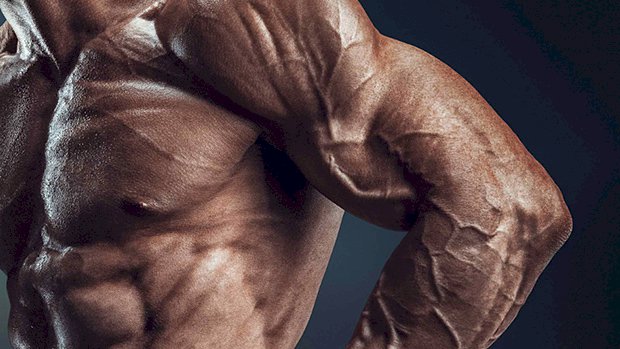 When it comes to training the biceps, simply doing more sets and reps won’t cut it. The problem? Most lifters are hitting the SAME parts of the biceps over and over again while completely leaving out – or at least under-stimulating – other parts. You need to hit both the long and short head of the biceps brachii (as well as the brachialis). Here’s an exercise for the often neglected short head: Spider Curl with Slow Negatives and Iso Holds Spider curls – where you lean over an incline bench and let the arms hang straight down – target the short head of the biceps. The big advantage of spider curls over preacher curls is the constant tension, especially at the top portion of the movement. The slower negatives allow more time under tension during the eccentric or lowering phase, where we can handle more load. This allows you to work at a higher intensity, and higher intensity means greater stress which means greater adaptation. Here’s an additional twist: use a fat grip. One of the benefits of thick-bar training is that thicker handles stimulate much more muscle activation in the hands, forearms, upper arms, and even the whole upper body. More muscle activation means much bigger muscle and strength
Origin: Tip: Trigger Biceps Growth With Spider Curls
Tip: Exercise Variety is Overrated
 “You Must Have Variety, Bro!” Oh Really? Some say that you won’t make progress if you do the same workout twice in a row. Others say that you won’t make progress if you keep the same exercise in your program for more than a few weeks. The truth? It’s those who don’t stick to any one program for more than a few weeks that never seem to make any significant progress. They’re the ones quoting old-school Dave Tate articles, yet don’t even look like they could squat their bodyweight. The worst culprits are those who like to toss in exercises for the novelty alone. “Look Ma, BOSU ball squats while juggling oranges! You know, to keep the body guessing!” The Greatest Training Gap Look, I’m not bashing exercise variety. Variety has a time and place. However, the greatest gap in most people’s training isn’t lack of novelty, but rather lack of mastery. Most people never experience their “true” fitness or strength because they never allow themselves enough time to get comfortable with a particular lift or movement. Who wants to perform plain ol’ vanilla deadlifts when you can add chains or perform them in a mine field? Master the Simple Stuff To add variety you don’t need to be excessive. Just changing your grip, foot stance, bar height, or adding pauses can be enough of a change to make the deadlift more effective (given a specific technique flaw or weakness). So rather than adding exercises haphazardly for the sake of “doing something cool and different,” use less variety and learn to get really good at doing the simple stuff
Origin: Tip: Exercise Variety is Overrated
Tip: A New Way To Use a Trap Bar
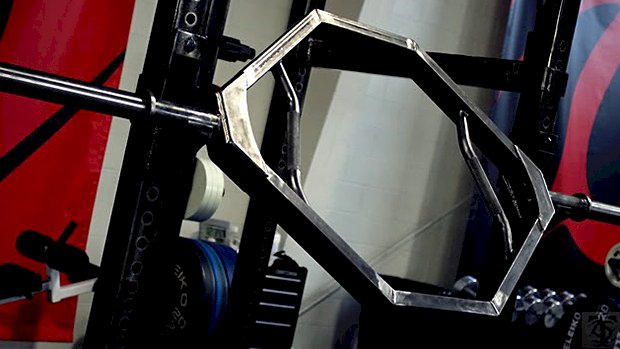 The Trap Bar Pullover Trap bar pullovers provide a unique stimulus to the upper back, shoulders, chest, triceps, and abs, and they force you to do pullovers correctly. Here’s why you need to start doing it: One of the most common mistakes with pullovers is to overstretch at the bottom of the movement. The unique and semi-awkward leverage used for trap bar pullovers forces you to terminate the range of motion at the ideal stopping point. If you overstretch, you’ll lose control of the weight due to the disadvantageous leverage. Pullovers with the trap bar allow you to use a wide, neutral grip, placing enormous tension on the lats, particularly in the stretched position. It’s also shoulder friendly. Because of the hanging nature of the weight and the challenging leverage that’s pulling away and against you, it takes twice as long to do each rep. Essentially, the trap bar exaggerates the arcing motion of the movement. The time it takes to move into and out of the stretched position is greater due to the size, awkward nature, and overall positioning of the load. Because you’re forced to slow down the movement – particularly in the stretched position – it takes additional stress off the shoulder joint while providing incredible stress to the surrounding musculature. The level of grip and forearm strength required during trap bar pullovers is unusually high. In order to control the trap bar and ensure it doesn’t twist in the hands, you’ll have to use near max-effort crushing grip-strength. The stimulus to the core and abs is higher than almost any other pullover variation. The trap bar also provides a less stable version of pullovers in general. As a result, it improves motor control by forcing you to hone in on mechanics. Trap bar pullovers can be done using the standard grip or using the outside frame for handles. Although they’re somewhat similar, the latter method is more challenging and less stable due to the length of the bar and decreased
Origin: Tip: A New Way To Use a Trap Bar
Tip: 3 Squat and Deadlift Challenges
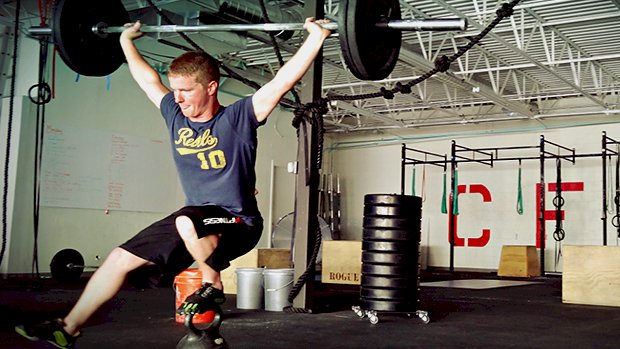
 Bodyweight Barbell Squat x 50 The fifty-rep set is mental and physical warfare. Performed once or twice per month, this test crushes training plateaus and builds serious mass on your legs. How to Do It: After a warm-up, load up a barbell with your approximate body weight, throw on some music, and start squatting for as many reps as you can. A good goal is 50 reps. This test is brutal. Use safety racks, a spotter, and plan extra recovery afterwards. How to Get Better: This test is easier for smaller guys. That’s just physics. But, regardless of size, the best way to improve endurance and relative strength is to get brutally strong. Focus on improving your one-rep max, then add one or two high-rep drop sets with your bodyweight every other week to finish off your legs. Front Squat Your 5RM Back Squat The front squat builds a steel-clad physique and incredible lower body strength just as well as the back squat. The front squat reinforces posture and adds mass to your upper back since your elbows stay elevated and your thoracic extensors work double time to hold position. Now, in the back squat we’ve all seen what happens when someone rounds their back, yelps like a kicked puppy, and jacks up their spine. No such issue on the front squat. If you round, the bar drops forward, and the lift ends without harm to your lower back. The trouble is, we’re all naturally stronger in the back squat, but most lifters are embarrassingly weak in the front squat due to poor strength in the anterior core and thoracic extensors. A good goal is to do a single front squat using the same amount of weight as you can back squat for 5 reps. Here’s the simple math: Take your back squat max and multiply it times .85. That will give you your back squat 5RM or close to it. For example, if your back squat max is 405 pounds, multiply that by .85 to come up with 345 pounds. Your goal is to front squat 345 pounds for one rep, or work your way up to it. Deadlift Sadiv Sets Sadiv sets are an advanced training method designed to boost your deadlift, test mental grit, and add tons of muscle to your posterior chain. Sadiv sets are a high volume, high-intensity monster of a deadlift workout. Beginners or the weak-minded need not apply. (Don’t even attempt this unless you’re deadlifting 1.5 to 2 times your bodyweight.) Here’s what to do: Set a timer for 12 minutes and load the bar with 60% of your 1RM. Perform as many reps as possible during the 12-minute span, shooting for at least 20 reps. If you don’t get 20 good reps, decrease the weight. Perform each rep as a single, resetting between each rep and pulling with perfect form. This means taking the slack out of the bar, keeping your hips back, your back flat, your chin down, and driving your heels into the earth. Perform each rep with max speed from the floor – leg drive is key. Once fatigue sets in, it’s vital to set up each lift like it’s a max attempt, brace the core, and drive the bar. Can you beat 20 reps with solid
Origin: Tip: 3 Squat and Deadlift Challenges
