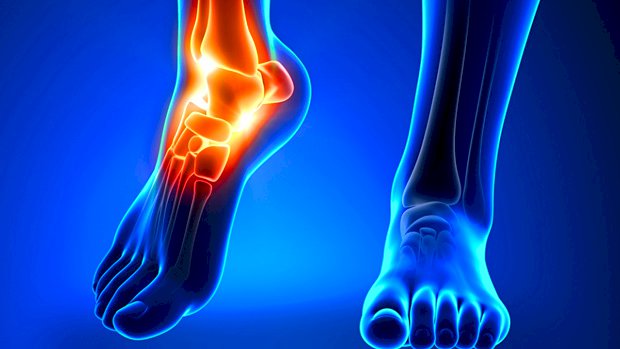
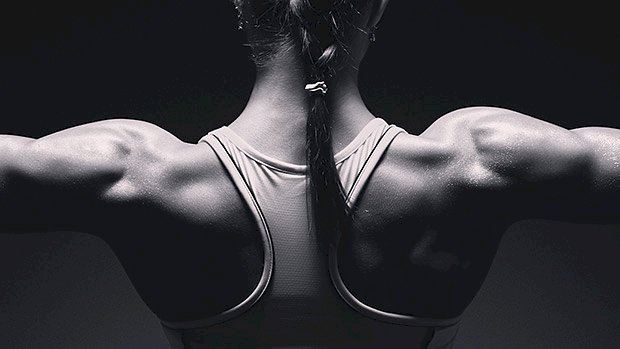
 Nearly everyone has limitations moving into dorsiflexion, which is required for squatting, lunging, and deadlifting. To increase mobility, hit the calves first on lower body days before your big compound lifts. Get a nasty pump using agonist/antagonist training. Improve Ankle Mobility By using calf raises (for gastroc work) along with lying banded dorsiflexions (for tibialis anterior work), you’ll get a metabolic-stress effect. This combo will unlock the neurological tension that makes your ankles as flexible as concrete bricks. The key is to train both of these movements out of an extended range of motion into the stretched position: For calf raises, control your ankles deep into dorsiflexion, get a stretch at the bottom of each rep for a full second, then drive up explosively. For the lying banded dorsiflexions, hold each peak of contraction for a full second at the top and control the movement back down with deliberate tension. Do sets between 15-20 reps for calf raises, and between 30-50 reps for dorsiflexions with short rests between the exercises. Rest 30-45 seconds between each
Origin: Tip: Improve Ankle Mobility Fast
Tag: Tip:
Tip: Build Your Back With Bodyweight
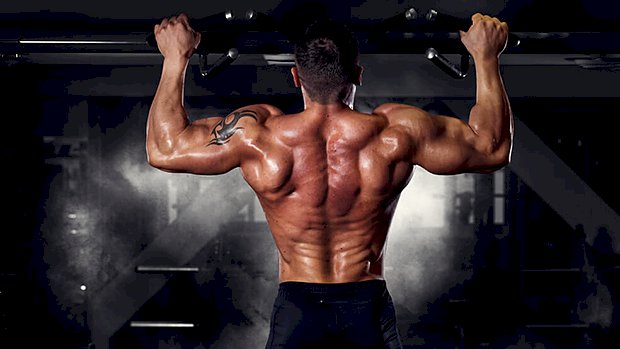 Mechanical drop sets (unlike regular ones where you just reduce the weight as you fatigue) allow you to switch to an easier modification of the movement, usually with the same weight. This helps you to increase metabolic stress and time under tension, both of which will stimulate hypertrophy. If you use this during the main part of the workout, shoot for 3-4 mechanical drop sets. If you use this as a finisher, then one set is more than enough. Do as many standard wide-grip pull-ups as you can. Use a weight vest or hang additional weight from a belt if you can do more than 15. Next, go to volitional failure on eccentric (negative) pull-ups. Jump up to the top position, then lower yourself as slowly as possible. Drop down under a suspension trainer or a bar and perform as many horizontal rows as you can (feet on the ground or elevated, depending on your level of fatigue). The suspension trainer is preferable as it allows your hands to rotate to maintain optimal shoulder position and to better engage the back muscles.
Origin: Tip: Build Your Back With Bodyweight
Tip: Age Makes No Difference in Recovery Rates
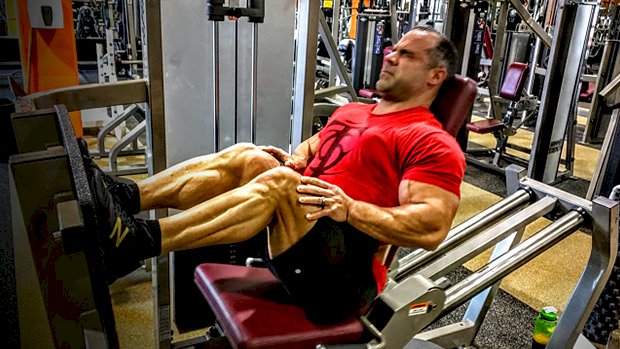
 The Middle-Age Stereotype? A lot of unfortunate things happen when a man hits his forties or fifties. His skin starts to resemble distressed leather and he leaves behind a winter storm of dead skin flakes whenever he gets up off the sofa. Stiff hairs and strange growths start to sprout from his body, making him look more like a potato that’s been stored under the sink too long than a man. He also finds himself giving up on colorful, presumably flattering underwear and gravitating towards the same, 5 in-a-bag discount, asexual, tightie-whities his mom used to buy for him when he was 10 years old because, realistically, there’s no scenario where any woman aside from an emergency room nurse is going to see him with his pants off. On the weightlifting front, he finds his progress slowing. Muscle comes hard while fat comes easy. His joints and muscles ache so bad in the morning that he wishes he could just call an Uber to take him straight to the can. But maybe all these age-related assumptions are just stereotypes, especially the ones related to weight lifting, because American researchers have discovered that as far as recovery rates, there’s no real difference between men in their 20’s and men in their 40’s or 50’s. What They Did The scientists recruited 19 recreationally trained men and split them into two groups, a “young adult” group (21.8 years old, plus or minus 2 years) and a “mature adult” group (47.0 years old, plus or minus 4.4 years). The men were asked to train one leg on an “isokinetic dynamometer,” which is a kind of glorified leg extension machine with electronic readouts. Their training protocol consisted of 8 sets of 10 reps with 60 seconds of rest between sets. The scientists measured max voluntary isometric contractions and isokinetic peak torque, along with blood values to determine levels of inflammation. Blood samples were taken before lifting and immediately after lifting and were repeated 30, 60, 120 minutes, 24 hours, and 48 hours post-exercise. What They Found The results revealed no differences between max voluntary isometric contractions and isokinetic torque. More importantly, there were no between-group differences between myoglobin, creatine kinase, C-reactive protein, or interleukin-6, all markers of recovery or inflammation. What This Means to You The researchers concluded that, “…this study indicated no differences in the recovery response between young adults and middle-aged adults for any of the performance measures, nor in subjective levels of muscle pain or soreness. Furthermore, no between-group differences were observed in the inflammatory or muscle damage response to the exercise protocol.” So maybe this study will help put to bed some of the misconceptions about age and lifting. Too many people have it in their minds that 40 or beyond is some sort of real, tangible barrier to progress. Granted, older lifters need to stay mobile and flexible, because that’s where real aging will manifest itself if you’re not diligent with your stretching, mobility drills, yoga, Kama Sutra sex, or whatever you do that keeps you from turning into a human floorboard. Other than that, older lifters shouldn’t necessarily temper their training or their goals because of fears they’re in the throes of codgerdom. Progress should continue just fine, thank
Origin: Tip: Age Makes No Difference in Recovery Rates
Tip: This Can Stop Fat Loss
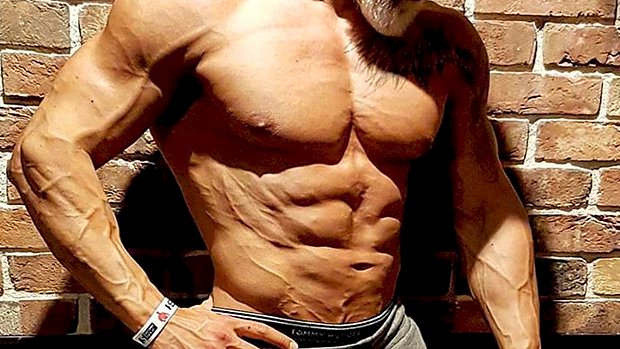
 Gut Dysfunction and Stalled Fat Loss Gut issues are a major source of stress for the body, and digestive issues can stall efforts to lose body fat. Think gut problems aren’t a big deal? They’re a huge deal. Proper digestion and the absorption of nutrients is essential for fat loss. The body is a complex chemical factory that can’t function properly without the right nutrients available. So asking your body to perform when it’s deficient is like expecting your car to run without oil. Luckily there are some basic ways to assess whether digestion is a problem. Study Your Poop The first consideration is the regularity and consistency of your bowel movements. These should be well formed with elimination at least once a day. Constipation and diarrhea are both red flags of digestive issues that need to be addressed. If you experience bloating, excessive gas, or reflux, then it’s likely you’re having difficulty absorbing nutrients and may have bacterial imbalances or food intolerances. Taking antacids or other medications to alleviate these issues will make the problem worse. They’re temporary fixes for deeper issues. Bad Bugs If your diet is low in processed foods and you suffer from these symptoms then testing for bacterial overgrowth, Candida, parasites, and other bugs may be necessary to identify exactly what’s going on. Food allergies and histamine reactions occur frequently when digestion and elimination pathways aren’t performing well. Gluten and lactose sensitivity are common and may have genetic components. If you find yourself becoming itchy, getting hives, urticaria or suffering from other chronic skin conditions, that’ll be another sign that you have bowel problems. Yes, all these things indicate gut dysfunction. Lots of symptoms indicate problems: gas, bloating, even the excessive feeling of fullness. It’s interesting how many people tell me they think those things are normal. So many fit, lean and otherwise healthy-appearing people have chronic gut issues. It’s not something to brush off. Testing and professional consulting from a specialist may be in
Origin: Tip: This Can Stop Fat Loss
Tip: The Only Good Smith Machine Exercise
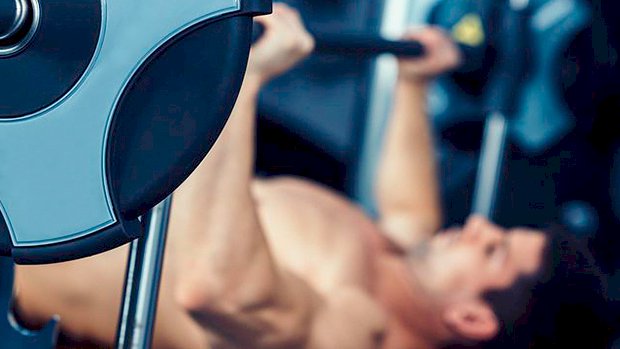 High-tension training methods teach our bodies to exert more force. Plyometrics and the shock method are often used for lower-body power development (depth jumps, loaded jumps, and landing from various heights.) However, very few people use the same methods for the upper body. Such drills can be very effective at improving bench-pressing strength. Example: the ballistic bench press. This is the only exercise in which I consider using the Smith machine effective. The objective is to lower the bar to the chest, throw the load in the air, then catch it and start again. The load you use should be light, because the goal is not to just be explosive, but to be ballistic. Use a weight that’s about 20 percent of your maximum effort. If you bench 300 pounds you’d use 60 pounds for the bench throws. Lower the weight under control, quickly reverse the motion, and toss the bar into the air as hard as you can. But be ready to catch it on the way down unless you want to get decapitated. Note: This won’t work well with Smith machines that use
Origin: Tip: The Only Good Smith Machine Exercise
Tip: Get Ripped on the Rower
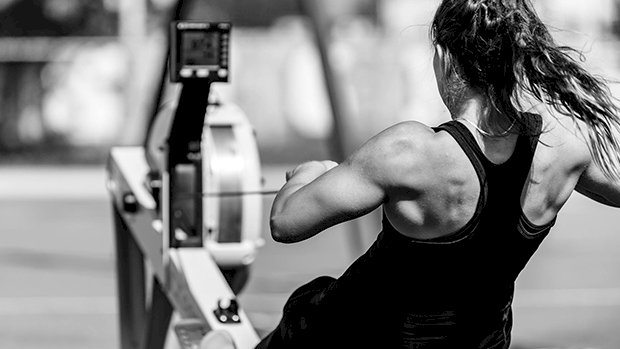 The Erg is the G.O.A.T. One of the major reasons people do cardio is to lose body fat. So it’s no surprise that the most common question people have is, “Which is the best cardio machine?” Let’s end this debate, once and for all. Purely considering the potential to burn the most body fat, the answer is the ergometer. The “erg” is better known as the rowing machine, and it’s hands-down the best fat burning cardio tool in the gym. Why is the erg the best choice for cardio? First, it’s one of the few pieces of cardio equipment that requires both your upper and lower body to operate the machine. This makes it literally twice as effective as only using your legs on most machines. Second, it’s low-impact so you can use it even if you have injuries or are overweight, without worrying about developing joint problems from repetitive high-impact activities like jogging on the treadmill. Finally, it’s a freakin’ brutal workout. Before I share my favorite fat-blasting erg workouts, you need to understand the basics of efficient rowing technique. The erg might be the best cardio machine, but it’s also the most poorly used piece of equipment in the cardio room. The Rowing Ergometer: Proper Technique There are two main positions in rowing: the catch and the pull. The catch: It’s basically the starting position, where you lean forward to grasp the rower’s handle. Use an overhand grip. Once you’re holding the handle, sit up tall with your shoulders pulled down and back, and your chest up. Your back should be flat, not rounded, in this position. It should maintain flat throughout your workout. The pull: Start with your legs – drive your heels through the foot-plate and use your legs for power. Next, keeping your back flat, hinge backward at the hips and lean back. Finally, pull powerfully with your arms. Since your legs are now extended, the chain should travel in a straight line without having to rise above your knees. Bring your hands into your ribs – not your throat – during the pull and keep your elbows tucked. At the end of the pull, your legs will be extended straight out, your knees will have only a slight bend, your torso should be leaned backward, and your arms will have pulled the handle toward your chest. Reverse the movement in the exact opposite manner: arms, torso, legs. You’re now back in the starting “catch” position. Repeat this at a slow pace to get the hang of the pattern: drive with your legs, lean backward, and pull with your arms; then straighten your arms, lean forward, and bend at the knees. The power comes first from your legs, then from a strong pulling motion once you’ve leaned back. Your upper body should stay straight, oscillating between “10 and 2” like a metronome when viewed in profile. Key Points Always maintain a strong core and upright posture. Avoid moving the chain up and down; it should travel in a straight line. Drive through your heels to produce the most power with your legs. Complete the movement by aggressively and powerfully pulling the handle to your ribs. Now with that technique work out of the way, we can get to the fun stuff – conditioning. The Workouts The best part about the rower, especially for someone who wants to torch fat without spending an hour plodding along on the treadmill, is that it’s well-suited for interval training. These workouts are absolutely brutal. Don’t believe me? Give these bad boys a try and let me know how it goes. Beginner: 5 x 200 meter sprints Row as fast as you can for 200 meters. When you’re finished, rest for twice as long as it took you to row before repeating the next interval. Aim for consistency across all five sets (the same pace and total time to complete the sprint). A shorter rower should complete this in 50-60 seconds, which means you should rest for around two minutes. A taller rower could complete this in about 40-45 seconds and rest for 90 seconds. Try to maintain your pace and work/rest times. Then progress this beginner workout by adding an extra interval every week or two, like this: 6 x 200 7 x 200 8 x 200 Intermediate: 4 x 250 meter sprints Row as fast as you can for 250 meters, but only rest for as long as the interval takes you to complete. A shorter rower will complete the work in about one minute and rest for about one minute. A taller or more experienced rower will take about 50 seconds and rest for the same amount of time. Progress this workout by adding more intervals each week: 5 x 250 6 x 250 7 x 250 8 x 250 Advanced: 4 x 500 meter sprints The working piece is going to take you about two minutes. The key is finding a pace you can maintain for the entirety of the set. Two minutes is taxing to your metabolic systems, which is good news for fat-burning, but bad news for your psyche. Avoid what rowers refer to as “flying and dying” – sprinting too fast out of the gate and coming to a painful halt when your oxygen consumption can’t keep pace with your energy expenditure. When starting with these longer
Origin: Tip: Get Ripped on the Rower
Tip: The Upper/Lower Split: Pros and Cons
 Most commonly, this training split involves 4 workouts a week with each session dedicated to upper and lower-body training in alternating succession, like this: Monday:Upper Body Tuesday:Lower Body Thursday:Upper Body Friday:Lower Body Pros For most lifters, training each muscle group twice a week is much more effective than only once. Many lifters enjoy the ability to give focused attention to a specific body region for an entire workout. Cons Twice a week may be less than optimal – especially for average to smaller guys who aren’t yet in the 1200 club (300 bench, 400 squat, 500 deadlift). Overall, this is a descent split, but there may be an even better way of organizing your training for the week. Check it out here: The Hybrid
Origin: Tip: The Upper/Lower Split: Pros and Cons
Tip: Do Fixation-Insertion Super Sets for Biceps
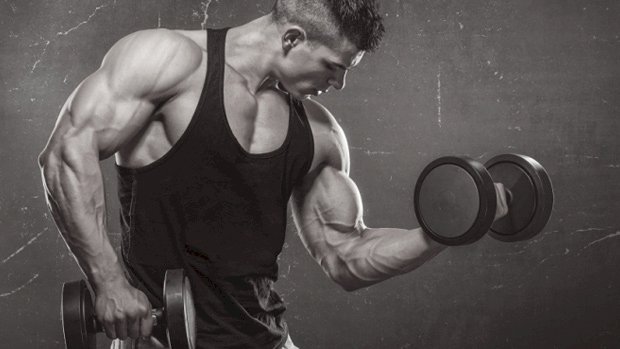 In kinesiology, the origin of a muscle is what is fixated and the insertion is what moves. If you can superset movements that combine these two opposite functions, you stimulate muscle fibers at both ends and you get super compensation. Here’s a nasty super set for biceps: Do 4-6 reps of close-grip chin ups. Rest 8-10 seconds. Then do 8-10 reps of incline dumbbell curls. See photo below. Do five sets, resting approximately 2 minutes between sets. Here’s What’s Happening When you’re doing the chin-up, the origin is at the elbow and the insertion is at the shoulder. Then, when you do the incline dumbbell curls, it’s the opposite: the origin is at the shoulder and the insertion is at the elbow. Mechanically, you’re doing two extremes, and inducing fiber damage beyond
Origin: Tip: Do Fixation-Insertion Super Sets for Biceps
Tip: A Different Way to Do Pulldowns
 A former coach used to have me do pulldowns on my knees with a narrow neutral grip, and I’m still doing them years later, but with a couple adjustments. A tip from Nick Tumminello inspired me to try these with a diagonal torso angle (instead of a completely upright torso), and that change actually made it a lot more effective. Kneeling Pulldown, Diagonal Torso Leaning back forced me to have to sit down on a leg. So play around with the degree of your torso angle until you can get the tension where you want it. The second adjustment was putting one foot in front. You don’t have to, but I’ve found that it helps me stay anchored on the ground a little better when I’m using more weight than my bodyweight. The kneeling pulldown will hit your back in a different way than the standard (not-from-the-floor) pulldown, but consider it supplemental rather than a priority. You’ll probably want to do them at the end of your workout because you can’t really load them quite as heavily as you might need to. There are two reasons for this: If you load it with too much more than your own bodyweight you’ll need to fight gravity as your body tries to rise off the floor. That’s why I keep one leg bent out in front. There’s actually not enough weight in the stack. You’ll notice that I’m using almost the entire stack. Trust me, that’s not because I’m crazy strong. I can use the whole stack and, I suspect, that I’m able to do so because of the advantage you get by being on the floor instead of seated, the way you are with traditional pulldowns. So, if you’re not a person who can use the entire stack on any cable exercise, you’ll feel like a rock star doing this. And bonus – people who aren’t familiar with this exercise might assume you’re stronger than you really are when they see you using the whole stack, or anywhere near it. And I’m a fan of
Origin: Tip: A Different Way to Do Pulldowns
Tip: How to Make the Step-Up Work Better
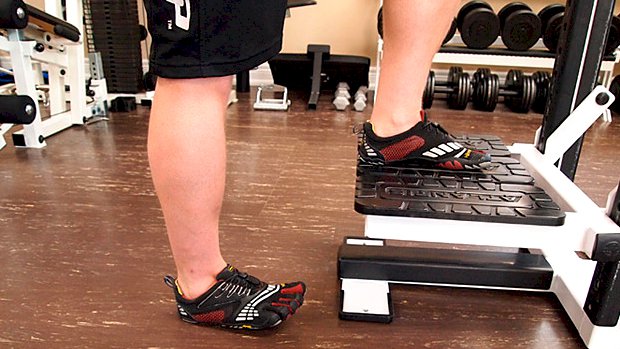 The Step-Up: You’re Doing It Wrong You don’t see a lot people doing the step-up. They probably tried it at one time but decided it just didn’t work. The problem is, most people don’t do it correctly. Most lifters unknowingly cheat on the step-up by leaning forward too much and pushing off the bottom leg. When you push off the floor leg, the leg on top of the box or bench isn’t doing much work. Make It Work: Curl Up Your Toes To keep from cheating on the step-up, curl up the toes of the foot that’s on the floor. Keep them curled up during the movement. This keeps you from being able to push off from the bottom leg so easily, because in order to push off you have to keep the toes down. As for bench or step height, you can go very high. The highest you can go is when the bench is so tall you’re up on your toes. It’s called the triple-jumper’s step-up and it involves the VMO and hamstrings more. It’s basically just a super high step-up. The key is that your knee shouldn’t buckle in as you step up. You can alternate legs or keep one foot statically on the bench until you do the desired number of reps. If you want more time under tension, use the static method where the foot up on the bench is kept in place. You can do step-ups using a barbell or dumbbells. They’re all good variations. Just keep your toes
Origin: Tip: How to Make the Step-Up Work Better
