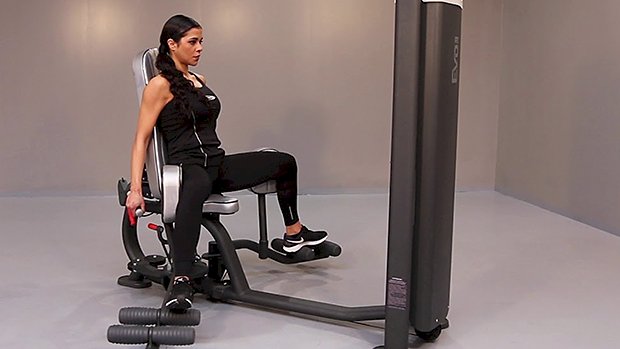
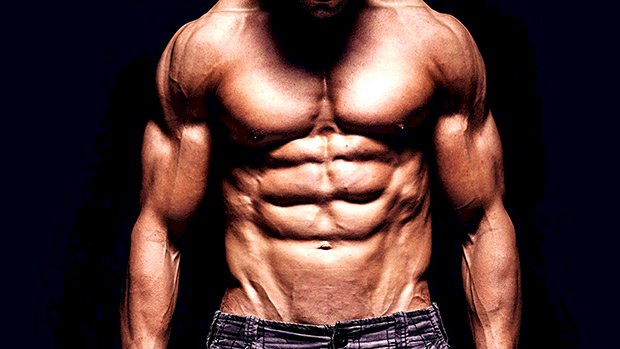
 The Good Girl/Bad Girl Machine These two machines get a bad rap because for a long time women were told to get on them to “shape and tone” their thighs via the bullshit known as spot reduction. In fact, I often have to wait for some little old lady to be done with these before I can hop on. And yeah, I got a few stares along the way. Even from granny. It’s crazy how many people hate these machines because they’re not regarded as “hardcore.” They saved me from a recurring injury when I was competing in powerlifting. I suffered from a bout of adductor strains during those years that drove me nuts, but once I got really freaking strong on the adductor machine my squat climbed from 635 to 660 pounds. I’m not saying there was “carryover” to my squat from doing the good-girl machine. But once I stopped having adductor strains, I was able to smash out some very productive squat cycles that allowed those gains to happen. I credit the adductor machine for that. But I didn’t approach it like Suzanne Summers ThighMaster time. I really pushed the progressive overload and worked to get brutally strong on them, eventually working up to using the whole stack for lengthy sets. With the bad-girl machine, aka the abductor machine, I used it prior to squatting as a way to get my hips and glutes warmed up. I stayed lighter for this movement and worked in the 15-20 rep range. When I initiated a squat workout this way, my squats felt way better and were more “in the groove” right out of the gate. If you find yourself struggling to hit depth early in your squat session because the loading isn’t heavy enough to force you down into position, or that your hips and knees are ornery in the warm-up process, throw these in before squats to potentially alleviate that problem. Three to four sets of 15-20 reps will do the
Origin: Tip: The Truth About the Bad Girl Machine
Tag: Tip:
Tip: Got Angry Knees? Squat Like This
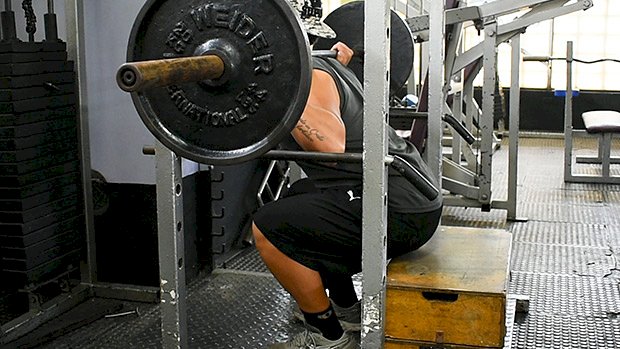 Got achy knees? Give the box squat a try: Set up a box or bench allowing parallel squat depth. Go a little higher if you’re still feeling knee pain, but don’t let it become a way to use too much load through a miniscule, restricted range of motion. If you’re able to use a greater ROM pain-free, go for it. Parallel tends to be a safe starting point for most people. “Grip” the floor firmly with your feet. Torque and rotate your hips externally to pull the knees into alignment with your hips and toes, creating a strong arch. Foot stance varies by individual, so find one that allows comfortable movement and the best range of motion. Keep in mind that the feet don’t need to be placed symmetrically – not everyone has symmetrical hip joints. Aim for a placement that allows you to feel the leg muscles evenly. Maintain external rotation of your hips through the entire rep. This should prevent your knees and ankles from collapsing inward, which would place greater stress on the knee joint and ACL. Maintain vertical shins by sitting back into your hips onto the box. A common issue here is poor ankle dorsiflexion. This can be immediately addressed by elevating your heels with squat shoes or a wedge, but is better managed with ankle mobility work for long-term resolution. By sitting back farther than a regular squat, we reduce the shear force, potentially alleviating the pain. Take a big breath and flex your abs hard to lock in that air and maintain a neutral spine. Brace your core all the way around your spine. Sit in a controlled manner onto the box without disengaging your core or legs and avoid rocking backwards to create momentum for the positive, or lifting, part of the rep. Use a controlled touch or brief pause. For added challenge, sustain a longer pause before the positive rep. Keep the movement strict and avoid failure, which would increase the likelihood of further aggravating your angry
Origin: Tip: Got Angry Knees? Squat Like This
Tip: Protein-Packed Lemon Squares
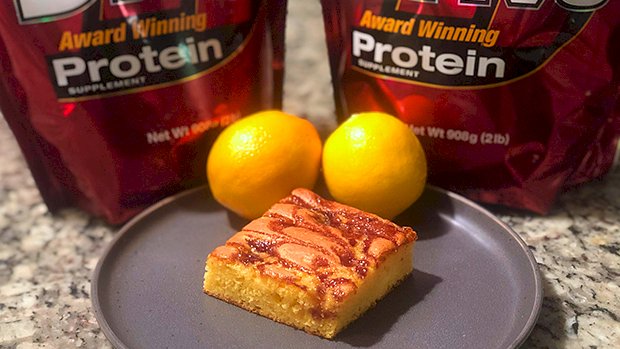 It’s a burst of lemon, a hit of blackberry, and an insanely moist square you’ve gotta sink your teeth into. These bad boys have 16 grams of protein in only ONE piece and just one gram of fat and 8 grams of net carbs. Think it’s too good to be true? Think the sizes must be tiny? Wrong. Now all you have to do is make them. Ingredients 1 Cup fat-free vanilla Greek yogurt 1/2 Cup lemon juice 1/2 Cup egg whites 1 Teaspoon vanilla extract The zest of one lemon (see note below) 1 package sugar-free lemon pudding (Jell-O brand) 1/2 Cup Splenda (the kind made for baking that’s equal to sugar, cup for cup) 1 Cup flour of your choice (regular, a low-carb mix etc.) 1/2 Teaspoon baking soda 1 Teaspoon salt 1 Cup vanilla Metabolic Drive® Protein 1/2 Cup no-sugar added blackberry jam Note: You’ll need a lemon zester. If you don’t have one, you can use what’s called a “microplane” to zest the lemon peel. If you don’t have one of those, just use the side of the cheese grater that has the smaller holes. Directions Preheat the oven to 350 degrees Fahrenheit and take your jam out of the fridge so that it sits at room temperature. This makes it a lot easier to drizzle. Get your lemon zest ready. Set a bowl down to collect the zest. Then use the lemon zester to scrape off the yellow part of the peel. If you’re using a microplane or cheese grater, rub the lemon in one direction (against the sharp edges of the holes). You only want to collect the yellow part, so turn the lemon as you go, letting the zest fall into the bowl. In a medium mixing bowl, combine yogurt, lemon juice, vanilla extract, lemon zest, and egg whites. Set aside. In a separate mixing bowl, combine flour, baking soda, Splenda, protein powder, and sugar-free lemon pudding. Mix both bowls together thoroughly. Pour into your baking dish. With a spoon, drizzle several lines across the top of your batter. Using a knife, make whatever pattern you’d like on top but be sure to push the jam into the batter a bit. Pop the pan into the oven for 30 minutes or until you poke it with a toothpick, and it comes out clean. Everyone’s oven is different so keep an eye on it. Allow a couple minutes to cool before eating – that jam gets pretty hot. Cut into 9 pieces and enjoy! Note: The macros will vary a bit depending on the type of flour you use. You can handle the math, big
Origin: Tip: Protein-Packed Lemon Squares
Tip: Death by Dumbbell – The Workout
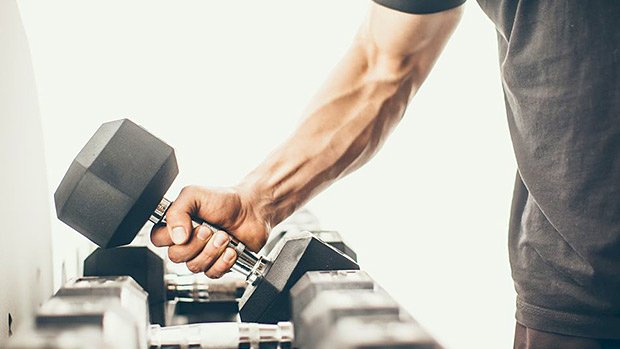 This is a simple, full-body workout that only requires one heavy dumbbell. It’s only four exercises, but they will challenge your shoulders, legs, and core stability. A lot of people avoid these exercises because they’re quite humbling. Don’t do that. Here’s what it looks like: The Workout 5 rounds of: 5 x Left arm overhead lunge 5 x Right arm overhead lunge 10 x Alternating bear row 5 x Left arm dumbbell strict press 5 x Right arm dumbbell strict press 5 x Goblet squat Take minimal rest between each round, aiming to finish in 12 minutes or less. To figure out what weight to use, find a dumbbell you can strict press for 10 reps with each arm and use that as your starting point. The strict press will be the limiting factor for most people. Exercise Tips Overhead Lunge:Make sure your elbow stays locked out the entire time and your ribs are pulled down. Do not arch your back; keep braced and reach high. Bear Row:Press down hard with the arm on the floor and draw the elbow of the pulling arm back as far as you can while maintaining square hips (squeeze your glutes). You can be super strict if you want, aiming to keep an unmoving plank throughout, but they’re a difficult movement so don’t be too hard on yourself. Just try not to look like a banana from the side. Dumbbell Strict Press:Don’t lean to the side. Pay attention to your lockout position, no half reps. Keep a more neutral grip and keep the dumbbell close. These will start to become challenging as you progress through the sets. Goblet Squat:Even though you’re holding the weight in front of you, try not to round your upper back. Keep your chest tall, grab the ground with your toes, and use the dumbbell to help you get nice and deep into your
Origin: Tip: Death by Dumbbell – The Workout
Tip: Eat This Way to Stop Achy Knees
 Achy knees are as emblematic of long-time lifters as cauliflower ears are of long-time Jiu Jitsu practitioners. Lift long enough and hard enough and your knees (and possibly other joints) will start to grind away and maybe get peed out and carried to the ocean where they might eventually become part of some distant tropical reef, home to some plucky invertebrate. Okay, that’s probably not how it works. Regardless, some lifters will be luckier than others. Their joints will degenerate, but only to the point where they’ll suffer the occasional grumpy knee, usually caused by a cold front that found Canada too limiting for its ambitions. But plenty of not-so-lucky lifters will spend years inundating themselves with alleged cartilage-rebuilding supplements like glucosamine and chondritin, eventually graduate to NSAIDS and opioids, and finally relent to a total knee replacement and spend the rest of their lives getting felt up by TSA agents at the airport because they lit up the X-ray scanners. Researchers at the University of Alabama at Birmingham might have presented people with bad joints an alternative fate, though. They found that simply going on a low-carb diet decreased pain and inflammation in guys with rickety knees. What They Did The scientists found 21 old guys with bad knees. They took serum samples and put them on one of three diets for 12 weeks: A control diet where they continued to eat as they had been. A low-fat diet that consisted of 800 to 1200 calories a day. A low-carb diet that allowed them to eat as many total calories as they wanted, but that only contained 20 grams of carbohydrates a day. Every 3 weeks, the participants were asked questions relating to functional pain, self-reported pain, quality of life, and depression. After the 12-week diet intervention was over, the researchers drew up a last round of serum samples to compare against the pre-test values. What They Found The guys on the low-carb diet reported reduced pain intensity and unpleasantness during functional tasks, as well as less general self-reported pain, as compared with the control group and the low-fat group. They also found significantly lower oxidative stress in the low-carb group. Their blood samples indicated a reduction in the concentration of TBARS (thiobarbituric acid reactive substances), which are a marker of inflammation. “In only 12 weeks, the quality of life and functional pain of this population were significantly improved, which may have been the result of a reduction in oxidative stress,” concluded the team. What This Means to You The results of this study might reflect a chicken or the egg dilemma. The researchers figured that the low-carb diet caused a reduction in inflammation, which of course resulted in reduced knee pain. However, I wonder if they might be looking at the results through a biologic lens rather than an engineering/physics lens. The low-carb group lost a lot of weight, more – perhaps surprisingly – than the low-fat group. That alone could have caused a reduction in inflammation and a reduction in pain. Consider that every time you take a step, the force on either knee is 1.5 times your body weight. Let’s say you weigh 200 pounds. That means when you walk on level ground, you’re putting 300 pounds of force on your knees. Hell, if you walk up some stairs, the force is 2 to 3 times your bodyweight, and it’s 4 to 5 times your bodyweight when you bend at the knee to pick up your iPhone. Let’s say your Fitbit nags you into taking 10,000 steps a day on level ground. Assuming you weigh that same hypothetical 200 pounds, you’re going to put a cumulative force of 3,000,000 pounds (300 pounds force x 10,000 steps) on your knees during that day. But what if you lost 10 pounds of bodyweight, perhaps through a low-carb diet? That same 10,000 steps would then subject your knees to a total of 2,850,000 pounds, which is a daily reduction of 150,000 pounds of pressure. Of course you’re going to experience less inflammation if you lessen the cumulative load. Of course you’re going to experience less pain. Lose more than 10 pounds and you reduce the total load further. So while the low-carb diet may have reduced inflammation and contributed to the improved quality of life in the gimpy-kneed guys, at least some or possibly a lot of the reduction in inflammation was caused by the reduction in weight. Of course, to joint pain sufferers, the specific reason for any reduction in pain probably doesn’t matter as much as the end
Origin: Tip: Eat This Way to Stop Achy Knees
Tip: The Russian Core Exercise
 Do the Twist, Comrade! The Russian twist is a forgotten gem of an exercise. It’s one of the best anti-rotational core exercises on the planet when performed correctly. Bonus: Its progression capacity is limitless. This core exercise requires your glutes to contract to provide stability from which to rotate. It also helps improve end-range hip extension. It teaches you how to disassociate your chest and arms from your hips (and even your low back to a small degree) to rotate effectively and safely. If you aren’t in constant control while performing the movement you’ll immediately fall off the ball, so the design keeps you on high alert and provides instantaneous feedback about where your body is and how you’re moving – great for motor learning. The movement reinforces systemic whole-body tension. This skill can’t be discussed enough. If you’re trying to build a monster deadlift, squat, or bench press (or even run faster) then you’ll need to quickly generate high degrees of tension to create more strength. The Russian twist will help you do that.
Origin: Tip: The Russian Core Exercise
Tip: Do This Exercise FIRST on Back Day
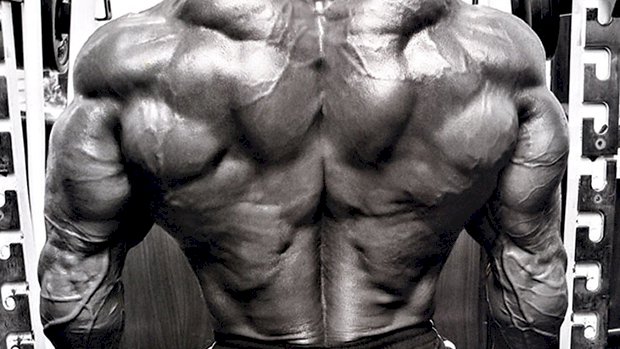 Do a stretch-based back movement before any big pulling exercises on back day. This “primer” exercise reverts your body into a normal posture by getting you into the opposite positions you most likely spend most of your day in. The single most effective movement to prime the back is the straight-arm pulldown and its variations. This movement involves isolating the latissimus dorsi. In most cases, it’s functionally shortened. Doing both an end-range stretch along with a peak concentric contraction works wonders. Straight-Arm Pulldown The straight-arm pulldown is based on internal tension. If you’re using a cable stack, it’s less about the external load you’re placing on the tissues and more about how you’re building and bracing your tension throughout a full range of motion throughout the set. As you’ll see, this movement will be humbling, so make sure you set your ego aside and train this exercise for the feel and
Origin: Tip: Do This Exercise FIRST on Back Day
Tip: The Most Neglected Body Part in the Gym
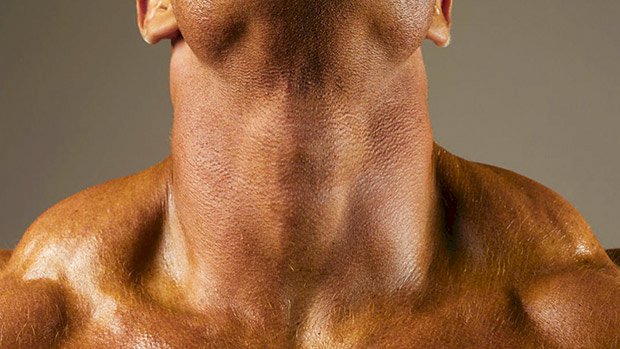 Strengthening your neck will benefit your posture and the overall look of your physique. But not many people do any sort of direct neck training. Sometimes it’s just a time issue. Here’s an exercise that gets the job done quickly: banded bent-over neck extensions. You’ll need a light to moderate band, an unweighted barbell set up in a rack just below knee height, and a bar bad. Stay strict with the slow negatives and let the bar pad stretch your neck at the bottom of the movement. Be careful not to overextend when you’re in full extension. Get a 1 second squeeze at the top and use the barbell to support your body enough to keep your spine relatively neutral. Do 4 sets of 8-10 reps at a 5101 tempo. However, if this is your first time directly targeting your neck, I’d be modest with the volume and stick to only 3 sets. You’re going to be
Origin: Tip: The Most Neglected Body Part in the Gym
Tip: The Push-Up That Prevents Injuries
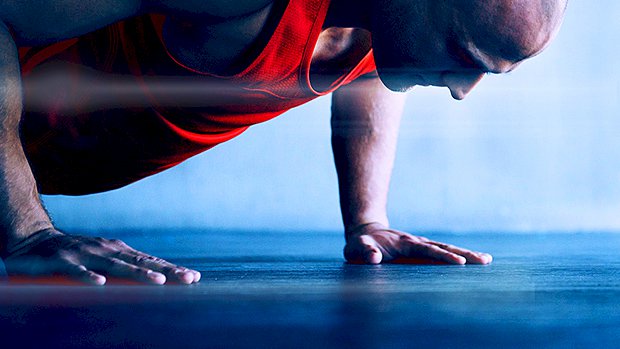 Rotation-Focused Push-Ups Strong and explosive athletes have a tendency to get locked in the sagittal plane (driven into extension). If this becomes excessive, they lose access to their frontal and transverse planes, which can cause injuries up and down the kinetic chain. To remedy this, offset push-up variations can be crucial in getting trunk rotation back. Push-ups in this category can include offset variations off a box (see video) and offset variations with one hand on a medicine ball. Based on your needs and goals there are tons of different options at your disposal. And if you want the best of all worlds, simply rotate your emphasis every 2-3 months to help build a strong, well-balanced, and bulletproof
Origin: Tip: The Push-Up That Prevents Injuries
Tip: Exercise Variety is Overrated
 “You Must Have Variety, Bro!” Oh Really? Some say that you won’t make progress if you do the same workout twice in a row. Others say that you won’t make progress if you keep the same exercise in your program for more than a few weeks. The truth? It’s those who don’t stick to any one program for more than a few weeks that never seem to make any significant progress. They’re the ones quoting old-school Dave Tate articles, yet don’t even look like they could squat their bodyweight. The worst culprits are those who like to toss in exercises for the novelty alone. “Look Ma, BOSU ball squats while juggling oranges! You know, to keep the body guessing!” The Greatest Training Gap Look, I’m not bashing exercise variety. Variety has a time and place. However, the greatest gap in most people’s training isn’t lack of novelty, but rather lack of mastery. Most people never experience their “true” fitness or strength because they never allow themselves enough time to get comfortable with a particular lift or movement. Who wants to perform plain ol’ vanilla deadlifts when you can add chains or perform them in a mine field? Master the Simple Stuff To add variety you don’t need to be excessive. Just changing your grip, foot stance, bar height, or adding pauses can be enough of a change to make the deadlift more effective (given a specific technique flaw or weakness). So rather than adding exercises haphazardly for the sake of “doing something cool and different,” use less variety and learn to get really good at doing the simple stuff
Origin: Tip: Exercise Variety is Overrated
