 Mini-Sets for Maximum Gains Suck at pull-ups? You need to work them with frequent training. Start every workout with a total of 20 pull-ups done in as little time as possible using “mini-sets” of half your current max effort. Use a clock to track how long it takes and try to beat that time each session. The best strategy is to NOT hit failure on any of the mini-sets since it would require too much rest between sets and thus would take longer to complete. Here’s How It Looks Let’s say your current max is 4 or 5 pull-ups. Start with mini-sets of 2, resting as little as possible between each set – about 20 seconds rest is plenty. When doing the second rep becomes a grind, extend the rest to 30 seconds. When the second rep becomes tough again even with the longer rest, move down to doing sets of 1 with 15-20 seconds of rest until you hit your total (20 reps) for the day. As you get stronger, you’ll be able to use more than two reps for your mini-sets, but be very gradual about increasing them. Monitor the time it takes you to complete 20 reps to gauge if your strategy is adequate. When you increase the reps per set, your total time should continue decreasing. Ideally, in 8 to 10 weeks you’d end up hitting the 20 reps in just two sets of 10 with about 20 seconds of rest. When that happens, you’ll likely be able to hit 15 good pull-ups in a row. Progression Method: 30 Total Reps, Then Add Weight Once you can complete 20 total reps in just two mini-sets with no more than 30 seconds rest, increase the target total to 30 reps and resume the progression. Eventually, when you can hit the 30 reps in just two sets with less than 20 seconds of rest, go back down to 20 total reps, but here’s the killer… add 15 pounds to your waist and resume the progression all over
Origin: Tip: Increase Pull-Up Power With This Simple Plan
Tip: Do This Medball Exercise Before Squats
 Doing an explosive exercise prior to lifting fires up your CNS and gets your body physically ready to lift hard and heavy. Olympic lifting variations are often used, but here’s one that almost anyone can do: the medball thruster. This exercise works great before squatting. Make sure you drive your knees out as you squat down. Utilize the stretch reflex (the bounce you feel at the bottom of the squat) to rocket your body back into a standing position. Once you reach this standing position, continue to explode up while forcefully extending the
Origin: Tip: Do This Medball Exercise Before Squats
Tip: Fire Up Your CNS For Better Lifting
 Use the Force This is a great way to begin any lifting workout. The idea behind “rate of force development” is to do an exercise that’s explosive in nature and that utilizes all of the body’s major muscle groups. Doing an explosive exercise prior to lifting fires up your central nervous system and gets your body physically ready to lift hard and heavy. Some lifters do rate of force development work by incorporating jumps, explosive push-ups, or variations of the Olympic lifts. While these are undoubtedly great ways to produce force, there are people that need less impact on the body. Heavier-set lifters and those recovering from an injury will have a hard time absorbing the impact from a jump. And beginners may not have the technical skills to perform Olympic lifting variations. If you’re one of these people, try out some of the exercises below before your next lifting session so you can still reap the power and strength benefits from force production. Medicine Ball Force Production Options Medicine Ball Chest Pass Similar to a basketball throw, step out with one leg while pushing off the other. Explosively extend your arms as you throw the ball to a partner or against a wall. This exercise goes well with any pressing day. Medicine Ball Thruster Make sure you drive your knees out as you squat down. Utilize the stretch reflex (the bounce you feel at the bottom of the squat) to rocket your body back into a standing position. Once you reach this standing position, continue to explode up while forcefully extending the arms. This exercise works great before squatting. Backward Medicine Ball Throw Keep a strong, flat back as you bend down towards the medicine ball. Explosively drive your hips forward as you go to rip the ball from the floor. Make sure you’re bracing your core the entire time and don’t hyperextend the back at the end of the throw. This exercise fits well on deadlift day. Jumping Force Production Options Banded Broad Jump This one is great for practicing a broad jump without as much impact. Placing a resistance band around your waist will greatly reduce ground impact as you land. Make sure you land with a flat back and knees tracking outward to prevent injury. Banded Lateral Single-Leg Hop This will feel awkward at first but it’s great for producing force laterally as well as activating the glutes and hamstrings. When you set up, remember to get your arms involved. Pretend you’re skating or running and hop using your opposite arm and opposite leg. Think of bringing your arms from your chin to your back pocket as you hop from side to side. Sets and Rep Scheme Remember that rate of force development is supposed to be explosive in nature. Don’t do these exercises as conditioning prior to training. Do 3-5 sets with no more than 5 reps per set. Give yourself plenty of time to recover between sets. These exercises are neural in nature which means you should be taking longer breaks between sets and should attempt to produce as much force as possible with each
Origin: Tip: Fire Up Your CNS For Better Lifting
Tip: Pros and Cons of the Bro-Split
 Most popular among bodybuilders, the bro-split involves devoting each workout to 1-2 muscle groups, such as: Monday:Back Tuesday:Chest Wednesday:Legs Thursday:Shoulders/Calves Friday:Biceps/Triceps Pros If you’re already huge and strong, your muscles will take between 4-6 days to recover from training. Therefore, training each muscle group once a week is likely ideal. You get to train 5 days a week, which many lifters enjoy. Many lifters enjoy the idea of dedicating an entire workout to a specific muscle/muscle group. The bro split has lots of benefits! Problem is, those benefits are usually offset by a very pesky drawback: Cons If you’re not huge and super-strong, your muscles will take between 1-3 days to recover from training. Therefore training each muscle group once a week is probably not frequent enough, and you’ll lose ground between sessions. Is there a better training split? I like a hybrid split. A hybrid split incorporates both whole-body days as well as upper and lower days into a 4-day training week. Check it out here: The Hybrid
Origin: Tip: Pros and Cons of the Bro-Split
Dynamic Training for Abs & Obliques
 So, the exercises presented here focus on helping you maximize the strength of your abdominals and obliques, and they also help you improve your rotational strength and power. Category 1 – Spinal Flexion Exercises Although some coaches claim that spinal flexion exercises are inherently dangerous, research has shown that those exercises can not only help promote nutrient delivery to the intervertebral discs, but may also provide superior muscle and performance gains versus isomeric ab exercises (4). However, some exercises may be contraindicated for people who have pain when performing them. In other words, spinal flexion exercises are no different than any other resistance training exercise. All exercises can induce stress, which causes tissue adaptation, but there’s a tipping point where you exceed your capacity. That’s the individual nature of training, and exactly what’s meant by training smart! That said, my top two spinal flexion exercises are stability-ball plate crunches and stability-ball reverse crunches, which is a more advanced version of a reverse crunch from the floor. Make sure you’ve got good control on regular reverse crunches before programming them. Stability Ball Plate Crunch Keep your knees bent at roughly a 90-degree angle throughout and flex and extend your spine with control over the ball. Hold the plate straight above your shoulders and reach your arms straight up toward the sky. Focus on making your knees drive the motion (bending and extending), not your abs. Stability Ball Reverse Crunch Most people use momentum and jerk their body up and down by kicking their legs to create the movement. Eliminating that momentum forces the abs to perform the action. Once you get your legs up over your body, slowly reverse this motion, lowering your spine back down toward the bench, one vertebra at a time. Don’t allow your legs to extend or your head to lift off the ball at any point. These spinal flexion exercises are my go-to movements because they allow for greater abdominal muscle stretch than floor crunches. This is important because full-range resistance training regimens, which train the muscles at long (stretched) lengths and include an eccentric component, can improve flexibility as well as, if not better than, typical static stretching. In other words, strength training at longer (stretched) muscle lengths (that includes an eccentric component) not only causes muscles to be stronger at long lengths, but also promotes flexibility by causing muscle fibers to produce new sarcomeres in series within a muscle, which allows the muscle to lengthen more (6, 7). Cable Side Bend A great example of a common exercise that doesn’t make biomechanical sense is side bends performed while holding a dumbbell on each side. Of course, the weight of the dumbbell offsets the weight on the other side, making this exercise ineffective at sufficiently loading the lateral flexors of the torso. Even performing side bends while holding a single dumbbell on one side of the body isn’t very effective at targeting the lateral core because of the angle of force involved. There’s just not much resistance. The dumbbell is very close to your body, giving you a mechanical advantage over the weight. You’d have to hold a very heavy weight, which may exceed your grip strength, to have a reasonable training effect. So instead of using dumbbells, use a single cable that’s at roughly a 45-degree angle to your body. It’s much more effective than holding a single dumbbell (or two). Stability Ball Side Crunch This exercise creates a great stretch on the lateral trunk flexors. If you’ve never done this one before, it can feel a bit awkward until you find the right foot placement against the wall and the right body position over the ball. Place your top leg about a foot-length behind your bottom leg and keep your back heel slightly off the wall while your front foot is flat against the wall. Also, position your torso over the ball such that you can create a stretch while bending over the ball without feeling like you’re going to fall over it. Lastly, make sure you move over the ball, instead of the ball moving under you. Medicine Ball or Weight Plate Side Lean Yes, this is like doing the “I’m a little teapot” dance you did as a kid. With your feet roughly hip-width apart, hold the weight plate or medicine ball directly above your head with your elbows slightly bent. While keeping the weight plate or ball directly above your head, lean your body laterally to one side and shift your hips to the opposite side until you feel a mild stretch. Reverse the motion and repeat, leaning your torso and hips to the opposite direction without pausing in the middle between reps. Category 2 – Rotational Exercises Rotary exercises are by nature cross-body exercises, which makes them a valuable aspect of strength training since rotation is such a big part of human functioning and athletics. Tight Cable Torso Rotation with Hip
Origin: Dynamic Training for Abs & Obliques
Tip: Build Pecs with the Hex Press
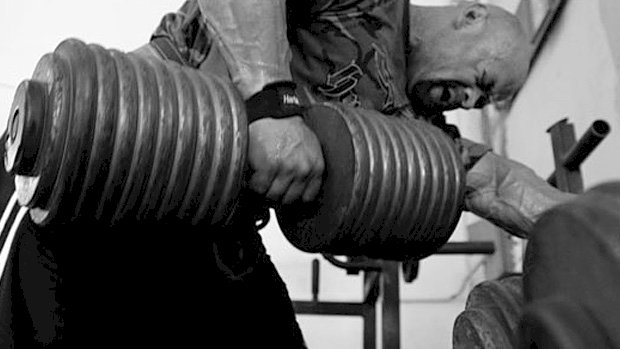
 Pain-Free Pressing Lifters suffer from a lot of anteriorly directed shoulder pain. It happens when the head of the humerus is pushed too far forward in the glenoid fossa. It feels awful. This position is exacerbated at terminal horizontal abduction, elevation, and external rotation, which are all components of traditional bench press variations. But this can be avoided by using a squeeze press, even when you’re managing some nagging shoulder pain. The Hex or Squeeze Press Use dumbbells and squeeze them together as hard as you can throughout the concentric (lifting) and eccentric (lowering) portions of the lift. You’ll get a legit training effect without flaring up your shoulders. By forcing your shoulders and deep humeral and scapular stabilizers to initiate tension into internal rotation and depression, the head of the humerus will translate more posteriorly and will be more centrated in the shoulder socket. This positioning allows you to use internal tension and torque production through the shoulders and still train
Origin: Tip: Build Pecs with the Hex Press
Tip: Do Pull-Ups Anywhere Like This
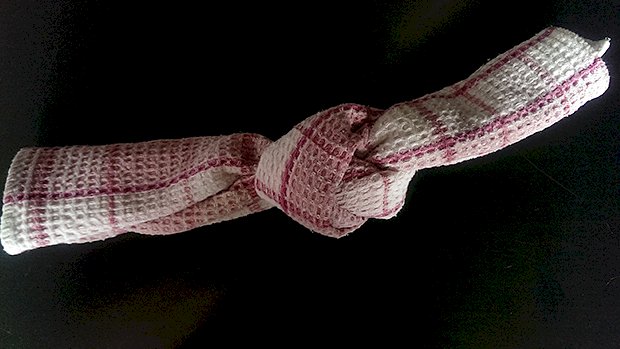 Push-ups, planks, bodyweight squats, and lunges can be done literally anywhere. But pull-ups require something to hang from, and that won’t always be available. If you travel a lot, you know that it isn’t easy to find a gym. If you’re lucky, the hotel you’re staying at has a gym, but you’ll have to be real lucky for that gym to be equipped with a pull-up bar. But there’s still a way you can do pull ups. All you need is a door and a couple of towels. Just follow these steps. Step 1: Tie a knot on one end of each towel. Make sure it’s tight. Step 2: Hang both towels over the door. The knot should be on the inside of the door when closed. Step 3: Close the door so it latches. Make sure the towels are laying flat enough on top of the door to get it to close. Step 4: Use the towels to do pull-ups. Your body will slide up and down the closed door. As a bonus, towel pull-ups really hit your grip and forearms hard. Find yourself a set of towels or rags made from a thin material and keep them in your suitcase. And never skip your
Origin: Tip: Do Pull-Ups Anywhere Like This
Interval Training on the Rowing Ergometer
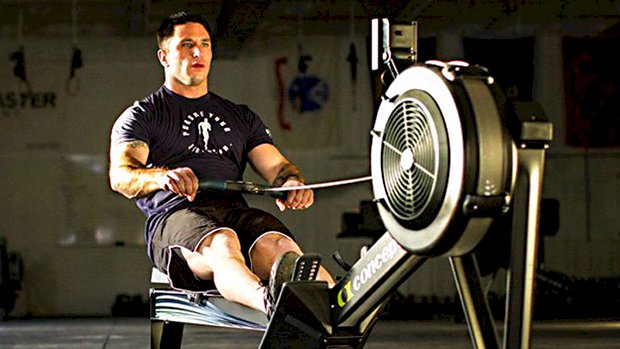 Lead Photo Credit: Again Faster Equipment (Jim Rego at CrossFit Southborough) Here’s what you need to know… The rower is unlike typical cardio machines. It’ll get you gassed immediately with zero impact on the joints. Move through your hips, not your spine. If you have back or hip issues, this may not be for you. There are a variety of workouts. Try intervals of 500-400-300-200-100 meters with 60 rest in between. Test yourself with a 2,000 meter row, or break it up into two sessions of 1,000 meters. Do 5 intervals of 300 meters with little rest in between, or just row as hard as you can for the length of a song. A Different Cardio Machine For the first decade of my career in the strength and conditioning field, I wasn’t too charitable when it came to cardio machines. But I learned the value of the rowing ergometer or “erg.” I learned this by getting my butt handed to me! Gassed, Wheezing, and Red-Faced I bought my wife a rowing machine for her birthday. Believe it or not, at an intimidating 5′ 3″, she was captain of her nationally ranked college crew team. The week we got it, I walked down to the basement to see her get after it on the erg. She was humming along, and making it look easy. I decided to hop on and try it out myself. I cranked out a 500-meter time trial and narrowly edged the 500-meter pace she’d just maintained over 2000-meter. In short, my wife kicked my ass. What’s worse, when I got off the erg I was completely gassed. When I was done wheezing, I joked with her that I couldn’t believe she used to wake up at 5 a.m. to do that in the middle of winter on an icy river. It was awful. Why was it so awful? Well, first, I was wildly inefficient with this cardio approach. Second, the stress was distributed over my entire body, so I felt like I was limited more by my ability to breathe than by local muscular endurance. Third, I’m a competitive bastard, and the thought of being out-rowed by my little wife didn’t sit well with me. So I decided I’d do it once a week as my interval training, and it’s proved to be one of the best training decisions I’ve made. Short Workout, Faster Recovery Why the love for the erg? First, you can get in a lot of work in a short amount of time. And because the stress is distributed over your entire body, rowing won’t gas your lower body like sprinting does. It’s a tough fitness challenge that can actually help you recover from heavy squatting and deadlifting — better than sprinting twice a week. Is Rowing For You? Before we get to the training protocols, note that this absolutely isn’t for everyone, so let’s outline the contraindications. You should not row if: You have symptomatic low back pain, or a history of symptomatic intervertebral disc pathology. Repeated flexion/extension of your spine is an injury mechanism for discs, particularly under compressive loading. You have hip pain of any sort. The full flexion nature of the rowing motion can exacerbate problems in this regard. You have an outrageously aberrant posture. If you’re really kyphotic (rounded shoulder), this approach to rowing will likely make it worse by feeding into your posture. You’re better off doing more controlled, lower-volume rowing variations in your strength training program in a position of thoracic extension. If you have an excessive anterior pelvic tilt and lordosis, it’ll just feed into that as well. You sit all day. If you’re at a desk for 8-10 hours a day, you really should avoid any sitting during your exercise session, and that certainly means avoiding it for 15-20 minutes at a time. You plan to do deadlifts or good mornings the following day. No matter how good your technique is, you’re still going to use your lower back a bit. I’ll typically row a day or two after I do these exercises. You have baggy shorts on. I made this mistake once. Don’t do it. Note on Technique There are coaches who devote their entire career to building elite rowers and optimizing technique. I’m not one of them. However, I do have one bit of advice: Move through your damn hips, not your spine. Got it? Good. That said, most advanced rowers pull a bit higher up, essentially toward their nipples/sternum. Effectively, it looks a bit more like an upright row — or Olympic lift pattern, when you effectively use your legs — than a true “row.” For the general fitness folks just looking for a training benefit as safely as possible, it’s probably more shoulder healthy to pull a bit lower down. The upper abs is a good reference point, even if it means you’ll go a bit slower. Rowing Workouts Use the rower for shorter duration intervals. When people who haven’t been properly educated on rowing technique try to crush 20-30 minute sessions, bad things happen. For that reason, stick to shorter bouts on the erg. Or just get up and walk around between sets, adding in some filler mobility or activation exercises. 1 – 5 x 300-meter with diminishing rest intervals The 300-meter distance is awesome because
Origin: Interval Training on the Rowing Ergometer
Tip: How to Customize Your Fat Intake
 How Does Fat Affect Your HEC? If there’s one thing I’ve learned from being a clinician it’s that individuality reigns supreme. When it comes to fat, or any macronutrient for that matter, I’m looking to help my patients understand their unique reactions. Science can guide us, but research regresses everything to the mean. It’s a tool of averages and not a tool of individual reactions. Off-the-shelf diets and protocols can be of use too, but in the end each individual will respond differently. I’m interested in helping my patients learn what works for them and what doesn’t. When it comes to fat for health and weight loss it really comes down to understanding how it affects hunger, energy, and cravings or what I call HEC (pronounced “heck”). If including fat in a meal makes HEC stay in check for longer, then I want my patients to discover that. If eating fat results in HEC going out of check, that’s also extremely useful to understand. The Protocol When I start this process I like for my patients to separate their macros as much as possible. This means they’ll choose from a few categories: Lean protein Fatty foods Fiber/water foods Starchy/sugary foods I instruct them to eat a base of protein and vegetables: an egg white veggie scramble, a piece of lean white fish and asparagus, chicken and broccoli etc. I ask them to note how that meal impacts HEC. Then I have them add fat to the meal. To make this easy, I use the “1 tablespoon of fat is 10g of fat” rule. Does adding 2 tablespoons of avocado to the egg white scramble stabilize HEC and result in less calorie intake later? Does adding a tablespoon of butter to the asparagus and broccoli help or hurt HEC? This simple strategy immediately tells my patient how fat impacts them. (And this can be done for starch as well.) Giving Power To The Patient Let’s face it, for some adding fat satisfies and stabilizes metabolic function, allowing them to feel full faster and for longer. This helps their food be more enjoyable and can result in them eating less overall. For others, adding fat can trigger cravings for other calorie-rich foods, may not satisfy them, and results in worse eating later and higher calorie loads for the day. Depending on their reactions I can then advise on a lower fat or higher fat ratio on their macros. Perhaps fat as 20% of total intake or fat as 40% of total intake. Perhaps I even learn they could thrive with a keto approach. This is a patient-first approach and saves me from my own bias and the uncertainties of research. It also gives the power to the patient to stop being a dieter and trend follower and start being a student of their own
Origin: Tip: How to Customize Your Fat Intake
Tip: Pull Before You Push and Pull More Often
 You need to keep a balance between pulling exercises (rows, pull-ups etc.) and pushing exercises (bench press etc.) If you don’t pay attention to that balance, you’re setting yourself up for bad posture, muscle tightness, and even joint pain. Train Your Back More People usually remember to get their back workout in to counter their chest or shoulder workout they did earlier in the week. But it doesn’t end there. Not even close. Due to our lifestyles, a 1:1 ratio isn’t enough when it comes to creating and promoting – and in many cases, restoring – balance among the muscles. It means training the back more frequently, with more volume, and for higher rep ranges than we generally do with our anterior muscles. Pull Before You Push There’s more. When you do an upper body workout that contains both front and back side muscle groups, program the pull exercises first, before doing the push exercises. Why? Scapular stability. Doing your pull-ups before doing your overhead presses, or your rows before bench presses, will create a much more stable shoulder environment for the second of the two exercises. Your rotator cuff muscles attach to your scapulae, and increasing blood flow and tightness to that region will do plenty to give the shoulder joint enough support to steer clear of unwanted injuries or general instability. It also means pain-free pressing. Even if you’re doing a straight pressing workout, prime the shoulders to bear load by stabilizing them with a couple of high-rep sets of rows of any variation, using any means of resistance – dumbbells, cables, or even bands. The goal is just to get the upper back to start feeling a mild pump and get activated. Pull Day Before Push Day Program a pull day before a push day in your weekly program cycle. If you’re already training back (or pull exercises) more than once weekly, just make sure at least ONE of those pull workouts is programmed before your major pressing workout. Tough workouts can produce DOMS (delayed onset muscle soreness), which can decrease range of motion or flexibility of the muscles. Take advantage of that restriction by getting the upper back muscles mildly sore before a chest workout. This won’t affect your chest or pushing work. The ROM inhibition can have the same effect on shoulder stability specific to heavy
Origin: Tip: Pull Before You Push and Pull More Often
