 Back in the 1970’s, Arthur Jones popularized the so-called high-intensity training (HIT, not to be confused with HIIT – high intensity interval training) approach to building muscle. HIT is based on the premise that only a single set of an exercise is necessary to stimulate growth, provided you train to the point of momentary concentric muscular failure. According to HIT dogma, performing additional sets beyond this first set is superfluous and perhaps even counterproductive to muscle development. Other prominent industry leaders such as Mike Mentzer and Ellington Darden subsequently followed Jones’s lead and embraced the HIT philosophy, resulting in a surge in its popularity. To this day, HIT continues to enjoy an ardent following. Now before I get accused of being anti-HIT, I’ll readily admit that it’s a viable training strategy. There’s no denying that it can help build appreciable muscle. And if you’re time-pressed, it can provide an efficient and effective workout. That said, if your goal is to maximize muscle development, HIT simply doesn’t do the trick. You need a higher training volume. Substantially higher than just one set per exercise. Multi-Set Protocols Are Superior The prevailing body of research consistently shows that multiple set protocols are superior to single set protocols for increasing strength and size. Meta-analyses published in The Journal of Strength and Conditioning Research show that multiple set training results in 46% greater increases in strength and 40% greater increases in muscle growth when compared to single-set protocols. Whether the hypertrophic superiority of multiple sets is due to greater total muscle tension, muscle damage, metabolic stress, or some combination of these factors isn’t clear. What is clear is that multiple sets are a must if you want to maximize your muscular potential. The Problem Problem is, even if you employ multiple sets it’s very possible you’re still not training with sufficient volume. The optimal number of sets needed to elicit superior growth will vary from person to person and depend on a host of individual factors such as genetics, recuperative ability, training experience, and nutritional status. But individual response is only part of the equation. The size of a given muscle also has relevance. Larger muscle groups such as the back and thighs need a higher volume than the smaller muscles of the arms and calves, which get significant ancillary work during multi-joint exercises. Splits vs. Full-Body Programs Another important consideration here is the structure of your program. All things being equal, training with a split routine allows for a greater daily training volume per muscle group versus a total body routine. And if you follow a training split, the composition of your split will influence training daily volume (a 3-day split allows for a greater volume per muscle group compared with a 2-day split). Accordingly, training volume is best determined on a weekly basis as opposed to a single session. Whatever your target weekly volume, optimal results are achieved by taking a periodized approach where the number of sets are strategically manipulated over the course of a training cycle. Understand that repeatedly training with high volumes will inevitably lead to overtraining. In fact, evidence shows that volume has an even greater correlation with overtraining than intensity. Only by embracing periodization can you reap the benefits of a high training volume while avoiding the dreaded overtrained state. Effective Periodization Let’s say you’ve determined that your maximum weekly volume should entail performing 18-20 sets per muscle group. Focus on a three-month mesocycle where you target 8-10 sets a week the first month, 14-16 sets the second month, and then culminate with an overreaching cycle in the final month where you perform 18-20 sets per week. Follow this with a brief period of unloading or active recovery to facilitate restoration and rejuvenation. Given that it generally takes one to two weeks for the full effects of supercompensation to manifest after completion of an overreaching cycle, you should realize optimal muscular gains sometime during the restorative
Origin: Tip: Turn Up the Volume
Tag: Tip:
Tip: The Recovery Intrusive Deadlift
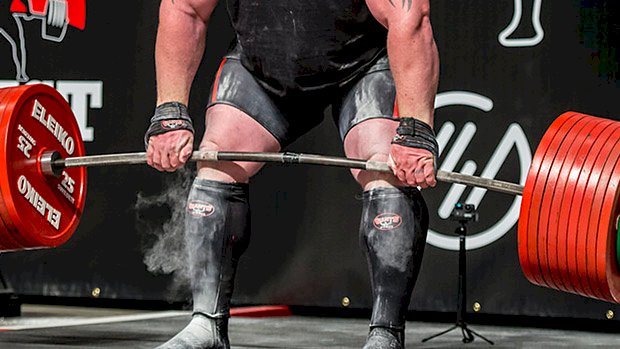 Don’t Do High Volume or High Rep Sets The deadlift is a “takes more than it gives” movement. It’s recovery intrusive, possibly more than any other compound movement. No lift causes a greater degree of “workout hangover” than heavy and hard deadlifting. Why? Most coaches say it’s because of the direct attachment of the hands to the bar, and the effect that has on the spine and autonomic nervous system. They also believe this causes a high degree of stimulation to the sympathetic nervous system, depressing the parasympathetic nervous system, causing a massive inroad to systemic recovery. All of this is theory, but it feels true. Especially after a heavy day of deadlifting. But theory aside, science shows us that volume isn’t actually the driver for strength gains. The neurological adaption to moving loads with greater speed, or moving greater intensities in a lift, are the primary drivers for strength improvement. There’s literally zero reasons to be doing highly-volumized deadlift routines. Same for trying to do high-rep (12-plus) working sets of deadlifts. Both will drive recovery into the ground. Do Sets of 3 to 5 Reps If you’re looking to build maximal strength in the deadlift then sets of three to five should be your bread and
Origin: Tip: The Recovery Intrusive Deadlift
Tip: Try the Gironda 8×8 Set/Rep Scheme
 Legendary bodybuilding coach Vince Gironda called this “the honest workout” because of the simple, honest muscle it could build. Just do 8 sets of 8 reps. The volume is high so keep the weights around 60% of 1RM. That’s a weight you could handle for about 12 reps. Here’s the catch: Take only 30 seconds between sets. This is obviously demanding and the goal is to create the biggest pump possible in the shortest time possible. That means strictly-timed rest periods and not being afraid to reduce the weight when needed. You’ll build muscle, increase work capacity, and ramp up your
Origin: Tip: Try the Gironda 8×8 Set/Rep Scheme
Tip: Forget the IT Band
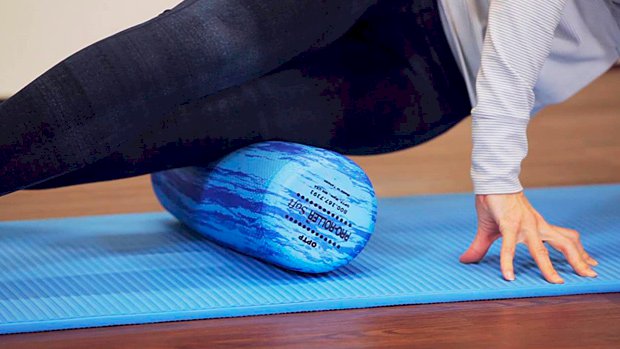 Foam Rolling the IT Band Rehab pros are divided on the topic of foam rolling the IT band. Some say you can’t deform dense fascial layers like the IT-tract (they’re correct), but they’d be blind if they didn’t recognize that a ton of people do get positive responses to rolling this piece of fascia. What Really Happens Here’s what’s really going on when you do it: By positioning the foam roller on the outside of your thigh on where you think the IT band is located, you’re actually targeting the underlying vastus lateralis (lateral quadriceps) and biceps femoris (lateral hamstrings) musculature. Most people have no idea how to target, let alone locate, a functionally shortened area of musculature or symptomatic trigger point. Just because it hurts and is located on the side of your leg doesn’t mean you’re “treating” the IT band. So if you’re a fan of foam rolling this area, then whether you realize it or not, you’re probably not on the IT band. You’d probably get long-term benefits by rolling a different area. Instead of trying to squash the IT band, target the quads and hamstrings directly. The Fix: Foam Roll the Quads and Hams Forget the IT band. Target the vastus lateralis and biceps femoris directly. All you have to do is slightly change the position of your body over the foam roller. You’ll get maximum benefit from SMR work in the lateral leg without continuing to be a slave to the IT band
Origin: Tip: Forget the IT Band
Tip: Try This Quick & Dirty Calf Fix
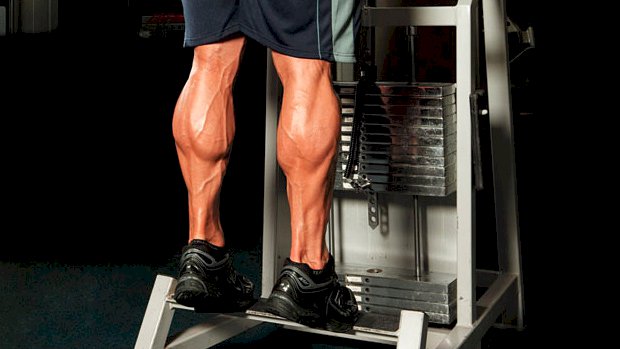 Talk to lifters and bodybuilders about calves and you’ll the hear the word “stubborn” come up often. The calves just don’t seem to want to grow, even if you persuade them with standard resistance training. That’s why many strength coaches employ shock techniques to force breakdown and subsequent muscle growth. Here’s one of those techniques from coach Charles Poliquin. Start at the standing calf-raise machine. Perform eight reps with a two-second pause at the bottom of each rep. Rest 10 seconds. Have a barbell sitting nearby loaded with about 25% of your body weight. Hold it in a squat position and, with minimal knee bend, jump up and down, bounding with the calves on each rep. Do this for 30 reps. “The eccentric damage caused by the landing will favor hypertrophy,” notes Poliquin. Repeat the superset four more times. “If that doesn’t make your calves grow, nothing will!” says
Origin: Tip: Try This Quick & Dirty Calf Fix
Tip: Vitamin D for Strength and Power
 Vitamin D deficiency is common. Fewer people are getting outdoors, and those who are vitamin D deficient will get even less during winter months. As you know by now, this has numerous health implications. But new research by Jung et al. found that vitamin D status can influence performance as well. The Study The researchers used 35 collegiate Taekwondo athletes with a low serum vitamin D concentration and randomly assigned them to two groups: One group of 20 people received 5000 IU of vitamin D per day for four weeks. The other group of 15 people received a placebo for four weeks. After four winter weeks, serum vitamin D concentrations increased significantly in the vitamin D group with no change in the placebo group. The results? The vitamin D group produced greater power and muscular strength. The placebo group saw no change. How to Use This Research First, get a blood test to see if you’re vitamin D deficient. Some health professionals even encourage people take it year round… without any testing beforehand. But if it’s winter or you live in an area that stays overcast and rainy most of the year, or you spend most of your time indoors, there’s a higher likelihood you’re deficient. Then find a dose that will raise your blood concentration levels. In the current study, 5,000 IU did the trick. We already knew getting sufficient vitamin-D could make you healthier and less susceptible to illness. And now there’s evidence it can make you stronger and more powerful
Origin: Tip: Vitamin D for Strength and Power
Tip: Protect Your Wrists from Lifting Injuries
 Passive Wrist Stretches These stretches will help you to create range of motion in your wrist flexion and extension by using the floor as assistance. If you have tons of wrist extension and zero flexion, your wrists aren’t balanced, and your elbows are going to get pissed off in the long-term. Never force any stretch and always listen to your body. If you notice that your wrists feel tender the next day after doing these, that’s your sign to back off a bit. If they’re okay then you can start to push a bit further the next time. If even using the floor is painful, then step it back a bit. These exercises can be regressed by using the wall. Try doing them after a session with a lot of grip work. You’ll notice forearm tightness practically disappear within minutes. As a side note, doing “shoulder rotations” in any of these positions also makes for a great warm-up addition. Radial and Ulnar Deviation Radial and ulnar deviation is the side-to-side motion of the wrists. It’s neglected by almost everyone. If you practice advanced hand balancing then this is absolutely crucial, and if you do overhead squats or snatch presses, this thumb-grab stretch is an awesome way to alleviate some of the pressure caused by heavy
Origin: Tip: Protect Your Wrists from Lifting Injuries
Tip: 7 Things Smart Lifters Know
 If you’ve been training for a decent amount of time, you’ve made some mistakes. It’s part of the process. But doing your homework can definitely save you some time and energy. It would be nice if there existed a simple answer or method to get us to our goals in the shortest possible time, but in reality we have to spend time under the bar and learn what makes our unique profile tick. With that in mind, here are some things to avoid, some things to think about, and some ideas to try out. 1 – Sometimes less is more. Try time-capping your training sessions at 60 minutes. Training for longer than 60 minutes might decrease serum testosterone levels and increase cortisol, at least if you’re hitting it hard and not taking 20-minute rest breaks between sets. 2 – Identify and stick to a goal. If you have training ADD then you’ve probably felt like your goals change biweekly. Avoiding this mistake is important if you’re ever going to make progress. Pick your goal and stick to it for at least 12 weeks and then reassess. The same goes for programs. It’s easy to get distracted by the “next best thing,” but that can lead to never knowing if a program is actually the right fit for you. Within 3-4 weeks you should be able to tell if that’s the case, but rotating programs weekly or biweekly won’t serve this purpose. 3 – Narrow your exercise choices. Today we have access to a lot of info, and that can be a handicap. We overthink what exercises to perform. Your workout will be much more efficient if you narrow it down to 4-5 movements and call it day. Your session should consist of a core lift, two to three accessory movements, and some direct ab work. 4 – Realize that not all experts are really experts. Access to information comes very easily on the internet, and if you have a great physique you’re an “expert.” Do your homework on the people you’re taking advice from. Having a great physique doesn’t mean you’re qualified to write individual training programs. 5 – Avoid the “one size fits all” approach. Having a one-size-fits-all program would make life easier, but unfortunately this just isn’t the case. Even if you have a coach, you have to experiment and find out where you’re weakest. Even the best coach may not be able to figure that out. Trying a program you found online is okay, but remember that just because a program worked for your friend doesn’t mean it’ll be the right fit for you. 6 – Do the boring work. Many lifters avoid the work they need the most because it doesn’t look cool on paper. That could be unilateral work, sled work, or weighted carries. This work goes a long way for everyone, regardless of your current level of experience. You’re only as good as your weakest link. If you don’t spend time building your base and bringing up your lagging muscle groups, you run the risk of injury. This work should be as high of a priority as anything else you do. 7 – Always be a student. We’re never done learning. As much as we know, there will always be people that know more. Find experts that know more than you do. Study their work, read their books, and experiment. Successful lifters know that they don’t know
Origin: Tip: 7 Things Smart Lifters Know
Tip: Does Compression Gear Really Work?
 Is compression gear worth wearing during strength or cardio workouts? The short answer is… sort of. It depends on the activity and your goal. Multiple studies have examined the effect of compression clothing on endurance, strength and power, motor control, and post-exercise recovery. Let’s go through it. Endurance This one is a little hazy. What we’re looking for here is some impact of compression on physiological markers such as oxygen uptake, blood lactate concentration during continuous exercise, blood gases, and cardiac parameters. The majority of research in this area is inconclusive on the impact of compression on these physiological markers. Note that while there seems to be plenty of anecdotal evidence supporting the use of compression wear during endurance exercise, the studies have been unable to consistently show a correlation. People may THINK they’re benefitting, which may in fact create a psychological and even an actualized benefit. But it’s impossible to isolate the psychological effect without using a placebo condition in a study. Strength and Power Exercise Research is mixed in this area as well. Some small positive effects have been observed on sprint performance and vertical jumping, but these benefits seem to be almost negligible. However, here’s where we get to some real potential benefits of compression gear: studies have shown positive effects on the removal of lactate (H+ buffering) during short rests between sets of High Intensity Interval Training (HIIT). Without getting into too much detail about hemodynamics, it makes sense that tight compression gear may enhance local blood flow and improve oxygen delivery, and additionally, may enhance arterial blood flow, which in turn will facilitate more efficient clearing of metabolites, the aforementioned H+ buffering, and distribution of nutrients. Proprioception and Neural Mechanics Research on compression gear has shown some improvements in proprioception and sensory feedback. As a reminder, proprioception is the body’s ability to know where it’s located in space. These improvements also may help explain the strength and power benefits during HIIT exercise. Muscle Recovery We know that compression will increase arterial blood flow and venous return. We can say that it will also increase clearing of cellular waste products, which may result in quicker recovery after an intense bout of high intensity exercise. Thermoregulation Clothing generally provides a barrier to heat transfer and thus slows sweat evaporation. Compression clothing may inhibit this natural process of heat transfer even more, which would IMPAIR performance in the short term (during exercise), even while potentially improving muscle repair and recovery times (post-exercise). Research is lacking on the effect of compression gear on sweat evaporation in cold weather temperatures. However, in theory, inhibited sweat evaporation would be less important in cold weather environments, so the negative impact of compression gear may be lessened, while the potential performance and recovery enhancements would remain. Summary It’s important to understand that compression may have benefits to exercise performance and recovery, particularly during and after high intensity interval training, but it may also have negative impacts on overall exercise performance in others areas such as the inhibiting of sweat evaporation. Hey, maybe you just wear it because it makes you look jacked, but it’s always a good idea to get the facts
Origin: Tip: Does Compression Gear Really Work?
Tip: Increase Pull-Up Power With This Simple Plan
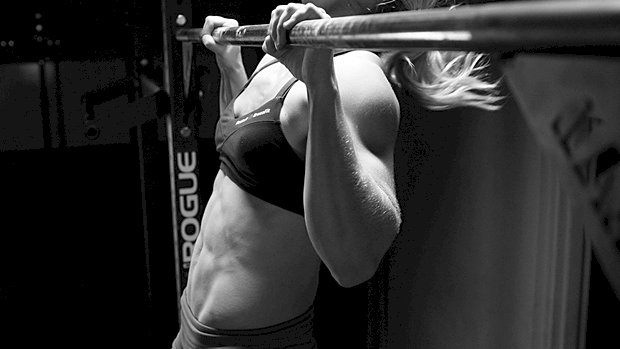 Mini-Sets for Maximum Gains Suck at pull-ups? You need to work them with frequent training. Start every workout with a total of 20 pull-ups done in as little time as possible using “mini-sets” of half your current max effort. Use a clock to track how long it takes and try to beat that time each session. The best strategy is to NOT hit failure on any of the mini-sets since it would require too much rest between sets and thus would take longer to complete. Here’s How It Looks Let’s say your current max is 4 or 5 pull-ups. Start with mini-sets of 2, resting as little as possible between each set – about 20 seconds rest is plenty. When doing the second rep becomes a grind, extend the rest to 30 seconds. When the second rep becomes tough again even with the longer rest, move down to doing sets of 1 with 15-20 seconds of rest until you hit your total (20 reps) for the day. As you get stronger, you’ll be able to use more than two reps for your mini-sets, but be very gradual about increasing them. Monitor the time it takes you to complete 20 reps to gauge if your strategy is adequate. When you increase the reps per set, your total time should continue decreasing. Ideally, in 8 to 10 weeks you’d end up hitting the 20 reps in just two sets of 10 with about 20 seconds of rest. When that happens, you’ll likely be able to hit 15 good pull-ups in a row. Progression Method: 30 Total Reps, Then Add Weight Once you can complete 20 total reps in just two mini-sets with no more than 30 seconds rest, increase the target total to 30 reps and resume the progression. Eventually, when you can hit the 30 reps in just two sets with less than 20 seconds of rest, go back down to 20 total reps, but here’s the killer… add 15 pounds to your waist and resume the progression all over
Origin: Tip: Increase Pull-Up Power With This Simple Plan
