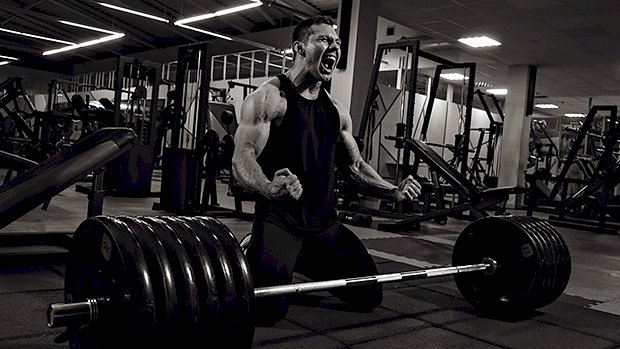
 The Functional Movement Patterns Sports rely on specific movements for performance. Those actions are derivatives of the four main athletic movements and the four main lifting movements. The four main athletic movements are jumping/landing, throwing/striking, locomotion, and rotation. But let’s focus on what you can do in the weight room. The four main lifting movements are: Pushing Pulling Knee Bend Hip Hinge This list of movement patterns should guide your training on a weekly basis. Now sure, the term “functional” is a buzzword, but think of these differently. Functional exercises give you the ability to carry out what you need to do on a daily basis. Having a functional body is about having physical freedom. This means building an all-around stronger, more adaptable body capable of performing at a higher level in any environment… not just inside the gym. That said, strength solves a lot of problems. It provides a better physical foundation to perform the four main athletic movements. So, a focus on the four main lifting movements is needed. Weekly Lifts: Your Checklist Every week do an exercise from each section. This will cover your bases. Since all exercises are merely variations of the main functional lifting movements, and since the categories they’re in are general, then select (and deselect) from each category what you’re capable of doing. Be discerning. Fit exercises to you; don’t fit yourself to exercises. Unless you’re injured, perform at least one of the following lifts each week: For Upper Body Vertical or Diagonal Pushing Lift Horizontal Pushing Lift Vertical Pulling Lift Horizontal Pulling Lift For Lower Body Double-Leg Knee Bend Lift Single-Leg Knee Bend Lift Double-Leg Hip Hinge Lift Single-Leg Hip Hinge Lift Let’s get into these variations and the top three exercises in each category. And if you’re training on the go, you’ll also see the top versions you can do using just bodyweight and bands. Pushing These exercises improve your ability to move something away from you like an object or opponent. These are the two specific types of pushing exercises you’ll want to do each week: vertical or diagonal pushing, and horizontal pushing. The Top 3 Vertical Pushing Exercises 1. One-Arm Dumbbell Overhead Press Overhead pressing with one arm increases core activation. You’re forced to maintain your torso position while dealing with the off-set load. There’s also less of a tendency to cheat by leaning backward, the way you might during two-arm overhead presses. 2. Dumbbell Rotational Overhead Press The rotation adds a little more coordination and control demand on both your shoulders and torso musculature. Plus, the foot pivot allows you to train some hip internal rotation, which is a key element to rotational power generation. 3. One-Arm Band Overhead Press This is a great option when you’re training with minimal equipment. You can increase the intensity by performing the reps fast, as shown in the video. The Top 3 Diagonal Pushing Exercises You don’t have to do both a vertical and a diagonal pushing exercise each week, though doing both can make your workouts more complete. But if time is a factor, choose either a vertical or diagonal exercise. If overhead pressing bothers your shoulders, then stick with diagonal pressing until you get your shoulder issues worked out. 1. Dumbbell Incline Press Incline presses train your pecs differently than horizontal pressing. Trainers often say “train movements, not muscles.” Here’s the reality: Muscles create movements. Muscles, along with your bones and connective tissues, respond to how they’re loaded. So, the only reason it’s important to push from a variety of angles is because they train the muscles differently. 2. Angled Barbell Press This is often called the landmine press. The landmine is really the name of a device (that you don’t even need) used for this exercise. But you just need a barbell and a corner. Because of the offset nature, this exercise also really hits your core musculature. 3. Band Incline Press No gym? No problem! Just pack some bands with you when you travel. And, even if you do have access to a gym, bands allow you to do dynamic effort (speed) work, as shown here. The Top 3 Horizontal Pushing Exercises When you do horizontal pushing exercises like bench presses, push-ups, etc., allow your elbows to go low enough to the point where you begin to feel a stretch in your pecs. Why? Because training at longer (stretched) muscle lengths not only causes muscles to be stronger at long lengths, it can also improves flexibility just as good as static stretching (1, 2). So the best way to prevent “tight” pecs is to do horizontal pressing exercises and other pec exercises in a way that creates some level of a stretch. 1. Barbell Bench Press Every meathead has a love/love relationship with the bench press. So I made sure to include it here because the bench press, to many lifters, is like a baby and its
Origin: The 4 Mandatory Lifting Movements
Tag: Mandatory
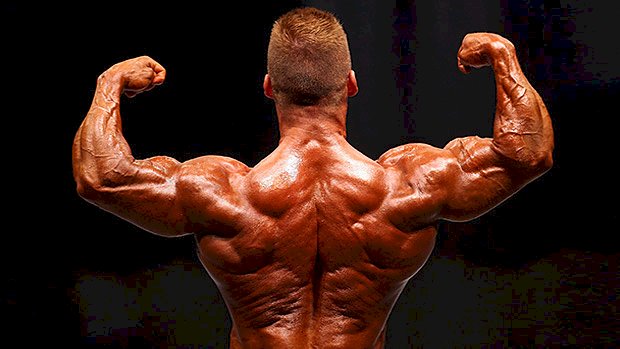
The 6 Mandatory Angles for a Big Back
 Building a big back takes a willingness to work hard, lift heavy, and train smart. Most lifters have the hard work and heavy lifting parts down. But to get full development – that chiseled topographical map of muscles – you need to train smarter. Simply hammering rows and pulldowns from the same angles every back workout isn’t going to cut it. You’ll see some positive changes, but you won’t maximize your potential. To do that, you’ll need to: Know what muscles you want to hit. Know what angles work what muscles. Know what exercises hit those angles. Know how to program those exercises. So first let’s cover the movement patterns and exercises (the fun stuff), then we’ll look at programming, and finally we’ll geek out and break down the anatomy. Movement Pattern 1: Low to High Pull By setting up the cable unit at your feet and pulling towards your chest as you’re hinged forward (and then pulling over your forehead as you stand up) you’ll create an upward motion that allows you to load up heavy. Use a wider neutral grip bar to maximize your retraction capability while also allowing for a great stretch of the lats after each eccentric (negative) rep. You’ll hit the lats, mid and lower traps, rhomboids, and posterior deltoids (and thus teres major). Check your form: Use a strong stance with feet driving into the ground. Use a proper hinge that loads the glutes and puts a small stretch on the hamstrings. Brace your core by engaging your midsection like you’re preparing to take a punch. Take a small step away from cable anchor to avoid slamming the weights back into the stack on each rep. This also allows you to go into a bit of an eccentric loaded stretch during each rep. Use a neutral grip with an emphasis on driving the elbows behind and “around” the back. Use a controlled eccentric/lowering phase with a small protraction reach at the end of each rep. Movement Pattern 2: High to High Pull This exercise is called an overhead banded face pull. The face pull doesn’t get as much love from hardcore lifters because you aren’t able to load it up like you can other back movements. This lift significantly limits the amount of weight you can handle at the end range. This will hit the external rotators, the posterior delts, the middle and upper traps, and a bit of your lats. Check your form: Use a strong stance with feet driving into the ground. Lean back slightly into your hips with a tall spine. Brace your core to resist the bands desire to pull you over. Pull your arms towards your eyes, elbows wide, until you reach ideal depth. Rotate your fists behind you as though you’re making a “field goal is good” hand motion. Hold this top squeeze for a two-second count and slowly release back to the start. Movement Pattern 3: Isometric Wide Grip Hold While it may seem sort of contradictory to have an isometric contraction on this list, our muscles don’t need to create movement in order to be worked, become exhausted, and require recovery that can lead to hypertrophy. In fact, isometrics done in the right way can actually help enhance our growth potential by targeting specific ranges of motion, and thus muscle fibers, that are weaker or underdeveloped. Anything like a farmer’s carry, a deadlift, or even an isometric row hold will do wonders hit the outer lats, the rhomboids, posterior delts, and traps. Technically you could accomplish this doing the snatch-grip trap bar deadlift, which was something I learned from Dr. Joel Seedman here. Or try my personal favorite carry variation – the cowboy carry: Your execution on both emphasizes the lat squeeze caused by actively depressing and downwardly rotating the scapula. As Tony Gentilcore has said, “imagine squeezing an orange in your armpits and making orange juice.” Movement Pattern 4: Horizontal Pull All rowing variations are horizontal in relation to your torso, and I like the one-arm row because it allows you to pull in a J-shape manner. While the one-arm row is a classic move in most programs, it can usually be done better by pulling with this J-shaped trajectory. One concept in muscular anatomy that’s often overlooked is the direction that fibers run. Muscles contract along the lines of fibers within them. So, muscles only contract in the direction those fibers run. In the case of the lats, the fibers run a bit diagonally from the shoulder joint down towards the lumbar spine. So it’s important to use those fibers that are high up in the back (and diving into the shoulder joint) by letting a weight travel in front of us during rows. This adjustment has been making a huge difference for my clients for years, and Lee Boyce has touched on it too. Check your form: Get one knee on a bench with the same-side arm directly underneath the shoulder joint. Your off-bench leg should shoot out wide to “get out of the way” and create a pocket for the elbow. Engage your core and brace to keep your spine level (tabletop back). Let the dumbbell begin
Origin: The 6 Mandatory Angles for a Big Back
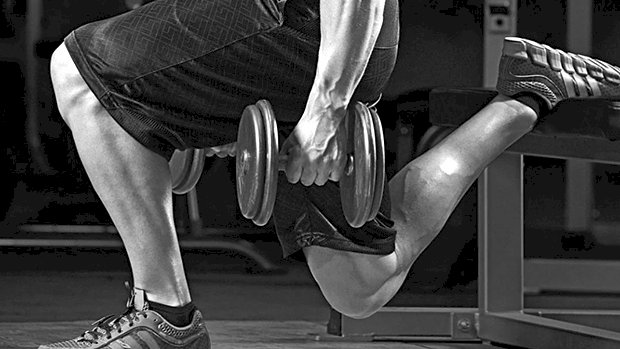
The 4 Mandatory One-Legged Exercises
 The Cause for the Pause Why train one leg at a time? Because a lack of single leg stability, strength, and power is linked to lower back pain and knee injuries. Plus, single-leg training is a powerful orthopedic health indicator. But it’s not always easy to get unilateral lifts right. That’s where pauses come in. They force you to perfect your technique. Better technique, better training results. Explosive Paused Dumbbell Bulgarian Split Squat The traditional Bulgarian split squat can help you identify functional weak links in single leg stance. Improving it takes motor control to create internal stability in the bottom position, which tends to be the most unstable. And the best way to improve your stability there is by adding an isometric pause at the bottom of each rep, then exploding out of the hole from that dead-stop position. You’re going to have to use less weight, but don’t worry. By increasing total time under tension to around 25-40 seconds per set, you can train yourself to repeatedly produce power in a more metabolically stressful environment while keeping movement patterns and muscular targeting on point. Do 6-10 reps per leg for 2-5 sets. If you can’t move explosively under control, then lighten the load until you can. Gradually add weight over time if you’re planning to go heavy. Paused Non-Alternating Dumbbell Walking Lunge Lunges are often left out of strength and hypertrophy programs because they’ve gotten a reputation for being lower back and knee killers. The non-alternating walking lunge with pauses at the bottom usually results in more pain-free training, less pissed off joints, and more size gains. While the forward lunge theoretically places more of an emphasis on the quads (due to the more vertical torso angle), this isn’t necessarily a good thing when it comes to longevity. More quad emphasis usually leads to more external loading and more front-sided knee pain, especially with harsh changes of directions in and out of the bottom position. Why? Because it leads to momentum and compensation. You can limit this by using a non-alternating step pattern. It places constant muscular tension on the lead leg. The goal here is to train unilaterally and get a metabolic stress-based pump in the lower body while sparing the knees. So another method we can use is adding short pauses at the bottom of each rep. Don’t rest your back knee on the floor, but rather hover over the floor with full tension for a half second before driving up with the front leg, lead by the glutes and hamstrings. While this movement can absolutely be loaded heavy, be careful not to lose the feel of it as the dumbbells get heavy. Stay strict on your tempo and technique for sets of 8-12 reps with pauses, and don’t forget to train both sides equally. Lead with your weaker leg first, then finish off each set with your more dominant side. Dynamic 90-90 Paused Reverse Lunge I hear it all the time from new athletes: “Single leg work hurts my lower back.” Most lower back pain can be attributed to two factors: a lack of stability through the lumbo-pelvic complex and/or a lack of hip mobility. So why not bring up both of these common deficits with this one movement? It’s important if you have motor control or balance issues. Test your hip and core stability with only one foot on the ground, and the raised knee and hip bent to 90-degrees. If you can’t hold this position for 30 seconds without losing balance and having to touch down, start doing single leg movements like this one. It’ll help you get strong and coordinated in single leg stance, and train you to stabilize and brace properly through the lower body and core. This will greatly transfer to your big lifts and keep you healthy in the long run. Start this movement by getting into that 90-90 position with one leg. You’ll notice that the heavier you load this exercise with dumbbells, the more challenging it’ll be to maintain stability. Pause for a full second at the top to tap into that lateral hip stability and glute activation, then drive that leg back behind into a reverse lunge. The back knee should graze the ground while your torso angle is positioned slightly forward to bias the posterior chain stability. From this bottom position, explosively drive back up into the original starting 90-90 position, leading with your hip flexors on the dynamic leg. Do this exercise in non-alternating fashion between 6-8 reps per side. Remember, the goal is to tap into your CNS and gain stability in the single leg stance, so keep your rhythm and tempo of the movement on point. This exercise can make your heart rate sky-rocket. It’ll smoke you without a ton of weight. Single-Arm Single-Leg Romanian Deadlift with Iso-Hold Do you suck at single leg RDLs? Does your lower back hurt? The two are related. And fixing this highly complex problem is quite simple: nut up and do the single leg RDL. My preferred setup for introducing and improving the single leg RDL
Origin: The 4 Mandatory One-Legged Exercises
