 Slap some muscle on your back with these innovative moves. Do 3-4 sets of 10-15 reps on each of these. X-Stretch Lateral Lat Pulldown Do you have trouble feeling your lats work? Here’s a surefire way to get them activated, pumped, and ready for gains. What to do Set up a high cable, grab the handle and sit sideways on the ground with your working side closest to it. Using an underhand grip, focus on the negative part of the exercise – the stretch of the lats – by leaning sideways towards the cable machine. Squeeze the lats and sit upright as you pull it back toward you. Palpate (touch) your lat with your non-working hand to help you feel it in the right place. Tip: Remember to keep your chest up throughout the movement. Angled Single-Arm Pulldown You might already do a chest-supported row in your workouts, but what about a chest-supported pulldown? This will put you in a totally different angle than any regular pulldown and hit your lats in a whole new way. What to do Set the handle high on a cable machine. Get an incline bench set up in front of it. Position yourself in a way that allows you to fully stretch your lats when leaning forward and extending your arm overhead, then push your shoulder blade back and down all while creating tension in the lats. Brace your core by hugging the bench with your non-working arm. Don’t allow the shoulder to roll forward (humeral glide). Tip: Squeeze your adductors (inner thighs) together to maintain stability throughout your body. Alternating Side-Dominant Lat Pulldown Take your standard lat pulldown, but emphasize one side per rep for an even stronger contraction. What to do Using an overhand grip, initiate the pull from the shoulder blade – pushing it down and back towards your back pocket. Keep your elbows stacked under your wrists. Keeping your upper back extended and chest up, pull harder with one side, concentrating on feeling your lat contracting on that side. While you focus on one side, allow the opposite side to assist in the movement. Tip: Don’t allow your torso to lean sideways as you perform the movement. Unilateral Chest Supported Row You already know how to do a one-arm row. This variation will help you get an even stronger mind-muscle connection with your working lat. What to do Set up an incline bench to support your torso, about 30 degrees. Anchor your arm to one dumbbell by pushing away from it to create stability throughout your body. Row with the opposite arm and rotate it from neutral to underhand grip. Tip: Squeeze your inner thighs together on the bench to create tension throughout your body.
Origin: Tip: 4 Lat-Building Exercises You’ve Never Tried
Tag: Exercises
Tip: 3 Exercises That Beat Boring Planks
 The front plank is a popular exercise to promote core stability. Fair enough. It has some benefits and there certainly are ways to make it more difficult. The problem is, holding any static position for more than ten seconds is boring and most guys avoid doing them. There’s a better option – something that’s much more challenging. You could hold a plank for just 10 seconds (or less) and then do several more holds interspersed with very short rest periods in-between so that the total time under tension adds up to a minute or longer. That’s where the exercises below come in to play. They provide a more intense static contraction than the standard front plank, and you don’t need to hold each rep for any more seconds than you have fingers on both hands. 1. Ab 45s I first came across this exercise in the book, “Underground Secrets to Faster Running,” by Barry Ross. No matter how strong you think your core is, Ab 45s will humble you! Here’s how you do it. Lie on your back with your knees bent and hook your feet under something stable, like a machine or two heavy dumbbells. Or get a training partner to hold your feet down. Scoot your butt as close to your heels as possible. Extend your arms out fully overhead and keep them in line with your torso throughout the set. Raise your head and trunk up to a 45-degree angle. Make sure to bring your arms along with you, keeping them fully extended and in line with your torso. Hold that position for a solid 5-second count and then lower your head and trunk back to the floor. Take a breath at the bottom and repeat the process. Build up to 5 sets of 5 reps with 5-second holds, and gradually work your way up to holding each rep for 10 seconds. 2. Reclining Field Goals If starting from the bottom-up is too tough, try going from the top-down with this exercise. I discovered this one in Nelson Montana’s e-book, “The Bodybuilding Truth.” According to Montana, abdominal development is genetically determined and classic movements such as sit-ups and leg raises are ineffective for the abs but extremely effective for the psoas (hip flexor) muscles. Montana believes that the abs respond best to contraction, not movement, and are stressed to a much greater degree when attempting to stabilize the core. You’ll understand what “attempting to stabilize” means once you try the exercise. Sit on the ground with your legs bent to about 90 degrees and your feet flat on the floor. Tuck your chin into your chest, round your back, and grasp the outside of your knees. Now lean back until your arms, still holding your knees, are straight. Make sure to keep your chin tucked in and back rounded. Once your arms are fully extended, slowly raise them up until they’re pointed directly overhead. If you find it difficult to maintain balance, you can move your feet out a bit to make it easier. The closer your feet are to your hips, the more challenging the exercise is, and vice versa. Hold the contraction for 5-10 seconds and repeat. Work up to the point where you can do 10-12 reps. This exercise requires no equipment and can be performed anywhere. Drop to the floor right now and give it a shot. You’ll be surprised at how challenging it is. A word of caution: It’s not uncommon to cramp on these isometric exercises. Make sure you’re well hydrated and once you start to struggle, stop. Listen to your body. If you try to push on, you’ll cramp, which is your body’s way of forcing you to stop. Take it slow and gradually ramp it up over time. 3. Superman Back Extensions This is a great antagonist movement for the above moves. Do it on a back hyperextension or glute-ham raise machine. Extend your arms fully overhead and keep them in-line with your torso throughout the set. Raise your upper body up until it’s parallel to the ground and hold that position for a strict 5-count. Then lower back down and repeat. Build up to 5 sets of 5 reps with 5-second holds, and gradually work your way up to holding each rep for 10 seconds. Programming All of these exercises make for great finishers. You can pair the ab exercises with the back extension in a superset fashion, or you can alternate between doing an ab exercise at the end of one workout and the back extension at the end of the next
Origin: Tip: 3 Exercises That Beat Boring Planks
4 Cool Fixes For Awkward Exercises
 Not every great exercise is designed with your individual body type in mind. Whether you’re too big, too small, too tall, or too busted up for a certain exercise, it doesn’t mean you have to skip the lift. All you have to do customize the exercise to make it work for you. Here are four examples. 1 – Use a Decline Bench for Hip Thrusts Hip thrusts can be awkward to set up. Since most gyms don’t own one of Bret Contreras’ patented Hip Thrusters, many lifters resort to getting a flat bench and propping it against a wall or sticking weight plates behind it to keep it from moving. This can work, but when it doesn’t it’s usually because of one of these reasons: The lifter is too short for the bench, so sitting on the floor puts the bench edge high up on his shoulders. That means he has to squirm and writhe to get into position before the first rep, and then do the same to take a seat on the ground after his final rep. The lifter slides on the bench and doesn’t have a consistent point of contact to use as an axis while thrusting. This gets worse if his back is sweaty. The bench itself slides or tips, usually away from the lifter as he progresses through his sets. The lifter struggles to get the right elbow and arm position to hold the bar comfortably. Making the shift from a flat bench to decline bench solves all of these problems. Since the bench is heaviest towards the high end of the decline, it’s much harder to make it shift by pushing against the low end. That’s simple physics. But banking the heavy end against a wall makes it foolproof. Plus, since you’re now using a bench lengthwise and not widthwise, your elbows are free to tuck towards your body and hold the bar in the position that works best for you. Lastly, since the south side of the decline bench typically terminates quite close to the floor, a lifter of any height can comfortably use one. 2 – Got Cranky Joints? Use Fat Grips for Pressing Many people rely on fat grips to increase the difficulty level of pulling exercises like chins, rows, and loaded carries. They’re a tremendous grip-training tool. They have another use, too, that benefits people who suffer from joint stress in the shoulders, elbows, and wrists. These people never consider bar thickness. Bar thickness during pushing movements like strict presses, bench presses, and dips can play a huge role in the amount of joint stress a lifter experiences due to the amount of centralized pressure in the palm of the hand. It takes a few sets to get used to it, but adding fat grips to each of the above movements (and even when pressing dumbbells) can create a world of difference to joint health and happiness. This is due to the added surface area of the handle that’s now spread across a larger percentage of the lifter’s hand. This tip can come in quite handy, especially if you’re a big guy with big hands. The load now diffuses itself over a greater area instead of one specific spot. You’ll notice the difference immediately. 3 – Big Guys, Use Two Ropes for Face Pulls If you’re tall with long arms, or if you’re very muscular, you may have trouble doing face pulls. Since a face pull starts in internal rotation and finishes at or above forehead level, its purpose is to exploit not only the scapular retractor muscles, but also to exploit a rotary component of the shoulder, dominated mainly by the rear deltoid. Guys with longer arms who use a standard rope will be at a much smaller (more acute) elbow angle when compared to shorter-armed guys at the end point of each rep. This difference can hinder how much rotation they can achieve at the shoulder joint, compared to what they could achieve if given the opportunity for a wider grip. The same problem exists for big guys with tight shoulders, pecs, or triceps. Ropes come in varying lengths, but many gyms feature ropes that are fairly short. Home and condo gyms are even worse. Since they usually attach to a carabiner, a smart move would be to instantly increase the length of the ropes by doubling them up. Put two sets of ropes on one carabiner and pull them long. Now you’ve instantly got a double-sized rope to do your pulls. Another benefit comes in the form of physics. Intentionally trying to “spread the ropes” on each rep requires a lifter to create outward (lateral) force at the same time he creates resistance against a horizontal force angle. Because of this, it proves much more challenging for the target muscles (kind of the same way squatting with banded knees works). In short, it won’t take as much weight to get the same result due to your “utilization of space” within your range of motion. As a bonus, all of this applies perfectly to triceps rope pressdowns too. 4 – Use an Incline Bench for Foot-Elevated Split Squats It can be a real hassle for someone who has limited ankle mobility to get to a reasonably comfortable starting position on rear-leg elevated split squats. Many debate between “squishing the bug” on the flat
Origin: 4 Cool Fixes For Awkward Exercises
8 Back Exercises You’ve Never Even Seen

The 4 Mandatory One-Legged Exercises
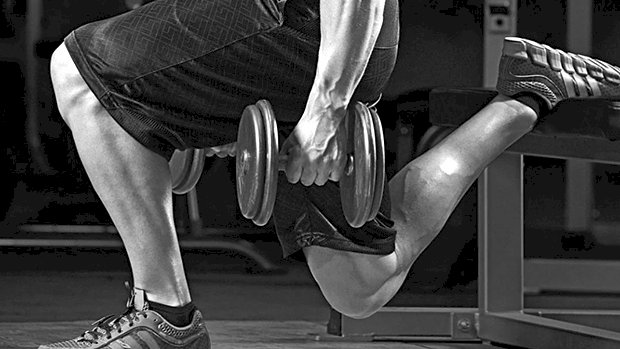 The Cause for the Pause Why train one leg at a time? Because a lack of single leg stability, strength, and power is linked to lower back pain and knee injuries. Plus, single-leg training is a powerful orthopedic health indicator. But it’s not always easy to get unilateral lifts right. That’s where pauses come in. They force you to perfect your technique. Better technique, better training results. Explosive Paused Dumbbell Bulgarian Split Squat The traditional Bulgarian split squat can help you identify functional weak links in single leg stance. Improving it takes motor control to create internal stability in the bottom position, which tends to be the most unstable. And the best way to improve your stability there is by adding an isometric pause at the bottom of each rep, then exploding out of the hole from that dead-stop position. You’re going to have to use less weight, but don’t worry. By increasing total time under tension to around 25-40 seconds per set, you can train yourself to repeatedly produce power in a more metabolically stressful environment while keeping movement patterns and muscular targeting on point. Do 6-10 reps per leg for 2-5 sets. If you can’t move explosively under control, then lighten the load until you can. Gradually add weight over time if you’re planning to go heavy. Paused Non-Alternating Dumbbell Walking Lunge Lunges are often left out of strength and hypertrophy programs because they’ve gotten a reputation for being lower back and knee killers. The non-alternating walking lunge with pauses at the bottom usually results in more pain-free training, less pissed off joints, and more size gains. While the forward lunge theoretically places more of an emphasis on the quads (due to the more vertical torso angle), this isn’t necessarily a good thing when it comes to longevity. More quad emphasis usually leads to more external loading and more front-sided knee pain, especially with harsh changes of directions in and out of the bottom position. Why? Because it leads to momentum and compensation. You can limit this by using a non-alternating step pattern. It places constant muscular tension on the lead leg. The goal here is to train unilaterally and get a metabolic stress-based pump in the lower body while sparing the knees. So another method we can use is adding short pauses at the bottom of each rep. Don’t rest your back knee on the floor, but rather hover over the floor with full tension for a half second before driving up with the front leg, lead by the glutes and hamstrings. While this movement can absolutely be loaded heavy, be careful not to lose the feel of it as the dumbbells get heavy. Stay strict on your tempo and technique for sets of 8-12 reps with pauses, and don’t forget to train both sides equally. Lead with your weaker leg first, then finish off each set with your more dominant side. Dynamic 90-90 Paused Reverse Lunge I hear it all the time from new athletes: “Single leg work hurts my lower back.” Most lower back pain can be attributed to two factors: a lack of stability through the lumbo-pelvic complex and/or a lack of hip mobility. So why not bring up both of these common deficits with this one movement? It’s important if you have motor control or balance issues. Test your hip and core stability with only one foot on the ground, and the raised knee and hip bent to 90-degrees. If you can’t hold this position for 30 seconds without losing balance and having to touch down, start doing single leg movements like this one. It’ll help you get strong and coordinated in single leg stance, and train you to stabilize and brace properly through the lower body and core. This will greatly transfer to your big lifts and keep you healthy in the long run. Start this movement by getting into that 90-90 position with one leg. You’ll notice that the heavier you load this exercise with dumbbells, the more challenging it’ll be to maintain stability. Pause for a full second at the top to tap into that lateral hip stability and glute activation, then drive that leg back behind into a reverse lunge. The back knee should graze the ground while your torso angle is positioned slightly forward to bias the posterior chain stability. From this bottom position, explosively drive back up into the original starting 90-90 position, leading with your hip flexors on the dynamic leg. Do this exercise in non-alternating fashion between 6-8 reps per side. Remember, the goal is to tap into your CNS and gain stability in the single leg stance, so keep your rhythm and tempo of the movement on point. This exercise can make your heart rate sky-rocket. It’ll smoke you without a ton of weight. Single-Arm Single-Leg Romanian Deadlift with Iso-Hold Do you suck at single leg RDLs? Does your lower back hurt? The two are related. And fixing this highly complex problem is quite simple: nut up and do the single leg RDL. My preferred setup for introducing and improving the single leg RDL
Origin: The 4 Mandatory One-Legged Exercises
Tip: Sit a Lot? Do These 4 Exercises
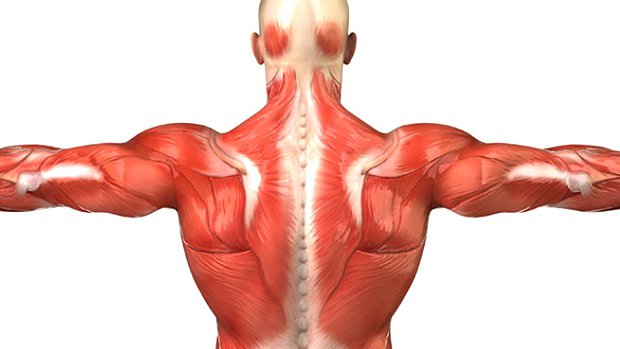 Slouchers, Do the T-W-A-Y Circuit Many lifters experience shoulder pain. This is often due to faulty biomechanics or weakness/inactivity of the scapular stabilizers (serratus anterior, rhomboids, levator scapulae and trapezius). Most commonly, anterior shoulder pain (in the front of the shoulder) will be due to difficulty fully retracting the scapulae. Much like the glute amnesia caused by prolonged sitting, scapular retractors can be hard to properly recruit after we sit slouched for hours. Because our shoulder blades tend to move into protraction (up and forward) when posture is less than ideal, you need to retrain your retractors to pull your shoulder blades down and back. The challenge is finding scapular retraction exercises in which the bigger, stronger muscles of the shoulder girdle won’t overpower their smaller counterparts. These exercises will help to combat the problem. Not only will they help lifters with shoulder stability for pain-free benching and overhead pressing, they’re also of great benefit for injury prevention in overhead movement athletes. All four exercises will be performed in a prone lying position. Take a breath to expand and stabilize the rib cage, lifting the sternum and head to achieve proper cervical and thoracic alignment. The range of motion will be minimal, which allows you to better target the scapular retractors. Maintain constant tension on the target muscles throughout the movement and between reps for maximum time under tension – don’t put your arms back down until all the reps are done. These movements are much more challenging than appear, so you’ll perform them with absolutely no load at first. Focus on movement control, squeezing the shoulder blades for a good strong peak contraction. The T Start with your arms straight out beside you in external rotation, thumbs up, forming a T-shape. Your upper arms should form a perfect 90 degree angle with your torso. Keeping your arms straight, lift your arms straight up while squeezing your shoulder blades together as hard as you can. Hold for a 3-second peak contraction. Repeat for 8-12 reps. The W Begin by extending your arms (palms down) up to 10 and 2 o’clock. Bend your elbows down and back as if you were trying to put your elbows in your back pockets (W-shape), focusing on a maximal contraction of the scapulae. Hold for a 3-second peak contraction. Repeat for 8-12 reps. The A Put your arms down alongside your torso (palms up) at about 5 and 7 o’clock (A-shape). Leading with the shoulder blades, lift your straight arms up and back as if you were trying to push off from a wall. Squeeze your scapulae hard and hold for 3 seconds. Repeat for 8-12 reps. The Y Extend your arms up (palms down) to about 10 and 2 o’clock (Y-shape). Leading with the hands, lift your straight arms up, while squeezing the shoulder blades back and down. Hold for 3 seconds and repeat 8-12 times. Programming Notes Perform all four exercises as a circuit at least two or three times per week. You can do them as a warm-up, at the end of an upper body workout, or even at home on the living room floor. In week 1, one set of each exercise will suffice. You’ll be surprised how tough they are. If the exercises seem too easy, you’re not trying. Focus on the squeeze. Add a second circuit in week 2 or 3 and then a third in week 3 or 4. Rest only 30 seconds or so between circuits. Resist the temptation to add load initially. You need to focus on maximally contracting the target muscles that drive full scapular retraction. You could easily cheat the movement up under load, but you won’t develop the proper mind-muscle connection you need to get the retractors firing. Once you’ve mastered recruiting the proper musculature, you can add a small load. Start with a 2.5 pound plate in each hand. If you go too heavy, other muscles will take over the movement and then you’re wasting your time. For the W, gravity is pulling in the wrong direction. Instead of using weights, anchor a low-resistance band to something stable a little way from your head, grab both ends and perform the movement as described above.
Origin: Tip: Sit a Lot? Do These 4 Exercises
