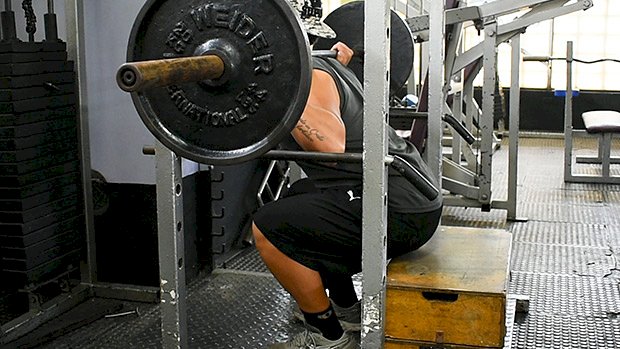
 Got achy knees? Give the box squat a try: Set up a box or bench allowing parallel squat depth. Go a little higher if you’re still feeling knee pain, but don’t let it become a way to use too much load through a miniscule, restricted range of motion. If you’re able to use a greater ROM pain-free, go for it. Parallel tends to be a safe starting point for most people. “Grip” the floor firmly with your feet. Torque and rotate your hips externally to pull the knees into alignment with your hips and toes, creating a strong arch. Foot stance varies by individual, so find one that allows comfortable movement and the best range of motion. Keep in mind that the feet don’t need to be placed symmetrically – not everyone has symmetrical hip joints. Aim for a placement that allows you to feel the leg muscles evenly. Maintain external rotation of your hips through the entire rep. This should prevent your knees and ankles from collapsing inward, which would place greater stress on the knee joint and ACL. Maintain vertical shins by sitting back into your hips onto the box. A common issue here is poor ankle dorsiflexion. This can be immediately addressed by elevating your heels with squat shoes or a wedge, but is better managed with ankle mobility work for long-term resolution. By sitting back farther than a regular squat, we reduce the shear force, potentially alleviating the pain. Take a big breath and flex your abs hard to lock in that air and maintain a neutral spine. Brace your core all the way around your spine. Sit in a controlled manner onto the box without disengaging your core or legs and avoid rocking backwards to create momentum for the positive, or lifting, part of the rep. Use a controlled touch or brief pause. For added challenge, sustain a longer pause before the positive rep. Keep the movement strict and avoid failure, which would increase the likelihood of further aggravating your angry
Origin: Tip: Got Angry Knees? Squat Like This
Category: mysql
Rip Away the Fat, Not the Muscle
 Use these basic, but often neglected, strategies and you’ll lose body fat pretty darn fast. And the best part? You’ll keep your hard-earned muscle. Rule 1 – Eat Plenty of Protein Protein is a dieter’s best friend. Most people are already aware it helps build muscle, but we tend to forget that protein requirements actually go UP as calories go down. So as you decrease your intake of carbs and fat in an effort to lose adipose tissue, protein intake becomes more critical because it’ll help prevent muscle loss when dieting. Not only does dietary protein help preserve lean muscle when your calorie deficit is high, but it also helps you feel more satisfied and less hungry, which helps you stick to you diet. Additionally, because of the thermic effect of food (TEF) protein consumption also speeds up your metabolism by about 25 percent. Remember, the thermic effect of food is the energy you expend digesting and assimilating what you eat. What, When, And How Much? Lean meats like chicken breast, turkey breast, and lean fish certainly fit the bill. There are also some types and cuts of red meat that are 90% lean or more. Egg whites, greek yogurt, and high-quality protein supplements like Metabolic Drive® Protein round out what should be your protein staples. The two most important times to have protein are before and after resistance training workouts. This is especially important when your goal is to keep all your muscle, which not only looks good, but also helps keep your metabolism high. Then just disburse your protein fairly evenly throughout the day. How much should you have? A simple, yet good rule of thumb is one gram of protein per pound of your bodyweight. So if you weigh 200 pounds, eat 200 grams of protein per day. Let’s say you’re going to eat five meals a day. Then simply have about 40 grams of protein per meal (which includes protein shakes). Sure, you could go a bit higher if you’re fairly lean and your energy output is high; and yes, you can go a bit lower on your protein intake if you’re overweight. But other than that, if you wanna burn fat in a hurry without losing muscle, you MUST master this first rule. Rule 2 – Eat LOTS of Veggies The vast majority of vegetables have very few calories, yet contain an array of micronutrients and phytonutrients that enable your body to perform optimally. Veggies are usually fibrous carbs. This means it’s a vegetable that’s high in fiber (and water) yet low in energy-producing carbs, and therefore low in the amount of insulin secretion caused. So they’ll help fill you up and keep you full longer, improve your health and performance, while having negligible calories. Not prioritizing vegetable intake is probably the primary flaw I see among physique athletes and lifters. It’s a mistake I made too. I’ve since realized micronutrient intake from a variety of vegetables is a critical component of any good diet. What, When, And How Much? Most vegetables qualify as fibrous carbs, but not all. Here’s a partial list of some of the more common fibrous veggies: Asparagus Bell peppers Broccoli Brussels sprouts Cabbage Cauliflower Celery Collard and turnip greens Cucumber Green beans Kale Lettuce Mushrooms Onions Peppers Spinach Summer squash You can, and often should, also eat up to one large tomato or carrot per meal. Now, when should you eat veggies? Every meal. The only justifiable exception is perhaps pre-workout to avoid being too full during training. If you have a high-tech intra-workout drink like Mag-10®, skip the veggies. How much? Consider a portion to be at least one cup or four ounces scale weight. But more would be even better, especially with variety. It’d provide even more physique-optimizing micronutrients and help optimize your pH (acid, base) level. You really can’t go wrong eating just about any amount of fibrous carbs. You’ll generally get full long before consuming too many calories. That reminds me of high-level bodybuilding client who asked if he should be eating fewer vegetables. After inquiring about his specific intake, he said he was eating an entire one-pound bag of mixed veggies with his last meal or two, every day! Given that he was steadily getting more and more ripped, I said, “Have at it!” By the way, he came in shredded, glutes and all, and we never lowered his veggie intake until right before the show. Rule 3 – Have Healthy Fat With Every Meal I hope you got the memo that dietary fat doesn’t automatically turn into body fat, and the other memo regarding all fat not being created equal. If not, consider these your memos, and welcome back from wherever you’ve been hiding. Dietary fat is a good source of steady energy, partly because it doesn’t lead to blood sugar spikes and the highs and lows in energy that come with that. Fat is also unique in that it doesn’t lead to insulin secretion (which actually blunts fat burning). In other words, eating fat doesn’t hinder fat-burning, whereas eating carbs can. Healthy fat also has
Origin: Rip Away the Fat, Not the Muscle
Tip: Protein-Packed Lemon Squares
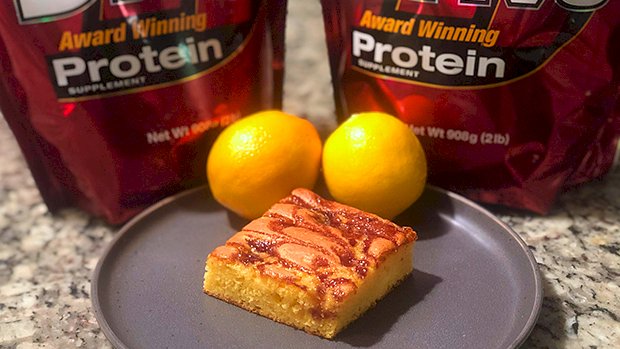 It’s a burst of lemon, a hit of blackberry, and an insanely moist square you’ve gotta sink your teeth into. These bad boys have 16 grams of protein in only ONE piece and just one gram of fat and 8 grams of net carbs. Think it’s too good to be true? Think the sizes must be tiny? Wrong. Now all you have to do is make them. Ingredients 1 Cup fat-free vanilla Greek yogurt 1/2 Cup lemon juice 1/2 Cup egg whites 1 Teaspoon vanilla extract The zest of one lemon (see note below) 1 package sugar-free lemon pudding (Jell-O brand) 1/2 Cup Splenda (the kind made for baking that’s equal to sugar, cup for cup) 1 Cup flour of your choice (regular, a low-carb mix etc.) 1/2 Teaspoon baking soda 1 Teaspoon salt 1 Cup vanilla Metabolic Drive® Protein 1/2 Cup no-sugar added blackberry jam Note: You’ll need a lemon zester. If you don’t have one, you can use what’s called a “microplane” to zest the lemon peel. If you don’t have one of those, just use the side of the cheese grater that has the smaller holes. Directions Preheat the oven to 350 degrees Fahrenheit and take your jam out of the fridge so that it sits at room temperature. This makes it a lot easier to drizzle. Get your lemon zest ready. Set a bowl down to collect the zest. Then use the lemon zester to scrape off the yellow part of the peel. If you’re using a microplane or cheese grater, rub the lemon in one direction (against the sharp edges of the holes). You only want to collect the yellow part, so turn the lemon as you go, letting the zest fall into the bowl. In a medium mixing bowl, combine yogurt, lemon juice, vanilla extract, lemon zest, and egg whites. Set aside. In a separate mixing bowl, combine flour, baking soda, Splenda, protein powder, and sugar-free lemon pudding. Mix both bowls together thoroughly. Pour into your baking dish. With a spoon, drizzle several lines across the top of your batter. Using a knife, make whatever pattern you’d like on top but be sure to push the jam into the batter a bit. Pop the pan into the oven for 30 minutes or until you poke it with a toothpick, and it comes out clean. Everyone’s oven is different so keep an eye on it. Allow a couple minutes to cool before eating – that jam gets pretty hot. Cut into 9 pieces and enjoy! Note: The macros will vary a bit depending on the type of flour you use. You can handle the math, big
Origin: Tip: Protein-Packed Lemon Squares
Pump and Grunt – New Biceps Finishers
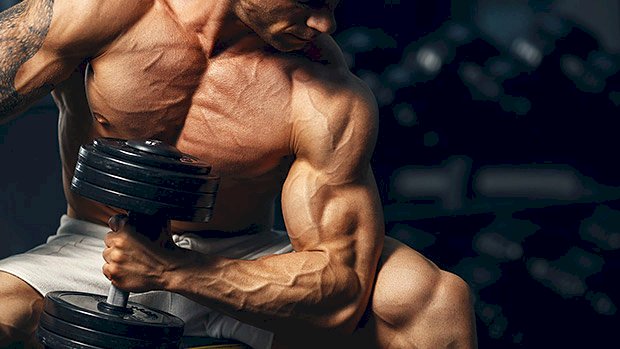
 When it comes to biceps training, we all love our 21’s, our drop sets, running the rack, and various other schemes that add metabolic stress or act as time-efficient finishers. They can get stale, though, so let’s breathe a little life into your workouts with these intelligent and basic (yet not boring) biceps protocols. 1 – Biceps Rotisseries Let’s “slow cook” your biceps, as well as the brachioradialis, via a lot of rotation and change in hand position. The protocol: Dumbbell Reverse Curl:6-8 reps with an estimated 12-rep max weight Dumbbell Hammer Curl:6-8 reps (same weight) Dumbbell Curl:6-8 reps (same weight) Dumbbell Cheat Curl:6-8 reps (same weight) 90-Degree Alternating Pronation/Supination:6-8 reps (after last cheat rep) 90-Degree Isometric Hold:Hold for as long as possible (after last supination and pronation) You’ll use the same weight throughout and there’s no rest between the variations. Rest 90-120 seconds and repeat. You’ll likely have to drop down a set of ‘bells to do a second series. You’ll need to leave your ego at the door. This protocol is straight-up metabolic stress, skin-splitting pump work! If you need to use 15-20 pound dumbbells, then so be it. Now isn’t the time to try and impress the Gym Shark girl next to you with huge weights. The weight selection on that first exercise is key. You want to have several reps in reserve. If you go too heavy on the reverse curl and get too close to failure, you won’t last and won’t hit the rep targets on the movements that follow. Trust me, by the third or fourth movement, it’ll get plenty hard. A quick note on the cheat curl – you want to hip hinge just a little and “pop” up powerfully. Pause the contraction and then do a very slow and focused negative. 2 – EZ Does Its This is a straightforward mechanical advantage drop set. We start with the theoretical weakest exercise and then manipulate leverage and strength curve to pour on more volume and extend the set. The protocol: Bent Over EZ-Bar Spider(ish) Curl:8-12 reps (to failure) Strict EZ-Bar Curl with Shoulder Flexion:Max reps (same weight) Strict EZ-Bar Curl:Max reps (same weight) Cheat EZ-Bar Curl:Max reps (same weight) Do the first variation using weight you can lift for 8-12 reps. From there out, go for maximum reps, always using the same weight. Rest 90-120 seconds and repeat. You’ll likely need to reduce the weight a bit to do a second round. Again, this is metabolic stress work – you won’t need a lot of load and you should only do 2 sets, tops. Apply the same guidelines on the cheat curl as laid out above: a little hip hinge and pop up forcefully. Pause the contraction and use a very controlled negative. Here’s an alternative version: This one uses an EZ-bar cable attachment and a low pulley. 3 – Rise Ups This is another straightforward and effective mechanical advantage drop set. With this one, you’ll start face down but spin around on the subsequent set, finally ending up standing, hitting both the long and short heads of the biceps hard in the process: Dumbbell Spider Curl:8-12 reps (to failure) Incline Dumbbell Curl:Max reps (same weight, same incline) Strict Standing Dumbbell Curl:Max reps (same weight) Standing Cheat Dumbbell Curl:Max reps (same weight) 90-Degree Isometric Hold:Max time (after last cheat rep) Do the first variation using a weight you can lift for 8-12 reps. Then go for maximum reps on the exercise variations that follow. The same guidelines apply here in terms of rest periods, sets, and load reduction. How and Where to Use These Regardless of your training split, use these biceps variations mid to late workout – after your heavier, straight-set progressive overload work. There are no hard and fast rules here. Remember, this is metabolic stress and muscle damage work. These aren’t protocols where you’re chasing weight or personal records. It’s all about tension, volume, and mind-muscle connection. Go after mechanical tension, maximizing load, and progression earlier in the workout using other exercises. These are not entrees; they’re side dishes. In Defense of Finishers You can certainly thrive by hammering basic stuff over and over for years, but isn’t training supposed to be fun? And who doesn’t like to pump up their arms? The protocols presented here are a way to make your training “flexibly structured,” quench your bro thirst, and implement some smart variety. There’s nothing wrong with leaving the gym with a pump and a smile and chomping at the bit to come back for
Origin: Pump and Grunt – New Biceps Finishers
Tip: Death by Dumbbell – The Workout
 This is a simple, full-body workout that only requires one heavy dumbbell. It’s only four exercises, but they will challenge your shoulders, legs, and core stability. A lot of people avoid these exercises because they’re quite humbling. Don’t do that. Here’s what it looks like: The Workout 5 rounds of: 5 x Left arm overhead lunge 5 x Right arm overhead lunge 10 x Alternating bear row 5 x Left arm dumbbell strict press 5 x Right arm dumbbell strict press 5 x Goblet squat Take minimal rest between each round, aiming to finish in 12 minutes or less. To figure out what weight to use, find a dumbbell you can strict press for 10 reps with each arm and use that as your starting point. The strict press will be the limiting factor for most people. Exercise Tips Overhead Lunge:Make sure your elbow stays locked out the entire time and your ribs are pulled down. Do not arch your back; keep braced and reach high. Bear Row:Press down hard with the arm on the floor and draw the elbow of the pulling arm back as far as you can while maintaining square hips (squeeze your glutes). You can be super strict if you want, aiming to keep an unmoving plank throughout, but they’re a difficult movement so don’t be too hard on yourself. Just try not to look like a banana from the side. Dumbbell Strict Press:Don’t lean to the side. Pay attention to your lockout position, no half reps. Keep a more neutral grip and keep the dumbbell close. These will start to become challenging as you progress through the sets. Goblet Squat:Even though you’re holding the weight in front of you, try not to round your upper back. Keep your chest tall, grab the ground with your toes, and use the dumbbell to help you get nice and deep into your
Origin: Tip: Death by Dumbbell – The Workout
Tip: Eat This Way to Stop Achy Knees
 Achy knees are as emblematic of long-time lifters as cauliflower ears are of long-time Jiu Jitsu practitioners. Lift long enough and hard enough and your knees (and possibly other joints) will start to grind away and maybe get peed out and carried to the ocean where they might eventually become part of some distant tropical reef, home to some plucky invertebrate. Okay, that’s probably not how it works. Regardless, some lifters will be luckier than others. Their joints will degenerate, but only to the point where they’ll suffer the occasional grumpy knee, usually caused by a cold front that found Canada too limiting for its ambitions. But plenty of not-so-lucky lifters will spend years inundating themselves with alleged cartilage-rebuilding supplements like glucosamine and chondritin, eventually graduate to NSAIDS and opioids, and finally relent to a total knee replacement and spend the rest of their lives getting felt up by TSA agents at the airport because they lit up the X-ray scanners. Researchers at the University of Alabama at Birmingham might have presented people with bad joints an alternative fate, though. They found that simply going on a low-carb diet decreased pain and inflammation in guys with rickety knees. What They Did The scientists found 21 old guys with bad knees. They took serum samples and put them on one of three diets for 12 weeks: A control diet where they continued to eat as they had been. A low-fat diet that consisted of 800 to 1200 calories a day. A low-carb diet that allowed them to eat as many total calories as they wanted, but that only contained 20 grams of carbohydrates a day. Every 3 weeks, the participants were asked questions relating to functional pain, self-reported pain, quality of life, and depression. After the 12-week diet intervention was over, the researchers drew up a last round of serum samples to compare against the pre-test values. What They Found The guys on the low-carb diet reported reduced pain intensity and unpleasantness during functional tasks, as well as less general self-reported pain, as compared with the control group and the low-fat group. They also found significantly lower oxidative stress in the low-carb group. Their blood samples indicated a reduction in the concentration of TBARS (thiobarbituric acid reactive substances), which are a marker of inflammation. “In only 12 weeks, the quality of life and functional pain of this population were significantly improved, which may have been the result of a reduction in oxidative stress,” concluded the team. What This Means to You The results of this study might reflect a chicken or the egg dilemma. The researchers figured that the low-carb diet caused a reduction in inflammation, which of course resulted in reduced knee pain. However, I wonder if they might be looking at the results through a biologic lens rather than an engineering/physics lens. The low-carb group lost a lot of weight, more – perhaps surprisingly – than the low-fat group. That alone could have caused a reduction in inflammation and a reduction in pain. Consider that every time you take a step, the force on either knee is 1.5 times your body weight. Let’s say you weigh 200 pounds. That means when you walk on level ground, you’re putting 300 pounds of force on your knees. Hell, if you walk up some stairs, the force is 2 to 3 times your bodyweight, and it’s 4 to 5 times your bodyweight when you bend at the knee to pick up your iPhone. Let’s say your Fitbit nags you into taking 10,000 steps a day on level ground. Assuming you weigh that same hypothetical 200 pounds, you’re going to put a cumulative force of 3,000,000 pounds (300 pounds force x 10,000 steps) on your knees during that day. But what if you lost 10 pounds of bodyweight, perhaps through a low-carb diet? That same 10,000 steps would then subject your knees to a total of 2,850,000 pounds, which is a daily reduction of 150,000 pounds of pressure. Of course you’re going to experience less inflammation if you lessen the cumulative load. Of course you’re going to experience less pain. Lose more than 10 pounds and you reduce the total load further. So while the low-carb diet may have reduced inflammation and contributed to the improved quality of life in the gimpy-kneed guys, at least some or possibly a lot of the reduction in inflammation was caused by the reduction in weight. Of course, to joint pain sufferers, the specific reason for any reduction in pain probably doesn’t matter as much as the end
Origin: Tip: Eat This Way to Stop Achy Knees
Tip: The Russian Core Exercise
 Do the Twist, Comrade! The Russian twist is a forgotten gem of an exercise. It’s one of the best anti-rotational core exercises on the planet when performed correctly. Bonus: Its progression capacity is limitless. This core exercise requires your glutes to contract to provide stability from which to rotate. It also helps improve end-range hip extension. It teaches you how to disassociate your chest and arms from your hips (and even your low back to a small degree) to rotate effectively and safely. If you aren’t in constant control while performing the movement you’ll immediately fall off the ball, so the design keeps you on high alert and provides instantaneous feedback about where your body is and how you’re moving – great for motor learning. The movement reinforces systemic whole-body tension. This skill can’t be discussed enough. If you’re trying to build a monster deadlift, squat, or bench press (or even run faster) then you’ll need to quickly generate high degrees of tension to create more strength. The Russian twist will help you do that.
Origin: Tip: The Russian Core Exercise
Why You’re Wrong About Machine Training
 I Used to be Anti-Machine Like many people who came to lifting heavy objects via the sports of weightlifting and powerlifting, I viewed machines with contempt. I believed people who used them lacked the intestinal fortitude to learn how to use free weights (which are “obviously” superior). Thankfully, I’ve managed to evolve to a less ideological viewpoint, opting for one that’s more evidence-based instead. I ask myself a simple question: “What’s the best way to get big and strong?” Answering this question allows me to be much more open and objective to considering any and all rational methods that take me from point A to point B. I care about the result, not how you get the result. And that’s what allowed me to view machine training in an altogether different light. An Evidence-Based Discussion Current scientific thinking suggests that muscles get bigger and stronger when they’re exposed to unaccustomed levels of tension. The magnitude of that tension is most important for strength goals, and the volume of that tension – the number of times your muscles experience tension per unit of time – matters most for hypertrophy (size) development. Both machine and free weight exercises expose your muscles to tension, but with slightly different pros and cons. So abandon your ideological thinking and think of both options simply as tools that have varying degrees of utility, depending on context and circumstances. And remember, you’re not restricted to one or the other. Machines and Free Weights: The Key Differences By definition, a machine-based exercise is a movement where you’re required to exert force against a resistance without needing to do much in the way of controlling that force, at least compared to similar free-weight exercises. Let’s examine two very similar exercises – the Smith machine squat and the barbell squat. They both stimulate the same muscles, but in slightly different ways. Let’s examine the pros and cons… Advantages of the Smith Machine Squat More technique options. Because the bar slides up and down a fixed rail, you can do a number of things you can’t do with a barbell, like placing your feet in front of (instead of directly under) the bar. This strategy allows you to assume a more upright position than you could achieve with a barbell squat, which means greater quadriceps recruitment. You can use more weight because you don’t need to balance or stabilize. This results in more muscular tension, which in turn equates to more pronounced strength and hypertrophy adaptations. The Smith machine is much more forgiving of relatively minor errors such as positioning yourself slightly off-center under the bar. Disadvantages of the Smith Machine Squat It doesn’t require you to control bar path. While this is the most often-cited criticism of machine training, I’ve never once – in my many years of studying motor unit recruitment – come across the notion that control was a necessary or even a desirable precondition for strength or muscle development. Again, muscle fibers adapt and grow when they’re forced to generate high levels of tension. Not only do Smith and barbell squats both afford the ability to provide this tension, in many cases, the Smith squat is a better way to provide this tension. If you only squat on a Smith machine, you’ll never learn how to do a proper barbell squat. While undeniably true, I wonder how consequential this really is, assuming that you don’t plan to compete in powerlifting. It’s much like pointing out that if you only play the piano, you’ll never learn to properly play the organ. If the goal is organ mastery, this is a problem. But if the goal is to cultivate more generalized musical skills, it’s not. The strength acquired by using free weight exercises has greater positive transfer to many “real world” skills. While we’re now at least getting into a more plausible defense of free weights, the concept of transfer is often poorly understood and applied, largely because movement structure is only one component of transfer. Now, don’t get me wrong, movement structure certainly matters. For example, it’s intuitively obvious that the strength gained from squatting will positively transfer better to a vertical jump than the strength you’d acquire doing leg extensions, mostly because the structure of a squat is much more similar to a jump than the structure of a leg extension. However, if you’re comparing the positive transfer potentials of Smith and barbell squats, there’s really not a whole lot of difference between the two, unless you place your feet considerably in front of the bar when Smith squatting. But even here, the differences are relatively minor. But does needing to control your muscular efforts during a barbell squat transfer over? While there might be something to this, unless you find the vertical jump to be a complex maneuver (in terms of balance and/or overall body control), I’m far from convinced that barbell squatting would offer a
Origin: Why You’re Wrong About Machine Training
Tip: Do This Exercise FIRST on Back Day
 Do a stretch-based back movement before any big pulling exercises on back day. This “primer” exercise reverts your body into a normal posture by getting you into the opposite positions you most likely spend most of your day in. The single most effective movement to prime the back is the straight-arm pulldown and its variations. This movement involves isolating the latissimus dorsi. In most cases, it’s functionally shortened. Doing both an end-range stretch along with a peak concentric contraction works wonders. Straight-Arm Pulldown The straight-arm pulldown is based on internal tension. If you’re using a cable stack, it’s less about the external load you’re placing on the tissues and more about how you’re building and bracing your tension throughout a full range of motion throughout the set. As you’ll see, this movement will be humbling, so make sure you set your ego aside and train this exercise for the feel and
Origin: Tip: Do This Exercise FIRST on Back Day
Tip: The Most Neglected Body Part in the Gym
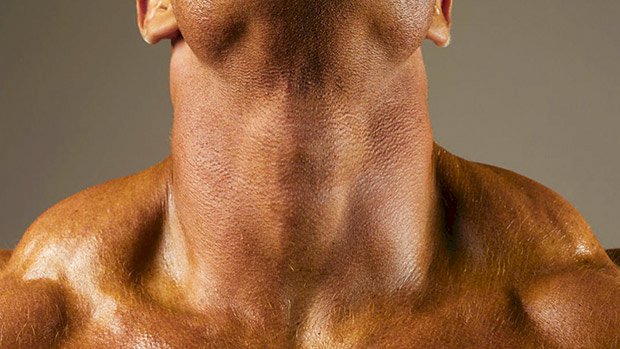 Strengthening your neck will benefit your posture and the overall look of your physique. But not many people do any sort of direct neck training. Sometimes it’s just a time issue. Here’s an exercise that gets the job done quickly: banded bent-over neck extensions. You’ll need a light to moderate band, an unweighted barbell set up in a rack just below knee height, and a bar bad. Stay strict with the slow negatives and let the bar pad stretch your neck at the bottom of the movement. Be careful not to overextend when you’re in full extension. Get a 1 second squeeze at the top and use the barbell to support your body enough to keep your spine relatively neutral. Do 4 sets of 8-10 reps at a 5101 tempo. However, if this is your first time directly targeting your neck, I’d be modest with the volume and stick to only 3 sets. You’re going to be
Origin: Tip: The Most Neglected Body Part in the Gym
