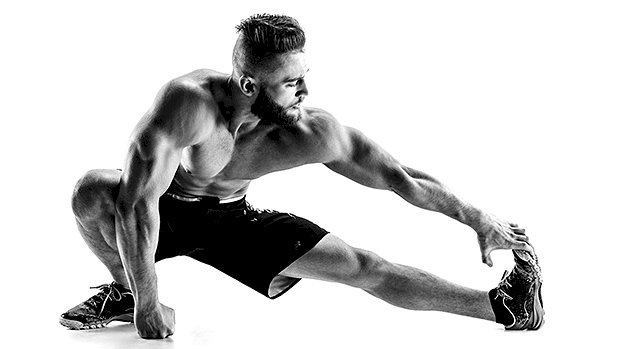
 Save your stretching for post-workout. This is when you want to hold stretches for a longer period of time while your muscles are still warm and receptive. These will help get rid of the kinks in your glutes and help prevent those kinks from cropping up again. Glutes and Hips This is called the standing pigeon stretch. Place one leg across a box at a 90 degree angle. Press your opposite hip forward and rotate the hip that’s on the box backward. Hips and Hip Flexors Do the lizard lunge with external rotation. Place one foot in front of you so that your knee is behind your shin. Extend your opposite leg behind you. Roll to the outside of your foot and press your knee away from your body. Hips and Thoracic Spine Do the squat hold with a reach back. Keeping your heels flat, squat down as deep as you can comfortably hold. While keeping you heels flat, reach one arm up as you try to touch your bicep to your ear. Ankles and Calves Place a resistance band around your ankle and loop the other end around a fixture. Keep your heel flat as you push your knee forward so that it goes past your toes. The band will pull your shin backwards, creating a stretch in your
Origin: Tip: Do These Stretches After Squats
A CrossFit Apology
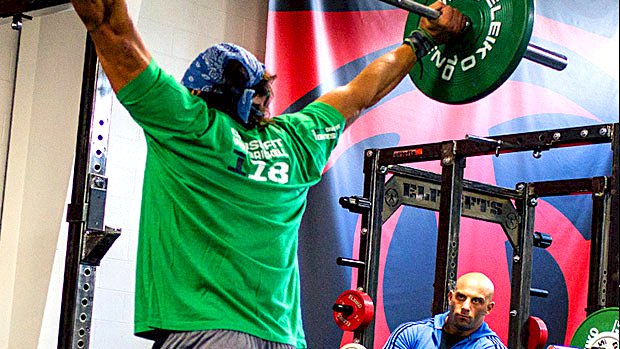 Here’s what you need to know… Build a strong back. CrossFitters work their lower backs every day in one way or another. Adopting this kind of strategy will carry over to Olympic lifts, deadlifts, and squats. Respect the reps. CrossFitters do a lot of high rep work, and it leads to both strength and muscle gains. Dominate the weight. CrossFitters newer to weight training often don’t have any mental blocks when it comes to hitting PRs and making fast progress. Lesson Learned I used to think CrossFit was a fad and assumed they all used bad form, that they couldn’t get strong or build muscle doing those workouts. I was wrong. Working with a lot of CrossFit athletes changed my mind. While I personally wouldn’t train using only WODs, I did learn a lot of things from coaching CrossFit athletes. I work with a diverse clientele: average Joes, athletes, bodybuilders, and CrossFitters, and I must say that next to the powerlifters, the CrossFitters were the strongest overall. Oddly enough, for a group that has a reputation for using bad form, they have probably the best form among the people I’ve trained. Serious CrossFitters are perfectionists and really work at their craft. Sure, they might have a slight technical breakdown during WODs, but most of the time their technique is solid. Here are the three things I learned by training them: 1 – Strengthen Your Lower Back This is the secret to fast strength gains on the Olympic lifts, deadlifts, and squats. CrossFit athletes – even most recreational CrossFitters – have super strong lower backs. And as a result, they make fast progress on Olympic lifts when properly coached. Heck, many that I coached took only a few months to hit weights that took me a few years to attain while training on the Olympic lifts full time. CrossFit athletes aren’t doing tons of fulltime Olympic lifting workouts, certainly not at the frequency that would justify the super fast improvements I’ve seen. The following are pretty much part of every single WOD. They’re doing hundreds, if not thousands, of reps per week involving the lower back to some extent: Deadlifting anything from super high reps (up to 100 reps in a workout) to super heavy weights Kettlebell swings with all sorts of weights and rep ranges High-rep Olympic lifting (not something I’d personally do or recommend) Not only do they do all this work for the lower back, but they tend to loosen up their form a bit during WODs. This makes them round the lower back slightly. I’m not saying that you should start doing tons of rounded-back lifting, but deadlifting with a rounded back puts more stress on your erector spinae and – if you don’t blow a disk – it will make your lower back stronger. Even Klokov does a ton of rounded-back pulling. When it comes to the Olympic lifts, a strong lower back allows you to stay in a position to make the best use of your strength when the weight gets heavy. One CrossFitter I coached started out doing deadlifts. He didn’t have much experience and had the worst fishing-rod deadlift form ever. I made fun of him at the time because he told me he was going to bring his 405-pound deadlift up to 535 in four months. I even wrote him an email saying why he was being unrealistic and how he was disrespecting powerlifters who work their tail off for every 10 pounds they added. Well, he actually did it, but with the most horrible form possible. Fast forward a year and that guy now has one of the best lifting forms I’ve seen and it’s because he has a super strong lower back. He’s now snatching, cleaning, deadlifting, and squatting superb weights for his size. I “theoretically” understood the value of a strong lower back, but never focused on it that much. I felt that I got all the lower back stimulation I needed from doing the Olympic lifts and squats. In retrospect I now know I always had a weak lower back and it probably held me back. Apply It The lower back responds better to a high volume of work. If you want to build it to a level that will give you the strength to shock people, you need to work it for a high number of reps at a very high frequency. The good news is that the lower back muscles seem to have the highest trainability of all the muscles. This means they get bigger and stronger very rapidly if you focus hard on training them. With the lower back the big secret is just training it. Try ending every session with a lower back exercise. Depending on how fresh I am or how strong I feel, I’ll pick the movement that will work the best on that day. If I feel tired, then doing heavy triples on the Romanian deadlift might not be a good idea. I’m now devoting a good amount of time on making my lower back stronger using various rep ranges, using from 3 to 10 reps on the Romanian deadlift and other pulls; 10-12 on loaded back extensions, the back extension machine, glute-ham raises, and reverse hypers; and up to 30 on kettlebell swings. Don’t dismiss something as simple as a back extension machine.
Origin: A CrossFit Apology
Unlock Natural Gains: Neuro Type 1
 Part 1 – Nonstop Natural Gains: The Neuro Typing System Part 2 – Unlock Natural Gains: Neuro Type 1 Part 3 – Double Your Natural Gains: Neuro Type 2 Part 4 – Never-Ending Natural Gains: Neuro Type 3 Part 5 – The Neuro Type Workouts Part 1 of this series introduces you to neurological typing. In short, your baseline levels of three neurotransmitters (dopamine, serotonin and norepinephrine) strongly influence your personality and dictate your how you should train and eat for best results. Your personality profile is largely determined by three key neurotransmitters: dopamine, serotonin, and norepinephrine. Your baseline levels of these chemical messengers are determined by genetics. The three basic personality types are: Type 1: Novelty seeker Type 2: Reward dependant Type 3: Harm avoider Each has its positives and its negatives. If you adopt a training style that doesn’t match your psychological and neurological type, you simply won’t get results from it, no matter how well-designed the program is. In this series, we’ll go over each type and what type of training, nutrition and supplement plan is best for each. To determine your type, review Nonstop Natural Gains: The Neuro Typing System. Below we’ll cover the novelty seeker. This type has a low dopamine level, causing him or her to seek out new things to stimulate it. You could call them “adrenaline junkies.” Optimal Training for Type 1: Novelty Seekers 1 – Training Preparation Novelty seekers have less dopamine than serotonin. They must increase dopamine prior to starting the actual workout to have good motivation and work capacity. If they don’t, performance will suffer in the first part of the workout. For that reason, it’s very important for them to focus on activation drills prior to starting their workouts: jumps, throws, high speed movements, etc. The focus needs to be on speed – moving violently but without creating a lot of fatigue. Example: 3 sets of 5 vertical jumps. Or striking a tire with a sledgehammer for 3 sets of 12 seconds. When it comes to the main heavy lift of the day, they should ramp up to the working weight while doing gradually heavier sets and focus on compensatory acceleration (CAT). That’s where you accelerate the weight as fast as possible during the concentric or lifting phase of the rep. This acceleration will increase force production and will amp up the nervous system by increasing the release of dopamine. A ramp should start at around 60% of your max. Do around 5 ramp-up sets before doing the work sets. These ramp-up sets should only be done for the same number of reps that you plan to do on your work sets, or lower. You want to amp up the nervous system without creating fatigue. A ramp could look like this: Ramp-Up Sets: Set 0: bar x 10 Set 1: 165 x 3 Set 2: 195 x 3 Set 3: 215 x 3 Set 4: 235 x 3 Set 5: 255 x 3 Note: Use maximum concentric acceleration on sets 1-5. Work Sets: Set 6: 275 x 5 Set 7: 275 x 5 Set 8: 275 x 5 Set 9: 275 x 5 Remember that dopamine and adrenaline are connected. Dopamine is used to produce norepinephrine which is used to produce epinephrine/adrenaline. So anything that amps you up will raise dopamine levels. Just be careful not to overdo it. This type has a low baseline dopamine level and can produce spurts of it, but they crash if they have to produce too much. When that happens during a workout, their willpower and motivation goes down the drain. 2 – Training Variation Type 1 lifters need a lot of variation in their training. They’re your typical “I can’t follow a program” guys. They always want to try something new. If you put them on programs like 5/3/1 or The Power Look (programs based around doing the same stuff over and over) they’ll get de-motivated and won’t get results. We often say that we need to stick to a program to make progress, but in their case it’s not necessarily true. Remember, whatever helps you train the hardest will give you the best results. On a static program, novelty seekers get bored easily and will lose focus if the training is too repetitive. In their case, a lack of sufficient variety is actually a stressor. This neuro type… Can stay on a program for 2 weeks. Does better on multiple types of stimulation in a week. Does better when different types of stimulation are included within a workout. Cybernetic periodization (freedom within a structure) is a great approach for them. This refers to pre-planning the first big lift of the workout but selecting the assistance work based on the performance of the main lift. Surprisingly, a lot of powerlifters are novelty seekers. The Westside Barbell system is the perfect example. They vary the main lift every one to two weeks, they do three types of stimulation per week (four if you include conditioning), and they use cybernetic periodization by selecting their daily assistance exercises based on how they performed on the main lift. Oddly enough, CrossFit is also a perfect example, especially the shorter 8-15
Origin: Unlock Natural Gains: Neuro Type 1
Tip: 4 Minutes to Fitness
 Who among us doesn’t remember dad getting up to go to work in the morning and getting down on the floor before he even took a leak to grunt out some watch-out-for-that-mousetrap push-ups followed by some awkward calisthenics? Sure! The old man had to stay in shape so he could power walk into the office and nail the Willoughby account! Personally, I don’t remember Dad doing anything like that at all, but I did see dads on TV doing this kind of thing, so I have to assume the practice was at least partially based on reality. Oddly enough, it looks like these dads might have been onto something, as a new study has shown that a brief but brutal 4-minute workout, composed entirely of calisthenics, was about as effective a cardio protocol as classic sprint training or high intensity interval training. What They Did Researchers herded up 55 healthy men who were all around 23 years old and split them into three groups for a 16-week study: One group performed high-intensity interval training where they performed 8 20-second bouts of sprinting at 130% of V02 max, each bout interspersed with 10-seconds of slow treadmill walking. A second group ran on the treadmill at 90-95% of VT2 (ventilatory threshold) for 30 minutes straight. The third group did 4 minutes of max effort exercises consisting of burpees, mountain climbers, squat thrusts (done while holding 3 kg. dumbbells), and jumping jacks. Each exercise was done balls-out for 20 seconds with each 20-second bout interspersed with 10-second rest periods. After completing all four exercises, they repeated the entire sequence one more time for a total of 4 minutes of exercise. What They Found After 16 weeks, all groups significantly improved their VO2 max, time to exhaustion (Tmax), VT2, velocity associated with VT2, and time to reach VT2. While the sprint training increased these parameters slightly more than the 4-minute protocol, it could simply be because the group that sprinted on the treadmill was much more easily able to gauge their intensity and their speed, while those doing the calisthenics had to rely on their own un-measured definition of “maximum effort.” Despite the small disparity in results between the sprint group, the steady-state exercise group, and the 4-minute group, the researchers concluded: “Our results demonstrate that HIIT-WB (the 4-minute protocol) can be as effective as traditional HIIT (the sprint workouts) while also being time-efficient compared to MICT (the 30-minute running protocol) to improve health-related outcomes after 16 weeks of training.” What This Means to You If you hate running, don’t have a treadmill in your 100 square foot Japanese micro-apartment, or simply enjoy exercising in your home in your underwear, you might successfully employ a four-minute, mostly bodyweight exercise protocol like the one used in this study. There’s probably no need go get hung up on the specific exercises, though. For instance, if you dislike any of the exercises used in this study, you can easily swap them out for ones you prefer. For instance, the video below shows T Nation contributor Nick Tumminello doing the 4-minute protocol using speed squats, burpees, mountain climbers, and speed skips. Nick doesn’t use 3-kg. dumbbells for any of the exercise, but you could easily do them with the speed squats to more accurately duplicate the protocol used in the
Origin: Tip: 4 Minutes to Fitness
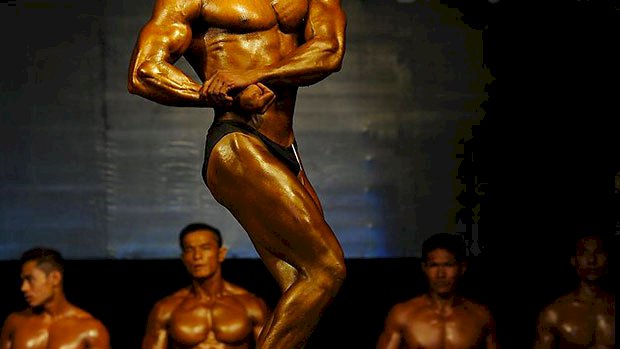
7 Pros, One Controversial Question
 We asked some of our T Nation pros this question: Would you want your child to compete in a physique competition (bodybuilding, figure, bikini, etc.)? Here’s what they had to say. Mark Dugdale – IFBB Pro As a father to three teenage daughters I would certainly not pressure them to compete in a physique competition. If they expressed an interest I’d be more concerned about their hearts. I’d want to know the motive compelling them to compete. There is little financial reward in physique competitions, particularly for women who aren’t willing to sell themselves salaciously on social media and elsewhere. If I felt garnering that kind of attention was their motive, I’d encourage them to consider a different pursuit. — Mark Dugdale Dr. Lonnie Lowery – Exercise Physiologist and Nutritionist I’ve wrestled with this question in the past. I have a son and I’m a former competitive bodybuilder, not just a one-timer, so I’ll focus on these particulars. My son, now 20, grew up in a household that was pretty balanced regarding fitness. Barbells are good things. Strength and muscle mass are empowering. Appreciation of healthy foods enriches life in a way most of the population simply doesn’t grasp. On the other hand, I didn’t want him in the kind of environment to which I was sometimes exposed as a competitive bodybuilder or as a back stage attendee at big events. Extreme calorie counting, eating disorders, full blown celebrations in the house over just being allowed to eat a tablespoon of peanut butter (true story), endocrine damage, unbalanced narcissism – and occasionally at competitions even recreational drugs and overt deviance. I didn’t even encourage him to attend my bodybuilding competitions, although he was welcome to. Before I get hate mail for being seemingly hypocritical – I do love bodybuilding – it’s just important to understand that I’ve seen some sketchy, damaging, and deviant stuff on its periphery. I know several journalists and organizers who share my view. Each has some mind-numbing tales, stories that may be more extreme at high-levels in the sport. There seems to be a fine line between dedication and obsession in physique competition. I’ve been guilty of drifting into self-destructive “warrior mode” more than a few times in my career. I bet many readers can relate. The flip side of the dark underbelly is of course the discipline and courage to stand out that physique competitions can develop. These are the lessons any young person should be exposed to: The daily act of “punching the clock” during those early morning or evening workouts when most people are comfy on the couch. The delayed gratification of a 20-week diet. Pouring your heart into something meaningful. Dismissing the naysayers. And all this for just a few minutes on stage. In many ways it’s more of a total lifestyle commitment than other sports. Anything worthwhile in life comes with commitment and sacrifice. So I can only offer the “middle path” as an answer to this question, especially if the entry into competition would lead to further competitions. If there’s a genuine calling to the sport and a seasoned guide who can keep the focus on the positivity and purity of what bodybuilding can be – then yes, I would want it for my boy. But without a little idealism, balance, and a voice of reason at his back, I’d have to say no. — Dr. Lonnie Lowery Paul Carter – Strength and Bodybuilding Coach I’d be okay with it because my middle daughter is, in fact, my training partner. I’d be able to help her with training, diet, and mental preparation. I already do my best to help her understand good nutritional choices without becoming obsessive about it. But there are plenty of women who compete and end up developing eating disorders or unhealthy relationships with food as a result. I’d also be there to help her understand that while it is a competition, it’s a subjective one. And that her placing isn’t a representation of the amount of work she had to put in to prepare for it. She can’t control the judging, but she can control how hard she works and how disciplined she has to be in order to be her very best. This is really the most important part about competing in any subjective sport like physique competitions, but also how we should be applying ourselves to virtually everything in life. The point is giving her best effort to succeed, even if the manifestation of that success doesn’t come by way of plastic trophies. Like with anything we immerse ourselves in, there can be valuable lessons learned in preparation for a physique competition, and it can teach you a lot about yourself. So yes, I’d be perfectly fine it. — Paul Carter TC Luoma – T Nation Editor No. God no. This question makes me think of a line from Breakfast of Champions, a Kurt Vonnegut novel. One of the characters has a daughter who he’s encouraging to be an Olympic swimmer, prompting the narrator to ask, “What kind of a man would turn his daughter into an outboard
Origin: 7 Pros, One Controversial Question
The Rep Bible
 Here’s what you need to know… How you perform your reps plays a huge part in stimulating the gains you want. The principle behind CAT is that when you’re lifting a submaximal weight, you can compensate that lack of resistance by accelerating more quickly. Dynamic correspondence reps require that you should lower and lift the weight the same way you do a max lift – same speed, same acceleration, and same tension. Constant tension reps are based on the principle of occlusion, which is when blood entry to the muscle is limited, depriving it of oxygen. Normal reps allow you to have energy to do more reps at a given weight while still using enough force to stimulate growth and strength gains. How Should I Do My Reps? I never get asked that question. That’s a shame because how you do your reps plays a huge part in stimulating the gains you want. Think about it. The workout itself is nothing but a long group of repetitions spread over different exercises. The basic unit of your session is the rep. The more reps you get right, the better your gains will be. By “get right” I mean doing the rep the proper way in order to get the exact stimulation necessary to achieve the gains you desire. There’s more than one proper way to do reps, and the style you use depends on what your goals are. The 4 Rep Styles 1 – The CAT Rep The concept of compensatory acceleration training (CAT) was popularized by powerlifting legend Fred Hatfield. The basic premise is simple: Force is equal to mass times acceleration (F = ma). In other words, you can increase the amount of force the muscles have to produce by increasing the mass (weight on the bar) and/or the acceleration you impart on the barbell when you lift it. So the principle behind CAT is that when you’re lifting a submaximal weight, you can compensate for that lack of resistance by accelerating more quickly. What does such a rep look like? Let’s say you’re doing a bench press. It means trying to blast the barbell off your chest and trying to accelerate it as much as possible for as long as possible. Another aspect of CAT is the transition between the eccentric (lowering) and concentric (lifting) portions. The transition itself should be rapid. This requires very strong antagonist muscles to stabilize the joints at the point of reversal. For example, you need strong rhomboids, rear delts, and lats to do a fast turnaround on the bench. Even the biceps can help. The majority of the eccentric phase should be done under control (not slowly, but you must control the barbell), but the transition point is rapid and then you attempt to produce as much acceleration as possible on the way up. If the weight is heavy, the bar might not actually move fast. The acceleration is meant to compensate for the lower weight, and a heavy weight means you won’t be able to compensate much and the acceleration won’t be high. Regardless, you still attempt to produce as much acceleration/speed as possible. Pros of CAT This rep style maximizes peak force production at any given load, so it makes the muscles stronger. By working on acceleration you’ll also develop more power/explosiveness than if you used a more “regular” lifting style, which is good if you’re an athlete trying to be explosive. By attempting to move as fast as possible you maximize fast-twitch motor unit recruitment. Over time you’ll become more efficient at recruiting those fibers, which will obviously help you gain more strength, size, and power in the future. By using the stretch reflex at the turnaround point, you become more efficient at using it in muscle actions, which can help you in athletic activities that require the use of the stretch reflex. Cons of CAT It will sound weird because I mentioned that CAT maximizes peak force output during a rep at a given weight, but CAT actually isn’t optimal for building “1RM slow-speed strength.” You’ll become very strong on fast reps, but as soon as the weight is too heavy for you to accelerate, you won’t be able to push it farther. Someone who trained otherwise, however, will normally be able to grind out a weight much heavier than the one he can lift with acceleration. I also mentioned that CAT leads to a higher peak force production for a given weight. That’s true. But it doesn’t mean that the average force production of the whole range of motion is higher. In fact it isn’t. What happens is that you produce a very high peak of force initially, but the later portions of the range of motion have a fairly low force production level because you’re relying on the momentum built from the initial thrust. In reality, the momentum actually “lowers the mass to overcome” in later parts of the movement, which diminishes the amount of force to produce. What happens is that you become very good at producing a burst of force over a very short time frame/range of motion, but you lose the capacity to keep that force production “turned on” for the duration of the rep. That means you won’t be
Origin: The Rep Bible
Tip: Do The Gorilla Row
 For building a strong back you can’t leave out rows. But this variation is likely missing from your training, and that’s a shame because you’re going to love it. Here’s how it’s done. Get your feet shoulder-width apart with two kettlebells between them. Hinge at the hip until you’re able to grab the handles of the kettlebells. This should put you in a deadlift position. Keep your knees out and sit back a little in order to engage the glutes and hams. Row one of the kettlebells up towards your hips with a slight rotation in order to allow your elbows to come back farther. Keep a tight grip on the other kettlebell that’s still stationary on the ground. Return the kettlebell back to the ground and repeat on the other side. Keep your back flat and head neutral. You can alternate sides or do all your reps on one side before the other, which makes it convenient if you only have one kettlebell. These are perfect for building grip and back strength. By rowing from a static position, you recruit more motor units which will increase muscle tension and have your lats pumped with blood. It also just enforces a proper hip hinge position. Although it emphasizes the back muscles, you’ll be surprised at how much your legs are actually working while performing this row. Cool Combinations Get creative and combine this row variation with other exercises. Here are two different combos to try: Renegade + Gorilla Row You can do a prescribed amount renegade rows before moving on to gorilla rows, or you can alternate between the two until you reach a total number of reps. I suggest doing all your renegade rows before the gorilla rows since the renegade variation is a bit more complex. Gorilla Row + Deadlift + Farmer’s Walks Try this at the end of the workout. Do between 4-10 reps of gorilla rows, followed by 4-10 reps of deadlifts, and end with a specific distance for your farmer’s walks, like 20 yards. Wait, Why Is It Called the “Gorilla” Row? The exercise came about when doing a combination of kettlebell movements. After I finished them, I lowered the kettlebells to the ground between my feet and found myself in a nice hip hinge with the kettlebells in perfect position to row from a dead stop. So I began rowing and my training partner said, “You look like a damn gorilla.” And that’s where it came
Origin: Tip: Do The Gorilla Row
7 Tri-Sets For Mass
 Tri-sets allow you to train multiple muscle groups back-to-back while allowing each muscle group to recover while you’re working another area. Not only is this a great way to build size and work capacity, it also helps maximize training time. The upper-body tri-sets here have been designed with the big-box gym member in mind. Each one uses the same piece of equipment, which makes it a useful option when you’re training at a crowded gym. Sets and Reps Since these tri-sets tend to involve isolation-type exercises, stay above 5 reps. Anything heavier than that makes it tough to avoid cheating. Do 2-3 sets of 6-15 reps per exercise in any given tri-set. Also, do tri-sets towards the end of your weight-training workout, which of course should include compound lifts. Dumbbell Tri-Set 1 These exercises go well together because they’re each performed back-to-back with a pair of dumbbells while lying on a flat bench. A – Flye B – Dumbbell Skull Crusher C – Dumbbell Pullover You can perform these exercises in any order of your choosing. That said, the order listed has a nice flow to it because finishing the last rep of the chest flye puts you in position to begin doing the skull crushers. Then, the final rep of the skull crushers flows right into doing the pullovers. Since the idea is to perform all three of these exercises back-to-back while lying on the bench, use a higher number of reps for the easier exercises (the ones you’re strongest at) and use a lower number of reps for the most difficult exercises (the ones you’re weakest at). Perform the pullovers holding two dumbbells parallel to one another instead of using both hands to hold one dumbbell. Holding two dumbbells should be more comfortable and less awkward on the shoulders. Dumbbell Tri-Set 2 A – Dumbbell Biceps Curl B – Triceps Kickback C – Shoulder A’s Since these exercises are performed standing, switching out dumbbells between exercises doesn’t interfere with the flow. You can grab a heavier set of dumbbells for the easier exercises (the ones you’re strongest at) and use a lighter set of dumbbells for the most difficult exercises (the ones you’re weakest at). Although you can perform this tri-set in any order you like, the order here works very well because it usually only requires you to change dumbbell loads once. You start off using the heavier dumbbells to perform the biceps curls and then switch to a lighter set to perform both the kickback and the A’s. Dumbbell Tri-Set 3 This one is also performed standing, so the same guidelines provided for the previous tri-set also apply here. A – One-Arm Overhead Triceps Extension B – Dumbbell 45-Degree Shoulder Raise C – Rear-Delt Flye The 45-degree shoulder raise serves as a nice middle ground between the conventional lateral raise and front raise. The order of the exercises is the preferred order for most people because it usually only requires them to change dumbbell load once. Start off with heavier dumbbell to perform the triceps extensions and switch to a lighter pair to do both shoulder movements. Cable Tri-Set 1 This tri-set involves rope handles attached at the top of a cable column (above your head). Perform the following exercises back-to-back: A – Rope Face Pull B – Rope Triceps Extension C – Compound Straight-Arm Pulldown Instead of performing the rope triceps extension, you can perform overhead rope triceps extensions (facing away from the cable column). Also, instead of doing the compound straight-arm pulldown, you can substitute straight-arm pulldowns with a rotation. Cable Tri-Set 2 This one involves a D-handle attached at the top of a cable column. A – Lateral Straight-Arm Pulldown B – High to Low Cable Chop C – One-Arm Triceps Extension Keep your torso fairly perpendicular to the cable column; don’t rotate your torso away from the cable column more than a few degrees as you reach the bottom of the range of motion. Doing so greatly reduces the rotational tension on your torso. For both of the cable tri-sets, switch the pin placement to use a heavier load on the easier exercises and use a lighter load for the most difficult exercises. Medicine Ball Tri-Set You’ll need a 6-12 pound rubber medicine ball (well-inflated) for this one. A – Medicine Ball Walkout B – Close Grip Push-Up on Medicine Ball C – One-Arm Medicine Ball Plank When performing the walkout, roll the ball out in front of you as far as possible without allowing your lower back to extend, or as far as possible without feeling discomfort in your lower back. When doing the close-grip push-ups, turn your hands outward so that your fingers point down towards the floor. Your elbows should be against your sides at the bottom of each push-up. When performing the one-arm plank, don’t allow your shoulders or hips to rotate, or your head or belly to sag towards the floor. Stability-Ball Tri-Set This one has a very intensive abdominal element to it. A – Stability-Ball Arch B –
Origin: 7 Tri-Sets For Mass
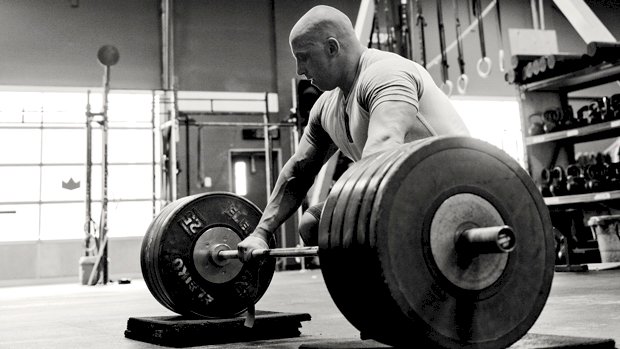
Interval Training on the Rowing Ergometer
 Lead Photo Credit: Again Faster Equipment (Jim Rego at CrossFit Southborough) Here’s what you need to know… The rower is unlike typical cardio machines. It’ll get you gassed immediately with zero impact on the joints. Move through your hips, not your spine. If you have back or hip issues, this may not be for you. There are a variety of workouts. Try intervals of 500-400-300-200-100 meters with 60 rest in between. Test yourself with a 2,000 meter row, or break it up into two sessions of 1,000 meters. Do 5 intervals of 300 meters with little rest in between, or just row as hard as you can for the length of a song. A Different Cardio Machine For the first decade of my career in the strength and conditioning field, I wasn’t too charitable when it came to cardio machines. But I learned the value of the rowing ergometer or “erg.” I learned this by getting my butt handed to me! Gassed, Wheezing, and Red-Faced I bought my wife a rowing machine for her birthday. Believe it or not, at an intimidating 5′ 3″, she was captain of her nationally ranked college crew team. The week we got it, I walked down to the basement to see her get after it on the erg. She was humming along, and making it look easy. I decided to hop on and try it out myself. I cranked out a 500-meter time trial and narrowly edged the 500-meter pace she’d just maintained over 2000-meter. In short, my wife kicked my ass. What’s worse, when I got off the erg I was completely gassed. When I was done wheezing, I joked with her that I couldn’t believe she used to wake up at 5 a.m. to do that in the middle of winter on an icy river. It was awful. Why was it so awful? Well, first, I was wildly inefficient with this cardio approach. Second, the stress was distributed over my entire body, so I felt like I was limited more by my ability to breathe than by local muscular endurance. Third, I’m a competitive bastard, and the thought of being out-rowed by my little wife didn’t sit well with me. So I decided I’d do it once a week as my interval training, and it’s proved to be one of the best training decisions I’ve made. Short Workout, Faster Recovery Why the love for the erg? First, you can get in a lot of work in a short amount of time. And because the stress is distributed over your entire body, rowing won’t gas your lower body like sprinting does. It’s a tough fitness challenge that can actually help you recover from heavy squatting and deadlifting — better than sprinting twice a week. Is Rowing For You? Before we get to the training protocols, note that this absolutely isn’t for everyone, so let’s outline the contraindications. You should not row if: You have symptomatic low back pain, or a history of symptomatic intervertebral disc pathology. Repeated flexion/extension of your spine is an injury mechanism for discs, particularly under compressive loading. You have hip pain of any sort. The full flexion nature of the rowing motion can exacerbate problems in this regard. You have an outrageously aberrant posture. If you’re really kyphotic (rounded shoulder), this approach to rowing will likely make it worse by feeding into your posture. You’re better off doing more controlled, lower-volume rowing variations in your strength training program in a position of thoracic extension. If you have an excessive anterior pelvic tilt and lordosis, it’ll just feed into that as well. You sit all day. If you’re at a desk for 8-10 hours a day, you really should avoid any sitting during your exercise session, and that certainly means avoiding it for 15-20 minutes at a time. You plan to do deadlifts or good mornings the following day. No matter how good your technique is, you’re still going to use your lower back a bit. I’ll typically row a day or two after I do these exercises. You have baggy shorts on. I made this mistake once. Don’t do it. Note on Technique There are coaches who devote their entire career to building elite rowers and optimizing technique. I’m not one of them. However, I do have one bit of advice: Move through your damn hips, not your spine. Got it? Good. That said, most advanced rowers pull a bit higher up, essentially toward their nipples/sternum. Effectively, it looks a bit more like an upright row — or Olympic lift pattern, when you effectively use your legs — than a true “row.” For the general fitness folks just looking for a training benefit as safely as possible, it’s probably more shoulder healthy to pull a bit lower down. The upper abs is a good reference point, even if it means you’ll go a bit slower. Rowing Workouts Use the rower for shorter duration intervals. When people who haven’t been properly educated on rowing technique try to crush 20-30 minute sessions, bad things happen. For that reason, stick to shorter bouts on the erg. Or just get up and walk around between sets, adding in some filler mobility or activation exercises. 1 – 5 x 300-meter with diminishing rest intervals The 300-meter distance is awesome because
Origin: Interval Training on the Rowing Ergometer
