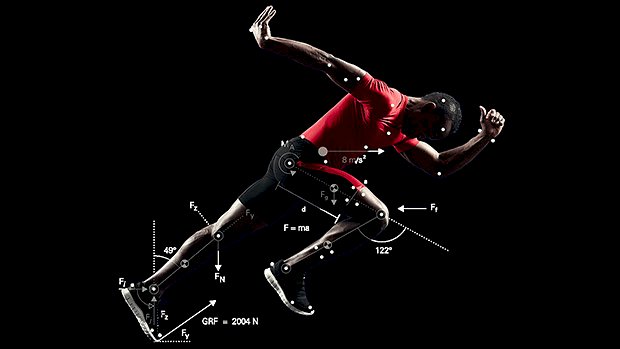
 Lift Bigger on the Big Lifts You are only as strong as your nervous system allows you to be. Explosive exercises and plyometrics are central nervous system (CNS) primers. When programmed strategically, they can unlock your power and strength potential in the big lifts. And if you’re an athlete, they’ll increase your explosive performance and make you neurologically efficient. Here’s what to do before bench pressing, squatting, and deadlifting. These moves will activate the muscles you’re about to use, prepare your body for explosiveness, and reveal your true strength potential. Bench Press Primer Twitchy Seal Jack + Explosive Medball Press A1. Twitchy seal jack, 3-5 reps A2. Explosive bentover medball press, 3-5 reps Do 2-3 total supersets with 30-45 seconds rest between bouts. Many lifters struggle with barbell bench pressing because it causes shoulder pain. But if bench pressing causes pain, it’ll also hinder your power and strength under the bar. You’d perform better without the pain. The first thing lifters often do is try to gain mobility. But more mobility isn’t going to fix your achy shoulders. What will? More activation and central nervous system stimulation. Before bench pressing, do an explosive CNS primer superset. Pair the jack with an explosive medball press. It’ll activate postural stabilizers of the core, hips, and shoulders AND trigger the type of heightened neurological state that produces powerful, pain-free presses. How to Do It The jack is a game changer for your performance. Don’t overlook it because of its old-school PE class history. It’s a safe and effective preparatory movement you can do anywhere. For the horizontal press, using the seal jack variation (arms in front of the body) is better because it moves the shoulders in and out of an end-range stretch. This slight stretch revs up the nervous system, especially when executed fast and with precision. Start with your arms elevated up so they’re about parallel to the ground with your palms facing one another and your thumbs up. Explosively complete 3-5 seal jacks, really focusing on moving in and out of that end range quickly and changing direction as fast as possible at the shoulders. These are about quality, not quantity. After a few twitchy reps of seal jacks, move directly into the medball press. Using a lighter medicine ball between 6-12 pounds, hinge at the hips with a neutral spine and engage the glutes and core to stabilize. You’ll be exploding the ball into the ground as hard and fast as you possibly can for 3-5 reps. Try to press with rhythm on these to elicit a heavy neural response that happens with quick repeat bouts. Keeping the total reps low and the quality high, shoot for 2-3 supersets with 3-5 reps of seal jacks and another 3-5 reps of medball presses, then hit the bench. You’ll enjoy the carryover to explosive performance. Deadlift Primer Twitchy Jumping Jack + Medball Slam + Horizontal Jump A1. Twitchy jumping jack, 3-5 reps A2. Explosive overhead medball slam, 3-5 reps A3. Depth broad jump from box, 1 rep Do 2-3 total supersets with 30-45 seconds rest between bouts. Because the deadlift is a relatively “slow” movement to the naked eye, it’s easy to forget that this lift needs to be one of the most explosive in your arsenal if you want to get stronger. But since the deadlift is notorious for being a backbreaker of an exercise, people gravitate towards doing passive prehab work on their spine, hips, and shoulders to prepare for pulling, which is exactly what NOT to do when trying to train explosively with maximal torso stiffness. Instead, match the deadlift with a neural primer that helps create maximal stiffness at the core while generating an immense amount of force output and fiber activation. How to Do It The first movement in the giant set is the old school jumping jack that’s performed with twitchy explosiveness in and out of a lat stretch in the overhead position. Why the jumping jack for deadlifts? Easy. The lats are some of the broadest muscles in the body with huge splaying attachment points throughout the back of the rib cage, lower back, and pelvis. You need them for deadlifting. By tapping into their activation you can help achieve better stiffness in the shoulders and torso during pulls. Stick with 3-5 fast reps, coordinating the feet with the arms up overhead. The deadlift is based on a hip extension movement pattern, so you’ll also need to train it with CNS primer movements. The overhead slam is the perfect way to train triple extension (hips, knees, and ankles extending) in a coordinated fashion. The slam also requires you to be explosive in the overhead position, which places an emphasis on both the lats and torso. Focus on fully extending the ball up overhead with the entire body and coming into a powerful flexion to slam the ball as hard as you can into the ground for 3-5 reps with maximal velocity. The final step is to do a depth broad jump. This is a hip-dominant jump
Origin: 5 Ways to Unlock Your True Strength Potential
Turn Rest Days Into Growth Days
 The Reason You’re Not Getting Better The way you handle your off days can greatly affect your ability to build muscle and get stronger. For the dedicated lifter, the problem isn’t that you take an occasional rest day. The problem is that you don’t take ENOUGH rest days and you don’t time them wisely in your training week. Off days can be a torture for iron addicts. For many people, a rest day makes them feel like they’re slacking off, so they train six or even seven days per week. Yet when you look at the most successful strength athletes and bodybuilders, four training days a week, sometimes five, seems to be the most common frequency. Those training six or seven days a week tend to progress at a slower pace than those hitting the gym four to five days a week. There are of course exceptions, but unless you’re genetically gifted, you should base your training decisions on the most widely successful approach, not on the exception. It’s a Growth Day, Not An Off Day Change your thinking like this: Think “stimulation days” instead of training days. Think “growth days” instead of rest days. When you take a rest/growth day you build more muscle, replenish glycogen stores more easily, and let the nervous system get back to an optimal working state. This will help you grow faster, but it’ll also improve your performance on the day you get back to the gym. The truth is, during your off days crucial things happen that make it easier to grow and get stronger. Your body has limited resources. And if you invest more resources in a training session, rather than resting, you’ll have fewer available to fuel adaptation and growth. During rest days you devote more of your resources to growth and repair. Your nervous, immune, and hormonal systems also get back to a situation conducive to growth and performance. If you’re well rested you’ll be able to perform at a higher level and do more volume, both of which will make the session more effective. “Growth days” make you grow directly by allowing you to recover. They make you grow indirectly by allowing your to put a greater stimulation on your body during your lifting sessions. A Big Nutrition Mistake Ask people what they do for nutrition during their off days and most will tell you they lower calorie or carb intake. (Heck, I’ve even recommended it in the past.) It’s a common recommendation, but it’s wrong. People think that since they won’t be training and burning as much fuel, they shouldn’t consume the same amount of carbs or else they risk gaining fat. If your goal is STRICTLY fat loss there may be some value to this. But if you’re looking to build as much muscle and strength as possible, you should see your off days as days where you’re trying to do everything you can to maximize growth and performance, not days where you don’t do anything. Think of your time off as an investment. With this in mind, what should you do nutrition-wise? Cut carbs and calories, leaving you with muscles that aren’t fully replenished with muscle glycogen and leaving you unable to take advantage of the anabolic properties of insulin? No! Do the opposite. Accelerate Growth Day Gains Insulin is the most anabolic hormone in the body. It shuts down catabolism (protein breakdown or muscle wasting) and ramps up anabolism – protein synthesis or building muscle. It also activates mTor which triggers muscle growth and increases glucose storage inside the muscles. Muscles being full of glycogen is itself anabolic. As a bonus, a fuller muscle is a stronger muscle. If your goal is maximum muscle growth and strength gains, it’s important to consume plenty of quality carbs and protein during those off/growth days. See each growth day as the only day in the week where the body is allowed to build muscle. If that were the case, what would you do on that day to make sure that you get every possible ounce of muscle growth? Certainly not lower your calorie or carb intake! At the very least, keep calorie and carb intakes the same or increase them a bit. I’d also increase protein intake slightly to take advantage of the more anabolic state. Mag-10® pulsing would be perfect for this. I simply add three Mag-10® servings of “pulses” to my regular protein intake on these days. How Many Growth Days Per Week? Most people should train four days per week. For a normal person, four HARD sessions per week is about all that can be done. Sure, training more often is possible, but it would require the careful and precise use of training days with a much lower stress level. I don’t like these because I always feel like I have to restrain myself and “train with the brakes on.” If you like to go balls-out, four training days a week is the best option to start with. That leaves us with three rest/growth days per week. Occasionally doing five sessions per week is fine, which would leave us with two rest/growth days. But this isn’t the ideal long-term solution. Where Do You Place Growth Days? One rule: Avoid taking two
Origin: Turn Rest Days Into Growth Days
The 3 Smartest Ways to Train Shoulders
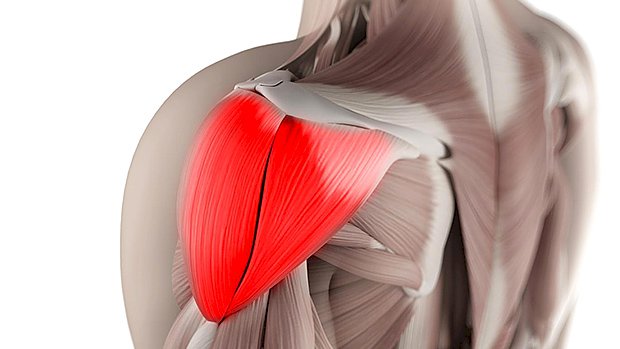 Stop Pissing Off Your Shoulders Years in the iron game can leave the shoulders beat to crap. The last thing you want to do is to piss off some of the most important joints in the body more than they already are. Your shoulder work should enhance the way this region of the body looks AND functions while improving your performance. Here are three pain-free strategies to decrease joint stress while maximizing the pump effect for growth and strength. 1 – Use Bands With Dumbbells Using bands and chains for accommodating resistance is usually reserved for the big lifts, but they should also be a staple in smart shoulder training. The only problem is the equipment restrictions. Bands are often too thick and chains are too heavy to complete enough full range of motion reps to get a good training effect. The secret is to use the ultra-light, handled bands that have become popular in commercial gyms. These bands have much smaller diameters and thickness, allowing you to apply accommodating resistance when used in combination with dumbbells. Holding the handles of the bands together with the handles of dumbbells works with the lateral raise and its variations. Staying consistent with the light band and increasing the dumbbell poundage allows you to train in strength, hypertrophy, endurance, and metabolic-stress based rep schemes without sputtering out on range of motion or losing control of shoulder stability. Another advantage bands provide during lateral raises is the ability to train explosively without losing shoulder stability at the top of the movement. Because the load is lighter at the bottom of the range when your hands are down by your sides, you’re able to engage the delts more explosively and have the speed of contraction slowed down by the increased resistance through the bands at the top. This is great for targeting the fast twitch motor units in the shoulders while also providing a novel, pain-free stimulus for shoulder training. Remember, train the shoulders explosively with this method. Focus on increasing the contraction speed in the concentric (lifting) part of the movement while slowing down the eccentric (lowering) part of the exercise. Don’t let the bands pull you down fast. 2 – Train Between the Usual Planes of Motion Open up an anatomy textbook and you’ll see that the deltoid is broken down into three distinct fiber orientations: the anterior, lateral and posterior. Though traditional training protocols have called for training shoulder flexion, abduction, and extension, it’s not the most effective way. Sure, isolating different parts of the deltoid is better than just barbell overhead-pressing yourself into an AC joint injury, but let’s try to be better than the industry standard, shall we? Training not only the three cardinal planes of motion, but BETWEEN these planes of motion is pivotal to finding what variation of shoulder raises fits your specific body type, while also taking into account things like functional instability, weakness, or even past injury. This strategy gives you endless angles to emphasize, adding novelty to traditional movement patterns while also minimizing chronic joint stresses commonly associated with sloppy lateral raises and overhead pressing. Check out the dumbbell scaption raise that works between the sagittal and frontal planes, emphasizing fibers between the anterior and lateral heads of the deltoid. Dumbbell Scaption Raise There’s a huge need for posterior and posterior-lateral direct deltoid training as many lifters place too much emphasis on vertical and horizontal pressing. To protect your shoulders and build some muscle in the posterior shoulder area, do 2-3 times more volume on the posterior shoulder than the anterior. 3 – Trigger the Metabolic Pump Effect The shoulders don’t traditionally respond well to heavy-ass loads. The deltoid is comprised of a majority of slow twitch muscle fibers, meaning that the average lifter will be more likely to get results from higher rep ranges of around 12-20 reps. While this is based on individual presentation of fiber and body typing, higher reps can be advantageous to almost every lifter by decreasing external loads placed on the shoulder joint, thus decreasing cumulative joint stress over time. Less weight moved equals less stress on the joints. But this doesn’t give you the excuse to get fluffy with your shoulder training and go light without challenging yourself. Building strength and size in the shoulders requires placing an emphasis not only on progressively overloading staple movements, but also on eliciting a huge metabolic pump effect in the tissues. The pump has been crapped on for decades by elitist powerlifters and strength athletes who are usually chronically injured, but tapping into metabolic stress is one of the most intelligent training variables to exploit for performance, aesthetic, and orthopedic success. There are a few key methods that will increase the metabolic stress of the
Origin: The 3 Smartest Ways to Train Shoulders
Tip: 3 Squat and Deadlift Challenges
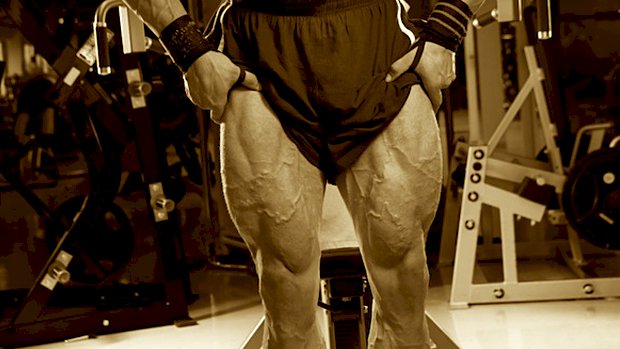
 Bodyweight Barbell Squat x 50 The fifty-rep set is mental and physical warfare. Performed once or twice per month, this test crushes training plateaus and builds serious mass on your legs. How to Do It: After a warm-up, load up a barbell with your approximate body weight, throw on some music, and start squatting for as many reps as you can. A good goal is 50 reps. This test is brutal. Use safety racks, a spotter, and plan extra recovery afterwards. How to Get Better: This test is easier for smaller guys. That’s just physics. But, regardless of size, the best way to improve endurance and relative strength is to get brutally strong. Focus on improving your one-rep max, then add one or two high-rep drop sets with your bodyweight every other week to finish off your legs. Front Squat Your 5RM Back Squat The front squat builds a steel-clad physique and incredible lower body strength just as well as the back squat. The front squat reinforces posture and adds mass to your upper back since your elbows stay elevated and your thoracic extensors work double time to hold position. Now, in the back squat we’ve all seen what happens when someone rounds their back, yelps like a kicked puppy, and jacks up their spine. No such issue on the front squat. If you round, the bar drops forward, and the lift ends without harm to your lower back. The trouble is, we’re all naturally stronger in the back squat, but most lifters are embarrassingly weak in the front squat due to poor strength in the anterior core and thoracic extensors. A good goal is to do a single front squat using the same amount of weight as you can back squat for 5 reps. Here’s the simple math: Take your back squat max and multiply it times .85. That will give you your back squat 5RM or close to it. For example, if your back squat max is 405 pounds, multiply that by .85 to come up with 345 pounds. Your goal is to front squat 345 pounds for one rep, or work your way up to it. Deadlift Sadiv Sets Sadiv sets are an advanced training method designed to boost your deadlift, test mental grit, and add tons of muscle to your posterior chain. Sadiv sets are a high volume, high-intensity monster of a deadlift workout. Beginners or the weak-minded need not apply. (Don’t even attempt this unless you’re deadlifting 1.5 to 2 times your bodyweight.) Here’s what to do: Set a timer for 12 minutes and load the bar with 60% of your 1RM. Perform as many reps as possible during the 12-minute span, shooting for at least 20 reps. If you don’t get 20 good reps, decrease the weight. Perform each rep as a single, resetting between each rep and pulling with perfect form. This means taking the slack out of the bar, keeping your hips back, your back flat, your chin down, and driving your heels into the earth. Perform each rep with max speed from the floor – leg drive is key. Once fatigue sets in, it’s vital to set up each lift like it’s a max attempt, brace the core, and drive the bar. Can you beat 20 reps with solid
Origin: Tip: 3 Squat and Deadlift Challenges
Tip: Eat Oatmeal Cookies, Build Muscle
 People are strange, especially bodybuilders and gym rats. Tell them to have some oatmeal with protein powder, a handful of nuts, and a little fruit for breakfast and they’ll do it. After all, that’s about the best breakfast you could eat if you like muscle. But tell them to have cookies and they’ll freak out. Like eating cookies for breakfast is bad or something… Okay, I get it. Most cookies are tasty little disks of Type-2 diabetes. But not these. In fact, these contain pretty much the same foods as the above muscle-building breakfast, with the added bonus of being portable. High-Protein Vanilla Oatmeal Cookies Ingredients 2 Cups old-fashioned oats 1 Cup unsweetened apple sauce 1 Soft banana 4 Scoops (120g) vanilla Metabolic Drive® Protein 2 Teaspoons vanilla extract 1/4 Cup Splenda (or equivalent sweetener of choice) 1 Teaspoon baking powder Cinnamon and powdered ginger, as much as you’d like Pinch of salt Optional: 1 Cup walnut halves Directions Preheat oven to 325 degrees. Line a baking sheet with parchment paper for easy cleanup. Mix all the ingredients together in a bowl. Using a cookie scooper, medium ice cream scoop, or a spoon, place 8-12 mounds of dough onto the sheet pan. Bake for around 20 minutes, depending on your oven, elevation, and size of your cookies. Larger cookies will require an extra minute or so, smaller cookies a minute or two less.
Origin: Tip: Eat Oatmeal Cookies, Build Muscle
Tip: The Side Stretch You Should Be Doing
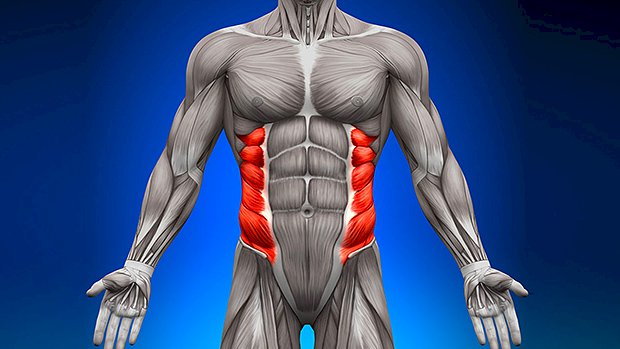 All About the Obliques The obliques are underrated. If they’re tight, everything else can be affected. Your obliques are responsible for both good hip function and shoulder function. If they’re not able to do their job correctly, you’ll experience a loss of strength, loss of performance and, in some cases, nagging pains that soon become injuries. The Anchored Side Stretch This stretch can help improve shoulder mobility, leg length discrepancies, and chronic lower back pain. Even if you have none of these issues, doing this stretch at the start and end of your workout will get you more mobile and help with recovery. How To Do It Stand close to a rig or doorframe. Place the inside hand on the rig/wall beside your hip, knuckles forward. Reach up and over with the outside hand and grab behind the pole/doorframe. Lean out away from the rig/wall into the area you wish to stretch. Breathe. Hold, sway, or change hand or foot positioning slightly to get the best out of it. Repeat on the other side.
Origin: Tip: The Side Stretch You Should Be Doing
The Best Squat You’re Not Doing
 Here’s what you need to know… Landmine squats are the solution for lifters who can’t squat correctly because of joint pain or mobility problems. For novice lifters, landmine squats teach proper squat form. For veteran lifters, they’re gentler on joints so you can augment your heavy back squats with landmine squats without repercussion. The arc of the bar travels back as you squat down, so you have no choice but to sit back and stay upright. Doing so builds and strengthens the quads. The Problem With Squats Squats are hyped-up as the king of leg exercises, but that only applies to a very small percentage of lifters: ones who actually squat well and ones who aren’t injured. Most lifters actually suck at back squats, at least initially. Mobility restrictions or their own anthropometry makes it tough to squat with an upright torso. As a result, the movement ends up looking like an ugly good-morning-squat hybrid. Even those with good form find back squats to be problematic when they have lower back, knee, or shoulder issues. Front squats are an option, but many find it tough to hold the bar, and it takes a lot of practice to get the hang of it. Learning to squat correctly is worth the effort, but trying to add heavy loads to an exercise you can’t do well is asking for trouble. The Landmine Squat Solution Landmine squats teach the squat pattern, so they’re an excellent way to work towards being able to do back squats and front squats. They’re also a great alternative for those who can’t perform regular squats because of injury. Start with one end of the bar in a landmine unit, or if you don’t have a landmine, just put one end of the bar in a corner using a towel to pad the bar so you don’t scratch the wall. If your gym has 45-pound plates with holes in them, you can also put a plate flat against a wall and put one end of the bar in one of the holes. From there, hold the other end of the bar against your chest and squat down and try to touch your elbows to the tops of your thighs or just inside your knees, depending on the width of your stance. It’s important to set up with the bar against your chest instead of away from your body so that you maintain an upright torso and don’t have to rely solely on your arms to hold the weight. The Goblet Squat Comparison Compare the landmine squat to the goblet squat. They’re similar to goblet squats in that they’re anteriorly loaded, but they’re better for teaching a good squatting pattern because the bar moves in a slight arc. Take advantage of that arc to help reinforce the pattern of sitting back into the squat and maintaining an upright torso – two things people struggle with most when it comes to squatting well. Since the arc of the bar travels back as you come down, you have no choice but to sit back, and you’re also forced to stay upright lest the bar jam into your sternum. Notice that the landmine squat allows the lifter to stay much more upright with far less forward knee travel, making it more joint-friendly for the knees and lower back while still crushing the quads. The landmine squat also allows for far greater loading than goblet squats, meaning it’s not just a teaching tool but a viable way to build strength and muscle if you load it up. Landmine Box Squats Here’s what a landmine box squat looks like as demonstrated by UFC athlete Brendan Schaub. It can also be helpful to perform landmine squats to a box or low bench that serves as a depth gauge. A box or bench will also act as a reminder to sit back into the squat, which is especially useful for folks who tend to come too far forward rather than just sitting back and engaging the hips. Just make sure to set up close to the box so that your calves are just in front of it or even lightly touching it. When and How to Use Them Combined with a heavy dose of mobility work, they’re a perfect gateway to regular squats and front squats to groove the pattern. For lifters looking to increase the volume of their lower body training, try landmine squats as an adjunct to regular squats since they’re a lot easier on the joints. Most people can’t tolerate doing heavy squats more than 1-2 times a week, but you could augment traditional squats with 1-2 days of landmine squats to train the squat pattern and work the quads without beating up the lower back and knees. For lifters who can’t do traditional squats because of injuries, landmine squats are a good alternative. Before you scoff at the idea, try doing them heavy and see what I mean. Landmine squats are a great option for taller guys who struggle to stay upright and have trouble targeting the quads with traditional squats. Doing 10-20 after you’ve completed your heavier leg work will blast your quads into
Origin: The Best Squat You’re Not Doing
Tip: The Craziest Looking Grip Strength Exercise
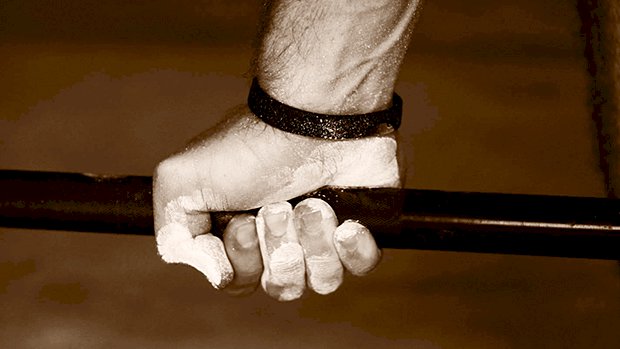 Barbell “Spiders” Most sports require good grip strength. And if you like lifting heavy barbells off the floor, grip strength is a must. This odd-looking but effective exercise builds dynamic crushing grip strength. It’s also a great movement for forearm size. Simply pick up a bar with a double overhand grip and pull the bar up as high as needed for you to catch it with a double underhand grip. This is a great way to get in extra grip work without any special equipment. I like to include grip training at the end of my lower body sessions, after deadlifting. You’re welcome to include grip training on other days if you find that works
Origin: Tip: The Craziest Looking Grip Strength Exercise
Tip: The Main Stretch You Need to Move Better
 Stretching the hip flexors (the front or anterior hips) will help you move better. It’ll also remove the “extensor block” which happens when tight hip flexors act as a brake for hip extension. This stretch makes it easier to activate and train the glutes as well. It’ll help you increase mind-muscle connection with your glutes, especially if you’ve been sitting for a long time before your workout. How to Do It Start in a half-kneeling position with your left leg in front of you. Push your hips forward and activate your right glute. The knee should be directly over your heel. Grab the left knee with your right hand and slightly rotate the upper body and hip toward the left. This will place the hip flexors on a great stretch. The twist will also reduce the typical compensation of “rotating away from the stretch” as you might automatically start to do. You’ll see in the photo that my hips are pushed forward. That’s intentional. Some recommend staying completely vertical with the spine while bracing the abs and glutes in this position. That’s fine. However, I prefer a deeper stretch (more in the direction of doing front splits). Do what feels
Origin: Tip: The Main Stretch You Need to Move Better
Tip: The Full-Body Core Exercise
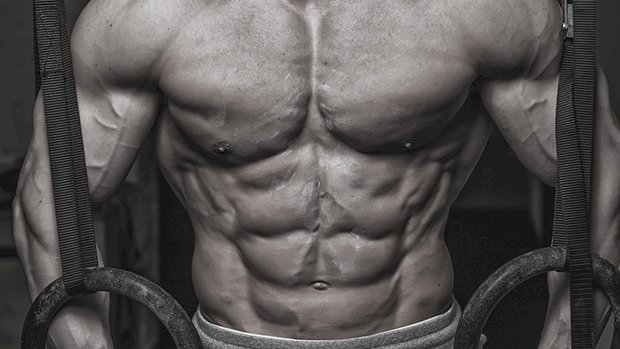 Dr. Stuart McGill changed the game with his outlook on core training to save the spine. He provides a great blueprint on bracing the core and all of the muscles that help stabilize your spine from just about every direction, which can improve performance. The “stir the pot” exercise is great for learning to brace the core: Now let’s ramp it up a notch. Try this variation: Grab a suspension gadget (TRX, rings, Blast Straps, etc.) with your body in the plank position – body straight from neck to toes and core braced tight. Make half circles with your forearms/elbows so the suspension device goes around your head, from shoulder to shoulder. Try not to move your body. (You can’t complete the circle because your head will be in the way, obviously.) This exercise is tougher than it looks. You’ll feel it all over your body. As you get accustomed to it, focus on limiting the speed of the movement and making larger circles with more tension throughout the body. This advanced exercise will improve your strength and stability, and it’ll have a big impact on your shoulders and
Origin: Tip: The Full-Body Core Exercise
