 Everyone’s done it. You go to Costco to pick up some boneless chicken breasts and some toilet paper and you leave with a 72-pound wheel of cheese, 12 boxes of Nutter Butter cookies, a palette of kitty litter, and a kayak. It’s easy to get swept up in all that raw capitalism, but if you can keep your cool and stay targeted, a lifter can pick up some great healthy or semi-healthy food items at Costco. Here are five of my favorite, off-the-beaten-Costco-path food items that I’ve grown to depend on: 1 – Kirkland Premium Chunk Chicken Breast I know what you’re thinking: It’s just some chicken in a can, fat head. But hear me out because this is a fantastic find. Each jumbo-sized can (12.5 ounces) not only tastes great (it’s seasoned with just a bit of chicken broth, which also makes it incredibly moist), but has nearly 46 grams of protein in it. These are great for when you want to give yourself a super-hefty dose of protein but don’t feel like making a shake or, for that matter, cooking up a dry chicken breast. I also use them whenever I want to drop a few pounds. I just open one up, drain it, dump it onto a paper plate, mix it with just a teaspoon of olive-oil based mayonnaise, and add a little salt. It makes a great, low-cal, zero-carb lunch that tastes surprisingly good. After doing this for about a week or so, I find I’ve dropped about 3-5 pounds with virtually no suffering. Then there’s the phenomenal cost. If you were to buy comparably sized cans at the grocery store, they’d cost you between 5 and 6 bucks each, but Costco sells a six-pack of these bad boys for the amazing price of about 12 dollars – that’s two bucks a can. 2 – Kirkland Brand Organic Olive Oil You might not have known this, but most olive oils you find at the grocery store are either counterfeit or woefully lacking in purity. There just aren’t enough olive orchards around the world to meet the demand, so various manufacturers and distributors doctor up their olive oil with some sort of seed oil and add chlorophyll and beta carotene for color and odor. The scoundrels figure that while some housewife in Idaho may be potato-savvy, she’s olive-oil stupid and won’t know the difference between high-grade olive oil and some stuff that was made with crankcase oil and Uncle Giuseppe’s moustache trimmings. A few years ago, the University of California Davis analyzed 186 extra-virgin olive oil samples taken randomly from shelves and found that 73% of them failed to meet the standards of purity established by the International Olive Council, and the extent by which they failed ranged from 56% to 94%. Enter Costco. To address the shortage of orchards, they bought their own and now produce a really terrific organic olive oil. It’s one of the few widely available brands in the US to actually meet the standards set by the Olive Council. While it might not have the real strong, grassy taste associated with some of the European varieties, it’s more-than-acceptable to most chefs. Samin Nosrat of Netflix’s “Salt Fat Acid Heat” even included it on his list of recommended olive oil brands. Best of all, the price is about 17 bucks for 2 liters, which is roughly 13% of the cost per ounce of one of Nosrat’s other recommendations. 3 – Townsend Farms Frozen Organic Triple Berry Blend If you were to go to the grocery store and buy 3 pounds of fresh blackberries, strawberries, and blueberries, the check-out girl’s gold digger instincts would kick in and she’d follow you home, thinking perhaps that your 2006 Toyota Corolla with the mismatched side panels was just a ploy to throw off fortune seekers. That’s how expensive fresh berries can be, but Costco sells this organic three-berry blend for about 11 bucks. But maybe you’re thinking that you prefer fresh anyhow, since it’s more nutritious than frozen. Not so. A study conducted by Bouzari in 2014 evaluated the amount of riboflavin, beta-carotene, vitamin C, and alpha-tocopherol (vitamin E) in frozen and non-frozen carrots, corn, spinach, broccoli, peas, green beans, strawberries, and blueberries. He and his colleagues found that frozen foods showed a minimal loss of vitamin C compared to big losses in non-frozen, “fresh” varieties. Likewise, frozen peas showed an increase in vitamin C and vitamin E over non-frozen, and the findings were true for fruits and vegetables even if they’d been frozen for 90 days. In other words, as long as the “chain of freezing” wasn’t broken – as long as the berries didn’t melt when the other berry pickers had to pack Reuben’s amputated finger with them en route to the hospital after it was cut off by the conveyor belt – they’re often as good or better than “fresh.” Lastly, you couldn’t pick a much better dietary and nutritional blend of fruits. All three are rich in anthocyanins and very low in total sugars. 4 – Wilcox Hard-Boiled Organic Eggs I can imagine the Wilcox Hard-Boiled Egg rep giving this pitch to Costco execs, only to be met with stony, perplexed,
Origin: 5 Foods Lifters Need to Buy From Costco
Tip: 200 Pound Man, 100 Pound Dumbbell
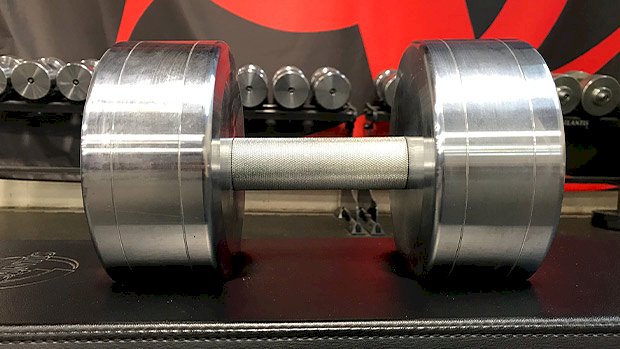 The One-Arm Dumbbell Bench Press Test You should be able to perform 5 reps per side with 50% of your bodyweight. That would be a 100-pound dumbbell for a 200 pound man. Before you throw a tantrum, yes, the barbell bench is absolutely valuable. The problem is, you can get away with pushing heavy weights even if you have glaring weaknesses and faulty mechanics. When you become “efficient” despite these issues, it’s only a matter of time until your strength reaches a glass ceiling and you get hurt. Once you refine your pressing mechanics and eliminate or decrease imbalances, you’ll stay healthy and build more strength over the long haul. The one-arm dumbbell bench press exposes any weak links and gives you immediate feedback on strength discrepancies between sides. With this info, you’re able to train each side individually and bring up weak points in your shoulders, pecs, and triceps. As a bonus, the unilateral load forces your core to work overtime to avoid the humiliation of falling off the bench. Can’t Do It? Take a brief hiatus from the barbell, dust off your dumbbells, and get re-acquainted with them. Perform the exercise with one arm or alternate sides on each rep, focusing on slowing down the eccentric (negative) portion of the movement and mixing in iso-holds at various
Origin: Tip: 200 Pound Man, 100 Pound Dumbbell
Tip: The Purpose of the Leg Press
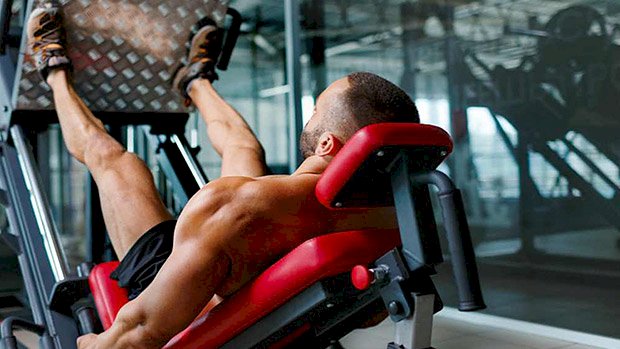 “The Leg Press is Useless!” The coaches and trainers who make that claim remind me of this saying (attributed to Albert Einstein): “If you judge a fish by its ability to climb a tree, it will live its whole life believing it’s stupid.” In the leg-press-is-useless scenario, the coach is probably looking at the leg press’s ability to serve a very specific purpose, like improving the barbell back squat. In other words, he really doesn’t understand how it could be useful in the proper context, like for pure bodybuilding purposes. First, we need to establish some guidelines about proper leg pressing, and then we can talk about the usefulness (or uselessness) of it from there. Proper leg pressing is a thing. There’s a right way and a wrong way to do it. It’s not quite as simple as just lowering the weight and pushing it back up. 1. Establish your active range of motion. This is done by lowering the weight, but not so far down that your butt comes off the seat or your lumbar spine goes into flexion (rounded). This is especially important as loading increases. Your discs don’t approve of your ass coming off the bench and your low back rounding. They end up eating a metric butt-ton of tension and torque. They weren’t made for that. So stop doing it. 2. Choose an appropriately challenging weight. Don’t train with your ego and load the leg press up with eleventy billion pounds, or have other clowns sit on top of the machine to garner more attention as you do two-inch range of motion reps. Or if you do, at least get it on video so we can watch. The interesting point about the excessive loading and partial range of motion is that you actually end up with less internal loading. A full range of motion with less weight will increase the internal loading on the muscle in comparison to a partial movement done with more weight. 3. Don’t fully lock out the knees. I know the knees and joints are actually made to lock out, but not with 1,000 pounds on top of them. The reason a non-lockout is important is because when you lock out, the tension will shift from the quads to the joints and connective tissue. After all, that tension and weight distribution has to go somewhere. Once you lock the knees out fully, then the quads are in a somewhat relaxed state in contrast to if the knees were in a small amount of flexion. You want a soft-knee, slightly bent at the top. Now, intelligent leg pressing involves an active range of motion that’s deep enough to create superior internal loading, but not so deep that you risk injury by invoking lumbar flexion. Then, of course, a soft knee at the top of each rep. So How is the Leg Press Useful? If you’re trying to make the claim that leg pressing is great at building a squat, then you’ll lose that argument. But here’s where it CAN be helpful: Starting Deadlift Strength The leg press helps to improve a deadlift that’s weak off the floor. The key is to make sure you’re using the same foot placement that you use for deadlifts. From there, mimic the start of the deadlift and do paused leg press reps instead of piston-style reps. The Sumo Leg Press This has been a longtime favorite of mine for loading up the glutes and hamstrings. Simply put your feet as high and wide as you can (comfortably of course) on the platform. This is a great movement for the glutes and hams in the lengthened position, but if you add bands and stop quite a bit short of lockout, you’re going to come to a real understanding of what a massive booty pump really feels like. Pour these on for high-rep sets, like 25-30. Quad Development Getting the feet very close together and low on the platform will cause a significant degree of knee flexion, forcing the majority of the tension directly onto the quads. Progress Evaluation John Meadows recently made this point: the leg press is on a fixed plane, so your form is very consistent with it. You can’t get all cheaty outside of reducing the overall ROM. So long as you’re training with some personal integrity on the range of motion, you get consistent feedback of your progress and will be able to track your progressive
Origin: Tip: The Purpose of the Leg Press
Tip: The Absolute Worst Time to Eat
 Several years ago, Christian Thibaudeau walked into T Nation headquarters and said, “I have a theory that when you’re very stressed out, the food you eat is more likely to be stored as body fat.” He must’ve been thinking about that all morning. He’s always thinking. As it turns out, new research shows he was right: anxious eating makes you gain fat faster. Eat When Stressed, Get (Even) Fatter Some people are stress eaters. They use the drug-like effects of food to distract themselves and calm down. Problem is, these are usually high-calorie foods. No one stress-eats kale. As expected, this leads to fat gain. Now, we’ve always assumed the fat accumulation occurs because of basic calorie math: the stress eater consumes more than he or she needs and stores the excess energy as excess jiggle. And that’s certainly part of it. But there’s more. In a recent study, Herbert Herzog, PhD, and his team of nerds overfed two groups of mice: One group was overfed in a stress-free environment. The other group was overfed too, but in an over-stressed environment. Dr. Herzog had them eat while sitting in 5 ‘o clock traffic and being nagged by their mouse-spouses… or something. (Sorry, the paper wasn’t clear how one goes about stressing out a rodent.) As expected, both groups of mice gained fat. But the stressed-out mice got fat faster than the stress-free mice, even though they were consuming the exact SAME number of calories. How Did That Happen? Hunger is largely controlled by the brain’s hypothalamus, while the amygdala is responsible for handing emotional responses, including anxiety. NPY (neuropeptide Y) is one of the brain chemicals that stimulates eating. It’s even produced in response to stress: get stressed and you’ll often experience false hunger signals. When scientists “switched off” NPY production in the stressed-out mice, their weight gain normalized – they gained the same amount as the unstressed rodents. Turns out the nerve cells that produce NPY have “docking stations” for insulin. Normally, after a meal, insulin is produced to help send the stop-eating signal to the brain. But in the study, the combo of high stress and high-calorie foods lead to insulin levels that were 10 times higher than the levels of the stress-free mice. Prolong this stress and the nerve cells become desensitized to insulin, causing them to crank out NPY. As you’d expect, this leads to overeating, but it also disrupts a body’s ability to burn energy through heat. As a result, an overstressed mouse (or human) will store more fat faster if he overeats when anxious. How to Use This Info Yes, this was a rodent study, but the human brain and body are the same, at least in this case, as a mousy brain and body. We all have those same brain bits, nerve cells, and neuropeptides. So the message is pretty clear: You’ll experience more cravings when you’re stressed out. If you eat high-calorie foods in that anxious state of mind, you’ll get fat faster. Don’t do that. Try to relax and calm down before eating, especially if it’s a high-calorie “cheaty” meal. Here’s a trick for that: De-Stress and Boost Recovery in 3 Minutes. If Christian Thibaudeau has a theory, he’s probably
Origin: Tip: The Absolute Worst Time to Eat
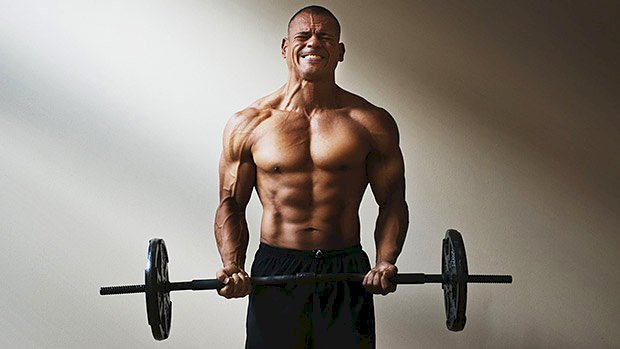
Tip: Lower Blood Pressure With This Tasty Treat
 Large humans often have elevated blood pressure. At least, that’s what we’ve seen in large, obese humans. The data on large, muscular humans is mostly lacking, but generally speaking, having more muscle (and the exercise that led to it) is usually associated with a lower blood pressure reading. Still, it’s not uncommon to run into lifters whose blood vessels are straining at their cellular seams. Their high BP might be caused by anabolic steroids, unfortunate genetics, or maybe just a rotten diet. It might even be psychological if the poor red-faced bastards manifest rage as their default emotional state. Also of concern is misdiagnosis. The standard blood pressure cuff in your doc’s office is designed for people with a 13-inch arm, which is going to run a tad tight on the average lifter. That can result in a systolic reading that’s about 8 points higher than it really is, which might be enough for the doctor to pull out a prescription pad and write a scrip for high BP. While the average Joe might not notice the effects of BP medicine, the average lifter might not fare so well. He or she’s likely to feel tired or dizzy and fail to match any previous PR’s in the sack. There’s an alternative, though… a palatable alternative. Scientists found that eating the equivalent of 100 grams of blueberries twice a day works as well as blood pressure medicines in reducing high blood pressure. What They Found Investigators from King’s College in London published a report that was a combination of four separate studies in humans and one in animals about the effects of blueberries on blood pressure and blood flow. The four human studies used a blueberry drink, a blueberry powder drink, or capsules that contained blueberry anthocyanins (the class of chemicals that give blueberries their characteristic blue color). The fifth study, conducted with mice, was designed to confirm the bioactivity of the anthocyanins and their metabolites. They found that after 28 days, the 24-hour systolic BP (the first number in a blood pressure reading) dropped a mean of 5.5 mm. Additionally, participants that drank the blueberry drink experienced an increase in “flow-mediated dilation” (FMD) of 1.5% just two hours after ingestion, with the FMD plateauing at 2.3% after 28 days. “Flow-mediated dilation” is a term for improved blood flow, and it’s important because each 1% increase in blood flow translates to 10% decrease in the risk of cardiovascular disease. How to Use This Info To try to duplicate the result of this study, you’d have to eat about 100 grams of blueberries twice a day, which equates to about two total cups of blueberries. That could be expensive or difficult, given the price or availability of blueberries in the off-season. Furthermore, it could grow old fast. A more feasible alternative might be to use anthocyanin capsules derived from blueberries. Cyanidin 3-glucoside is one such anthocyanin, its blood-pressure lowering properties having been confirmed through other, separate studies (Xu, 2004, Aloud 2018). As a bonus, it’s also been shown to increase insulin sensitivity and exercise capacity, along with turning white fat cells into more metabolically active (i.e., more fat-burning) brown fat (Yilin, 2017). For best results, take 4 to 6 capsules of cyanidin 3-glucoside, sold as Indigo-3G®, once per day on an empty stomach 30 minutes prior to
Origin: Tip: Lower Blood Pressure With This Tasty Treat
Tip: Smoke Your Legs With an EZ-Bar
 Every gym has an EZ-curl bar, and it’s not just for arm day. It’s actually a great tool for lower-body training. Due to the unique shape of the bar, two positions work well: the front rack or front squat position, and the Zercher. The Front Rack Holding the EZ-bar in a California-style (arms crossed) front rack is as comfortable as it gets. Here’s how it looks with a rear-foot elevated split squat: Many struggle with the standard front rack because of mobility restrictions and jacked-up shoulders. The shape of the EZ-bar sits nicely on the shoulders, while the California grip adds to the comfort. The narrow width of the bar also makes it less awkward for beginners, as well as for times when the squat rack is taken up or space is limited. Having an EZ-bar in your garage gym is always a good idea. Benefits of the front rack include a more upright torso, a forward load distribution, greater quadriceps dominance, and solid trunk development. The Zercher Position The shape of the bar fits nicely in the crooks of the elbows, and a little padding increases the comfort of this sometimes-awkward setup. Here’s how it looks with a squat: That anterior load will fire up nearly every muscle in your body. It’s a good position to use if you’re limited on workout time, and it’s great for those involved in MMA and tactical strength and conditioning. In the Zercher position you can squat, lunge, split squat, hip hinge, and do step-ups and loaded carries. Preparation The front rack position is easy. For the Zercher however, you might want to use some elbow or knee sleeves, a towel, or fat grips for added padding. If there’s respectable weight on the bar it can be awkward to pick the bar up and get it into position. You have four options: Sit the bar on a gym bench and load it there. Take it from a kneeling or half-kneeling position. Use free-moving (independent) squat stands. This is the best option for bigger weights. Load the bar while it sits in a preacher bench and take it from there. Set the Zercher position off the floor. You’re also welcome to pick it up like a gorilla if your body allows you to. Exercise Options Zercher Good Morning (Staggered Stance) Front Rack Lunge Zercher Lunge Zercher Split Squat Step-ups and loaded carries also work great with an EZ-bar in either the Zercher or front rack
Origin: Tip: Smoke Your Legs With an EZ-Bar
The Truth About Rest-Pause Training
 Wait, What’s Rest-Pause Training? Rest-pause is an intensity extending method that’s long been praised for its strength and hypertrophy benefits. It’s where you perform an exercise to technical failure. After your initial set, you pause briefly. This “rest period” is typically 15-30 seconds. Then you’ll do another set until failure before taking another brief break. You do this until you’ve completed a targeted number of total reps. The total reps you choose depends on a variety of factors, but generally speaking, it should be double the amount of reps you were able to perform during the first initial set. So for example, if I were able to bench a weight for 8 reps in the first set, I’d aim to accumulate 8 more reps in the following sets to hit the targeted total of 16. Here’s what that might look like: Set 1:8 reps to failure (8 total reps completed) 15 seconds rest Set 2:4 reps to failure (12 total reps completed) 15 seconds rest Set 3:2 reps to failure (14 total reps completed) 15 seconds rest Set 4:1 rep to failure (15 total reps completed) 15 seconds rest Set 5:1 rep to failure (16 total reps completed) Does It Work? Yes, it can work for both muscle and strength gains because you’re able to maintain high motor unit recruitment. It also allows you to use the same high loads for all sets, unlike something like drop sets where you reduce the load with each subsequent set. Anyone who’s tried rest-pause knows it works… to a degree. The research confirms its efficacy, too, but a lot of coaches have probably exaggerated how well it works, especially as it relates to strength and size. Are the benefits of rest-pause more from the rep scheme itself, or is it just a matter of basic lifting principles like intensity, volume, and effort? I’d argue it’s more of the latter, especially when you compare it to boring old traditional lifting where you do a set, take a full rest period, and then do another set. Rest-Pause and Hypertrophy A 6-week study comparing strength, hypertrophy, and muscular endurance between rest-pause training and traditional training found all measures were equal after the study, except lower body endurance and lower body hypertrophy, both of which were higher in the rest-pause group (1). If taken at face value, this study shows you can get equal strength but induce more muscle growth and more endurance benefits by switching from traditional sets to rest-pause sets. However, if you look a little closer, you’ll realize you probably can’t have your cake and eat it too. Both groups (which included both men and women) trained 4 times a week with 2 days designated as upper-body push days and 2 days devoted to training back, biceps, and legs. The rest-pause group lifted with 80% of 1-rep max to failure with a rest-pause protocol that included 20-second rest periods between sets until lifters reached 18 total reps. The traditional group did each exercise for 3 sets of 6 using 80% of 1-rep max. They rested 2 to 3 minutes between sets. This study should get a lot of credit as its design was better than most studies. It used trained individuals, controlled for the same 1-rep max, and made sure both groups did 18 total reps, but unfortunately there were some issues that would obviously favor the rest-pause group: 1 – Intensity was matched, but effort wasn’t. Both groups used their respective 80% of 1-rep max, but the rest-pause group trained to failure while the traditional group not only didn’t train to failure but couldn’t have, given their protocol. The traditional group did 3 sets of 6 at the same load of 80% of 1-rep max. In general, someone using 80% of 1-rep max load should be able to crank out at least 7-8 reps when taken to failure (6), but they were only instructed to do 6 reps per set. Furthermore, if you consider the following personal differences, the participants might have easily done an even greater number or reps: Individual differences:Research consistently shows that different people can crank out a different number of reps even with the same 1-rep max (2). Adaptation differences:The more endurance you have, the more reps you can complete before failure at a given 1-rep max percentage, even when using as high as an 80% load (3). Gender differences:Women can perform more reps given the same 1-rep max (4). Any guy who’s trained with a girl can easily testify to this. Some women are just insane volume queens. Considering all this, there are plenty of reasons to think the traditional lifting group stopped short of, or pretty far from, failure. The study had another problem, too. 2 – Progressive overload wasn’t matched. The rest-pause group used progressive overload, but not the traditional group. Since the rest-pause group was instructed to train to failure until reaching 18 total reps, progressive overload was naturally built into their program. Hypothetically speaking, as they got stronger, their weekly progression for a given exercise could’ve looked something like
Origin: The Truth About Rest-Pause Training
Tip: Cutting and Bulking – Age Matters
 Your age is probably the biggest factor when it comes to being able to bulk or add lean tissue effectively. Under 30 Years Old Young dudes tend to be bathing in testosterone and growth hormone. They have good insulin sensitivity and they’re working with efficient metabolisms. These are the prime years for all-out bulking cycles, and it’s when you’ll get the most out of them from a growth standpoint. I’m talking about dudes past puberty and younger than 30. Over 30 Years Old After 30, the loss of fast twitch muscle fibers, the slowing of metabolism, and a shallower and less responsive hormonal pool all become factors for muscle building. This doesn’t mean a noob in his 30’s isn’t capable of making some awesome muscle mass gains. He can. It just means he’s not working with his most optimal physiological environment compared to the late teens and early 20’s. From a nutritional standpoint, your actual age matters significantly. Due to being less insulin sensitive as you age, and needing a greater supply of leucine to maximize muscle protein synthesis, you’ll need to manipulate your carbohydrate and protein intake to take these variables into account. Protein Lifters under 40, regardless of whether they’re bulking or cutting, will get by just fine on a protein intake of 0.8 to 1.0 gram per pound of bodyweight. Someone in their 40’s will need a greater intake of protein to fully maximize muscle protein synthesize (while paying special attention to leucine intake). Over 40 you’re going to want to eat protein at a rate of around 1.25 to 1.5 grams per pound of bodyweight, whether you’re trying to gain muscle or lose fat. Carbs Carb intake should be comparatively different as well. A young guy swimming in hormonal bliss that’s relatively lean might need to take in as much as 3.5 grams of carbs per pound of bodyweight in order to maximize growth. A 45 year old guy who’s similarly lean probably won’t be able to do that without gaining excessive fat. For a guy in his 40’s, carb intake to the tune of 1.5 to 2 grams per pound of bodyweight will be in the ballpark for mass gaining. Fat Fat intake during a mass cycle for a younger guy should be on the lower side with carbs being the focus. For the older guy, a slightly higher fat intake, lower carb intake, and high protein intake will serve him best. Calories During a smart bulking or cutting cycle, everyone needs to create a starting point at maintenance calories, then adjust protein, carbs, and fats from there. Maintenance for most people is going to fall within the spectrum of bodyweight x 13-15 for caloric intake. For mass gains, add about 10% to your maintenance intake. Yes, you’ll have to log everything, track your weight and body comp, and adjust as needed to fine-tune these starting numbers. That 10% increase in calories comes from carbs, fats, or a combination of both, as long as the requirements for protein are being met. For a fat loss cycle, simply subtract 10% from maintenance and reduce carbs, fats, or both based on preference. Protein really shouldn’t change very much, if at all. Age and Training Younger guys with limited training experience will be able to get away with more workouts in a week and still recover. That’s mostly because they aren’t very strong and haven’t cultivated the ability to train with an exceptional amount of effort. Due to their more efficient physiological environment and lack of existential life stress, young dudes can often train more and recover just fine. But this more or less applies to noobs at any age. If you’re still novice to intermediate, you’ll probably be able to get away with training more often each week than an advanced guy who’s capable of slinging some heavy iron. For the young lads, 5-6 training sessions a week will probably be doable. With guys over 30, four to five times a week might work best. For those over 40, three to four times a week is often
Origin: Tip: Cutting and Bulking – Age Matters
Stop Stretching, Start Lifting
 Mobility matters. As many experienced lifters have learned, mobility restrictions have harmful repercussions when neglected. But remember when “functional training” began to take off? What started off as a good thing quickly became a circus act. Unfortunately, a similar trend is emerging alongside the rise of mobility training. It’s getting a bit goofy. Your goals are probably simple: you want to build muscle, lose fat, get stronger, improve performance, and feel better. Unless you’re trying to become a yoga instructor or make it as a contortionist, you aren’t going to the gym with the sole intent of moving like Gumby. Within the context of training and performance, the only “mobility” that matters is that which has a direct transfer to what you do in the gym, on the field, or throughout daily life. If your mobility enables you to move well and stay healthy while getting stronger, it doesn’t matter if you can touch your toes or do the splits. Stretching and mobility drills have their place, but there’s more to it. The reality is, if you want to improve your mobility and overall function, strength training reigns supreme. Without it, any transient changes that coincide with other modalities won’t “stick.” Let’s Look at the Facts Strength training is superior to static stretching for improving mobility and flexibility. Don’t fall for the antiquated notion that strength training will make you stiff. The research is clear: stretching is not superior to lifting in terms of improving mobility and flexibility. A plethora of studies show that lifting heavy loads through a full range of motion (ROM) is more effective than any other modality for increasing “functional” ROM in the hips, shoulders, hamstrings, ankles, lats, pecs, etc. One study compared the effects of strength training to static stretching in relation to mobility/flexibility in the hamstrings, hips, shoulders, and knees. The researchers concluded that lifting exercises performed through a full range of motion “can improve flexibility as well as, or better than, typical static stretching regimens.” (1) Another study conducted on a group of elite judo athletes looked at the effects of a 12-week strength training program on ROM. It concluded that lifting weights led to significant improvements in mobility/flexibility at the shoulders, trunk, and hips. (2) Greek researchers looked at a group of men who trained with loads at 40, 60, or 80% of their 1RM or one-rep max. The results showed that higher intensities were linked with greater improvements in mobility/flexibility. That is, the men who trained at 80% of their 1RM were the ones who saw the greatest improvements. (3) Strength training improves your ability to stabilize and control newfound mobility. A dead man can do the splits. Flexibility isn’t a physical limitation; it’s a neuromuscular state that helps limit your movement to prevent injury. The feeling of being “tight” when you stretch doesn’t necessarily mean you need to work on your flexibility. In reality, the “tightness” is a byproduct of your nervous system interpreting the stretch as a potential injury, thus shutting the muscle down. When you perform loaded exercises through a full ROM with a controlled eccentric descent (the “negative”), you’re getting a functional stretch within a stable position. At the bottom of a squat, for example, the muscles of the lower body are lengthened to their most optimal position while tension is maintained. Unlike static stretching, which is often performed with shoddy technique and compensatory movement patterns, a loaded exercise forces you to control the entire movement without exceeding your body’s natural range of motion. When you increase passive flexibility via stretching without being able to stabilize or control that extra ROM, you’re risking instability at the joints and increasing your likelihood of injury. If a lack of mobility is problematic, hypermobility paired with instability is catastrophic. Individuals with hypermobile joints are better off taking a jackhammer to their knees than they are getting under a heavy bar. Strength training, especially when performed with an eccentric focus, allows your body to find the ideal balance of stiffness, stability, and mobility. Strength training increases muscle length. Stretching doesn’t. The mechanisms that improve mobility and flexibility as a result of strength training are vastly different than they are for stretching. The notion that stretching increases a muscle’s length is completely false. Stretching is akin to pulling on a rubber band. Sure, it lengthens when you apply tension, but it returns to its normal length when you let go. During a stretch, temporary improvements in flexibility occur primarily due to an increased stretch tolerance and a decreased pain signal associated with reaching a specific muscle length. It’s a neurological process. Nothing within the structure of the muscle actually changes. You’re simply able to stretch
Origin: Stop Stretching, Start Lifting
Tip: Assisted Dips – Useful or Just a Sissy Exercise?
 This machine gets poo-poo’d by the strength training community. The thinking is that everyone should be able to do regular dips with their bodyweight, bare minimum, for a set of 20. I don’t disagree with that. If your shoulders are in good health and you’ve got adequate anterior serratus strength, then dips are a staple in a “just barbell” program. Dips do an amazing job of developing the chest and triceps and, for the most part, have a low degree of injury potential. (I write that even though I suffered a tremendous pec tear doing dips, but I still consider them relatively safe.) The benefit of the Gravitron or any assisted dip machine is that the shoulder joint isn’t dealing with as much torque on it by having to offset the load of your bodyweight. With the Gravitron, you can still get the benefits of dips, but in a more joint-friendly fashion that also allows you to focus on making the muscles do the work, rather than focusing on moving your body through space. Thanks to the offset loading, you get a chance to “feel around” with different body positions, and that can help you figure out a torso and elbow angle that feels natural for you. Lastly, you can crank out some bad-ass metabolic stress work with assisted dips. Start by selecting an offset load that allows for 12 reps. Then increase the offset load so that you can do another set of 12 reps, but this time to failure. Increase the load one more time for another set of 12 reps to failure. If you haven’t done a set of these, then you’re missing out on some sweet pecs/triceps pump action. These hurt in a really glorious way. If you’re truly maniacal, hop on over to the Smith machine and do a set of Smith machine push-ups with the bar set at the bottom position. If that doesn’t smoke all of your pressing muscles to the max, then you’re truly dead
Origin: Tip: Assisted Dips – Useful or Just a Sissy Exercise?
