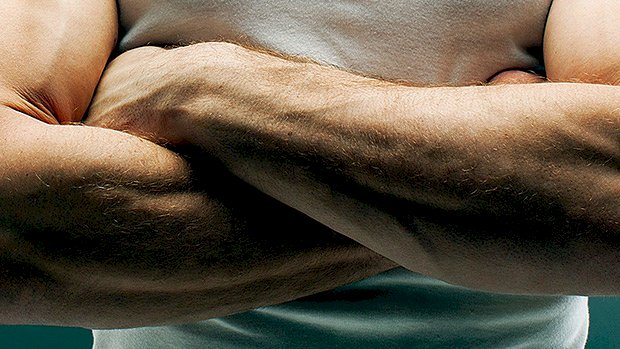
 High-Frequency Forearms Want bigger, stronger forearms? Train them often. Forearm exercises don’t cause much, if any, muscle damage, especially for exercises with less eccentric loading like the wrist roller or Thor’s hammer (see video). But even wrist flexion and wrist extension will cause little damage. Furthermore, these exercises have a very small impact on the nervous system because they’re very simple and done with light weights. Energy expenditure is low too since it’s a short range of motion and smaller muscles are involved. None of the factors requiring more recovery time are present with forearm training. Unless you go absolutely crazy with the volume there’s no reason you can’t train forearms every day. Why Do I Want Big Forearms? Because big forearms look cool. Hey, they’re the only thing that’s 100-percent showing in a T-shirt! Having well-developed forearms will do more for you than simply attracting admiration. Bigger and stronger forearms make it easier to build bigger biceps. Coach Charles Poliquin wrote about this phenomenon 20 years ago. The body hasn’t changed since that was written. By building bigger, stronger forearms you’ll be able to handle more weight in both curling and pulling exercises, which will increase the stimulation on the biceps and back muscles. Bigger forearms and a stronger grip also help the bench press. Look at the top bench pressers in the world; they all have thick forearms. To bench heavy weight you need a strong grip. The harder you can squeeze the bar, the less the wrist will tend to cock and get the bar misaligned. (The bar should be directly above the wrist joint. If the wrist is cocked, the bar moves away from that alignment.) On top of that, big forearms create a bigger “body” on which to spread the load of the bar. This can decrease stress on the shoulder joint. One Caveat and a Program You shouldn’t overdevelop one part of the forearms. For example, the wrist flexors tend to be trained a lot more than the wrist extensors (the flexors are involved a lot when curling and pulling) and the forearms supinators are often dominant over the pronators. Just like any other muscle imbalances in the body, this can lead to problems like tendonitis. So if you want to jack up your forearms and train them every workout (or every day) then work on flexion/extension one workout, do supination/pronation on the next, and do grip work on the third. Then just rotate through that. Since forearm exercises have a short range of motion, you’ll need to do either higher reps or use a slower tempo to create enough fatigue and trigger growth. Sets lasting 30-60 seconds should be your target. I actually don’t count reps when doing forearm work. I put a timer on and keep working until I’ve achieved failure or close to it in the 30-60 second range. But I’ll prescribe a number of reps in a couple of the examples below for the sake of simplicity. Workout A – Flexion/Extension Exercise Sets Reps Rest A1 Wrist Roller 3-4 30-60 sec. 1 min. A2 Wrist Curl 3-4 10-12 90 sec. Workout B – Supination/Pronation Exercise Sets Reps Rest A1 Thor’s Hammer Pronation (4 second negative) 3-4 10-12 1 min. A2 Thor’s Hammer Supination (4 second negative) 3-4 10-12 1 min. Workout C – Grip Exercise Sets Reps Rest A1 Pinch-Grip Deadlift (Hold 30-60 sec.) 3 2 min. A2 Fat-Grip Hold (Hold 30-60 sec.) 3 2 min. You can use other exercises if you prefer, but you get the
Origin: Tip: How to Really Train Your Forearms
Tag: Your
Tip: Fix Your Cranky Neck and Traps
 Whether it’s due to explosive Olympic lifting, tons of shrugging, or just straining under the bar, your neck can become irritated due to overactive traps. Although this is a problem in and of itself, it can also lead to worse problems down the road, like tension headaches or migraines. Your upper traps, after all, are attached to the base of the skull. Making things worse, overactive upper traps will “take over” during rows and other pulling exercises which will lead to poorly developed middle and lower traps, rhomboids, and lats. If you’re ready to ditch your neck pain, use these mobility, stretching, and strengthening exercises to loosen your traps and retrain your mid-back. Step 1 – Soft Tissue Work Begin your workout by doing a little soft tissue work on the traps. Releasing your overactive traps first is a must if you want to fix your neck pain. It’s tough to foam roll your traps, so try applying pressure with a barbell. Step 2 – Do Some Light Stretching Once you’ve released your bound-up traps, do the following stretch on your neck/traps to restore your range of motion. Side Tilt Neck Stretch with Shoulder Depression Attach one end of a band to a low anchor and the other end to your wrist to depress one shoulder. Use your other hand to pull your head in the opposite direction. First, bring your chin to your chest, followed by taking your chin toward the ceiling. Stay in the range where you feel the most tension. Step 3 – Strengthen and Activate the Mid-Back The goal here is to both depress and retract your shoulder blades. Strengthening and activating your mid-back will help balance out your upper traps. To make sure your mid-back is doing the work, you’ll want to go much lighter and do more volume than you normally would for these exercises. One-Arm Lat Pulldown Visualize your shoulder blade sliding down your back with each pull. The goal is to pull your traps down by activating your lats. One-Arm Seated Cable Row Visualize squeezing your shoulder blade so that it moves closer to your spine each time you pull the handle towards the bottom of your rib cage. This will keep the shoulder from elevating and the upper traps from taking
Origin: Tip: Fix Your Cranky Neck and Traps
Tip: Can You Shrink Your Waistline by Working Abs?
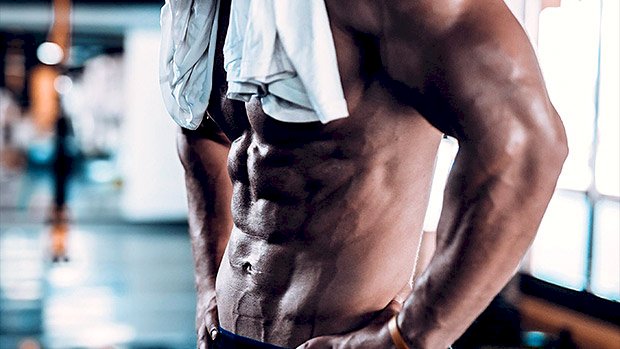
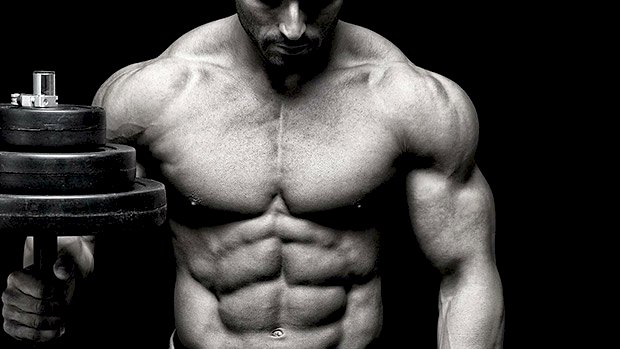 So I’m doing a set of overhead dumbbell presses at the gym when I overhear a client complaining to her trainer that she needs to “shrink her stomach” for an upcoming high school reunion. Now get this, her trainer – a guy I know and normally respect – didn’t ask about her diet. Nor did he at least march her 10-years-past-high-school cheeks over to the treadmill. Instead, he leads her through a 15-minute ab routine consisting of incline sit-ups, crunches, and (groan), side bends. What’s annoying about this is that the trainer knows that all the ab exercises in the world aren’t going to do a damn thing about a midsection grown soft by a steady diet of wine, gouda cheese, and avocado toast. But then I started thinking about it. Maybe he doesn’t know ab exercises don’t result in spot reduction. And if he doesn’t know, how many other trainers and regular folk don’t know? Maybe it’s one of those myths that still persist despite all contrary evidence, like how you’re supposed to pee on your leg if you get stung by a jellyfish. So I was curious to see if there were any studies to either confirm (ha!) or, once and for all, disprove the notion that ab exercises lead to fat reduction around the waist. There aren’t many that deal with the subject, but the best one seems to have been published in the Journal of Strength and Conditioning a few years ago. Here’s what the researchers did and what they found. Consider it a public service announcement and send it to any trainers, friends, or acquaintances still suffering from Ab Exercise Delusion Syndrome. What They Did The researchers recruited 24 participants (14 men and 10 women) and randomly assigned them to either a control group or an exercise group. Anthropometrics, body comp, and abdominal endurance were tested before and after training. The exercise group performed 7 different ab movements: Bent-Knee Sit-Ups Lateral Trunk Flexion Leg Lifts Oblique Crunches Stability Ball Crunches Stability Ball Twists Abdominal Crunches Each exercise was performed for 2 sets of 10 reps. Subjects trained 5 days a week for 6 weeks. What They Found “Abdominal exercise did not result in change in measures of abdominal fat (android fat measured by DXA, waist circumference, abdominal skinfold) compared to the control group.” The exercise group did, of course, build greater abdominal strength and endurance, though. What This Means to You No matter how much we want it to be true, ab exercises won’t give you a Hymenopteran waist (that’s “wasp-like” to you non-entomologists). Women in particular should take note of this fact because legions of them have fallen victim to doing too much direct ab and oblique work. They’ve bought into the notion of spot reduction but sadly, it’s led to thicker midsections. Why? Because the more you train a muscle, the bigger it gets. That woman who wanted to “tone up” her stomach for her class reunion that I mentioned in the intro? By working her abs hard and long, she’ll likely have even more trouble fitting into that floral bodycon number she picked up at Dress Barn. And, okay, maybe that slightly thicker waist is okay with her when she’s lean, but when she puts on even a little fat, she’s going to look even less hour-glass shaped than before. If you’re like most women, you want a flat, tapered waistline. You get that through a combination of diet, metabolic conditioning, and whole-body exercise – not by doing countless ab exercises. Unless you want your abs to stand out in sharp relief, you should work them briefly, infrequently, and probably without any additional resistance. If, however, you want your abs to pop (like most men), you can add resistance and train them like any other muscle group so that they’ll grow and say
Origin: Tip: Can You Shrink Your Waistline by Working Abs?
Tip: How to Get Your Very First Pull-Up
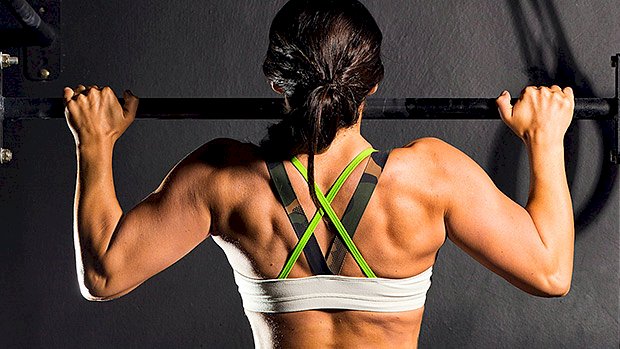 I remember how frustrating getting my first pull-up was. There were times just spent looking up at the bar and wondering why I simply wasn’t moving. The best way I found to finally get my chin over the bar was a combination of similar but easier movements, combined with variations which took away a lot of my bodyweight. Let’s break each of those exercises down: Australian Pull-Ups This is a horizontal row which gets you used to pulling your bodyweight. With your feet on the floor you can easily adjust the assistance you give yourself. The more horizontal you are and the further away your feet are from your hands, the harder it is. The horizontal position should make it a bit easier for you to engage your lats. Try to keep your body straight and not bend at the hip as you pull. Negative Pull-Up This uses the full range of motion of the pull-up, but in reverse! It’s no secret that the eccentric (negative) part of any movement builds a lot of strength, and pull-ups are no different. Learning to control that entire range on the way down will carry over to when you’re going back up. If you jump up and immediately start to fall, build yourself up to a comfortable 10-second hold with your chin over the bar (the “top” of the rep) before you start doing the negative. Low-Bar Pull-Up Like the Australian pull-up, you can adjust how much of your bodyweight you remove by assisting yourself with the feet. Ideally you want to be on the tiptoes or the backs of your toes rather than the ball of your foot, encouraging you to use as little assistance as possible. This is where your technique starts to come into play and you need to focus on engaging your lats for the pull, not using the biceps which is a common beginner mistake. (See A Quick Fix For Better Lats for more info.) Think about pressing into the bar from your lats or “bending the bar.” Play around until you can feel your lats working. Banded Pull-Up These often get a bad rap because when the band is at full extension it will give you the most assistance. This means you get the most help at the bottom of the rep which reduces the need for you to learn how to initiate the pull with your lats. However, they’re great for volume. You just need to be disciplined. Be hard on yourself and only use a band which will allow your 5 reps to be doable, but not easy. Even if you start to only get 3 or 4 reps on your last set, it’s better to push yourself here than simply be bouncing up and down on a band – that will get you nowhere. Eventually you want to be doing these with a very thin band. Once you’re getting close, attempt a rep or two without a band. You might just surprise yourself. The program is simple and organizes the movements into two quick sessions that you can easily fit into your gym schedule: Session 1 Australian Pull-Up:3×10 Negative Pull-Up:5×3 Session 2 Low-Bar Pull-Up:5×5 Banded Pull-Up:5×5 Adjust the assistance of each exercise to reduce your bodyweight so that you can complete all the reps. Your aim over time isn’t necessarily to increase the reps or sets that you do, but instead to improve the movement itself and slowly adding in more of your own weight. For example, you’d aim to get more horizontal on the Australian pull-up, go slower on your negative, use less assistance from your feet on the low-bar pull-up, and use a thinner band on your banded pull-up. Consistency is key. Bodyweight training can be tedious, but the rewards are very satisfying. Pull-ups teach you how to properly engage your lats and give you a ton of shoulder stability for any overhead
Origin: Tip: How to Get Your Very First Pull-Up
How to Evaluate Your Protein Powder
 When it comes to evaluating the quality of a protein, it all comes down to bioavailability and amino acid profile. Bioavailability simply refers to how much of a particular protein people absorb. To figure this out, scientists give test subjects carefully measured amounts of protein to ingest. The scientists then play cards until the test subjects’ poop hits the Tupperware container, at which point they measure how much nitrogen is in it. They then use the amount of nitrogen detected to calculate how much protein was in the feces and compare it to how much was ingested. The final number is referred to as the BV, or biological value. Is the BV of a Protein Worth a Shit (Literally)? The trouble is, the calculation wasn’t very good from the get go because it neglects some basic human dietary mechanics. First of all, if the protein is “fast acting,” like whey, some of it can be converted to glucose, particularly if the person is a keto madman and is chronically low on carbs (and ipso facto, glycogen). Secondly, bacteria in the gut tend to filch some of the protein. While BV is kind of outdated, protein manufacturers still use it occasionally to play the “our protein is better than yours” game. The current accepted protein evaluation standard, used by the FDA, is the PDCAAS, or Protein Digestibility Corrected Amino Acid Score, which combines biological value with a protein’s amino acid profile. Some proteins have practically everything a human needs to sustain tissue growth. We call them “complete” proteins. They have a nearly perfect blend of essential amino acids (those we can’t make ourselves) and branched chain amino acids (BCAAs), which are particularly important to muscle growth. Other proteins are missing certain amino acids or have lousy amounts of BCAAs, so much so that their amino acid profile wouldn’t support the growth of a banana slug. Unfortunately, the PDCAAS isn’t the best way to gauge a protein’s quality, either. To calculate it, the scientists again measure and calculate excreted nitrogen, but the PDCAAS, like the BV, doesn’t take into account any protein that was eaten up by the bacteria in the gut. It also requires that test subjects have an empty stomach, which exposes the test to all kinds of inaccuracies. In real life, you might quaff a protein shake, but there’d probably still be a slab of lasagna down there to slow down the protein’s absorption. Equally likely is that there might be some Wheat Chex floating around your stomach like inflatable pool toys that might bind up some of that protein because of their high-fiber content. That leaves a relatively new scale, the Digestible Indispensable Amino Acid Score, or DIAAS. It measures the nitrogen content of the ileum, or small intestine, instead of the nitrogen in the feces. This allows researchers to get a more realistic evaluation of a protein’s bioavailability because the measurement occurs before all those bacteria were able to munch up a lot of the ingested protein. It also takes into account the digestibility of each amino acid instead of the overall protein. It’s currently the best scoring system in use. Got all that? If not, it doesn’t matter so much. What’s important is to just choose the best protein source based on your needs and our current best guesses as to which support muscle and tissue growth the best. So, How do the Various Proteins Rate? Plant-derived proteins are probably the fastest growing sector in the protein business. At first glance, it makes sense they’d be doing fairly well. Anything associated with plants is instinctively thought to be healthier, but the thinking is a bit two-dimensional in that these plant-protein fans aren’t actually eating plants, but the amino acids that are left over when the water, fiber, chlorophyll, polyphenols, vitamins, and minerals – just about everything else in the plant – is extracted. My Hanes cotton underwear are probably closer in composition to an actual plant in nature than a pile of plant-derived protein. But there remains another truth, this one particularly inconvenient: the amino acid profile of plants is not the same as what you’d find in human muscle. Sure, most of the amino acids are there, but usually not in the amounts you’d need to support optimal growth of muscle. That being said, there are a couple of plant proteins that come close to being complete: pea protein and soy protein. The PDCAAS shows pea protein at an impressive 0.893, while soy proteins rates from 0.95 to 1.00, depending on how they were processed. That means that pea protein is damn close to the highly desirable 1.0 score that most animal proteins come close to, while soy protein is neck-and-neck with them. That’s a little misleading, though. The PDCAAS must grade on a curve or something so animal-derived proteins don’t get swelled heads because they actually truncate the numbers. If they didn’t do that, whey protein isolate would score 1.2 on the scale and milk protein a tad higher,
Origin: How to Evaluate Your Protein Powder
Tip: Know Your Triggers
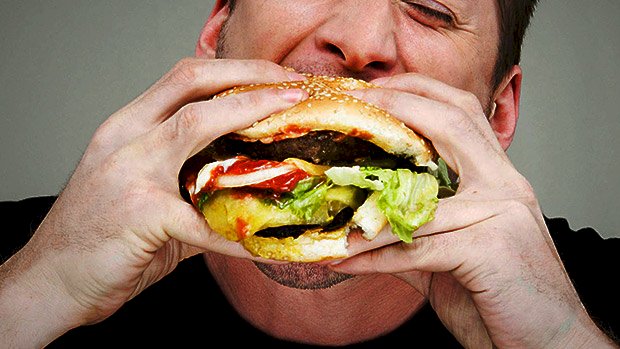 All of us have trigger foods. These are foods that send us spiraling right into the seventh circle of gluttony hell. Those triggers vary greatly from person to person. This is one area where I’d define foods as being “good” or “bad” based on your reaction to eating them. Contextually, a bad food is one that meets the seventh circle criteria when you’re trying to get lean. It’s up to you to be aware of what foods cause you to eat more even after you’ve had your fill. For me, it’s basically anything that doesn’t fall under the bro-diet umbrella. So basically anything that’s not eggs, oatmeal, rice, chicken, etc. I don’t just eat a slice of pizza; I eat four pizzas. I don’t just eat one doughnut; I clean out the bakery. Some people CAN just have two Oreos. They’re called sociopaths and they feel nothing, have no emotions, and lack empathy. It’s up to you to identify your trigger foods and eliminate them during the time that you’re trying to have a high degree of compliance. No, this isn’t something you have to do forever. But if you’re wanting to shed fat and you don’t want to screw it up, then just eliminate the foods that cause those problems. Beware the Scarcity Effect This is one obstacle to look out for. It’s when we end up wanting something because of the perceived lack of availability. The less access we have to something, the more we tend to crave it. This can be a lethal combination when it comes to trigger foods. The solution to replace those trigger foods with foods that are “close enough.” If you love pizza, try a thin crust or cauliflower option using toppings that are higher in protein and lower in calories: grilled chicken instead of sausage, extra veggies, half the cheese, etc. If you love cookies and brownies, try the low fat and/or low carb recipes for those foods. If it’s easier for you to just abstain all together, then do that. But figure out what you need to do to stop short-circuiting the fat loss process by giving in to your trigger
Origin: Tip: Know Your Triggers
Tip: Should You Bench With Your Feet Up?
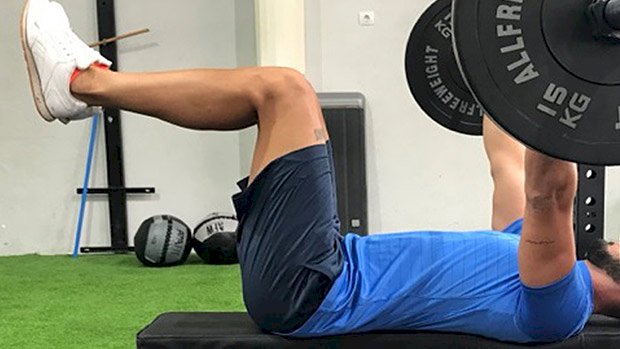 Charles Poliquin used to have a term for guys who bench-pressed with their legs off the floor and their knees bent at a 45-degree angle. He called them “future orthopedic patients.” He thought that benching that way was plain stupid and totally useless, unless maybe Ludmilla, the one-eyed Russian former Olympic shotputter who works in custodial services at the gym was mopping up around the bench press and you had to lift up your legs because you were afraid of getting a meaty backhand across the face for mucking up her clean floor. I’ve always thought it was a stupid way to bench, too, and I can’t help but shoot condescending stares at any moron I see doing it. That’s why it was particularly painful to read this new study. It seems, cough, hem, haw, that benching with your feet off the floor actually increases the involvement of the pecs, delts, triceps, and even the muscles in the forearms. But then I thought about it a bit and decided that their findings, while legitimate, weren’t applicable to anyone who wants to add muscle or get stronger. What They Did Spanish scientists recruited 20 young men and carefully established their 1 RMs (the most weight they could lift for one rep). They then wired them up with enough electrodes to make them look like the dudes in a Marvel Comics origin story, just before something went horribly wrong and turned them into super heroes or super villains that spat lighting bolts out of their wazoo. After thoroughly warming up, the subjects performed 8 reps of bench press with 60% of their 1 RM with either their feet on the ground or their feet elevated. They did a set of 8 reps using a 2:2 tempo (both lowering and raising the bar to a count of 2). After an appropriate rest period, the participants repeated the lifts, doing the opposite (feet up or feet down) of their first test. What They Found Doing bench presses with the legs up significantly increased the recruitment of the pectoralis major (clavicular portion, sternal portion, and costal portion), anterior deltoid, triceps brachii (medial head), forearms (flexor digitorum), rectus abdominis, external oblique, and rectus femoris muscles. This prompted the authors of the study to write, in Yoda-speak, the following: “To perform the bench press exercise with flexed hips could be recommended for training in sports where the upper limbs and hip flexor muscles are required.” How to Use This Info While I don’t doubt the findings of this study, I’m still not going to do or recommend the “legs up” bench press. I’ve got several reasons. For one, the slow tempo they used in the study doesn’t reflect how people normally bench and I’m pretty sure that lifting explosively, or at least quickly, would show a different recruitment pattern. Secondly, their study showed that there’s more activation of the rectus femoris in the legs-up bench than there is in the conventional bench. The trouble with that is, the bench, when it’s done with any amount of significant weight, is actually a whole-body lift with all kinds of involvement from the legs. Clearly, these guys were using a weight that was so light that it didn’t require any drive from their legs. If they had used a heavier weight, it would surely have shown a higher level of recruitment of the rectus femoris than just lifting up your legs so Ludmilla can mop under your feet. Third, other studies have shown the opposite – that the conventional bench recruits more muscle than the legs-up version. (Of course, those studies used a BOSU ball underneath the lumbar spine to introduce instability, and the weight of the lifter plus the weight on the bar just might have smushed the ball down so it was, in effect, close to being a flat or semi-flat surface.) Lastly, recruitment of motor units isn’t the end-all and be-all of hypertrophy or strength. What matters more is the mechanical loading the muscle fibers are subjected to. Look at it this way, if you were to put on a chicken costume, climb atop your house and jump off, you’d recruit a whole lot of pectoralis-muscle fibers as you frantically sought to achieve flight, but all the flapping in the world wouldn’t lead to additional strength or size. What you need is adequate load, but if you attempted legs-up benches with much more than the 60% of 1 RM used in the Spanish study, you’d eventually run into the same problem you do with any type of instability training – having to balance the bar lengthens the amount of time between the eccentric and concentric part of a movement, resulting in a much-impaired stretch-shortening cycle, which impedes strength gains. Also, the limiting factor in any kind of instability training becomes the strength of the stabilizer muscles involved in the lift. In other words, muscle fiber recruitment of the chest, delts, and triceps ultimately would suffer because the amount of weight you’d need to coax the muscle to grow would likely be more than you could balance and keep from ending up an orthopedic
Origin: Tip: Should You Bench With Your Feet Up?
Tip: Mix This Into Your Food to Get Super Healthy
 Flaxseed: The Comeback Poor old flaxseed was once a rising star in the nutritional world. It was touted as being the highest non-ocean source of omega-3 fatty acids, so if you didn’t like to eat mackerel, herring, or oysters every day, flaxseed was your girl. But then people found out that flaxseed came with an omega-3 catch: It didn’t actually contain DHA or EPA, the omega-3s the human body needs. Instead, it contained alpha linolenic acid, which the body has to convert to DHA and EPA. That might not sound like a big deal, but it turns out the conversion process is kind of a heavy enzymatic lift for the body, so much so that only 10 to 15% of the linolenic acid gets converted into DHA and EPA (the rest is burned as energy). So flaxseed fell out of favor. It was left to molder on the shelves at Whole Foods, passed over for the younger and prettier chia seeds, but don’t worry, flaxseed isn’t vindictive like your ex. She’ll take you back, because that’s just the kind of big-hearted seed she is. And while she may not have the omega-3 horsepower of her fishy friends, adding a daily teaspoon or two to your diet could improve your health considerably in the following categories: 1. Cardiovascular Disease Flaxseed, at least in animal studies, has proven to be effective in slowing the build-up of plaque induced by high-cholesterol and high-fat diets, in addition to lowering circulating levels of trans fats. As far as human trials, flaxseed has been shown to significantly decrease systolic and diastolic blood pressure, so much so that it led to a prediction of a 50% decrease in the incidence of heart attack and stroke. 2. Diabetes Dietary flaxseed reduced blood glucose in people with Type 2 diabetes, along with lowering blood sugar in people with prediabetes. 3. Cancer A review of ten human trials led to the conclusion that flaxseed reduced the rate of tumor growth in women with breast cancer. Cancers of the prostate, lung, colon, ovary, endometrium, liver, and cervix have also been inhibited by flaxseed. 4. Skin Health Women involved in a 12-week, randomized study found that dietary flaxseed oil led to a significant decrease in trans-epidermal water loss, skin roughness, and scaling, with an increase in skin hydration and fullness. 5. Gastrointestinal Health Because of its high fiber content, flaxseed has shown a lot of promise in giving relief from constipation, in addition to reducing symptoms of irritable bowel syndrome (IBS). It also appears that it’s fermented in the gut and leads to the formation of short-chain fatty acids, which may favorably alter the microbial microenvironment. Forms of Flaxseed While we generally think of flaxseed in its whole-seed form, it’s also available in ground form, as flaxseed oil, and as partially defatted flaxseed meal. More recently, a “milk” form has entered the market to compete with almond and oatmeal milk. The latter iteration is fast gaining popularity as it contains no cholesterol or lactose, is suitable for people with soy, nut, or gluten allergies, and is more healthful than almond milk. I prefer the ground form, though, as it adds a slightly nutty flavor to foods. Crushing the outer seed also makes both the ALA and the ecoisolariciresinol diglucoside (SDG), flax’s predominant antioxidant polyphenol, more bioavailable. However, crushing the seed through grinding also exposes these chemicals to oxidation, so ground flaxseed needs to be kept in the freezer to preserve its magic. What are the Naysayers Going to Point Out? Every nutrient or food seems to have its detractors, and flaxseed is no exception. They’ll tell you that the protease inhibitors, phytic acids, linantine, and cyanogenic glycosides found in flax make it impossible or unlikely that the body will be able to absorb and benefit from it. They’re right in theory, but wrong in practice, as several studies have reported no deleterious effects from these flax components. Other party poops will complain about the cyanide formed in the gut when flax is ingested, like cyanide ever killed anybody. Okay, it has, but this isn’t an issue here. Taking one to two teaspoons of flax will result in about 5-10 mg. of hydrogen cyanide being manufactured, but the human body can easily detoxify up to 100 mg. of cynanide a day. Just keep your flax consumption down to less than a kilogram a day (2.2 pounds), which I wouldn’t think would be an issue. Just the Flax, Ma’am To reap the benefits of flaxseed, add a teaspoon or two a day to anything that might benefit from its texture or taste, from oatmeal to salad or yogurt to soups. Start slow, though, as your gut may rebel against such a big dose of fiber if it isn’t used to
Origin: Tip: Mix This Into Your Food to Get Super Healthy
Your Guide To Heavy-Light Training
 Look Great, Perform Even Better People that look and perform like muscular athletes usually do two things in the gym: They train to improve performance by driving up strength, speed, and conditioning. They use specific hypertrophy work to attack weak points and, ultimately, build a balanced physique. But the problem among most people is that they treat aesthetics (looking good) and athleticism (performing well) as mutually exclusive training goals. Fortunately, they don’t have to be – especially when you use and adjust the training methods of the late Olympic sprint coach, Charlie Francis. While Francis wasn’t programming workouts to help his athletes look better naked or bust a deadlift PR, his high-low principle is what kept them progressing without burning out. We can use the same idea to increase both performance and hypertrophy. Here’s an overview of what that looks like before I get into the details. Heavy-Light Training Overview It’s also called an “intensive-extensive” or a “high-low” training split. It bases workouts on the neurological demand of training. It places the highest-demand work on nonconsecutive days. The “heavy” or intensive days are when you do exercises that are more demanding on the central nervous system. For lifting, this can mean that the work is greater in complexity, has greater explosive demands, or requires max strength. The “light” or extensive training days are based on a higher volume and less weight. To keep the workout challenging without such extreme neural demands, this will mean creating more metabolic stress within your muscles. Four Benefits Of Heavy-Light Training 1. You get stronger and look better at the same time. This programming allows you to train muscles and movement patterns more frequently. For many lifters, this results in improved technique and, as a result, faster gains in strength compared to training a muscle or movement pattern once per week. You also get the bonus of consistency. Organizing workouts in a way that keeps you from digging yourself into a recovery hole will allow you to keep training and keep challenging your body without burning out. You can’t change your body composition or gain strength without consistent effort and that’s what this type of training guarantees. 2. You feel good and stay fresh from workout to workout. The reason this type of program works is because of its varying neurological demands, which keep systemic stress in check. You’ll be able to squat, deadlift, etc. more often, but you must vary the loading and volume to prevent excess fatigue. To understand it better you’ll need to know a couple things about the nervous system. Let’s cover that… Your nervous system has two parts: The central nervous system (CNS), composed of the brain and the spinal cord. The peripheral nervous system (PNS), all the remaining nerves and ganglia outside of the brain and spinal cord. Motor units consist of one motor neuron and all the muscle fibers it stimulates. When a signal is sent from the nervous system, it activates the motor unit. Then all the muscle fibers innervated by the motor unit are stimulated and contract. Each motor unit consists of a bundle of muscle fibers and a motor neuron. Small fibers are in small bundles and in control of smaller, finite movements. Large muscle fibers are in bigger bundles to generate maximum power and strength. So when you unrack a weight at 95% of your 1RM, your nervous system goes into overdrive, sending massive signals to your body to increase muscular recruitment. Motor neurons, and virtually every other nerve in your body, are constantly receiving information from other nerves. As a result, it becomes supercharged, recruiting more muscle fibers to execute the near-max squat, along with improving muscle fiber recruitment on subsequent exercises, making them more effective. That means lifting heavy all the time is best, right? Nope. If you lifted heavy every workout, your nervous system, joints, and tissues would start screaming at you before too long. That’s where this programming shines. It limits the overall stress you’re placing on your body by adjusting the demands on your CNS by varying load, speed, and intent of exercises. 3. You improve your technique. With heavy-light training you do each movement pattern more often than most training splits. When it comes to maximizing your performance, the more often you do a movement correctly, the more proficient you’ll become. Once a movement becomes more naturally and technically precise, your strength numbers can improve, driving up work capacity, which will lead to improvements in your physique. Remember when you first started deadlifting and you had to learn the mechanics of the movement? While you were deadlifting you’d think things like, “Don’t round your back and pull the slack out of the bar.” But with lots of repetition using good technique, you get the movement down pat. Reaching this state of “unconscious competence” in
Origin: Your Guide To Heavy-Light Training
Tip: Your Lateral Raises Aren’t Working
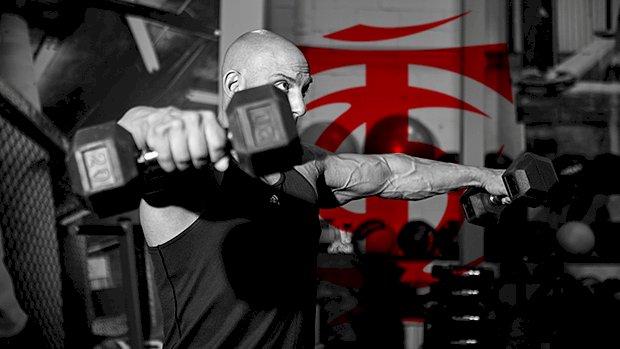 To make the lateral raise effective at recruiting the delts (and not just the traps) first focus on pushing the dumbbells AWAY, not on lifting them up. Try to bring the dumbbells as far to your sides as possible. They should only go up as a result of you pushing sideways. This minimizes trap recruitment. Here are three alternative exercises to try: 1. The Backpack Raise No, you won’t be doing lateral raises while wearing a backpack (although that would likely work too) but with resistance bands looped around your shoulders to keep them down. The traps get involved when the shoulders raise up instead of just rotate. The bands, by keeping the shoulders down, help you focus on the delts better. To set up, you step on the inside of the band and hook the other end around the shoulder. Then do that on the other side with a second band. The bands’ position on the shoulder is important. You want to place it on the AC joint, not on the trap. If the band is on the trap it will actually increase the recruitment of the trap by creating a greater mind-muscle connection with that muscle and a reactive contraction because of the pressure. You’ll still need to focus on pushing the dumbbells away instead of lifting them up, but the bands will make that a lot easier. 2. The Handcuff Raise with a Mechanical Drop Set For this one you’ll use a short resistance band looped around your wrists, like handcuffs. Use a band with only a small amount of resistance; no need to go crazy here since you’re only using it to shift the tension to the medial delts. Choose dumbbells that are a bit lighter than what you’d normally use for 10 strict reps. Let’s say a weight you could do 12-15 quality lateral raises with. The first step of the mechanical drop set is to do partial lateral raises with the band and dumbbells. Go as high as the band will allow, which should be around a third to a half of the way up. Do as many good reps as you can. Then immediately drop the band and do regular lateral raises with dumbbells only. Shoot for 8-10 reps. Then, drop the dumbbells and put the band back on and do partial reps (like in step one) with only the band. Don’t rest between each step of the mechanical drop set. If you want to set your medial delts on fire, this is the exercise for you! 3. The Incline Lateral Raise This is the “less cool” option but one that I’ve been using for at least 15 years successfully with people who have dominant traps. Sit down on an adjustable bench angled at around 30 degrees and do lateral raises from that position. Still focus on pushing the dumbbells out, not lifting them up. This greatly decreases trap activation, but you still have to focus on pushing the dumbbells far away from your side instead of
Origin: Tip: Your Lateral Raises Aren’t Working
