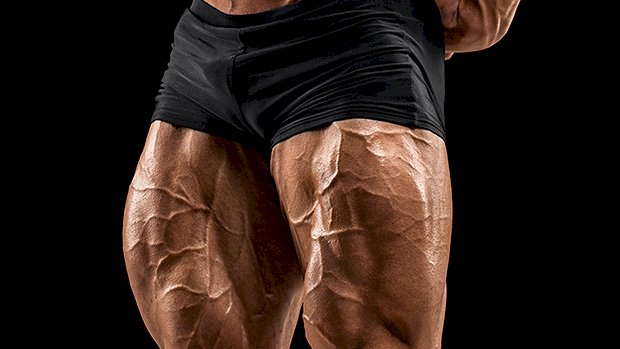
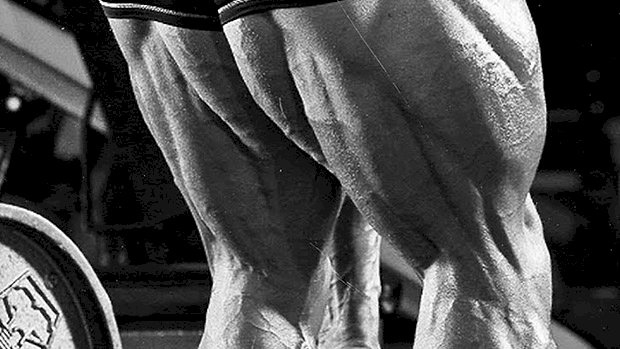
 Whether you use a dedicated landmine device or you just shove a barbell into a corner (against a towel or even an old shoe), this style of training is worth adding to your program. These three variations will smash your lower body, but in a different way than you’re probably used to. Plus, this type of work has transferability to your big lifts. Getting jacked while being more functional? Win-win! Landmine Squat Unlike the goblet squat, the landmine variation changes the strength curve and actually turns the squat into more of a hip-dominant movement. Our society is plagued by lower back problems, which isn’t surprising given our daily postures. Extra work for the posterior chain is always a plus. This isn’t a movement for the faint of heart either. The loading capability will challenge even the most seasoned meathead. Build up to a heavy 8-10 rep set over the course of 5-6 sets. Landmine Reverse Lunge If you’re looking to change up your lunge variation, this is it. The landmine version affects the strength curve differently than a kettlebell or dumbbell pressed against the chest because of the biomechanics of the movement angle of the barbell. You’ll be surprised be the increased level of balance required as well. Try 3-4 higher-rep sets of 8-15 per leg. Single-Leg Landmine RDL The single-leg RDL is a challenging movement for just about anyone. It’s often used as an assessment tool and, as you can imagine, the loading capacity is quite low with it. But with the landmine variation, loading capacity is higher because the level of stability required is lower. Try 3-4 sets of 8-10 reps per
Origin: Tip: 3 New Ways to Blow Up Your Legs
Tag: Your
Tip: Pummel Your Abs with Butt Scratchers
 “Butt scratchers” are named after how a dog looks when trying to wipe its butt on your carpet. If yours does this frequently, you may want to consult a vet. For humans though, mimicking this butt drag (except going backwards) is a surefire way to pummel your abs. Here’s what they look like: The idea is to tuck your pelvis under, behind your arms. Your butt isn’t touching the floor though; it should be as far off the floor as your arm length will allow. This “drag” movement makes these particularly useful at working your abdominals through both spinal flexion and posterior pelvic tilt. This combo means that butt scratchers are effective at working your superficial abs in their fully-shortened position. There’s zero abdominal load through most of the movement, but as soon as your butt drags behind you you’ll be lucky if your abs don’t cramp from the intense contraction. Try to hold it there for a brief second before letting your abs up for a breather. Awareness of your superficial abs can often be an issue when trying to develop them. You need to actually find them before you can target them with more loaded ab exercises that’ll make them grow. Butt scratchers will help you find your abs with very little load and have them wrecked after just a few sets. If you’re the type that feels abdominal crunches in your neck, or leg raises in your hip flexors or lower back, then butt scratchers are a novel alternative that’ll get the job done. No Sliders or Space? No Problem! If you don’t have a pair of sliders, don’t worry. For a fraction of the cost, a pair of furniture sliders will do the same thing and will slide on most surfaces. You’ll find these in many hardware stores or any gigantic online retailer named after a rainforest. An old towel will also slide comfortably on a wooden lifting platform or gym floor. As an alternative, butt scratchers can also be performed statically. Your hands stay in one position on the floor and you’ll rock back and forth. Again, the focus should be on tucking your pelvis under and behind your forearms. Statically, these can be done with your heels in a suspension trainer (TRX, etc.), on a foam roller, or with a Sorinex glute-ham roller or similar. If T-Rex arms let you down, an easy workaround would be to have something by your sides to elevate you higher. Push-up handles, yoga blocks, a few hex dumbbells, or step boxes will
Origin: Tip: Pummel Your Abs with Butt Scratchers
Tip: Set Your Hammies and Glutes on Fire
 The hip-banded RDL (Romanian deadlift) is a great way to load your hamstrings and glutes. Having a band pulling your hips back promotes correct RDL technique. It can also be a useful extrinsic coaching cue if you’re new to RDLs. Using the setup shown here will enable you to use more band resistance. You’ll be able to double up the band and have more control. Bonus: It seems to promote a better hip hinge – there’s something to hinge (take a bow) over. Of course, the band helps to add horizontal load through the hips, making it a potent butt-builder as well. To develop your hamstrings and the rest of your posterior chain, sets of 6-8 work well. To Hit the Hamstrings Harder:Steer clear of locking out, working a two-thirds movement at the bottom. To Hit the Glutes Harder:Lock out at the top with some posterior pelvic tilt for extra butt
Origin: Tip: Set Your Hammies and Glutes on Fire
Tip: 7 New Ways to Attack Your Core
 Adding an extra rep to your max bench press is exciting. Adding more reps to your max number of sit-ups? Not so much. After you’ve achieved a certain level of fitness, that’s just boring and unproductive. So how can you make your core training more challenging? Try these. They’ll not only make your abs look better, they’ll also teach you to develop full-body tension that translates over to your big lifts. Plank Plate Shuffle Grab three 2.5 or 5-pound plates. Stack them on top of each other. With your opposite hand, bring the plates over one at a time to the opposite side of your body. Work on not moving your hips at all. TRX Body Saw Set up the TRX so that when your legs are “in” you’re parallel to the ground. Push your legs back as far as you can without going into low-back extension. Sandbag Pull-Through This can be done in the push-up position or the bear crawl position. Pull the sandbag to the other side of your body without rotating your hips. Put a weight on your back to make this even more challenging. Plank Push-Pull In the plank position, instruct your partner to provide resistance as you push out, then again provide resist as you row in. No partner? You can use a cable station. Wall Plank Find a spot on the wall where you can put your feet up. Make sure your body is parallel to the ground and hold the plank position. Deadbug with Plate Grab a 25-pound plate and assume the deadbug position. Flex at your shoulders so the weight goes over your head. The further back the harder this will be. Make sure your low back stays in contact with the ground the entire time. Bring one leg out and hold. Try putting both legs out or strapping on leg weights to make this more challenging. Earthquake Bar Offset Isohold Attach a kettlebell to one side of the bar. Be careful that it doesn’t tip. Unrack the weight and resist side bending. This can be done with a regular bar as
Origin: Tip: 7 New Ways to Attack Your Core
Tip: Bulletproof Your Biceps
 Biceps tears are common in powerlifting. Using an alternate grip when deadlifting? That underhand arm is at risk. Tears are even more common in strongman. Tire flips and stone lifting are the usual culprits. Happens in bodybuilding too. And if you’re a fan of ring dips or muscle-ups, then you too are at risk. Tears happen when the biceps are loaded and then suddenly lengthened. In a deadlift, they generally happen if the arm isn’t 100-percent straight at the start but then straightens during the pull. In strongman, tears occur when a stone or tire slips. As the object drops, the athlete tries to stop it, rapidly loading the biceps as they lengthen. To some extent, it’s a problem you can’t always prevent, but you can definitely lower your risk. Lessons From the Biceps Femoris Soccer players have hamstring tear problems. A huge amount of money and time has gone into trying to prevent them. What people have found is that the risk factor involves the way the hamstring is loaded (and overloaded) as it lengthens – the same mechanism of injury as biceps tears in strength sports! Research has also found that strengthening the hamstrings as they lengthen helps reduce the injury risk. The most famously researched exercise has been the Nordic curl. How can we use this for our biceps? We use a Nordic curl for biceps, otherwise known as the biceps glide. This exercise loads the biceps as they lengthen. The Biceps Glide Loading and conditioning the biceps this way will, over time, reduce the risk of tearing when mixed-grip deadlifting, stone or tire lifting, and in life in general. Notes When you first do this exercise, you’re fatiguing the biceps through the risky range of movement and loading pattern. Initially, you might slightly increase risk. So go gently at first, progress carefully, and for 72 hours stay away from other movements that may also put your biceps at risk. As you improve at this exercise, you could use them as a warm-up to activate the biceps before a high-risk movement. This needs to be done lightly and for low volume without fatiguing the biceps. Once you’re proficient with glides, you can load them up heavier to condition the biceps, but in sessions 72 hours away from full-body, high-risk movements like deadlifts and strongman events. The movement itself will always have a risk. It has to in order to have a positive conditioning effect. It’s very low and controlled risk relative to the movements where biceps tend to pop, but you should still treat it with respect. Ease into it and be progressive.
Origin: Tip: Bulletproof Your Biceps
Tip: How to Fix All Your Biceps Problems
 Most guys struggle to build their biceps. This is usually because… They have crappy form. They lack stability. They’re ignoring one of the functions of the biceps. Swinging the weights, leaning back, doing half-reps, and letting the shoulders take over are all common issues. Training like this might boost your ego, but it won’t build your biceps. How To Fix Those Problems The best solution is to create a stable base by strengthening your lower and mid-traps, rear delts, and rotator cuffs so that you’re placing tension on the biceps and making them work to overcome the weight. Want a more immediate fix? Artificially create a position of stability during your curls. Take a look: You can see that I’m getting support from the leg pads of a lat pulldown machine. This will allow you to drive your triceps back into the pad and create a very stable platform to train the biceps. It also makes it harder to cheat your reps. Another problem solved. This all adds up to more tension going where you want it – the biceps. More tension equals more growth. Why the Offset Grip? You already know the biceps bend the elbow. But they also supinate the wrist. Taking an offset grip will cause the weight to shift to one side. Place the thumb-side of your hand up against the end plate of the dumbbell. This means if the dumbbell is pulling you into pronation, your supinators (including the biceps) have to work hard to keep the dumbbell level. You end up working both elbow flexion and supination. This increases the activation of the biceps during each rep. By making these small tweaks, every rep will stimulate the biceps more than the regular, sloppy curls you see in gyms all over the world. Work to develop strength in this exercise and your biceps will grow way more than they were when you were “curling” the 60s. Oh, and if you ever progress to using the 60s for reps on offset supported curls, your arms will be
Origin: Tip: How to Fix All Your Biceps Problems
6 Ways to Upgrade Your Back Workout
 There comes a time when you’ve done rows and pull-ups to oblivion and reach a plateau in strength, muscular development, or both. That’s when it’s time to think outside the box. These hidden tricks can help you do just that. 1 – Stop Moving Weight This may seem misleading. I’m not saying you shouldn’t resistance train. I’m saying you need to stop training with weight that you can actually lift. I just blew your mind, right? No, really, if you want to improve your strength and even your mobility, you’re going to get through your sticking points by using isometrics (trying to lift something that can’t be moved). The benefits: Isometrics allow you to apply maximum force without risking injury since the body isn’t changing positions under load (which is the most likely scenario for injuries). They strengthen a part of a typical force curve that traditional weight training would simply pass through. As an example, focus on shoulder flexion and extension isometrics to hit the rear deltoids and lower traps, thereby challenging the limits of your range. Watch me put Dani Shugart through the gears: Setting up a barbell with a heavy load on the pins in the rack is a great way to do both of these isometric exercises. Banking it against the back of the rack makes it even more sturdy. 2 – Pause for the Cause The above is all fine and good when it comes to the idea of trying to push something away from you (in this case, the loaded bar). When you pull something towards you and hold the end ranges, it typically exposes glaring issues of weakness that lifters have been overlooking for years. Adding a pause to a pulldown or row is a good first step in acknowledging that it’s a different ballgame. Beyond this, however, we can increase the octane by taking things back to fitness testing in 11th grade gym class. The flexed-arm hang was probably a piece of cake when you were 16 years old, weighed 150 pounds, and were unaware of good lifting technique. I remember being able to hold myself up there for close to a minute. Change the game and use proper pull-up mechanics, though, coupled with all of your added mass, and you have a whole new challenge that probably won’t allow you to do much more than a 20-second hold. If you’re not used to these, prepare for a world of intrinsic soreness for the next couple of days. 3 – Do Big Boy Rollouts Yep, they’re an ab exercise… until you use a barbell instead of an ab wheel and go out wide (think of your bench press grip). Then they become one of the greatest ways to torch your upper lats and teres muscles. They can be a game-changer for the constant tension they provide to the upper lats during both the eccentric and concentric halves of the lift. Bonus points: If you really want to torch the upper lats, then try supersetting barbell rollouts with snatch grip deadlfits. You can even use the same bar. Boom. 4 – Rock n’ Row If you want to engage as much of your back musculature as possible during your seated rows (or horizontal pulls in general), it’s imperative you add some movement from the hip joint. I call this “toprock.” By applying a little sway with a neutral spine, you’ll remain safe while keeping the emphasis away from the biceps and away from unwanted shoulder glide once the weight begins to get a little heavy. Think about it: The “intro to training” textbooks says the form police will arrest you if you keep anything other than a completely rigid torso when doing rows, but applying a bit of momentum is perfectly acceptable and isn’t “cheating.” This is me doing what I consider to be a standard set of heavier seated rows: As you can see, I’m maintaining good tension throughout the rep, and never is there any rounding of the lumbar (or thoracic) spine. And, as the video below shows, I believe this same principle should apply to all row variations, within reason: 5 – Isolate with Fisherman Rows Dumbbell rows are a staple in many programs for unilateral pulling strength and development of the lats. Unfortunately, there are plenty of people who might not have the right conditioning to use the classic single-arm dumbbell row without risk, and others who just plain struggle to get a handle on proper form and technique. For lifters with a history of lumbar issues, the last thing they need is a one-sided load combined with an uneven hip position, which is what happens when they place one leg up on a bench while the other stays grounded. Moreover, finding the right places to put your hands and feet to promote a level hip position to avoid the pitfalls can be frustrating. Even healthy lifters can have trouble finding a position that gives the proper amount of emphasis to the right areas. The major difference you’ll see right off the bat with the fisherman row is the fact that both legs are mounted on the bench, not just one. This immediately stabilizes the pelvis so you don’t have to spend time trying to finding the least objectionable hand, foot,
Origin: 6 Ways to Upgrade Your Back Workout
Your Guide to Pre-Workout Supplements
 What’s a “Pre-Workout” Anyway? It can mean a few things: A pure stimulant to jack you up before training, or a substance to get you mentally focused. A nutritional drink with the right carbs, proteins, and amino acids to fuel workout performance and subsequent recovery. A combination of one and two above. In short, pre-workout supplements are meant to enhance your performance in the gym. They can contain all sorts of ingredients that increase energy, improve blood flow to the muscles, or enhance focus. There are all sorts of formulations, but before you decide to buy a pre-workout supplement, you need to know the facts. Common Pre-Workout Ingredients Some pre-workout supplements are junk. The only legit way to know if a pre-workout is good or not is to simply look at the ingredient label. Marketers often lie, but the ingredients don’t (well, usually). Here are some common pre-workout ingredients: Beta Alanine Betaine Caffeine Creatine L-Citrulline L-Leucine Let’s go over the evidence and show what the clinical studies tell us about these ingredients. Beta Alanine Beta alanine is a naturally-occurring amino that’s responsible for giving you the “tingles” associated with some pre-workout formulations. Those tingles come from increased blood flow to the skin and muscles, which has an impact on performance. In one of the largest research papers published on beta alanine to date, researchers found that it could improve athletic performance by up to 10.49%. The research paper looked at dozens of clinical studies and found that simply taking two grams of beta alanine before a workout was enough to give users a boost in their athletic performance. According to researchers, beta alanine most likely works by increasing “intracellular pH buffering, as the result of increased muscle carnosine levels.” In layman’s terms, this means that beta alanine helps decrease cellular acidity levels from intense exercise. The bottom line is that beta alanine is a great ingredient to have in your pre-workouts, and it’s one of the best ingredients for getting a pump. Betaine Anhydrous This is a naturally-occurring chemical that’s produced by the body, but can also be found in foods such as spinach, beets, seafood, and wine. One study, cited by 70 other clinical research papers, found that supplementing with betaine anhydrous can improve muscle mass, endurance, and body composition. Specifically, the study found that the cross sectional area of the arms increased drastically when users supplemented with betaine. Bench press volume increased dramatically also, along with lean body mass. Caffeine Caffeine is, by far, the most common ingredient found in pre-workout supplements. The benefits of caffeine are very well studied. A meta-study of caffeine published in the British Journal of Sports found that caffeine consumption before a workout can help improve athletic performance by anywhere between 2% and 16%, which is a hell of a lot in the sports performance world. Creatine Creatine is naturally created in your body, and it’s essential to the production of adenosine triphosphate production (ATP). Your body needs ATP to create energy, and thankfully, creatine helps your body create more of the compound. One research paper, conducted at Baylor University and cited by 437 other clinical researchers, found that creatine drastically increased overall athletic performance: “Short-term creatine supplementation has been reported to improve maximal power/strength (5-15%), work performed during sets of maximal effort muscle contractions (5-15%), single-effort sprint performance (1-5%), and work performed during repetitive sprint performance (5-15%). Moreover, creatine supplementation during training has been reported to promote significantly greater gains in strength, fat free mass, and performance primarily of high intensity exercise tasks.” Creatine is especially known for its ability to help users gain muscle mass. Take a look at the following graph from the website Healthline: According to this graph, users can put on nearly twice as much muscle mass when training and taking creatine, as opposed to just training alone. L-Citrulline L-Citrulline, or citrulline malate, is known to enhance endurance and decrease muscle soreness both during and after your workouts. Citrulline also helps muscles recover faster. One study, conducted by the Department of Medicine at the University, found that supplementing with citrulline malate reduced muscle soreness by a whopping 40%, which is a huge deal because it allows athletes to get back into the gym a lot quicker. L-Leucine Among the amino acids, the one that has perhaps the biggest effect on regulating protein synthesis is leucine. It’s the main mTOR amplifier among amino acids. Although leucine is found in any whole protein source, some pre-workout blends add an extra amount of it for an added muscle protein synthesis punch. What’s the Best Pre-Workout Formula? So, what’s the best
Origin: Your Guide to Pre-Workout Supplements
Tip: A New Way to Murder Your Hamstrings
 Looking for a new way to build your hamstrings? Try these. Triple-Threat Hamstring Bridge A1:Long Hamstring Bridge (toes down) x 5-10 A2:Medium Hamstring Bridge (toes down) x 5-10 A3:Regular Hamstring Bridge (heels down) x 5-10 Do 5-10 reps in each position, finishing each with a 5-10 second isometric hold – contract as hard as possible and battle against gravity. Master bodyweight before you add a barbell (or even use a sandbag across your hips). Besides being a good hamstring builder, these can also work as an activation exercise with bodyweight only, helping feel your hamstrings later in the workout. This is a form of mechanical drop set. You start with the hardest position (knees straight, toes down), and finish with the position where you have the greatest mechanical advantage (knees at 90 degrees, heels down). Adding isometric holds into the equation allows you to get a little more time under tension in each position. Isometrics will help you tap into the abundance of high-threshold motor units your hamstrings contain. Hams, Not Glutes You probably already use a combination of hamstring curls and hip hinges (RDLs, back extensions, pull-throughs, etc.) to train your hamstrings, but bridges are often left out. Normally, lifters do glute-dominant bridge variations. To hit your hamstrings, you make a few changes: Driving through your toes encourages a co-contraction of your calves and hamstrings. “Active insufficiency” of the gastrocnemius increases hamstring activation. Using a larger angle at the knee increases hamstring length and moment-arm length, placing more tension through the hamstrings. Elevating your feet on a box or bench changes leverage factors to bias more hamstring dominance, as opposed to elevating your back (hip thrusts) which will bias the glutes. All of these factors can be manipulated to target your hamstrings during
Origin: Tip: A New Way to Murder Your Hamstrings
8 Secrets For Building Your Best Upper Chest
 While many lifters get decent mid and low-pec development, it’s rare to see a truly filled-in upper chest. When it comes to aesthetics, the upper pecs are a game changer. Here are eight things you need to know (and do) to build yours. 1 – Check Your Ego at the Door The biggest reason guys lack upper pec development? They turn chest day into ego day. Flat bench pressing gets all the love because they can use more weight. But if you’re serious about reaching your pec potential, you need to put your ego aside and focus on incline movements – even if you train in a public gym and you currently suck at inclines. Upper pecs are a tricky area. Unless you won the genetic lottery, just emphasizing incline pressing may not be enough. 2 – Hit BOTH Parts of Your Upper Pecs When people think about the upper pecs, they only think about the clavicular portion of the pectoralis major. But there are TWO major portions. The clavicular part originates on your clavicles and run almost parallel to your anterior deltoids. When doing incline presses, many lifters mistakenly use the same grip and style they use for flat bench presses. However, research shows that one great way to emphasize the clavicular portion of your pecs is to use a narrower grip when doing inclines (1). This brings your elbows in and gets your shoulders moving in the direction of your clavicular fibers. Note: Don’t bring your elbows in all the way; this will place stress on the anterior delts. If you use a barbell, use a shoulder-width grip and focus on squeezing your hands together as you press the weight to increase the recruitment of your pecs. You can also do this with dumbbells and your arms at a 45-degree angle: This elbow tuck position is so powerful that you may not even need to use an incline. Research shows that simply doing flat bench press with a reverse grip lights up your clavicular fibers (2). The downside of the reverse-grip bench press? You move your arms into external rotation. While it works, it may not be optimal because the pecs assist in internal rotation. As a result, a better approach is to press with dumbbells (off floor or bench). With dumbbells you get the same elbow position at the bottom as a reverse-grip bench press, but you can internally rotate your arms as you press up for max pec recruitment. The other part of your pecs that’s often forgotten is the upper sternal portion. If you look at the pec anatomy, you’ll see sternal fibers running all the way up to the top of your sternum. If you look at the line of pull of these fibers, you’ll see they’re still pulling your arm across your body. If you only press with your elbows tucked, or a steep incline, you might miss this part. To develop the upper sternal fibers, you need a low incline and a wider elbow position. Note: If you have shoulder problems, or experience pain pressing this way, don’t do it! However, if you want to give it a go, here are some tips that’ll help hammer your pecs while sparing your shoulders: Don’t force the elbow flare – maintain a slight elbow tuck. Remember, you’re on a slight incline. Flat bench pressing with wider elbows is riskier for your shoulders because your shoulders are abducted (out to the side) and internally rotated. This puts you in a position of shoulder impingement. But when you use a slight incline, you externally rotate your arms which moves you out of that shoulder impingement position. Stop when your elbows are in line with your shoulders. This is where most people naturally stop anyway. Also note that the distance between the dumbbells and your shoulders will vary depending on your arm length, so stop looking at the dumbbells and start looking at your elbows. 3 – Find YOUR Optimal Bench Angle If you’re trying to build your upper chest, the angle matters. If your bench angle is too high, your upper pecs will drop out and your anterior delts will take over. What’s your optimal angle? Research shows that a bench angle of about 30-45 degrees may be best for hitting your upper pecs (3). However, before you pull out your protractor, you should know that this study was done with only 14 subjects. That leaves us with the question, “What about individual variation?” If you look carefully at a bunch of different people, you’ll notice significant variance in chest cavities (sunken, flat, barrel, etc.). How can people with different chest structures press on the same bench angle and expect the same muscle activation? The optimal angle for you might be higher or lower than the next bro at your gym. To find your best angle, try this test: Attach a light band to a rack or post at about eye level. Keep the band tension very light. Grab the band and raise your hand overhead. Place your opposite hand on your upper pec of the raised arm. Draw your hand in until it’s at or just past the midline of your body. Slowly lower your hand. Stop the movement when you feel your upper pec light up. Turn to a side mirror and
Origin: 8 Secrets For Building Your Best Upper Chest
