 Large humans often have elevated blood pressure. At least, that’s what we’ve seen in large, obese humans. The data on large, muscular humans is mostly lacking, but generally speaking, having more muscle (and the exercise that led to it) is usually associated with a lower blood pressure reading. Still, it’s not uncommon to run into lifters whose blood vessels are straining at their cellular seams. Their high BP might be caused by anabolic steroids, unfortunate genetics, or maybe just a rotten diet. It might even be psychological if the poor red-faced bastards manifest rage as their default emotional state. Also of concern is misdiagnosis. The standard blood pressure cuff in your doc’s office is designed for people with a 13-inch arm, which is going to run a tad tight on the average lifter. That can result in a systolic reading that’s about 8 points higher than it really is, which might be enough for the doctor to pull out a prescription pad and write a scrip for high BP. While the average Joe might not notice the effects of BP medicine, the average lifter might not fare so well. He or she’s likely to feel tired or dizzy and fail to match any previous PR’s in the sack. There’s an alternative, though… a palatable alternative. Scientists found that eating the equivalent of 100 grams of blueberries twice a day works as well as blood pressure medicines in reducing high blood pressure. What They Found Investigators from King’s College in London published a report that was a combination of four separate studies in humans and one in animals about the effects of blueberries on blood pressure and blood flow. The four human studies used a blueberry drink, a blueberry powder drink, or capsules that contained blueberry anthocyanins (the class of chemicals that give blueberries their characteristic blue color). The fifth study, conducted with mice, was designed to confirm the bioactivity of the anthocyanins and their metabolites. They found that after 28 days, the 24-hour systolic BP (the first number in a blood pressure reading) dropped a mean of 5.5 mm. Additionally, participants that drank the blueberry drink experienced an increase in “flow-mediated dilation” (FMD) of 1.5% just two hours after ingestion, with the FMD plateauing at 2.3% after 28 days. “Flow-mediated dilation” is a term for improved blood flow, and it’s important because each 1% increase in blood flow translates to 10% decrease in the risk of cardiovascular disease. How to Use This Info To try to duplicate the result of this study, you’d have to eat about 100 grams of blueberries twice a day, which equates to about two total cups of blueberries. That could be expensive or difficult, given the price or availability of blueberries in the off-season. Furthermore, it could grow old fast. A more feasible alternative might be to use anthocyanin capsules derived from blueberries. Cyanidin 3-glucoside is one such anthocyanin, its blood-pressure lowering properties having been confirmed through other, separate studies (Xu, 2004, Aloud 2018). As a bonus, it’s also been shown to increase insulin sensitivity and exercise capacity, along with turning white fat cells into more metabolically active (i.e., more fat-burning) brown fat (Yilin, 2017). For best results, take 4 to 6 capsules of cyanidin 3-glucoside, sold as Indigo-3G®, once per day on an empty stomach 30 minutes prior to
Origin: Tip: Lower Blood Pressure With This Tasty Treat
Tag: with
Tip: Smoke Your Legs With an EZ-Bar
 Every gym has an EZ-curl bar, and it’s not just for arm day. It’s actually a great tool for lower-body training. Due to the unique shape of the bar, two positions work well: the front rack or front squat position, and the Zercher. The Front Rack Holding the EZ-bar in a California-style (arms crossed) front rack is as comfortable as it gets. Here’s how it looks with a rear-foot elevated split squat: Many struggle with the standard front rack because of mobility restrictions and jacked-up shoulders. The shape of the EZ-bar sits nicely on the shoulders, while the California grip adds to the comfort. The narrow width of the bar also makes it less awkward for beginners, as well as for times when the squat rack is taken up or space is limited. Having an EZ-bar in your garage gym is always a good idea. Benefits of the front rack include a more upright torso, a forward load distribution, greater quadriceps dominance, and solid trunk development. The Zercher Position The shape of the bar fits nicely in the crooks of the elbows, and a little padding increases the comfort of this sometimes-awkward setup. Here’s how it looks with a squat: That anterior load will fire up nearly every muscle in your body. It’s a good position to use if you’re limited on workout time, and it’s great for those involved in MMA and tactical strength and conditioning. In the Zercher position you can squat, lunge, split squat, hip hinge, and do step-ups and loaded carries. Preparation The front rack position is easy. For the Zercher however, you might want to use some elbow or knee sleeves, a towel, or fat grips for added padding. If there’s respectable weight on the bar it can be awkward to pick the bar up and get it into position. You have four options: Sit the bar on a gym bench and load it there. Take it from a kneeling or half-kneeling position. Use free-moving (independent) squat stands. This is the best option for bigger weights. Load the bar while it sits in a preacher bench and take it from there. Set the Zercher position off the floor. You’re also welcome to pick it up like a gorilla if your body allows you to. Exercise Options Zercher Good Morning (Staggered Stance) Front Rack Lunge Zercher Lunge Zercher Split Squat Step-ups and loaded carries also work great with an EZ-bar in either the Zercher or front rack
Origin: Tip: Smoke Your Legs With an EZ-Bar
Tip: Build Your Back With Bodyweight
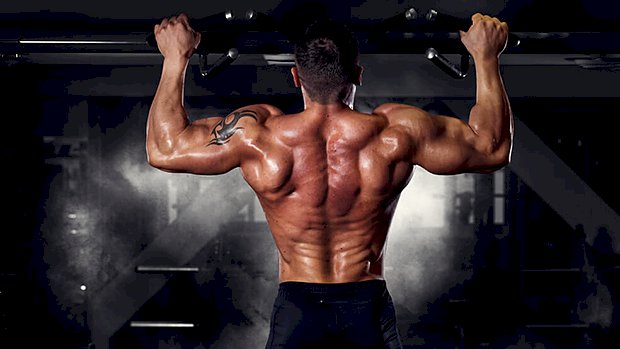 Mechanical drop sets (unlike regular ones where you just reduce the weight as you fatigue) allow you to switch to an easier modification of the movement, usually with the same weight. This helps you to increase metabolic stress and time under tension, both of which will stimulate hypertrophy. If you use this during the main part of the workout, shoot for 3-4 mechanical drop sets. If you use this as a finisher, then one set is more than enough. Do as many standard wide-grip pull-ups as you can. Use a weight vest or hang additional weight from a belt if you can do more than 15. Next, go to volitional failure on eccentric (negative) pull-ups. Jump up to the top position, then lower yourself as slowly as possible. Drop down under a suspension trainer or a bar and perform as many horizontal rows as you can (feet on the ground or elevated, depending on your level of fatigue). The suspension trainer is preferable as it allows your hands to rotate to maintain optimal shoulder position and to better engage the back muscles.
Origin: Tip: Build Your Back With Bodyweight
Tip: Crush Your Lats With This Exercise
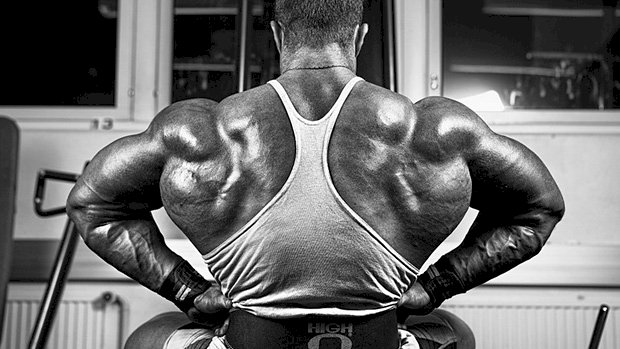 This is one of the very best bang-for-your-buck exercises for increasing strength and muscle mass while also maintaining and even enhancing mobility through the shoulders and back. As anyone who’s tried to stretch a fully pumped muscle knows, this is not a comfortable feeling. That said, this isn’t for beginners. Neutral-Grip Lat Pulldown, Accentuated Eccentric The neutral grip allows the lats to increase their range of motion into a stretch at the top of the movement while also helping the shoulder complex stay in a more centrated position. Both variables are great for longevity, orthopedic health, and muscularity. Rock back a little in this exercise to create almost a high-row angle on the concentric (pulling) portion of the exercise, then come back and normalize your torso position into neutral. Bring your head forward to really stretch through the eccentric (negative) portion of the exercise. If you master this movement, get a partner to force the eccentric by pressing down on the weight stack as you slowly let your hands and arms move up into a straightened position. (See video.) If you’re a sicko who loves the pain, add a 10-30 second forced stretch out of this exact position while maintaining neutral shoulder alignment and stretching through the lats. This will stick a fork in your workout, so program it on the tail-end of an upper body or back-emphasized training
Origin: Tip: Crush Your Lats With This Exercise
Tip: Build Muscle With “Death By” Sets
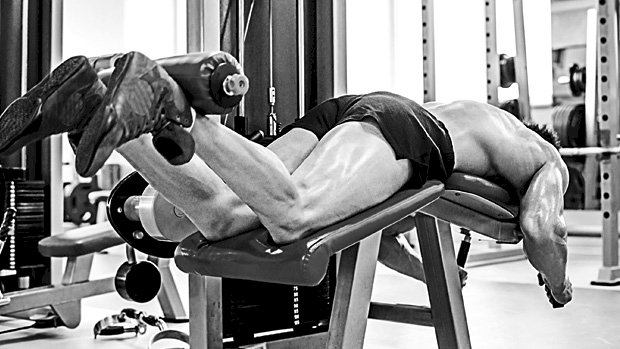 Contractile failure is the main trigger to stimulate muscle growth. That means you go until can’t get another full rep with good form. The key in this variation of rest-pause training is hitting failure at several points in the same set. Basically, one “set” may be two minutes long with little 10-second breaks taken within the set. “Death by” means that you continue until you can’t do any more. Here’s an example. Hamstring Curl, Death-By Rest-Pause Start with a weight you can do for 6-8 reps. The number you get isn’t important, this is just to help you pick the best weight to start with. Go to failure. The last rep should be tough, but you should be able to do the full rep in good form. Don’t try to do half of a ninth rep and then fail. Remember, contractile failure means completing a FULL rep and not being able to do another full rep. Rest for 10 seconds. Using the same weight resume the set and once again go to failure. Continue the pattern: reps to failure, 10 second pause, reps to failure, 10 second pause… until you reach a point where you know you can’t possibly get one more full rep. Continue doing the same process until you can only perform a single complete rep in a mini-set, where you know that getting a second one would be impossible. Since these sets are amazingly powerful but also traumatic on the body, only do one or maybe two sets per exercise. This method is ideal for isolation
Origin: Tip: Build Muscle With “Death By” Sets
Tip: Trigger Biceps Growth With Spider Curls
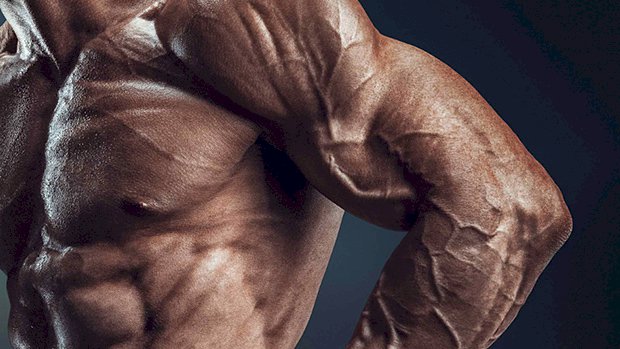 When it comes to training the biceps, simply doing more sets and reps won’t cut it. The problem? Most lifters are hitting the SAME parts of the biceps over and over again while completely leaving out – or at least under-stimulating – other parts. You need to hit both the long and short head of the biceps brachii (as well as the brachialis). Here’s an exercise for the often neglected short head: Spider Curl with Slow Negatives and Iso Holds Spider curls – where you lean over an incline bench and let the arms hang straight down – target the short head of the biceps. The big advantage of spider curls over preacher curls is the constant tension, especially at the top portion of the movement. The slower negatives allow more time under tension during the eccentric or lowering phase, where we can handle more load. This allows you to work at a higher intensity, and higher intensity means greater stress which means greater adaptation. Here’s an additional twist: use a fat grip. One of the benefits of thick-bar training is that thicker handles stimulate much more muscle activation in the hands, forearms, upper arms, and even the whole upper body. More muscle activation means much bigger muscle and strength
Origin: Tip: Trigger Biceps Growth With Spider Curls
Tip: Increase Pull-Up Power With This Simple Plan
 Mini-Sets for Maximum Gains Suck at pull-ups? You need to work them with frequent training. Start every workout with a total of 20 pull-ups done in as little time as possible using “mini-sets” of half your current max effort. Use a clock to track how long it takes and try to beat that time each session. The best strategy is to NOT hit failure on any of the mini-sets since it would require too much rest between sets and thus would take longer to complete. Here’s How It Looks Let’s say your current max is 4 or 5 pull-ups. Start with mini-sets of 2, resting as little as possible between each set – about 20 seconds rest is plenty. When doing the second rep becomes a grind, extend the rest to 30 seconds. When the second rep becomes tough again even with the longer rest, move down to doing sets of 1 with 15-20 seconds of rest until you hit your total (20 reps) for the day. As you get stronger, you’ll be able to use more than two reps for your mini-sets, but be very gradual about increasing them. Monitor the time it takes you to complete 20 reps to gauge if your strategy is adequate. When you increase the reps per set, your total time should continue decreasing. Ideally, in 8 to 10 weeks you’d end up hitting the 20 reps in just two sets of 10 with about 20 seconds of rest. When that happens, you’ll likely be able to hit 15 good pull-ups in a row. Progression Method: 30 Total Reps, Then Add Weight Once you can complete 20 total reps in just two mini-sets with no more than 30 seconds rest, increase the target total to 30 reps and resume the progression. Eventually, when you can hit the 30 reps in just two sets with less than 20 seconds of rest, go back down to 20 total reps, but here’s the killer… add 15 pounds to your waist and resume the progression all over
Origin: Tip: Increase Pull-Up Power With This Simple Plan
Tip: Build Pecs with the Hex Press
 Pain-Free Pressing Lifters suffer from a lot of anteriorly directed shoulder pain. It happens when the head of the humerus is pushed too far forward in the glenoid fossa. It feels awful. This position is exacerbated at terminal horizontal abduction, elevation, and external rotation, which are all components of traditional bench press variations. But this can be avoided by using a squeeze press, even when you’re managing some nagging shoulder pain. The Hex or Squeeze Press Use dumbbells and squeeze them together as hard as you can throughout the concentric (lifting) and eccentric (lowering) portions of the lift. You’ll get a legit training effect without flaring up your shoulders. By forcing your shoulders and deep humeral and scapular stabilizers to initiate tension into internal rotation and depression, the head of the humerus will translate more posteriorly and will be more centrated in the shoulder socket. This positioning allows you to use internal tension and torque production through the shoulders and still train
Origin: Tip: Build Pecs with the Hex Press
