 1 – Add Some Instability Work… At the Right Time There’s a time and place for everything and that includes using some instability training for the chest. Here’s the only rule about instability training: Make sure you do your stable movements first so that your chest is pre-fatigued before you hit it with something unstable. If you haven’t tried it before, use the “hanging band technique.” If you don’t have a specialized bar, you can double up some loop bands and add kettlebells or plates, as seen below: Alternatively, you can use an unstable base of support by doing push-ups off a stretch band: You’ll find yourself struggling to maintain stability from four different directions (up, down, forward, and backward). 2 – Stop Counting Reps on Accessory Exercises After you’ve already finished your heavy barbell or dumbbell bench workout and are ready to move on to accessory movements (flyes, push-ups, banded exercises, machine work), use a rep range that actually makes you lose count. I’m not saying you need to be doing sets of 85, but high reps are your friend. If you’re strictly counting out sets of 6 or 8 reps on these exercises, you’re not going to build your chest much. Get some blood into the muscle bellies for once so you can get that insane pump you’ve only read about. Use these high-rep accessory exercises as a way to ease up on the shoulder joints, take advantage of superior isolation, and groove the movement patterns for efficiency. 3 – Use Cables for Flyes The classic dumbbell flye is perfectly fine, as long as you realize it forfeits a piece of your force curve. Remember, the chest fibers run in a generally horizontal fashion. When you hold on to a pair of dumbbells, the force angle follows that fibrous path – in theory at least – because of the movement pattern, but in truth, the force angle is directly downward, bearing on the shoulder joint. In other words, you’re attempting to do a horizontal movement using a relatively vertical load. To clarify, let’s exaggerate a bit. Imagine you were going to try flyes with 100-pound dumbbells. There’s a high chance you couldn’t perform a deep flye movement with that kind of weight because it’s just too heavy for the pattern. But, you COULD hold them there at the top of the lift for as long as you want because that position doesn’t stress the actual muscles. However, when you switch that force angle to a horizontal one – in the form of a cable flye where the cables are trying to pull your hands apart rather than the dumbbells simply pressing downward – it can act as a game changer for your activation levels. Not only does this better match the direction of the pec fibers for better quality reps that use more of the force curve, it also makes it much easier to keep good form, even when you’re losing steam. The video gives a demo of conventional incline cable flyes, but also shows an easy way to extend a set by simply converting the flye into a cable press to get some help from the triceps. 4 – Stop Ignoring Push-Ups Whether you want to do them one handed, two handed, using rings, a suspension setup, or with your feet elevated, the classic push-up affords too many benefits that many other movements can’t deliver. There just aren’t many people who are really good at push-ups who don’t have a great chest. That says something. Here are some distinct advantages that push-ups offer: Push-ups are healthier for the shoulder joint. They allow the shoulder blade to move around the ribcage as the movement progresses. This movement matches the upper arm’s change in position – scapulohumeral rhythm. Without it, we’d have gummy shoulders. This is particularly important because conventional bench press patterns force you to pin your shoulder blades back. Consequently, you don’t get a chance to train that healthy scapulohumeral rhythm as much as you need to. Push-ups help engage the serratus anterior, a muscle on the side of the torso that engages when the shoulder blades protract. Developing that muscle can keep your shoulders healthy AND really help finish off an impressive V-taper. Proper push-ups create plenty of time under tension that can’t be duplicated with other exercises. You’ll understand that when you crush repeated sets of 40. You shouldn’t be afraid to make a whole workout out of push-ups. You haven’t “graduated” from them just because you’re strong enough to press 300 pounds. Look at it this way: If you can’t do a set of 35 unbroken push-ups, then you’ve got work to do. No one should get to the point in their fitness where having proper control over bodyweight staples goes to shit and they no longer possess the strength or endurance to do them properly. Try This: If you really want to cook your chest, try super-setting push-ups and bodyweight deep dips. Do 12 reps of push-ups and then do dips to failure and see how many rounds you can get done in 25 minutes. When your chest and triceps are ready to pop out of your shirt, you can DM me
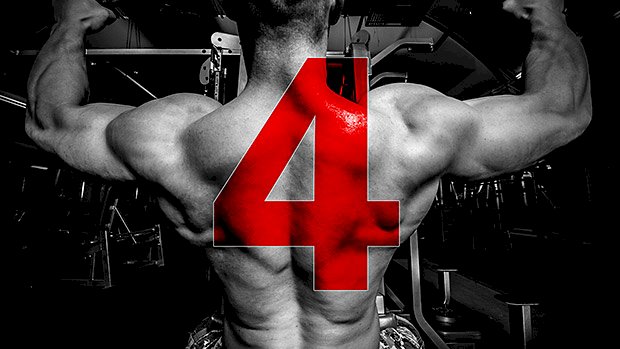
Origin: The 4 Best Ways to Reignite Chest Growth
Tag: Ways
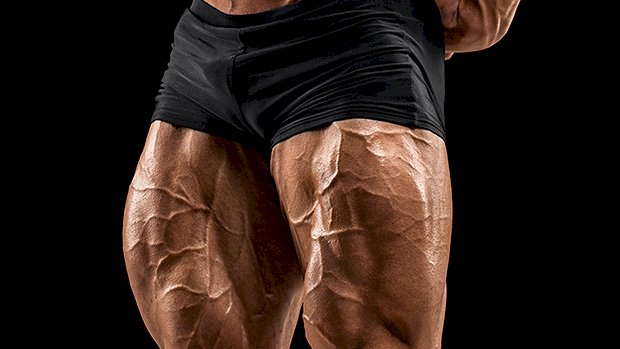
Tip: 3 New Ways to Blow Up Your Legs
 Whether you use a dedicated landmine device or you just shove a barbell into a corner (against a towel or even an old shoe), this style of training is worth adding to your program. These three variations will smash your lower body, but in a different way than you’re probably used to. Plus, this type of work has transferability to your big lifts. Getting jacked while being more functional? Win-win! Landmine Squat Unlike the goblet squat, the landmine variation changes the strength curve and actually turns the squat into more of a hip-dominant movement. Our society is plagued by lower back problems, which isn’t surprising given our daily postures. Extra work for the posterior chain is always a plus. This isn’t a movement for the faint of heart either. The loading capability will challenge even the most seasoned meathead. Build up to a heavy 8-10 rep set over the course of 5-6 sets. Landmine Reverse Lunge If you’re looking to change up your lunge variation, this is it. The landmine version affects the strength curve differently than a kettlebell or dumbbell pressed against the chest because of the biomechanics of the movement angle of the barbell. You’ll be surprised be the increased level of balance required as well. Try 3-4 higher-rep sets of 8-15 per leg. Single-Leg Landmine RDL The single-leg RDL is a challenging movement for just about anyone. It’s often used as an assessment tool and, as you can imagine, the loading capacity is quite low with it. But with the landmine variation, loading capacity is higher because the level of stability required is lower. Try 3-4 sets of 8-10 reps per
Origin: Tip: 3 New Ways to Blow Up Your Legs
Tip: 7 New Ways to Attack Your Core
 Adding an extra rep to your max bench press is exciting. Adding more reps to your max number of sit-ups? Not so much. After you’ve achieved a certain level of fitness, that’s just boring and unproductive. So how can you make your core training more challenging? Try these. They’ll not only make your abs look better, they’ll also teach you to develop full-body tension that translates over to your big lifts. Plank Plate Shuffle Grab three 2.5 or 5-pound plates. Stack them on top of each other. With your opposite hand, bring the plates over one at a time to the opposite side of your body. Work on not moving your hips at all. TRX Body Saw Set up the TRX so that when your legs are “in” you’re parallel to the ground. Push your legs back as far as you can without going into low-back extension. Sandbag Pull-Through This can be done in the push-up position or the bear crawl position. Pull the sandbag to the other side of your body without rotating your hips. Put a weight on your back to make this even more challenging. Plank Push-Pull In the plank position, instruct your partner to provide resistance as you push out, then again provide resist as you row in. No partner? You can use a cable station. Wall Plank Find a spot on the wall where you can put your feet up. Make sure your body is parallel to the ground and hold the plank position. Deadbug with Plate Grab a 25-pound plate and assume the deadbug position. Flex at your shoulders so the weight goes over your head. The further back the harder this will be. Make sure your low back stays in contact with the ground the entire time. Bring one leg out and hold. Try putting both legs out or strapping on leg weights to make this more challenging. Earthquake Bar Offset Isohold Attach a kettlebell to one side of the bar. Be careful that it doesn’t tip. Unrack the weight and resist side bending. This can be done with a regular bar as
Origin: Tip: 7 New Ways to Attack Your Core
6 Ways to Upgrade Your Back Workout
 There comes a time when you’ve done rows and pull-ups to oblivion and reach a plateau in strength, muscular development, or both. That’s when it’s time to think outside the box. These hidden tricks can help you do just that. 1 – Stop Moving Weight This may seem misleading. I’m not saying you shouldn’t resistance train. I’m saying you need to stop training with weight that you can actually lift. I just blew your mind, right? No, really, if you want to improve your strength and even your mobility, you’re going to get through your sticking points by using isometrics (trying to lift something that can’t be moved). The benefits: Isometrics allow you to apply maximum force without risking injury since the body isn’t changing positions under load (which is the most likely scenario for injuries). They strengthen a part of a typical force curve that traditional weight training would simply pass through. As an example, focus on shoulder flexion and extension isometrics to hit the rear deltoids and lower traps, thereby challenging the limits of your range. Watch me put Dani Shugart through the gears: Setting up a barbell with a heavy load on the pins in the rack is a great way to do both of these isometric exercises. Banking it against the back of the rack makes it even more sturdy. 2 – Pause for the Cause The above is all fine and good when it comes to the idea of trying to push something away from you (in this case, the loaded bar). When you pull something towards you and hold the end ranges, it typically exposes glaring issues of weakness that lifters have been overlooking for years. Adding a pause to a pulldown or row is a good first step in acknowledging that it’s a different ballgame. Beyond this, however, we can increase the octane by taking things back to fitness testing in 11th grade gym class. The flexed-arm hang was probably a piece of cake when you were 16 years old, weighed 150 pounds, and were unaware of good lifting technique. I remember being able to hold myself up there for close to a minute. Change the game and use proper pull-up mechanics, though, coupled with all of your added mass, and you have a whole new challenge that probably won’t allow you to do much more than a 20-second hold. If you’re not used to these, prepare for a world of intrinsic soreness for the next couple of days. 3 – Do Big Boy Rollouts Yep, they’re an ab exercise… until you use a barbell instead of an ab wheel and go out wide (think of your bench press grip). Then they become one of the greatest ways to torch your upper lats and teres muscles. They can be a game-changer for the constant tension they provide to the upper lats during both the eccentric and concentric halves of the lift. Bonus points: If you really want to torch the upper lats, then try supersetting barbell rollouts with snatch grip deadlfits. You can even use the same bar. Boom. 4 – Rock n’ Row If you want to engage as much of your back musculature as possible during your seated rows (or horizontal pulls in general), it’s imperative you add some movement from the hip joint. I call this “toprock.” By applying a little sway with a neutral spine, you’ll remain safe while keeping the emphasis away from the biceps and away from unwanted shoulder glide once the weight begins to get a little heavy. Think about it: The “intro to training” textbooks says the form police will arrest you if you keep anything other than a completely rigid torso when doing rows, but applying a bit of momentum is perfectly acceptable and isn’t “cheating.” This is me doing what I consider to be a standard set of heavier seated rows: As you can see, I’m maintaining good tension throughout the rep, and never is there any rounding of the lumbar (or thoracic) spine. And, as the video below shows, I believe this same principle should apply to all row variations, within reason: 5 – Isolate with Fisherman Rows Dumbbell rows are a staple in many programs for unilateral pulling strength and development of the lats. Unfortunately, there are plenty of people who might not have the right conditioning to use the classic single-arm dumbbell row without risk, and others who just plain struggle to get a handle on proper form and technique. For lifters with a history of lumbar issues, the last thing they need is a one-sided load combined with an uneven hip position, which is what happens when they place one leg up on a bench while the other stays grounded. Moreover, finding the right places to put your hands and feet to promote a level hip position to avoid the pitfalls can be frustrating. Even healthy lifters can have trouble finding a position that gives the proper amount of emphasis to the right areas. The major difference you’ll see right off the bat with the fisherman row is the fact that both legs are mounted on the bench, not just one. This immediately stabilizes the pelvis so you don’t have to spend time trying to finding the least objectionable hand, foot,
Origin: 6 Ways to Upgrade Your Back Workout
Tip: Easy Ways to Do the Hardest Ham Exercise
 Notorious Nordics Build larger, stronger, and more injury-resilient hamstrings with Nordic hamstring curls. People who perform Nordics experience fewer hamstring strains and other injuries, making this movement a valuable part of an athlete’s program. Be warned: Nordics cause serious muscle damage and deep soreness. Nordics are usually performed with a partner holding your ankles, but here are some alternatives when working out solo. A leg extension or hamstring machine will work well if there’s adequate space in front of the machine. The padded roller offers a perfect resting point for your heels. A Smith machine works great too if the bar can lower to the ground. Use a foam pad on the bar to rest your calves against. Load the bar with enough weight to hold it in place. How to Do Nordics Begin in an upright position with knees flexed to 90 degrees and heels or base of calves resting against the padded machine. Bret Contreras recommends dorsiflexing your ankles (raising the foot upwards towards the shin) to place the calves in an elongated position. Maintain neutral hips throughout the movement. Place your hands in front, ready to catch your body at the bottom position. Slowly lower yourself through the eccentric (negative) phase of the movement until you can no longer maintain control. Emphasize tension through your hamstrings during the slow negative. Absorb the bottom of the movement by decelerating your momentum in the push-up negative, then quickly transition into an explosive push-up. Re-engage your hamstrings by curling yourself upward as the push-up momentum brings you high enough to safely load the hamstrings with your bodyweight. Begin the negative portion of the next rep. If you don’t yet have the upper-body pushing power to propel the explosive push-up, decelerate the negative portion carefully and pause. Hand walk yourself back into the starting position and repeat negative-only reps. Take into consideration your bodyweight and torso length. Heavier and longer lifters will find this more challenging. Not strong enough yet? You can use a band to help out: A few individuals will possess the strength-to-bodyweight ratio to perform a full range of motion positive and negative. Use a weighted vest if you’re a bad-ass. Sets, Reps, and Sore Knees Aim for 3-4 sets of 5-8 reps. Begin conservatively to get comfortable and avoid disabling soreness. (After your first workout with these, you’re probably screwed regardless.) Increase as you tolerate more volume. Perform Nordics later in your workout to avoid massively fatiguing your hamstrings before lower-body compound movements. Don’t be afraid to use some padding for your knees. Focus on the pain in your hamstrings, not the pain in your
Origin: Tip: Easy Ways to Do the Hardest Ham Exercise
4 Ways to End Back Day With a Bang
 One of the things that separate the wolves from the sheep in the iron game is back development. It’s easy to train the stuff you can see in the mirror. It gives you the “warm and fuzzies” that come from immediate gratification. But some of the largest and most impressive muscular structures – with the biggest potential for growth – reside on the back side of the body. A guy who puts in years grinding away on his upper back and lats – embracing the aching stretches and the powerful pulls – will end up with a physique that ultimately blows away the one developed by the dude who’s just pressing, flying, and curling his way to mediocrity. So let’s get into the good stuff. Use these four lat-dominant finishers to level up your lat game and end your back day with a bang! 1 – The Rack Pull-Up Marathon Fellow T Nation contributor Paul Carter has sung the praises of rack pull-ups here before. If you’re after more width, this is a monster. This finisher uses the rack pull-up as the foundation and, from there, we’re just going to manipulate leverage and body position to create a nasty mechanical drop set. Set up a bar in a Smith machine or rack at upper-chest height. Set an incline bench out in front of you to prop up your straight legs. When you’re at the top of the pull-up, your thighs should be as close to parallel to the floor as possible. Then do the following: Rack Pull-Ups:max reps Modified Behind-The-Neck Rack Pull-Ups:max reps Modified Rack Pull-Ups:max reps Feet-Elevated Scap Depressions:max reps Use straps. Don’t take any rest between any of the above exercises, outside of what it takes to transition. On the second and third exercises, use as little lower-body assistance as necessary to complete the reps. 2 – Pulldown Lollapalooza This is an efficient mechanical drop set requiring only a high pulley and a rope attachment. You won’t even have to change the weight. Do the following: Straight-Arm Pulldowns:12-15 reps to failure (upright position) Straight-Arm Pulldowns:max reps (bent over position) Bent-Over “J” Pulldowns:max reps Hybrid Motorcycle Row/Face Pull:max reps Bent-Over Lat Pulldowns:max reps Take no rest between exercises. This protocol has a nice flow to it and you’ll appreciate the pump. 3 – Twelve Angry Reps If you have access to a dual-adjustable pulley or freedom-type trainer, give this one a shot. You’re going to hold the reps constant from exercise to exercise while also adding a bit of weight at each transition. Do the following: Straight-Arm Pulldowns:12 reps (use about a 15-rep estimated max weight) Split Stance High Rows:12 reps (add a plate beyond what you used in the first exercise) Half-Kneeling Lat Pulldowns:12-plus reps (add a plate beyond what you used in the second exercise) Half-Kneeling Lat Pulldown ISO Hold:for max time Take about 10 seconds or so to transition between exercises, recover just a bit and change the weight, with the exception of the last exercise where you’ll take 20 seconds to recover from the previous movement. 4 – DUDS (Double-Up Drop Sets) Don’t let the “DUDS” acronym fool you: they’re far from a dud finisher. Pick literally any lat pulldown variation and do this: Do an all-out set to failure (5 to 8 reps) Cut the weight in half and double the number of reps (10 to 16) Immediately cut the weight in half again and double the number of reps (20-32). If you need to take mini 10-second breaks to finish, go ahead. I’d suggest doing it on a well-designed pullover machine. When to Use These These are finishers. They’re not meant to replace heavier, progressive-overload back work. Start your back workouts with the big, basic exercises (rows, chin-ups, pull-ups, lat pulldowns, etc.) and chase rep and/or weight personal records. The four protocols above are metabolic-stress type work and should come at the end of a workout and only be done for ONE set. Don’t abuse these; maybe sprinkle them in every other week or
Origin: 4 Ways to End Back Day With a Bang
Tip: 3 Ways to Get Growing Again
 We get this (extremely vague) question often: “My gains have stalled. What do you suggest?” It’s tough to answer since we don’t know your main goals, your age, or even if you’re a girl person, a boy person, or one of those people who identifies as a lesbian parakeet. But here’s some general advice: 1 – Do the opposite. There are tons of great training programs here on T Nation, but the best one is probably the one that’s the most different than the one you’re doing now. Here’s an example. Back in 2005, not-yet-a-Dr. Chad Waterbury introduced a training system based around doing 10 sets of 3 reps. Not 3 x 10, but 10 x 3. And T Nation readers who adopted the program reported great gains in muscle and strength. Now, there’s more to the program than the set/rep scheme, but doing 10 x 3 was radically different than what most lifters were used to doing. It presented a new challenge, recruited motor units that had been largely dormant, ramped up force production and, in short, “shocked the system” and triggered new adaptations in size and strength. So take a look at how you’ve been training for the past few months. Now, do the opposite: Always do 12-15 reps? Then load up the plates and do 3-5. Always train super heavy for low reps? Then lighten it up and shoot for 60 seconds of time under tension for each set. (Set a timer and try not to poop out your spleen.) Always use barbells because “free weights are best?” Switch to a mostly machine-based program. Always do decline barbell presses? Do inclined dumbbell presses. Train 6 days a week? Train 3. Or vice-versa. You get the idea. Or just adopt someone else’s program. I know, the internet experts often advise people to avoid “cookie cutter” programs, but they can be valuable. Any program from the T Nation archives is probably going to push you harder than you push yourself. And it’s probably going to force you to try some new things. 2 – Do something that excites you. Several T Nation coaches have said it: Training very hard using a substandard program is better than lazily going through the motions on the “perfect” program. Take 6 weeks off from what you “should” be doing and train in way that gets you amped up. Maybe you’ve been training like a bodybuilder because hypertrophy is your main goal, but powerfully swinging around kettlebells looks damn fun at the moment. So do it. (We won’t tattle on you.) You’ll get better in other ways, and after a while you’ll be itching to do slow negatives, set-extending partial reps, and pump workouts again. 3 – Examine your diet. Keep a food log. After a week, figure out the average number of calories you consume per day. Now add around 300 to that. Take tape measurements all over your body. Log your rep PRs at the gym. Readjust that calorie number based on your progress over the next few weeks. Chances are, you just weren’t eating enough. Bonus: Get the edge with a good supplement. Still stuck? First, make sure you’re taking care of peri-workout nutrition. Consider Plazma™, Surge® Recovery, or Surge® Workout Fuel. Check out the details on each one. If that’s taken care of, read up on Micro-PA®. This will activate and amplify muscle cell protein synthesis. Take a serving one hour before your lifting
Origin: Tip: 3 Ways to Get Growing Again
The Yearly Test: 5 Ways to Access Real Progress
 Once you’re a seasoned lifter, tracking your progress can be challenging. It’s not as simple as adding 5 more pounds on the bar every week anymore, and odds are, you cycle through your lifts to help avoid overuse injuries and keep fresh. So monitoring progress from lift to lift is like comparing apples to oranges, which can make it difficult to know if you’re truly getting better. The solution? Test yourself periodically with a variety of markers comprehensive enough to give you feedback that matters. You likely want to build muscle and strength while being fit and healthy. This means there are more factors to consider than just one-rep maxes on the big three. Sure, if you’re a competitive powerlifter, then your absolute strength on those matter most. For everyone else, there are other qualities to measure and see where they stack up from one year to the next. What Qualities Should You Test? Strength It can be broken down into absolute and relative categories. Absolute strength is going to be the maximum amount of force you can apply, like a max lift. Relative strength is your strength compared to your size, like what you’d demonstrate during pull-ups or any bodyweight exercise. Muscle How much muscle are you carrying in relation to your bodyweight? This is as simple as getting a body fat test using calipers, bioelectrical impedance, Bodpod, or hydrostatic weighing. While they all have varying degrees of reliability, you’re looking for trends, so just use whichever tool is most readily available to you and stick with that to see how your body composition might be changing. Health Health means the absence of disease, and since we know keeping a relatively lean physique reduces disease risks, this gets covered to a large degree in the body fat test. Yearly blood work is also a good idea, but that’s outside our scope here. Fitness This is a term more open to interpretation. You could think of it as your ability to perform specific physical tasks. Michael Phelps was fit to swim but not to win the Tour de France. For our purposes, let’s think of it more in terms of conditioning. The specific activities you like to do could influence the way you test your conditioning and determine what events you’re fit for. But I’m a big fan of the 10/10 test (we’ll get into the details in a bit). It isn’t a sprint and it’s not a pure endurance event, but falls somewhere in the middle, making it a good bet for most people. The Five Tests Here are the tests you should give yourself each year (the week of your birthday is a good time) to know whether your training is yielding real results or if you just spent the whole year spinning your wheels. You can do them all on the same day if you’d like, or just do them all within the same week. Keep track of your results so you have something to compare to next year. 1 – Bench Press: Bodyweight x Max Reps One-rep maxes are great, but if you gain a bunch of weight, even if it’s not all lean mass, you’re also likely to increase your bench. If you gain 20 pounds and bench 10 more pounds than you did when you were lighter, does that really make you better? A better way to look at this is by taking your current bodyweight and lifting it for max reps on the bench. This will help you do a better job of assessing your relative strength, and you can make sure any mass you gain (or lose) positively impacts your performance. 2 – Chin-Up: Bodyweight x Max Reps Strength relative to your bodyweight wins out here. If you get too fat, your chin-up numbers are going to drop. If you add lean mass, it shouldn’t negatively impact your chins. In a perfect world, your number of bodyweight chin-ups would exceed the number of bodyweight bench presses you could do. This would help with shoulder health and indicate an adequate strength balance. If your chin-up numbers are less than your bench numbers, it’s a sign you need to focus more on pulling than pressing and/or review your diet and lose some fat. 3 – Front Squat: 3RM No battery of tests would be complete without a max strength test. You could make an argument that this should be a deadlift or back squat, but here’s why the front squat is a better option: Front squats are self-limiting; you either nail it or you dump the bar. When it comes to testing your back squat and deadlift, you can still complete less than perfect reps, which can skew your comparison from one year’s test to the next. You’re looking for real improvement, not how much you can cheat to improve your numbers. If you’re on the platform in competition, it’s all about winning, so hell yeah, do what you need to complete the lift. When it comes to testing yourself to see if your training has been productive, there’s no room for risk. Besides being self-limiting, you need a lot to go right to front squat heavy: ankle mobility plus a strong lower body, trunk, and upper body to keep tension and maintain a clean front rack. It checks a lot of boxes, which makes this the best
Origin: The Yearly Test: 5 Ways to Access Real Progress
6 Ways to Keep Getting Stronger
 Here’s what you need to know… All progression models have their limits. These advanced strategies will allow you to keep getting stronger. End every single workout with a few sets of your worst lift. Use contrast series lifting. Do a series of 3 sets of an exercise using different speed dynamics with moderate weight, light weight, and then heavy weight. Perform isometric holds. Pick up the barbell, bring it to the weakest position, and hold it there for 12 seconds. Use next-day isolation work. Do isolation work for the weakest muscle involved in your main lift from the preceding day. Do the lift you want to improve the most twice in your workout. Doing 4 sets of an exercise twice during a session will lead to greater strength gains than doing 8 sets in a row. The Double Progression Model The stronger you get on the big, basic barbell lifts, the more muscle you’ll grow. Period. And one of the best ways to do that is to use the double progression model. First you select a rep range. Let’s say 5 reps per set. Then you select a number of sets to perform, 5 for example. You want to do all 5 work sets using the same weight and your goal is to complete all 5 sets using your target rep range. When you can complete all your sets with the same weight at the targeted number of reps, you’re allowed to increase the weight at your next session. Not being able to get all your sets done with the upper limit of the range – for example getting 5, 5, 5, 4, 3 reps – is fine, but it means you don’t get to increase the weight at your next session. However, double progression has its limits, just like any other progression model. At some point you’ll need to use advanced strategies to keep getting stronger. Here are six of my favorite. 1 – End Every Workout With Your Worst Lift If your bench press is your worst lift and the one you want to improve the most, add 3-4 sets at the end of every workout you do (on top of your regular bench press work). The reason for this is that the neural adaptations tend to be greater for the last thing you do in a workout. That’s why I like to end the session with a few high quality sets of a key lift or physical quality. When your goal is to bring up one specific lift, especially if it’s been stuck for a while, this should be your go-to strategy. The minimal load to stimulate rapid strength gains is 80%, so that’s the weight you should be using for your daily, end-of-the-workout sets. Use this strategy for at least four weeks. Pick one lift you want to focus on and perform 3 to 4 sets at 80% of your maximum. The number of reps will vary depending on what you did during the rest of the session. If you did a heavy pressing session, you might only get 2 or 3 good reps with 80%. If you did squats or deads, your upper body will be fresh enough to allow you to get 5 or 6 reps. The key thing is staying at 80% for all of your work sets. Ideally you would not reach failure on any of the sets. This technique works by improving neural efficiency for the target lift. You’ll improve intra- and inter-muscular coordination, which will allow you to rapidly gain strength in that movement. Rapid strength gains should be sustainable for 4-6 weeks. By the way, since you’ll hit the focus lift every day, you’re bound to have some residual fatigue and you might not feel stronger right away. The gains in strength on the target lift will show up about 10-14 days after you stop doing this strategy. You’ll get a big performance gain seemingly out of nowhere! Note that this also works well for improved muscle growth. One of my figure girls made very rapid gains in glute and leg muscularity by finishing every workout with four sets of front squats for four weeks. 2 – Contrast Series Lifting I adapted this method from a technique used in track and field, both with sprints and throws. It consists of doing a series of 3 sets (with a normal rest interval between sets) of a movement using different speed dynamics. For example, when working with a bobsleigh Olympian, we did one 60m resisted sprint (speed parachute), one overspeed 60m sprint (towed sprint with overspeed device), and one normal 60m sprint. We did the same thing with shot putters – throwing an overweight implement, followed by an underweight implement, and finally a normal one. In both instances you would have a slower movement, a faster than normal movement, and a normal one. This leads to greater gains in power. You can use this the same approach with basic strength lifts: Set 1: Moderate weight (70-80%) using a very slow eccentric tempo (about 5 seconds on the negative) and a 2-3 second pause at the bottom of the eccentric while still under load (e.g., not completely in the hole in a squat, not touching the chest on a bench, or the floor on a deadlift). The concentric or lifting part is then performed normally. Do 2-3 reps. Rest 2 minutes Set 2: Light weight (60-70%) done explosively. Control the lowering portion but explode from the bottom, trying
Origin: 6 Ways to Keep Getting Stronger
5 Ways to Unlock Your True Strength Potential
 Lift Bigger on the Big Lifts You are only as strong as your nervous system allows you to be. Explosive exercises and plyometrics are central nervous system (CNS) primers. When programmed strategically, they can unlock your power and strength potential in the big lifts. And if you’re an athlete, they’ll increase your explosive performance and make you neurologically efficient. Here’s what to do before bench pressing, squatting, and deadlifting. These moves will activate the muscles you’re about to use, prepare your body for explosiveness, and reveal your true strength potential. Bench Press Primer Twitchy Seal Jack + Explosive Medball Press A1. Twitchy seal jack, 3-5 reps A2. Explosive bentover medball press, 3-5 reps Do 2-3 total supersets with 30-45 seconds rest between bouts. Many lifters struggle with barbell bench pressing because it causes shoulder pain. But if bench pressing causes pain, it’ll also hinder your power and strength under the bar. You’d perform better without the pain. The first thing lifters often do is try to gain mobility. But more mobility isn’t going to fix your achy shoulders. What will? More activation and central nervous system stimulation. Before bench pressing, do an explosive CNS primer superset. Pair the jack with an explosive medball press. It’ll activate postural stabilizers of the core, hips, and shoulders AND trigger the type of heightened neurological state that produces powerful, pain-free presses. How to Do It The jack is a game changer for your performance. Don’t overlook it because of its old-school PE class history. It’s a safe and effective preparatory movement you can do anywhere. For the horizontal press, using the seal jack variation (arms in front of the body) is better because it moves the shoulders in and out of an end-range stretch. This slight stretch revs up the nervous system, especially when executed fast and with precision. Start with your arms elevated up so they’re about parallel to the ground with your palms facing one another and your thumbs up. Explosively complete 3-5 seal jacks, really focusing on moving in and out of that end range quickly and changing direction as fast as possible at the shoulders. These are about quality, not quantity. After a few twitchy reps of seal jacks, move directly into the medball press. Using a lighter medicine ball between 6-12 pounds, hinge at the hips with a neutral spine and engage the glutes and core to stabilize. You’ll be exploding the ball into the ground as hard and fast as you possibly can for 3-5 reps. Try to press with rhythm on these to elicit a heavy neural response that happens with quick repeat bouts. Keeping the total reps low and the quality high, shoot for 2-3 supersets with 3-5 reps of seal jacks and another 3-5 reps of medball presses, then hit the bench. You’ll enjoy the carryover to explosive performance. Deadlift Primer Twitchy Jumping Jack + Medball Slam + Horizontal Jump A1. Twitchy jumping jack, 3-5 reps A2. Explosive overhead medball slam, 3-5 reps A3. Depth broad jump from box, 1 rep Do 2-3 total supersets with 30-45 seconds rest between bouts. Because the deadlift is a relatively “slow” movement to the naked eye, it’s easy to forget that this lift needs to be one of the most explosive in your arsenal if you want to get stronger. But since the deadlift is notorious for being a backbreaker of an exercise, people gravitate towards doing passive prehab work on their spine, hips, and shoulders to prepare for pulling, which is exactly what NOT to do when trying to train explosively with maximal torso stiffness. Instead, match the deadlift with a neural primer that helps create maximal stiffness at the core while generating an immense amount of force output and fiber activation. How to Do It The first movement in the giant set is the old school jumping jack that’s performed with twitchy explosiveness in and out of a lat stretch in the overhead position. Why the jumping jack for deadlifts? Easy. The lats are some of the broadest muscles in the body with huge splaying attachment points throughout the back of the rib cage, lower back, and pelvis. You need them for deadlifting. By tapping into their activation you can help achieve better stiffness in the shoulders and torso during pulls. Stick with 3-5 fast reps, coordinating the feet with the arms up overhead. The deadlift is based on a hip extension movement pattern, so you’ll also need to train it with CNS primer movements. The overhead slam is the perfect way to train triple extension (hips, knees, and ankles extending) in a coordinated fashion. The slam also requires you to be explosive in the overhead position, which places an emphasis on both the lats and torso. Focus on fully extending the ball up overhead with the entire body and coming into a powerful flexion to slam the ball as hard as you can into the ground for 3-5 reps with maximal velocity. The final step is to do a depth broad jump. This is a hip-dominant jump
Origin: 5 Ways to Unlock Your True Strength Potential
