 But after this solid foundation has been built, the opportunities for growth and progress are mental, not physical. Sure, you’ll always benefit from getting refreshers on a proper form, nutrition, and programming. But the real source of making gains, changing your body, and evolving your fitness lies in your ability to prioritize, motivate, execute, and repeat. And repeat. And repeat! Those functions are psychological in nature. Mental Skills 101 Psychological or mental skills are intentional thinking strategies that enhance performance, increase enjoyment, and promote persistence in pursuit of goals. Athletes commonly use mental skills for sport performance, and fitness professionals and enthusiasts can use them just as easily and effectively. There are a variety of mental skills, but three of the most widely used and studied are: Imagery/visualization Arousal/activation regulation Self-talk Let’s go over each one with a suggestion or two on how to implement them into your current training habits: 1 – Imagery/Visualization Also known as “mental rehearsal,” imagery is a skill that researchers have studied extensively in sport psych settings, and which has repeatedly been shown to enhance performance and make sports and exercise more enjoyable (Weinberg, 1981 and 2008). When you mentally rehearse, you create or recreate an experience in your mind. This could be an optimal performance from a real memory, or an ideal performance you’ve created with your imagination. Using sounds, sights, sensations, and even smells, you draw on your senses to experience success and to practice execution of a skill in your mind. You can use imagery before a workout or just before a specific lift or movement. If you compete, you can mentally rehearse on rest days, during warm-ups on practice days, and pre-performance during competition days. How to Do It Working on one of “the big 3” lifts? Or your pull-up? Visualize yourself executing it perfectly just before you practice. Let’s take the deadlift as an example. See yourself approaching the bar… planting your feet… getting your air… getting your hands on the bar and pulling the slack out… driving your heels down… pushing off the floor… finishing with the hips… Bam! Visualizing your lift can build confidence, prime your thoughts and expectations for success, and increase the practice (or “reps”) you get with the exercise. 2 – Activation-Regulation All of us have an optimal level of energy that helps us perform our best. Think of a scale of 0-10. If zero is almost asleep, super relaxed, and chill, and 10 is about-to-explode, crazy amped and way-too-anxious, what number represents the ideal level of energy for strength training? Is this different than the ideal energy level for cardio? How about while you’re at work or reading and learning? The point is that there’s a specific point along this 0-10 scale at which you’d perform your best, and you can engage in anxiety-reduction and arousal-inducing techniques to slow yourself down (or pump yourself up) in order to do your best. When the pressure is too high and you’re overly activated (nervous, jittery, anxious, panicky) the risk for error is higher and enjoyment is lower. When there’s not enough pressure, you may feel flat, fatigued, or unmotivated, which can lead to underwhelming effort and performance. How to Do It The next time you’re competing, or even performing an exercise that you want to improve on, assess your energy/arousal level on a scale of 0-10. Then, ask yourself what the optimal energy level would be. If the number needs to be higher than it currently is, you can increase activation by increasing your rate of breathing, listening to music that’s energizing, or giving yourself a pep talk. If the number needs to go down, you can try progressive muscle relaxation (PMR), wearing a heart rate monitor and attempting, with your focus and breath, to slow your heart rate 5-10 beats per minute, or creating a relaxation response (Benson Thinking only in extremes (all-or-nothing) thinking. Arbitrary Inference:Generalizing one negative comment or experience to be representative of everything in your life. Mental Reading:Presuming you know what others are thinking. Catastrophizing:Thinking that the absolute worst thing that can happen, will happen. Emotional Reasoning:Presuming that feelings are facts. “Shoulds”:Focusing on how things “should” have gone down, as opposed to how they actually are. Any of these thought patterns sound familiar? Also known as cognitive distortions (Beck, 1963), these styles of thinking often lead to discouragement, frustration, anger, sadness, and a slew of other negative emotions. When you’re discouraged and thinking negatively, you’re less likely to take a risk, push yourself hard, or persist with a challenging goal. Recognizing your own tendencies to think negatively is the first step. Once you’ve identified some problematic thinking, consider the impact those thoughts
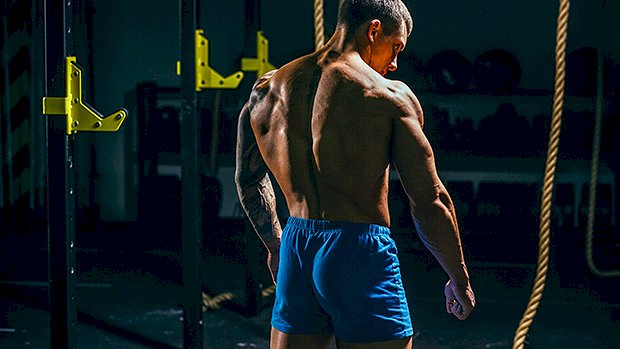
Origin: 3 Psych Skills for Strength Training
Tag: Training
Tip: Bodyweight-Only Backside Training
 Ignore the name. Gliding hamstring curls are more than just hamstring builders. This bodyweight exercise will light up your hamstrings, glutes, back, biceps and everything in between. The basic setup: Set some suspension handles (rings, Blast Straps, TRX etc.) off the floor around hip height. When you lay down and grip the handles, your shoulders should be clear off the floor. Next, drag over a bench or a box about a body length away from the handles. It’s important that the height of the box is about the same as your grip on the suspension handles. If the box is too low you’ll reduce the effectiveness of the exercise, while a box higher than the handles will further increase its intensity. Grab the handles, dig your heels into the box, drive your hips up, and then glide your butt towards the box. If your hamstrings are deconditioned then don’t be surprised if they cramp up. You have been warned. Use this basic setup if you’re only looking to blast your hamstrings, then progress to the single-keg variation: This is a good way to make your hamstrings feel like they’ve been savagely beaten for days afterwards. A good indicator is whether you can pull your butt towards your heels while maintaining the same degree of hip extension. If your hips are dropping as your hamstrings fully flex, you’re not allowing your hamstrings to be loaded in their fully shortened position. Go back to the basic setup and build some foundation. Ready for more? Add in an isometric row: To step it up a level and hit your entire posterior chain, try adding in an isometric row. Using the same setup as before, perform an inverted row (fat man pull-up) and hold at the top. Pull your shoulders back and flex your biceps hard. Then pull your butt towards your heels. That’s one rep. Although the row changes the angle of pull for the hamstrings, theoretically making it easier, due to the co-contraction of pretty much everything on your backside, the row makes it much harder. As part of a full-body workout, you’ll get a lot of bang for your buck with this one. Up for a challenge? Try this: Try going one leg at a time combined with an isometric row. This exercise can be challenging even for the most advanced athletes. If you can knock out sets of these straight away and live to tell the tale, then my hat’s off to you. Considerations and Progressions Each exercise can be made to work your hamstrings harder by increasing the height of the box relative to the suspension handles. By doing this you’ll somewhat be pulling yourself more vertically. However, if combining this with a row, you should consider how the height of the box will change the angle for your back. The simplest way to increase the intensity is to maintain the same setup, but use a weighted vest as your strength increases. There are more creative ways to increase the difficulty using resistance bands, but this ends up looking like a scene from 50 Shades of Gray. Personally, I’d go there, but you might not want to! If you don’t have access to suspension straps, these can be done in a Smith machine with your hands on the bar. They have a slightly different feel to them, but are still effective. Start with the two-legged versions, with or without the row. Once you can hit 12 good reps then try the single-leg versions. Once you hit 12 reps with these, consider adding extra weight. Try 2-4 sets of 6-12 reps as part of a full-body workout or some lower-body isolation
Origin: Tip: Bodyweight-Only Backside Training
German Volume Training – The Real Story
 Interested in trying German Volume Training? This is what lifters will often say about it: “German weightlifters used it to go up a weight class.” “Canadian weightlifter, Jacques Demers (Olympic gold medalist), built his tree-trunk legs with it.” “It was the go-to hypertrophy method of bodybuilding guru, Vince Gironda.” This all sounds really good, right? Well, not so fast. The Reputation of GVT Few training approaches in history are as well-known as GVT. It’s been used for close to 50 years and was popularized in the early 90s by Coach Charles Poliquin. It has a nearly mythical status, and few people question its effectiveness. All the dramatic anecdotes might have something to do with its popularity. The credibility of Poliquin, who brought it to the masses, also likely played a role. Its simplicity and mathematical elegance (basically, 10 sets of 10 reps) may have also had an impact on our perception. But while few people question its efficacy, I’ve rarely seen it live up to the hype. Full disclosure: While I hate doing GVT, I used to recommend it because I was brought up in the Poliquin coaching tree. I also created a program 20 years ago that was an adaptation of GVT (called Optimized Volume Training) and it was just as high in volume. I didn’t have the knowledge and experience that I have now. So, let’s examine GVT more in-depth to see if it’s a good fit for you. What is GVT? GVT is first and foremost a loading scheme. You do 10 sets of 10 reps with 60-120 seconds of rest between sets using 60 percent of your maximum on the lift. At first, the weight feels light for the number of reps prescribed. At 60 percent, you’d typically be able to perform 15 to 20 reps. But as you accumulate fatigue from set to set, the last three rounds are very hard. Coach Poliquin added the antagonistic pairing to GVT. In his variation, you’d do 10 sets of 10 reps on two exercises per session. This would look like an A1/A2 format: One set of A1. Rest 60-75 seconds. One set of A2. Rest 60-75 seconds. Then go back to A1. The cornerstone of each workout is two antagonistic exercises, each done for 10×10. In the Poliquin version Two assistance exercises would be added (B1/B2) and performed for just three sets of 10-12 reps each. Also, each muscle group would be trained directly once a week. The split would look like this: Chest and Back Quads and Hamstrings Biceps and Triceps Shoulders and Rear Delts Coach Poliquin also added the tempo variable. You’d do each set typically using a 3020 or 4010 tempo – lower slowly, lift fast(er), no pauses at the bottom. So a set of ten reps would last 50 seconds under load. These are the characteristics of modern GVT. But in reality, as long as we talk about 10 sets of 10 reps with short rest intervals, we’re talking about GVT. GVT in Theory The theory is that by accumulating a massive amount of fatigue, you’d stimulate more growth. You get an accumulation of fatigue due to the high volume, long time under tension for each set, and incomplete rest periods. You gradually build up more muscle fiber fatigue by repeating the same movement over and over so that the effort is very demanding on the last few sets. Simple and logically appealing. But does it hold up? GVT in Science: Two Studies Let’s first look at actual scientific studies that researchers did on 10 x10. 1. The first study by Amirthalingam et al. compared six weeks of 10 sets of 10 reps to doing just five sets of 10 reps. They used a three-day training split and mostly multi-joint exercises. (1) After six weeks, the five sets group had significantly more muscle growth and strength gains than the 10-sets group. Sure, the GVT group also gained size and strength, but less than the five-sets group. 2. In another study, researchers compared lifters doing five sets of 10 to lifters doing 10 sets of 10. Both groups used 60-80 percent of their 1RM over 12 weeks and found no significant difference between the two groups (2). The GVT group even started losing lower body mass between weeks 6 and 12. For strength and size, the five-sets group seemed to get superior results, but it wasn’t significant. Nevertheless, at best, it indicates that 10 sets is no better than five. (And if you need twice the work to get the same results, it’s an inferior protocol.) Another Approach Now let’s look at it through the “maximally effective reps” approach developed by Chris Beardsley. What are maximally effective reps? Reps in which you’re recruiting and stimulating as many muscle fibers as you can, mostly focusing on the growth-prone fast-twitch fibers. As early as 2007, in my book “High-Threshold Muscle Building,” I wrote how recruiting and stimulating fast-twitch fibers was the key to stimulating maximum growth. That’s because these fibers have the greatest hypertrophy potential. So you recruit all the recruitable fast-twitch fibers when you must produce around 80 percent of your maximum force potential at that moment. The wrong interpretation
Origin: German Volume Training – The Real Story
Nasty Ab Training
 At some point, you’ll need to add resistance to your ab training to build an actual six-pack. And if you’re like most (somewhat masochistic) lifters, you also probably like that burning feeling you get after a ton of reps. Ab exercises just aren’t satisfying without a strong mind-muscle connection. Drop sets for abs can help you achieve both. You’ll start with a heavier weight or percentage of your own bodyweight, then drop to something a little easier and continue until you reach near-technical failure. Here are five cruel ideas to get the juices flowing. 1 – “Lower” Ab Blast A1. Decline Bench Garhammer Crunch x 8-15 A2. Flat Garhammer Raise x AMGRAP Do three rounds of these. What does AMGRAP mean? As many GOOD reps as possible. Don’t keep cranking away with bad form. Garhammer raise variations are great for hitting the function of the lower portion of your rectus abdominis, working it hard in its active range (through posterior pelvic tilt). They were invented by sports scientist John Garhammer, PhD, and popularized by the late Charles Poliquin. Using them as a drop-set is a good way to combine a more challenging, higher load variation with an easier version. This means you’ll hit the golden rep range for building those abs, achieve a longer time under tension, and fatigue more motor units. If these are too easy, then straighten your knees more. You can also vary the incline of the bench (more incline = harder). Be sure to keep your toes pointed inwards and focus on working the active range at the top – think butt off floor. 2 – Athletic Obliques A1. Cable Chop (left): 8-12 A2. Cable Tight Chop (left): AMGRAP Rest 30 seconds A3. Cable Chop (right): 8-12 A4. Cable Tight Chop (right): AMGRAP Only rest between A2 and A3. Go straight from one set to the next. Then rest as needed before you start the whole thing all over again. Do three rounds. Cable chop variations are some of the most effective exercises for building an athletic midsection, making your abs as athletic and strong as they look. Chops help build an efficient power transfer between your lower and upper body, meaning they’re great for athletes. Adding rotation to your training is a must if you want a good set of obliques. Start with your standard cable chop setup. Keeping your elbows straight throughout, swipe the cable horizontally. Engage your core and hips in a powerful transfer of movement (think of the whip of a baseball swing). Once you’ve completed your set on one side, continue the set by “dropping” to a stronger chop position. A “tight” chop simply means your elbows are going to come in tight to your ribs. By bending your elbows and bringing the cable in you’ll be able to lift more weight, or in this case get in a few more reps. Complete a drop-set on one side before switching to the other. 3 – Leveled-Up Planks A1. Iso Row Plank (left): 10-30 seconds A2. 3-Point Plank (left): 10-30 seconds Rest 30 seconds A3. Iso Row Plank (right): 10-30 seconds A4. 3-Point Plank (right): 10-30 seconds Rest for just 30 seconds between A2 and A3, but for everything else go straight from one set to the next. Then after A4, rest as needed before you start the whole thing all over again. Do three rounds. Are you still busting out traditional planks like your life depends on it? Well, hovering a few inches off the floor on all four limbs probably isn’t going to get you where you want to be. Sure, the plank is one of the most basic of core exercises to develop muscular endurance. And while there’s a lot of evidence this can help you with low-back pain and posture, most of life doesn’t happen planted statically on your toes and elbows. Try increasing the intensity of your planks by adding load and throwing in an anti-rotation component. Resisting extension and rotation will carry over far better to just about everything, from walking to landing a right hook. It’ll also hit those obliques and QL’s (quadratus lumborum) harder too. With an iso plank row, using a wider stance will allow you to use more weight, but feel free to go narrower if you’re chasing more instability. Start with the weight, drop it, then keep holding. It’s that simple. 4 – Ab Rollouts… But Harder A1. Banded Ab Rollout: 6-10 A2. Ab Rollout: AMGRAP Do three rounds and use a band you trust! It’s hard to beat an ab wheel rollout. It’s crazy how something that looks like it belongs on a late-night shopping channel has now become a staple in many strength and conditioning programs. Rollouts require a strong eccentric “braking” action on the way down to eliminate a face plant. Then it requires a co-contraction of your abs, obliques, transverse abs and lats to execute in full. The only downside is the loss of tension and reduced difficulty at the top versus the bottom of a rollout. It’s much harder at the bottom. And while you could technically do a drop-set starting with a weighted vest, or even starting on your toes, using a resistance band helps accommodate
Origin: Nasty Ab Training
Tip: Eccentric-less Training For Size
 You might remember when I coached Daryl Gee for the Mr. Olympia. One particularity of his routine was daily “eccentric-less” training. It consisted of various forms of Prowler pushing and sled dragging. Remember, the eccentric phase of a lift is usually the lowering or negative portion where the muscles lengthen and stretch. Eccentric-less work removes that portion. If you think about pushing against a sled, each step forward against the weight is concentric. There’s no negative. I also used frequent sled work with a 63-year-old bodybuilder who was making a comeback. He wanted to get back into competing, but his knees were messed up. He couldn’t do any traditional lower-body exercises – no squats, leg presses, lunges, leg extensions, etc. He’d come to see me three days a week and we’d do various types of Prowler pushing and sled drags for his lower body. He ended up winning the overall against guys half his age and his legs were his best body part! He was also able to resume regular lower-body training afterward because his knees were fixed. Two Lessons From This Prowler/sled work is effective at increasing size or strength if you use the right parameters. This type of exercise can be done very often. Sled work is pretty much devoid of an eccentric load. As such, the amount of muscle damage created is very low. That means you can recover quickly. For hypertrophy, since you’re not causing much muscle damage, you must rely on other pathways to stimulate growth: Fiber fatigue Lactate accumulation The release of growth factors. All of these are maximized when the time under load is significant, but not so long that loading has to be light. So 30-45 seconds of work seems to work very well. If strength is your goal, opt for very heavy sets of 10-50 meters with an ideal distance of 30 meters. And, obviously, you can do sled work for conditioning. You can go as high as two minutes per set. I prefer to stay in the 50-70 second zone with either a challenging weight or a challenging speed. When you do frequent (even daily) Prowler/sled work, do one version per day for 3-4 sets. While very little muscle damage is done, you still use a lot of fuel when doing them, so you can end up releasing too much cortisol if you go too heavy on the volume. Note: The 63-year-old bodybuilder used 2-3 variations per workout, but that’s all he did on those workouts. If you add them to your sessions, select one variation per
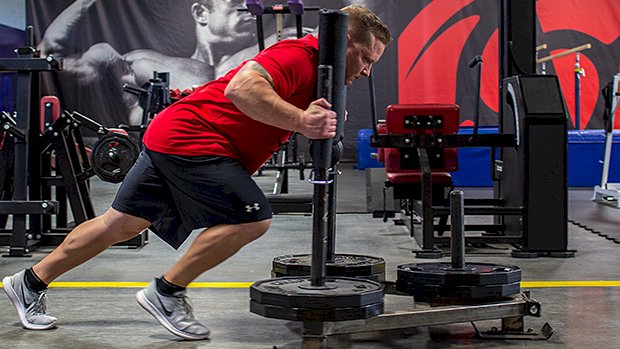
Origin: Tip: Eccentric-less Training For Size
Tip: Block Training For Beefy Abs
 Every Day Abs? My strategy for ab training? Using blocks of intense abdominal training where I hit them every day for 4-6 weeks. You can recover rapidly from pretty much any abdominal exercises except those full range GHD sit-ups you see in CrossFit. (This movement creates a powerful stretch of the rectus abdominis – especially when done with the speed they use – which will cause a lot of muscle damage, and require more recovery time.) Daily ab training at an adequate level of intensity is one of the fastest ways of improving abdominal aesthetics, provided you’re lean enough to show them. The “abs are made in the kitchen” mantra isn’t quite accurate. Abs are simply revealed in the kitchen: you must be lean. Building them through direct training will increase the likelihood of seeing them. It’ll also make it easier to see them at a slightly higher body fat level. For example, even when I’m at around 13-15% body fat I can still see a clear 6-pack because the muscle bellies of the rectus abdominis are so thick they create a contrast between themselves (the “packs” portion) and between the tendinous sections that separate them. In contrast, I’ve known plenty of figure competitors who don’t do loaded abdominal work (or any abdominal work) to avoid “making their waist bigger” who show no abdominal separation even at very low levels of body fat. Training abs with added resistance – so that you fatigue at 6-12 reps – is how you increase the thickness of the muscle bellies and increase abdominal separation. You also need to do your ab work the right way. Use this approach when training abs: Start by flexing the abs as hard as you can before even starting the rep. Imagine getting punched in the stomach. While maintaining the tension, initiate your rep. Don’t go up too fast. Focus on being able to maintain the tension. At the end of the concentric range of motion, once again try to contract your abs as hard as you can. They should already be contracted hard, but you likely can increase the contraction even more. Do the eccentric or negative while trying to maintain maximum muscle tension. I like to superset one loaded ab exercise with an unloaded one. You do 3 sets of one superset every day. A few suggestions: Option 1 Exercise Sets Reps A1 Seated Cable Crunch Facing Machine 3 6-12 A2 Swiss Ball Crunch 3 6-12 Note: The goal is to make each rep so hard that it’s impossible to get more than 12 reps. Option 2 Exercise Sets Reps A1 Seated Cable Crunch Facing Away From Machine 3 6-12 A2 Hollow Body Hold (Max time 30-45 seconds) 3 45 sec. Note: If you have other ab exercises you respond well to, feel free to use them
Origin: Tip: Block Training For Beefy Abs
Your Guide To Heavy-Light Training
 Look Great, Perform Even Better People that look and perform like muscular athletes usually do two things in the gym: They train to improve performance by driving up strength, speed, and conditioning. They use specific hypertrophy work to attack weak points and, ultimately, build a balanced physique. But the problem among most people is that they treat aesthetics (looking good) and athleticism (performing well) as mutually exclusive training goals. Fortunately, they don’t have to be – especially when you use and adjust the training methods of the late Olympic sprint coach, Charlie Francis. While Francis wasn’t programming workouts to help his athletes look better naked or bust a deadlift PR, his high-low principle is what kept them progressing without burning out. We can use the same idea to increase both performance and hypertrophy. Here’s an overview of what that looks like before I get into the details. Heavy-Light Training Overview It’s also called an “intensive-extensive” or a “high-low” training split. It bases workouts on the neurological demand of training. It places the highest-demand work on nonconsecutive days. The “heavy” or intensive days are when you do exercises that are more demanding on the central nervous system. For lifting, this can mean that the work is greater in complexity, has greater explosive demands, or requires max strength. The “light” or extensive training days are based on a higher volume and less weight. To keep the workout challenging without such extreme neural demands, this will mean creating more metabolic stress within your muscles. Four Benefits Of Heavy-Light Training 1. You get stronger and look better at the same time. This programming allows you to train muscles and movement patterns more frequently. For many lifters, this results in improved technique and, as a result, faster gains in strength compared to training a muscle or movement pattern once per week. You also get the bonus of consistency. Organizing workouts in a way that keeps you from digging yourself into a recovery hole will allow you to keep training and keep challenging your body without burning out. You can’t change your body composition or gain strength without consistent effort and that’s what this type of training guarantees. 2. You feel good and stay fresh from workout to workout. The reason this type of program works is because of its varying neurological demands, which keep systemic stress in check. You’ll be able to squat, deadlift, etc. more often, but you must vary the loading and volume to prevent excess fatigue. To understand it better you’ll need to know a couple things about the nervous system. Let’s cover that… Your nervous system has two parts: The central nervous system (CNS), composed of the brain and the spinal cord. The peripheral nervous system (PNS), all the remaining nerves and ganglia outside of the brain and spinal cord. Motor units consist of one motor neuron and all the muscle fibers it stimulates. When a signal is sent from the nervous system, it activates the motor unit. Then all the muscle fibers innervated by the motor unit are stimulated and contract. Each motor unit consists of a bundle of muscle fibers and a motor neuron. Small fibers are in small bundles and in control of smaller, finite movements. Large muscle fibers are in bigger bundles to generate maximum power and strength. So when you unrack a weight at 95% of your 1RM, your nervous system goes into overdrive, sending massive signals to your body to increase muscular recruitment. Motor neurons, and virtually every other nerve in your body, are constantly receiving information from other nerves. As a result, it becomes supercharged, recruiting more muscle fibers to execute the near-max squat, along with improving muscle fiber recruitment on subsequent exercises, making them more effective. That means lifting heavy all the time is best, right? Nope. If you lifted heavy every workout, your nervous system, joints, and tissues would start screaming at you before too long. That’s where this programming shines. It limits the overall stress you’re placing on your body by adjusting the demands on your CNS by varying load, speed, and intent of exercises. 3. You improve your technique. With heavy-light training you do each movement pattern more often than most training splits. When it comes to maximizing your performance, the more often you do a movement correctly, the more proficient you’ll become. Once a movement becomes more naturally and technically precise, your strength numbers can improve, driving up work capacity, which will lead to improvements in your physique. Remember when you first started deadlifting and you had to learn the mechanics of the movement? While you were deadlifting you’d think things like, “Don’t round your back and pull the slack out of the bar.” But with lots of repetition using good technique, you get the movement down pat. Reaching this state of “unconscious competence” in
Origin: Your Guide To Heavy-Light Training
Tip: How Limb Length Affects Training
 Can Limb Length Play a Role in Exercise Selection? Yes! Exercise selection is the most important training variable. Imagine if you’re a patient at the doctor’s office and the conversation went like this… Doctor:I’m going to prescribe you 200mg twice a day. Patient:200mg of what, Doc? Doctor:What do you prefer? Which medication do you feel like taking? It doesn’t make sense, right? Well it’s the same with training. Think of sets, reps, and training methods as the dosage and exercises as the medicine. While everybody will improve their body and performance by gradually becoming stronger on the big basics, simply doing those and nothing else will emphasize certain muscles over others, and might not end up giving you the result you’re looking for. Some people will get great pec development from the bench press while others will only grow their triceps and delts. Some will build tremendous quads from back squatting and others will build bigger glutes. Limb length relative to torso length helps determine which muscles receive the most stimulation. Here’s a general overview: Body Type 1 – Long Limbs/Short Torso Tend to progress more easily on pulling movements than on pressing ones Have an easier time getting stronger on the hip hinge/deadlift than on the squat Upper Body Pressing Pecs are the easiest to develop Delts are second Triceps are the hardest to develop Upper Body Pulling Lats are the easiest to develop Rhomboids, rear delts are second Biceps are third Upper traps are the hardest to develop Lower Body Training Glutes are the easiest to develop Hamstrings are second Quads are third Calves are the hardest to develop Body Type 2 – Short Limbs/Long Torso Tend to progress more easily on pressing movements than on pulling ones Have an easier time getting stronger on the squat than on hinging/deadlifting Upper Body Pressing Triceps are the easiest to develop Delts are second Pecs are the hardest to develop Upper Body Pulling Upper traps are the easiest to develop Biceps are second Rhomboid, rear delts are third Lats are the hardest to develop Lower Body Training Quads are the easiest to develop Calves are second Hamstrings are third Glutes are the hardest to develop All of this is true most of the time, but there will be some exceptions. (Arnold, for example, is long limbed and had huge biceps.) That info allows you to better select the assistance work you’re doing in a program by telling you which muscles will need added direct work. For example, I have short legs, so I don’t need any direct assistance work for the quads. They grow just fine by doing squats exclusively and I prefer to invest my training time on exercises that are actually needed to fix a weakness. However, I do need direct glute and hamstring work. You don’t need as much (if any) direct work for the muscles that are the easiest to develop, but you’ll need a lot more for those that are the hardest. Knowing this also helps us better select the big lift variations for our workouts. If I have long legs, the front squat will be better than the back squat for overall development. Why? Because with the back squat I’ll get mostly glutes and some hamstrings while with the front squat I’d stimulate the quads. A heels-elevated back squats would also do the trick. While there’s nothing wrong with good, smart programs you find on the internet, you should still give yourself some leeway in exercise selection: you can respect the spirit of a program while choosing better
Origin: Tip: How Limb Length Affects Training
6 Exercises for Pain-Free Shoulder Training
 When dealing with a shoulder injury or shoulder dysfunction, you’ve got one task (other than diagnosing the injury or guessing the source of the pain): Pick the right exercises to optimize the results as best you can while avoiding pain or excessive inflammation. Here are some options. 1 – Rack Viking Press Assuming your gym doesn’t have a Viking press machine, the rack Viking press is a great alternative. It’s a pain in the ass to set up, but if you’re willing to go to the trouble, it can be an effective way to load the shoulders while still being relatively shoulder friendly. Many lifters find the Viking press to be an effective way to get strong overhead while avoiding existing shoulder issues. The advantage? It allows you to change your pressing angle to one that suits your anatomy by adjusting the height of the furthest safety pin (the one the bar is pivoting on). Pressing either overhead or horizontally with a neutral grip offers some shoulder-saving benefits too. It limits elbow flare and offers a more stable position for the shoulder to press from. More neutral-grip pressing like this could be the one simple change you make that gives immediate benefits to your shoulder health and performance. 2 – Landmine Single-Arm Press When experiencing shoulder pain, limit the amount of work you do above 90 degrees of shoulder flexion, especially if it’s a pain trigger. The angle of pressing here is effective for hitting the shoulders while the neutral grip adds to the shoulder-friendly nature too. It’s not often mentioned, but the landmine offers another benefit to cranky shoulders. The thickness of the end of the bar is like that of a fat-grip barbell. Many who experience shoulder pain claim to have less pain when using a thicker barbell. We’re not sure why, but it might similar to what we see with bottoms-up kettlebell pressing where there’s an irradiation effect with increased shoulder muscle activation. 3 – Elbow Gripped Lateral Raise Iso Overhead pressing can be a pain and inflammation trigger, but so can more isolated shoulder exercises like conventional lateral raises. Switch to performing lateral raises in the scapular plane of motion. Instead of lateral raises to the side (frontal plane), try shifting the angle 30 degrees forward. Not only do the deltoid and supraspinatus have a more direct line of pull in the scapular plane, there’s also increased activity of the external rotator muscles. If using the scapular plane isn’t enough to ameliorate pain, then you can try gripping some dumbbells in your elbows and doing iso holds instead (see video). This works great for clunky shoulders, but it’s also an excellent option for anyone who just wants to get their shoulder pump on. Bringing the dumbbells in simply shortens the moment arm and takes the wrists and elbows out of the equation. This makes it kinder on the shoulders while also helping those who have dodgy wrists or lateral elbow pain (golfers elbow). If you really want to blow up your delts, try this: A1 Lateral Raises (Scapular Plane):12-15 reps. Superset with… A2 Elbow-Gripped Lateral Raises, Max Iso:Hold for as long as possible using the same weight. Repeat for 2-3 sets, then struggle with the steering wheel to drive home. 4 – Pronating Dumbbell Press Swapping a barbell with dumbbells is an easy way to help prevent pain because the dumbbells offer freer motion and more natural shoulder movement. The space underneath the acromion process is already pretty tightly packed when you go overhead, and using a stiff barbell with an overhand grip doesn’t help. That’s not to say a barbell military press should be labeled as bad, but like most everything else, it has a time and a place. While you’re experiencing pain, though, switch to dumbbells, along with choosing a neutral or pronating grip. Adding a 1-second pause at the bottom of each rep is also a good way to minimize shoulder stress while forcing more muscle contractile components to do the lifting. 5 – Accentuated Eccentric Landmine Push Press The angle of pressing here is also relatively safe for most, providing you’re okay with the explosive nature of this move. If you’re not ready for this, just scale it back a bit by pressing with two hands and lowering with one. You’ll still get the eccentric overload, but it’ll be a little less “jerky” on the shoulder. 6 – Eccentric Lateral Raise Start doing your lateral raises in the scapular plane as explained earlier, but then combine it with some eccentric loading and you’ll get one heck of a shoulder-friendly isolator. Bending the elbows on the concentric (lifting) portion shortens the moment arm from the dumbbell to the shoulder, making the weight a little easier to handle. This also gives you the chance to focus on lifting with the elbows for pure isolation of the delts. On the way down, the moment arm lengthens to a more disadvantageous position, weight-wise, thus providing some eccentric (negative)
Origin: 6 Exercises for Pain-Free Shoulder Training
Shock Training for Superhuman Power
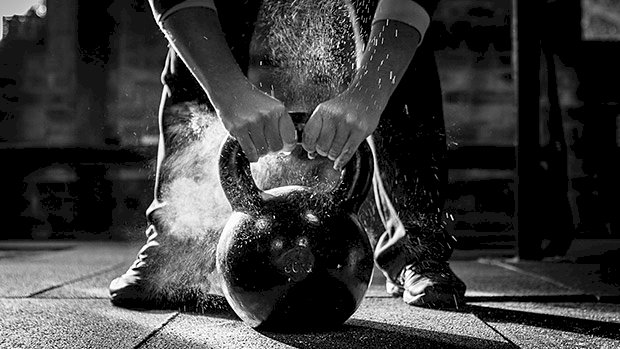 Although you’re probably tired of hearing about “secret” Soviet training programs, the Soviet track and field teams really were dominant in the Olympics. One reason is the work of obsessive sport scientist Yuri Verkhoshansky who created a hugely successful training protocol based on jumping drills. He’d have athletes drop from 60-inch boxes in what he called “depth jumps.” Specifically, an athlete drops off a box, lands briefly to absorb the shock, and then immediately jumps as high as possible, which led to a 14% increase in maximal strength among highly-trained volleyball players. Even so, I wouldn’t recommend them for most athletes unless they’ve got great squat form and strength. There are, however, safer alternatives. Lower Body Shock Training – Kettlebell Over-Speed Eccentrics We can activate the same beneficial mechanisms found in the depth jump with Russian kettlebell swings. How? By placing an emphasis on the downward (eccentric) portion of the swing. Instead of absorbing the weight of our own body, as we do in depth jumps, we absorb the shock of the kettlebell when it switches directions. The more we force the kettlebell down, the greater the plyometric effect. In the lab, Brandon Hetzler found that experienced kettlebell instructors could swing a 32-kilogram kettlebell back down with a force equivalent to three times their bodyweight. Most of the beneficial effects of kettlebell swings come from when we reverse force, so the more force there is to reverse, the more strength (and explosiveness) we’ll gain. Kettlebell swing over-speed eccentrics can be done in three ways. Accentuate the Eccentric:Normally, we let the kettlebell float into position and let gravity take it back down into our next swing. However, we can actively accelerate it downward by forcefully “throwing it” between our legs. Partner Assisted Downward Throw:In this scenario, we have a person stand on the side and push down on the kettlebell when it reaches the top. Band Assisted Eccentric:This version involves wrapping a band around the kettlebell and standing on the band. Once the kettlebell hits the top of the swing, the band accelerates the kettlebell back down. Don’t do these over-speed eccentrics with higher reps. You’re taxing the nervous system a lot more than you would with regular swings. Ten or fewer reps is a good rule of thumb. Upper Body Shock Training – Drop Push-Ups Verkhoshansky also created multiple apparatuses to create a similar “depth jump” effect with the upper body. Picture a bench-press type device that drops the weight down on top of you and then allows you to explode it up. (Please don’t try creating this type of gizmo at home as Verhoshansky’s device had built in safety features.) However, we can mimic this effect with drop push-ups. To do these, create a stable base of about 12 inches high, just outside your normal push-up stance. Position yourself atop the stable base. Drop off the base. Catch yourself (and simultaneously absorb some plyometric force) before you do a face plant. Explosively push up as quickly as possible (similar to the depth jump). Once the rep is finished, place both hands back on the base and start the next rep. An Explosive Program Doing this type of “depth jump” training can build enormous amounts of explosiveness. It can also serve as a nice adjunct to your traditional training by providing a bit more explosive power. For most people, I’d suggest doing the following program to break out of your plateaus. It takes about 6-10 minutes and should be done three times a week. A note of caution, though – this program is only for trained athletes who exhibit good control of their movements: On odd minutes, do 10 kettlebell swing over-speed eccentrics. On even minutes, do 10 drop push-ups. Continue back and forth for the prescribed number of rounds. On Mondays:6 rounds On Wednesdays:10 rounds On Fridays:8 rounds Why This Works There are three main reasons why kettlebell swing over-speed eccentrics and drop push-ups (and depth jumps, of course) build explosiveness and strength: Greater CNS Stimulation:The shock of the sudden reversal of force leads to greater muscular excitation. The more frequent the muscle nerves fire, the more strength you build. Myotatic Reflex:As the muscle lengthens, the muscle spindle is stretched and its nerve activity increases. Powerlifter Andy Bolton utilizes this reflex. He performs three hamstring stretches immediately prior to executing the lift, performing the lift on the execution of the third stretch. Neurogenic Effects:These occur when the time between stretching the muscle and the subsequent shortening decreases as the pre-motor cortex anticipates the shock. This means our reflexes get faster. In general, the more we do these plyometric-type movements, the more our body builds explosive power. This explosive power can help our absolute strength (deadlift), speed strength (clean), and pure speed (sprinting). Basically, we’re
Origin: Shock Training for Superhuman Power
