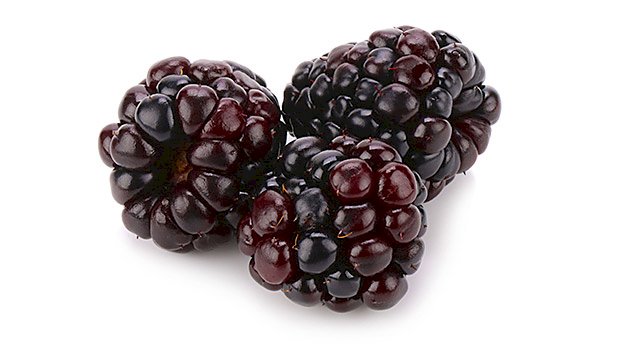
 The Manliest Meal Here’s a scenario for you female types: You meet someone you kinda-sorta like at the gym and you agree to meet him at the Outback Steakhouse for dinner. You, the bench-pressing, deadlifting, 100% woman that you are, order the Melbourne Porterhouse, cooked so rare you can put your ear to it and hear the sounds of the Australian prairie. But instead of asking for some equally bovine entrée, your date just orders the salad and nothing else: a plate full of lettuce, radishes, and carrots, accompanied with some small grouping of blueberries and strawberries. Now be honest. Didn’t your thighs suddenly clench tightly together? Didn’t an old, weather-worn sign proclaiming that “This here billabong has gone completely dry” suddenly pop up in front of your female parts? There’s no way you’d sleep with this, this… herbivore, right? He’s obviously a low-testosterone hamster, or rather, since you’re eating “Aussie” food, a gerbil, right? Well, get ready to be served a big Bloomin’ Onion of irony, missy, because a new study shows that your fruit-salad munching friend is more likely to be able to achieve and sustain a strong erection than the steak-eating guy who skimps on the plant food. Blue Berries Inversely Related to Blue Balls Researchers from the University of East Anglia and Harvard recently published the results of a large, population-based study in which they monitored over 50,000 men over the course of 30 years. The men were periodically asked about their ability to achieve and maintain an erection, tracking back to 1986. The study found that those who regularly ate foods rich in certain polyphenols (e.g., anthocyanins, flavanones, and flavones) had improved sexual function and were far less likely to suffer from any kind of erectile dysfunction. Foods that contain these particular polyphenols and that were prevalent in the diets of strong-erection men include blueberries, cherries, blackberries, and radishes. Encouragingly, the results were seen from eating what lead researcher Aedin Cassidy described as “just a few portions a week.” Strong Heart, Strong Penis It’s well known that certain polyphenols – anthocyanins and flavonoids in particular – are associated with a reduced incidence of diabetes and cardiovascular disease, and generally speaking, a good heart equals a good erection. After all, it’s all about hydraulics. So it stands to reason that if dietary polyphenols prevent or slow down the development of these diseases, you ipso facto get better erections. Of course, there are likely other mechanisms involved, too. Certain anthocyanins can activate the enzyme AMPK, which affects nitrous oxide systems, which in turn control the intensity and duration of erections. How to Use This Info It’s clear that ingesting certain polyphenols, most notably those found in blueberries, strawberries, blackberries, radishes, red wine, apples, pears, and citrus products, can improve erections and help prevent erectile dysfunction. Exactly how much you’d have to eat requires further study, but it looks like you could easily duplicate the benefits experienced by the men in this study by adding a handful of blueberries to your cereal or protein shake a few times a week. Alternately, you could go the supplement route to make things even easier. Indigo-3G® is an anthocyanin product that was designed to increase insulin sensitivity, but it’s also about the most concentrated form of the anthocyanins available and should go a long way in fortifying sexual function. Likewise, the product Superfood, which is a freeze-dried preparation consisting of 18 different fruits and vegetables, contains abundant amounts of the polyphenols singled out in the erection study. Oh, one more thing, and it goes back to the beef-tongue-in-cheek opening of the article: Steak eaters would have at least one turgid leg up over people who only ate polyphenol-rich foods and not animal flesh. The meat eaters get lots more vitamin B12 than non-animal flesh eaters in general, and B-12 is essential to strong erections. The take-to-bed message regarding erections is this, though: A strong and hale erection is indicative of overall health. It’s the flaccid canary in a coalmine, and if your canary is dead, failing, or flailing, start by shoring up your nutrition with polyphenols (and maybe even some more animal
Origin: Tip: The Best Foods for Sexual Health
Tag: Tip:
Tip: The Perfect Anabolic Drink
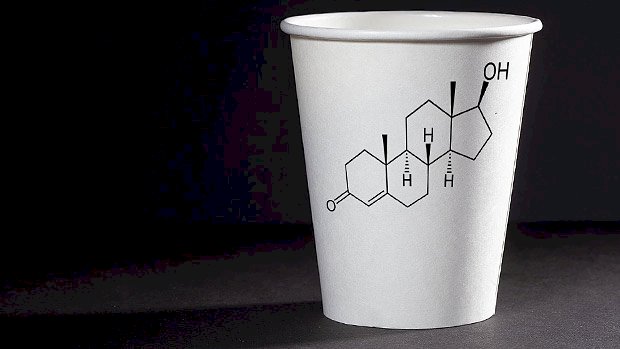 The Healthiest Drink in the World That’s it. The contest is over. We knew coffee lowered the risk of heart disease, thwarted different types of cancer, protected your liver, lowered your risk of type 2 diabetes, and made you live longer in general, but the results of a new study cinch it. Coffee, I’m naming you the healthiest drink in the world. Granted, your previous accomplishments were all praiseworthy, but when the American Journal of Clinical Nutrition reported that drinking coffee has been found to elevate testosterone while simultaneously lowering estrogen in both men and women, I ordered the cake, rented out the local Moose Lodge, sent out all the invites, and blew up all the celebratory balloons for your coronation. What They Did Epidemiologists from Harvard University looked at data from 15,551 women and 7,397 men who’d participated in the Nurses’ Health Study and the Health Professionals Follow-Up study. They wanted to know how drinking coffee affected C-peptide levels, estrone, total and free estradiol, total and free testosterone, total adipokinectin, high-molecular-weight adipokinectin, leptin, C-reactive protein, interleukin 6, and soluble tumor necrosis factor receptor 2, among other things. What They Found Compared with non-drinkers, subjects who drank four or more cups of coffee a day had lower concentrations of estrone (-6.4%), total estradiol (-5.7%), and free estradiol (-8.1%), while displaying higher levels of free testosterone (7.3% in women and 3.6% in men), and total testosterone (9.3% in women and 5.3% in men). Levels of C-peptide, leptin, C-reactive protein, IL-6, and sTNFR-2 all went down too, while levels of the fat-burning hormome adipokinectin went up (9.3%). The effects were dose dependent, meaning that while one daily cup of coffee had some beneficial effects, two cups worked better and three worked better still, while four or more cups showed maximum benefits. Perhaps surprisingly, it didn’t seem to matter whether the participants were drinking caffeinated or decaffeinated coffee – the effects were largely similar. The researchers concluded the following: “Our data indicate that coffee consumption is associated with favorable profiles of numerous biomarkers in key metabolic and inflammatory pathways.” How to Use This Info So what is it about coffee that makes it so damn healthy to drink? It definitely has nothing to do with caffeine, as this study and numerous others – including at least one that measured the ergogenic benefits of coffee – found that the advantages were conveyed equally well by decaf coffees. Instead, it likely has something to do with the over 1,000 biologically active compounds found in the drink, but while many of them are highly anti-inflammatory and anti-oxidative, there’s one that appears to be particularly gifted in those areas. It’s known as chlorogenic acid, or CGA. Therefore it makes sense that we should seek out brews that are particularly rich in CGA. Here’s how to make sure you’re getting the stuff that raises testosterone and lowers estrogen the most: Opt for Kenyan, Ethiopian, or Columbian, because coffee beans grown at high altitudes and near the equator have the highest amount of CGA. If you’re buying grocery store brands, opt for Dunkin’ Donuts Original Blend and McCafe Premium Roast Decaf, medium roast. As far as general CGA guidelines, keep the following in mind: Flavored blends don’t usually have a high CGA content because they typically use low-quality, low CGA beans (the artificial flavor negates the need for good-tasting, high-CGA beans). Light and medium roast coffees preserve CGA, while dark roasts destroy them (along with generating undesirable byproducts like acrylamide, the carcinogen found in French fries and potato chips). Use fresh ground coffee beans when possible. Pre-ground versions usually lack flavor and are short on CGA. Very fine grinds are the most healthful, but also the most bitter. Medium grinds have an acceptable amount of
Origin: Tip: The Perfect Anabolic Drink
Tip: Which Type of Milk Should You Drink?
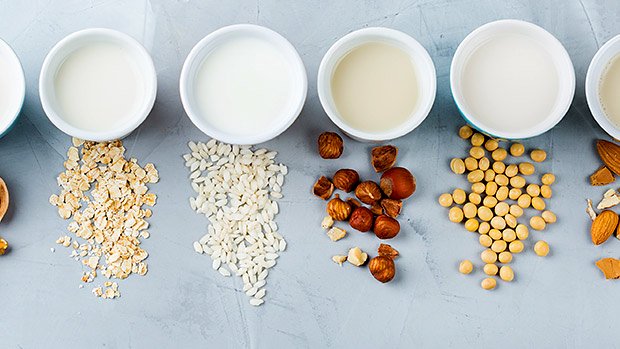 Let’s First Get One Thing Straight… Milk is what female mammals secrete to nourish their young, so calling the liquid you get by pulverizing any of various seeds, nuts, or fruits “milk” is hugely inaccurate. There are, after all, no soybeans, almonds, oats, or coconuts that lactate, even though the last one kind of looks like a hairy hooter. Regardless of what you call them, these plant-based juices are hugely popular. Just stand in line at your local Starbucks and see how many hamsters signal their nutritional virtue by ordering their lattes with one of these milk alternatives (as if replacing milk with a dollop of one of these sugar-saturated Frankenjuices is going to make a difference in their health). Any way you look at it, though, regular, whole-fat milk is nutritionally superior to all of the plant-based alternatives. There are, however, two completely valid reasons not to make milk your choice of liquid to pour on your cereal, mix in your protein drink, or whiten up your coffee – one, you’re vegan, which by definition rules out cow’s milk, or two, you’re lactose intolerant, in which case cow’s milk is your digestive enemy. I should also accept that many of you, because of pasteurization, the China Study, or maybe because it comes out of a cow’s lady parts, think that cow’s milk is what the devil dips his raspberry scones into and thus won’t touch it. Fine. Those delusions are, as they say, beyond the scope of this article. Regardless of your reasons, there’s one, possibly two, milk substitutes that make for a valid alternative to milk. They’re oat milk and cashew milk. A Bunch of Players But None of Them Starters The idea behind most plant-based milks sounds great. Sure, mash up some plant matter. Strain out the crap, add water, and fill up on pure plant nutrients, proteins, and fatty acids. Too bad it doesn’t really pan out that way. Take almond milk, for instance. It gives you none (or very little) of the benefits of almonds, which include proteins and good fats, and neither does it give you the benefits of regular milk since it lacks calcium. For one thing, each carton only contains a handful of almonds, and the handful in question is a wee, gnarled, arthritic thing that can only scoop up a couple of almonds without spilling them onto her orthopedic shoes. Not only that, but when you strain out the insoluble stuff from the “milk,” you lose most of the stuff you’d eat almonds for in the first place. Of course, manufacturers usually add calcium and vitamins A, D, and B-12 (along with a bunch of sugar, unless you get unsweetened variety), but you’re still getting very little protein – about 1 gram per cup, compared to about 8 grams for milk. It’s true, though, that almond milk is generally 50% lower in calories than cow’s milk since it lacks any significant amounts of fat and, since it’s not an animal product, it contains no saturated fat or cholesterol… if any of that matters to you. (Unsweetened almond milk is also virtually carb-free if that’s something you’re looking out for.) Few of the other milk substitutes fare much better as they each have their individual drawbacks. Pea protein milk is higher in protein than almost all of the others, but it’s not made with the whole pea and, as such, lacks the polyphenols that would make it a truly healthy drink. Plus, its second major ingredient is sunflower oil, which is rich in the omega 6 fatty acids that most of us already sop up too much of every day. Coconut milk tastes great as it’s just watered down coconut fat. It’s probably similar in nutritional value to some of the nut drinks, but it’s really calorie dense, especially if you choose a sweetened variety. Of course, if you want to cash in on MCT oils (of which all four varieties are present in coconut milk), drinking it is an okay strategy since approximately 60% of its fatty acid content is made up of MCTs. Soymilk, one of the pioneers of the genre, is higher in protein than some of the nut based milks, but it’s basically intolerable, taste-wise (unless you choose one that’s been sweetened up the wazoo), and it’s so pale and watery that I’m surprised they haven’t slapped a Coors label on it to expand their market. Another strike against soymilk is the possible presence of certain plant isoflavones that mimic estrogen and can, in the long run, create hormonal havoc in both men and women. That pretty much leaves us with oat milk and cashew nut milk. So Why Do Oat Milk and Cashew Nut Get a Pass? Most oat milks are made of nothing but oats, water (in the ratio of 1 cup of oats to three-fourths cup of water), sea salt, and a bit of rapeseed oil. Nutritionally, each cup has about 120 calories, 5 grams of fat, 16 grams of carbs (of which 7 are from naturally occurring sugars), 2 grams of fiber, and about 3 grams of protein. Compared to milk, that’s a little more sugar, a little less fat, and a lot less protein, but drinking milk alternatives for their protein is like eating rum
Origin: Tip: Which Type of Milk Should You Drink?
Tip: Is This Thing Worth Using?
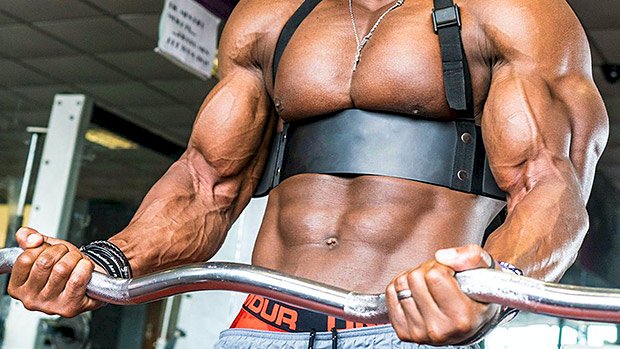 When you curl, the weight moves out in front of your feet and out of your base of support. Long, lanky arms amplify this problem. When the weights get heavy, your focus shifts away from your biceps to stabilizing your body. However, the old-school training accessory called the “arm blaster” fixes the problem. Benefits By resting your triceps on the arm blaster, you can focus on flexing your biceps. This gives you similar isolation to preacher curls without the added elbow stress at the bottom and loss of tension at the top. Tip: Resist the urge to let you triceps move off the arm blaster as you curl the weight up. Good Alternatives: No arm blaster? No problem! If you have long arms, curl with your back against a wall or do seated dumbbell curls on a back-supporting
Origin: Tip: Is This Thing Worth Using?
Tip: A New Angle on the Shoulder Press
 Heavy overhead presses are key for shoulder development. However, the anterior shoulder and triceps do most of the work. If you want your shoulder presses to be more posterior-delt dominant, give this angled shoulder press variation a shot. Set up on the lowest point on the cable machine and use no attachment. Using a staggered stance, position your body at an angle, keep your chest up, and brace your core. This setup will allow you to create enough tension for stability purposes. Position the handle in front of your shoulder. You should be feeling tension in your delt. Keep your elbow close to you. Press up along the same line of your body (at an angle), and reverse the movement to the starting position. This exercise is great if you have limited shoulder mobility or if you’re trying to target more of the posterior delt. It’s a great exercise for keeping constant tension on the muscle with moderate loads. Try this for 3-4 sets of 12-15 reps per
Origin: Tip: A New Angle on the Shoulder Press
Tip: The Figure-8 Farmer’s Walk
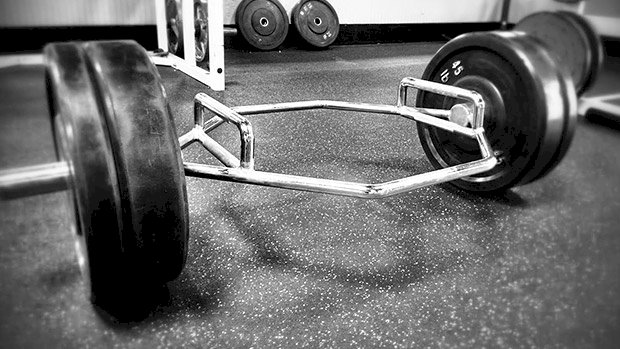 Farmer’s walks are a game-changer for total-body strength and size. However, there’s a good chance you don’t do them because your gym doesn’t have farmer’s walk bars or a nice long strip of turf to do them. Enter the trap bar figure-8 farmer’s walk. The Benefits Great for building your upper back and traps. Easy to load heavy. Unless your gym has farmer’s walk implements, you’ll quickly out-grow this exercise using dumbbells or kettlebells. They make turns easier. Even if you have access to farmer’s walk implements, you’ll find them very difficult to turn when the weight gets heavy. This can place a lot of extra rotational torque on your lower back. This isn’t a big deal if you have a nice long runway. With a trap bar, you can easily do a figure-8 pattern in a relatively small area. This gives you a practical way to lift heavy weight AND extend your time under tension. Tips Dig your hands into the handles in the set-up. Don’t just hold the weight – crush it! Maintain perfect deadlift technique as you lift the weight. Resist the urge to rush. A slow, controlled pace makes the turns easier, reduces your risk of tripping, and extends your time under tension. Keep your chest up even as you get tired. At the end of your set, stop your body and the weight, then lower under control (again, think proper deadlift form). Good alternative: Use heavy dumbbells or kettlebells – a temporary fix until you get your gym to buy a trap
Origin: Tip: The Figure-8 Farmer’s Walk
Tip: How to Get Your Very First Pull-Up
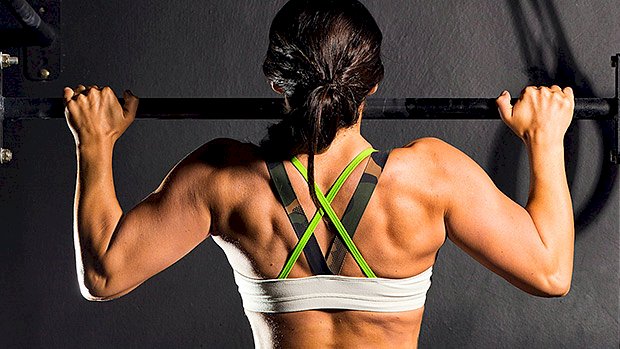 I remember how frustrating getting my first pull-up was. There were times just spent looking up at the bar and wondering why I simply wasn’t moving. The best way I found to finally get my chin over the bar was a combination of similar but easier movements, combined with variations which took away a lot of my bodyweight. Let’s break each of those exercises down: Australian Pull-Ups This is a horizontal row which gets you used to pulling your bodyweight. With your feet on the floor you can easily adjust the assistance you give yourself. The more horizontal you are and the further away your feet are from your hands, the harder it is. The horizontal position should make it a bit easier for you to engage your lats. Try to keep your body straight and not bend at the hip as you pull. Negative Pull-Up This uses the full range of motion of the pull-up, but in reverse! It’s no secret that the eccentric (negative) part of any movement builds a lot of strength, and pull-ups are no different. Learning to control that entire range on the way down will carry over to when you’re going back up. If you jump up and immediately start to fall, build yourself up to a comfortable 10-second hold with your chin over the bar (the “top” of the rep) before you start doing the negative. Low-Bar Pull-Up Like the Australian pull-up, you can adjust how much of your bodyweight you remove by assisting yourself with the feet. Ideally you want to be on the tiptoes or the backs of your toes rather than the ball of your foot, encouraging you to use as little assistance as possible. This is where your technique starts to come into play and you need to focus on engaging your lats for the pull, not using the biceps which is a common beginner mistake. (See A Quick Fix For Better Lats for more info.) Think about pressing into the bar from your lats or “bending the bar.” Play around until you can feel your lats working. Banded Pull-Up These often get a bad rap because when the band is at full extension it will give you the most assistance. This means you get the most help at the bottom of the rep which reduces the need for you to learn how to initiate the pull with your lats. However, they’re great for volume. You just need to be disciplined. Be hard on yourself and only use a band which will allow your 5 reps to be doable, but not easy. Even if you start to only get 3 or 4 reps on your last set, it’s better to push yourself here than simply be bouncing up and down on a band – that will get you nowhere. Eventually you want to be doing these with a very thin band. Once you’re getting close, attempt a rep or two without a band. You might just surprise yourself. The program is simple and organizes the movements into two quick sessions that you can easily fit into your gym schedule: Session 1 Australian Pull-Up:3×10 Negative Pull-Up:5×3 Session 2 Low-Bar Pull-Up:5×5 Banded Pull-Up:5×5 Adjust the assistance of each exercise to reduce your bodyweight so that you can complete all the reps. Your aim over time isn’t necessarily to increase the reps or sets that you do, but instead to improve the movement itself and slowly adding in more of your own weight. For example, you’d aim to get more horizontal on the Australian pull-up, go slower on your negative, use less assistance from your feet on the low-bar pull-up, and use a thinner band on your banded pull-up. Consistency is key. Bodyweight training can be tedious, but the rewards are very satisfying. Pull-ups teach you how to properly engage your lats and give you a ton of shoulder stability for any overhead
Origin: Tip: How to Get Your Very First Pull-Up
Tip: A Weird Way to Row
 The problem with the one-legged Romanian deadlift (RDL) is that it hasn’t traditionally been trained as seriously as it deserves. It’s a tremendous movement that can offer great benefits. But we also need to perform accessory work for the one-legged RDL. Ask any powerlifter worth their salt and they’ll detail the exhaustive work they do to support their main lifts, and the one-legged RDL is no different. So how do we support the one-legged RDL? What can we do outside of the exercise itself to promote better performance, specifically single-leg stability? Enter the split-stance row. Once you try it, you’ll wonder why it isn’t already a staple of your training. The Split-Stance Row Set up in some variation of a split-stance. My preference is the corner stance shown in the videos below. Aim to have your knee over your mid-foot. Split-Stance Dumbbell/Kettlebell Row The goal is for 95% or more of your weight to be on the front leg so it doesn’t turn into a balancing act. Use just enough rear-foot contact to maintain a stable position. If you’re using a dumbbell or kettlebell, you’ll row it on the lateral side of your front leg. If you’re using a barbell, you’ll center it on your front shin. From there, you just row. Do the opposite leg (and arm if you’re using dumbbells or kettlebells) on the next set. Once you’ve got the hang of things, you can make it spicy simply by increasing the angle of your front knee. Split-Stand Barbell Row How to Program It Split-stance rows are an effective way to prepare yourself for split-squats, lunges, or, of course, the one-legged RDL, especially if you’re a bigger guy and your own body weight is challenging. Four to eight weeks of these will substantially increase your readiness for more unilateral lower-body work. Keep the reps in the moderate range, 6-10 per set. Once you’re performing single-leg exercises like a champ, you can keep doing split-stance rows as an accessory move to build truly formidable single-leg strength. Of course, if you’re already primed for one-leg work, start doing one-legged RDLs as your primary movement and do split-stance rows as an accessory
Origin: Tip: A Weird Way to Row
Tip: How to Lift with Angry Joints
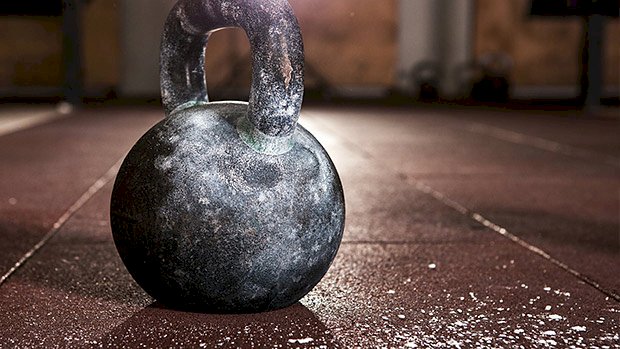
 Lift hard for long enough and you’ll eventually have some joint pain. Whether it’s the knee, shoulder, lower back, or wrist, something will probably flare up. Now, you could pop some pain killers and grind through it until your flare-up becomes a real injury… or you could do the smart thing and manage your injury. If you’re ready to check your ego, use some of these strategies. Increase Your Volume and Decrease Weight Your muscles may be able to take heavy daily lifting, but that doesn’t mean your joints can. Dropping the heavy lifting and increasing your reps will not only give your joints a break, it’ll allow your nervous system to recover while you shift focus towards muscle growth. The amount of effort you put into your workouts doesn’t need to change just because you’re going lighter. Taking shorter rests and increasing your reps will create more metabolic stress which will lead to greater hypertrophy. Also, higher reps will get the heart pumping hard which provides extra blood flow and circulation to your cranky joints. Partial Reps Partial reps create more time under tension and emphasize the “pump” when lifting. Limiting your range of motion to the middle two-thirds of your lift and avoiding the lockout will relieve excess strain on your joints. As an example, here’s the neutral, close-grip incline press: Use Bands as Upper-Body Assistance This can prevent excessive stress at the end range of motion on your pull-ups and push-ups. They’re a great way to add both higher volume and partial reps while allowing your body to be in constant motion for your calisthenics exercises. Banded Partial Push-Up Banded Partial Pull-Up Even if you’re capable of repping out 50 push-ups or 20 pull-ups, bands push your volume even higher and keep a smooth muscular contraction throughout your sets. Deload Your Spine for Lower-Body Work If you feel like you’ve shrunk a couple inches after compressing your spine with heavy squats, it may be time to deload. You can still work the squat movement without all the spinal compression. One of the best ways is with the belt squat. The belt squat takes the spine out of the equation because a belt is placed around the hips and the weight is applied from the waist down. No belt squat machine? Rig together your own variation. One way to do it is to use a couple straps, a hook, some boxes, a weight belt, and a heavy kettlebell or two. Kettlebell Belt Squat Ideally, keep your butt pushed against a wall. This will provide extra stability and allow you to use your glutes and hamstrings to a greater
Origin: Tip: How to Lift with Angry Joints
Tip: Strong Legs, Ready-For-Anything Knees
 Sure, some version of the squat and the deadlift should be staples of every program, but they only make you move in the sagittal (forward and backward) plane of movement. They don’t require you to go from side to side. This is a huge missed opportunity for athletes and weekend warriors. No one wants a blown ACL. You want to be able to trust your knees if you need to change direction sideways playing basketball or making a cut on the football field. And you never know when you’ll slip on ice or find yourself having to catch your balance when you’re in an awkward position. Adding simple exercises like the lateral lunge or the goblet variation will help your knees and keep your legs more balanced. Lateral Lunge Stand with your knees and hips slightly bent, feet shoulder-width apart. Keeping your head and chest up, take a slow side-step to the right. Keep your toes pointed forward. Keep the left foot in place and shift your weight to the right leg. Flex the right knee and hip into a lateral lunge. Keep your upper body upright or slightly bent forward. Pause at the bottom. A straight line should form between your right foot, knee, and shoulder. Push your body back to the starting position. Tip: You might not be able to get all the way down like you would with a normal squat. Cool. Go as far down as you can. Once you get a little better at it, add some weight with a kettlebell or a dumbbell. Goblet Lateral Lunge Use the same starting position and movement as the lateral lunge. Keep the weight tucked under your chin like you would for a goblet
Origin: Tip: Strong Legs, Ready-For-Anything Knees
