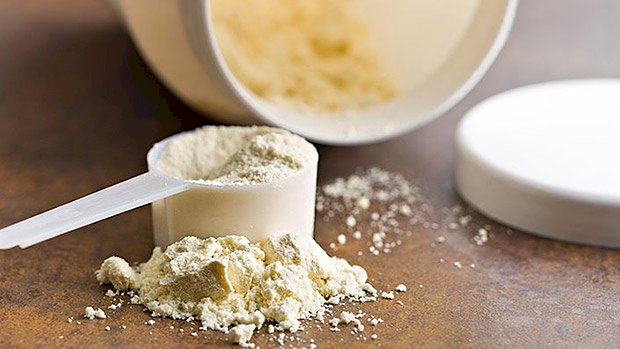
 Exogenous ketones – waste of money or worth it for some? I guess it depends on why you’re using them. Right now, they’re relatively new on the scene. There’s only very slight evidence they’re having an impact on performance enhancement, and very little (if any) evidence they’re aiding fat loss. Science is notoriously slow with answering these questions and that’s frustrating for all of us, especially when it means the overzealous people of anecdotes fill the void. Add an MLM (multi-level marketing) component to it and you have a big mess of novelty bias, research gap, bioscience, and monetary motivation to contend with. I will say this: If you’re using the keto diet to lose weight, the use of exogenous ketones does NOT make much sense. If you eat the ketones, your body sees no need to make its own ketones. You may still be in ketosis on your ketometer, but are those ketones you’re making from your own fat stores or from the stuff you just drank? Where they may have some utility is getting into ketosis faster, exercising under ketogenic conditions, and experiencing satiation. We know that protein is THE most satiating macronutrient. Some evidence suggests once the body starts making ketones they’re on a par with protein in satiating potential. Exogenous ketones may play a role in controlling SHMEC (sleep, hunger, mood, energy, cravings) in that all-important three days to get into ketosis. I call that the AKZ (the Almost Keto Zone). Most people who try keto can never get past these three miserable days and therefore end up getting fatter. They cut carbs and then binge within three days and repeat that cycle again and again. So, I think there are some possible beneficial areas to explore the use of exogenous ketones, but right now the science doesn’t substantiate the hype. It’s also useful to note that the ketosalts widely available currently have shown less potential in research compared to the ketone esters which, if I am not mistaken, are not available
Origin: Tip: The Truth About Exogenous Ketones
Tag: Tip:
Tip: The Stretch That Accelerates Gains
 Can stretching help you build muscle faster? Yes, if you use a certain type of stretching. What type? Weighted stretching. You’ve probably read about how loaded stretching increases activation of the anabolic mTor pathway, increases your active range of motion, and creates an occlusion effect that promotes increased blood flow and delivery of nutrients to muscle cells. So let’s take a look at one more benefit. Pre-Set Antagonist Weighted Stretching Most of the benefits of weighted stretching focus on the target muscle. For example, performing a bottom-range dumbbell press hold at the end of a chest workout. But what if we were to stretch the pecs right before doing a set of, say, rear-delt rows? What you get is increased active range of motion of your row, along with higher output and better quality muscle contractions. How does this work? It’s based on the agonist-antagonist relationship: For a muscle to shorten to the desired range, its antagonist must be able to lengthen to accommodate. Taking the example of the row, the pec minor has to lengthen to allow the rear delts to shorten. The rear delts are the agonist; the pecs are the antagonist. When the agonist shortens and contracts, the antagonist lengthens and relaxes. This is a slight oversimplification, given that the antagonist doesn’t always relax, at least not fully, but you get the idea. The exercise combos below have been thoroughly tested and work very well: 6 Ways to Apply This Method Clavicular Pec Weighted Stretch – Rear Delt Row Cue:Actively pull or “row” into the stretched position. Tip:If you’re not confident with a heavier loaded hold, do a wide flye stretch with a submaximal load. Sternocostal Pec Stretch – Lat Focused Pulldown Cue:Cue the elbows towards the base of the spine to keep them tight during the stretch. Tip:If you can knock out dips comfortably, you could also hold an isometric stretch at the bottom of a dip. Mid-Trap and Rhomboid Stretch – Pec Dec Flye Cue:Think about getting your shoulder blades to your pecs. Tip:Use a long rope in a seated cable machine or sit on the floor. Keeping the lumbar as neutral as possible, allow the T-spine to flex while simultaneously protracting as much as you can. Couch Stretch – Hamstring Curl Cue:Actively drive the stretching knee through the floor. Tip:If you want to intensify the stretch, reach the arm on the same side overhead and side-bend away from the stretching leg. Want to take it up a notch again? Do it under a squat rack and use a band to further increase the lengthening of the hip flexors. Weighted Biceps Stretch – Triceps Extension Cue:Think of pushing your elbow through your elbow “pit,” fully flexing the triceps. Tip:Set up the bench at an angle where you can get your elbows behind your torso without the shoulders rounding forward. A 40-50% incline is usually best. Anterior Tibialis Stretch – Calf Raise Cue:Simultaneously push your toes away from you while pulling your heels towards you. Think about creating a straight line with the top of your feet and shin bones. Tip:If you have bum knees, then an option is to use a rear-foot elevated split squat with active plantar flexion. Putting These Stretches Into Action These stretches are performed in one of two ways: A constant isometric contraction in the lengthened position of the antagonist with a moderate load. Multiple smaller holds of 3-5 seconds with submaximal loads. Use either method and allow 20-30 seconds between the weighted stretch and performing your working set. You should be able to shorten the target muscle to a significantly greater degree than normal, thus increasing your ability to maximally contract the muscle. Increased stimulus equals increased
Origin: Tip: The Stretch That Accelerates Gains
Tip: Forget Yogurt – This Stuff is Better and Badder
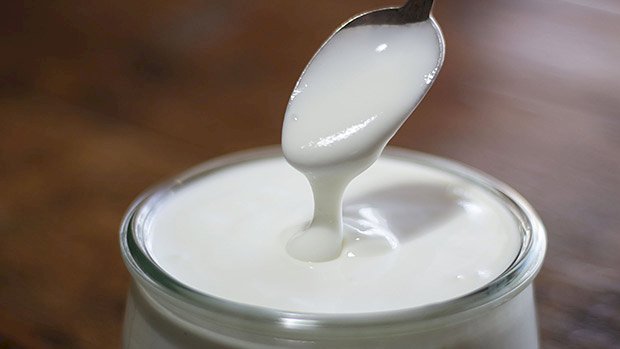 Yogurt’s been using me for years. She seduced me with her smooth, milky white body and delectably fruity bottom, whispering in my ear how good it’s gonna be, baby, when she fills me up with all her beneficial bacteria. I always end up letting her have her way with me and when I wake up in the morning, she’s gone. No note, nothing. I feel so cheap. And what’s worse, the bacteria she gave me are all gone too. That’s the thing with yogurt. Her supposedly beneficial bacteria are more or less transient. They hit our gut, hang around a bit, and then get bored. Then they take the next poop-Uber out of colon town. That’s why I’ve dumped yogurt’s fermented ass and found someone more faithful, someone who gives me a lot more beneficial bacteria than she ever did; bacteria that are faithful and are more likely to stick around. Her name is kefir, and I want to introduce her to both mom and you, in that order. What the Hell is Kefir? Kefir is a milk product made from starter grains of bacteria and yeast. The end product is a slightly sour, slightly fermented beverage that even most lactose intolerant people can drink. While it’s traditionally made from cow, goat, or sheep milk, you can make it from any type of plant-based milk (soy, rice). It can even be made from coconut milk or water to make coconut kefir, which should not be confused with the name of the stripper who lives below you in apartment 2B. The word itself comes from a Turkish word that means “feeling good,” and was traditionally made in skin bags and hung above doorways. Every time someone came through the doorway, they’d make like the bag was an annoying striker from an opposing soccer team and they’d throw a shoulder into it, thereby jostling the contents of the bag and ensuring efficient fermentation. What’s particularly cool about kefir is that it contains between 10 and 34 strains of probiotic, “good” bacteria, whereas yogurt contains only 2 to 7 strains. More importantly, as mentioned, some studies have shown that the kefir bacteria attach to the lining of the gut and form colonies instead of dying off or being excreted. That allows the kefir to change your microbiome for the better and affect all kinds of beneficial changes to your digestion and overall health. What Kefir Can Do For You While kefir doesn’t have a standardized nutritional profile, it’s safe to say that any kefir product is going to be high in calcium, magnesium, potassium, vitamin B12, vitamin A, biotin, folate, and lots of enzymes. Macronutrient-wise, a typical 8-ounce serving contains roughly the following: 160 calories 10 grams of protein 12 grams of carbs 8 grams of fat This is essentially the same as you’d find in an 8-ounce glass of whole milk, although kefir has a little bit more protein (about 2 grams). Aside from providing you with those nutrients and populating your gut with beneficial bacteria, kefir has the following superpowers: It builds a stronger immune system:Kefir contains an insoluble polysaccharide called kefiran that’s been shown to have antimicrobial properties, in addition to supposedly lowering cholesterol and blood pressure. It builds stronger bones:Okay, any milk product will do this as they all provide calcium and vitamin K2 (which aids in calcium absorption), but it’s worth noting nonetheless. It fights bowel problems and supports digestion in general:Kefir’s friendly and helpful bacteria have been shown to combat Crohn’s disease and irritable bowel syndrome (IBS). Likewise, taking it during and after antibiotic therapy can go a long way in preventing the gastrointestinal havoc the drugs often cause. It can fight cancer:Admittedly, it seems that nearly everything falls into one of two camps: Either something causes cancer or it fights cancer, so it probably becomes hard nowadays to accept something as a cancer fighter. Even so, kefir appears to have some special gifts in this area. A study conducted at the School of Dietetics and Human Nutrition at McGill University found that kefir reduced breast cancer cells by 56 percent as opposed to yogurt’s meager 14 percent. What’s It Taste Like? Kefir, like most anything else nowadays, comes in a variety of fruit flavors sweetened with a metric f-ton of cane sugar, but drinking anything else but the plain, unsweetened stuff is for kefir sissies. Besides, you can sweeten it up at home with artificial sweeteners, but the plain, unsweetened kind is by no means unappealing. It’s sour, I’ll give you that, but I think any adult palate can handle it, if not downright appreciate it. When you drink it, it gives the sensation of coating your entire stomach in a soothing embrace. It kind of reminds me of the time Homer Simpson drank melted candle wax to coat his mouth, esophagus, and stomach so that he could win a chili-pepper eating contest, but more nutritious and a lot less dangerous. How to Best Use Kefir I drink one 8-ounce glass of kefir a day, either divided into two servings or all at once. I sometimes
Origin: Tip: Forget Yogurt – This Stuff is Better and Badder
Tip: The Food That Fights Depression
 Is She Crazy? Nah, She Just Needs a Steak. Harvard Health Publishing estimates that 1 in 10 adult women in America are taking antidepressants. They’re the pumpkin spice lattes of the drug world – women just love them. Or at least their docs just love prescribing them. Maybe women are more prone to depression. Or maybe men are just too macho to admit they’re having mental health issues. Or maybe (just maybe) women are being prescribed powerful and often unpredictable drugs to combat what could just be a common nutritional deficiency. For example, could some depressive symptoms be “treated” with a couple of juicy sirloin steaks every week? The findings of a new study out of Australia point in that direction. The Study Researchers at Deakin University had themselves a little theory. They believed red meat might be associated with mental health problems, so they conducted a little study to prove it. Boy, were they surprised. They gathered up 1000 Aussie Sheilas (women-folk) and evaluated their mental health and red meat consumption. It’s was all very thorough and utterly boring, so let’s skip to the their conclusion: red meat HALVES the risk of depression in women. The Important Details The women who didn’t eat red meat were twice as likely to have a diagnosed depressive or anxiety disorder. Now, only a few were full-blown vegetarians and some of them didn’t even avoid red meat; they just didn’t eat very much of it. Most of the study participants ate plenty of chicken, fish, pork, and turkey. Now, remember, this was an Australian study. And Down Under the recommended intake of red meat (beef and lamb) is three to four small servings a week. They used that guideline to establish low, normal, and high red meat intake. Another consideration: Most Australian beef and lamb is grass-fed. It’s certainly not the same stuff you’re getting in your Taco Hell Burrito Gordito. The researchers (surprising even themselves) ended up recommending a few servings of lean red meat a week to stave off depression and anxiety. They guessed that the sad, anxious women just weren’t getting enough omega-3 fatty acids, which are important for mental health. On the flip side, they also suggested that eating too much red meat (more than the Aussie standard of 3-4 servings a week) may also lead to mental health issues, though they didn’t explain why. Wait! Did They Miss Something? It’s true that the anti-inflammatory actions of omega-3s may help relieve depression. Grass-fed red meat contains more good-for-ya fatty acids than grain-fed red meat. But is something else going on here? I think so. What the beef-denying women were also missing was IRON. The symptoms of low iron overlap remarkably with some of the common symptoms of depression. Regardless of whether it’s inadequate iron or low omega-3s, it’s clear that women need to be eating red meat, up to a few times per week. Just make some of that grass-fed if you can. If that’s not possible, go the supplement route for both iron and omega-3s. Look, depression can have many causes, and we still don’t understand everything about it. But let’s make damn sure we take care of the nutritional aspects first before we start popping questionable prescription
Origin: Tip: The Food That Fights Depression
Tip: The Best Way to Use Caffeine
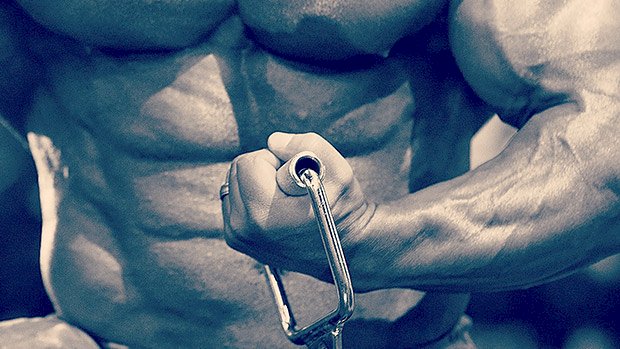
 It’s rare that PhD-types look at a bunch of studies and come out with some specific recommendations. They could demonstrate how a bunch of cats – when held upside-down from a height of two feet and then dropped – landed on their feet a thousand times in a row, but they still wouldn’t jump to any conclusions about how the 1001st attempt might turn out. Hell, you could waterboard the PhD’s to force a bit of kitty conjecture out of them and the best you could expect is for them to glug out a couple of terms like “sample size!” or “lack of controls!” That’s why this recent paper written by some-time T Nation contributor Dr. Brad Schoenfeld and colleagues seems a bit unusual. They conducted a review of the effects of caffeine supplementation on powerlifters and actually offered some useful, concrete recommendations on dosing, timing, and other factors that could benefit not only powerlifters, but also regular lifters and athletes of all kind. What They Did Caffeine is the popular drug of choice of competitive athletes – not because it’s the best ergogenic drug by any measures, but at least partly because it was dropped from the World Anti-Doping Agency’s list of within-competition banned substances. Powerlifters especially love it, though. As proof of their love, caffeine levels in urine samples of powerlifters and weightlifters in general have been found to be significantly higher than those of athletes from other sports. It’s no wonder since the drug can improve maximum strength by 3-4%, which, in the powerlifting world, might mean the difference between winning your weight class and being the guy who’s chosen to scrub out any suspicious stains from the other competitors’ singlets. Caffeine’s status and effectiveness obviously piqued the interest of Schoenfeld and his scientist friends as they scoured through nearly every study on the subject and filtered out some amazingly specific and useful advice. Here are some of the highlights from their paper: Caffeine Performance Caffeine may improve maximum strength from 3-4%. The evidence pertains specifically to the squat and bench press, but there’s no reason it wouldn’t apply to the deadlift, too. Caffeine definitely has positive effects on strength, but may also be useful for attenuating any fatigue-induced decline in muscle strength. Caffeine Dosing Optimal dosing is 2-6 mg/kg, although individual experimentation is needed. Repeated dosing may work better for competitions that are longer than two hours. This practice, using smaller doses of caffeine (2 mg. per kilogram) before each event, may maintain steady plasma caffeine levels. Caffeine Timing If using caffeine capsules, take them 60 minutes prior to event. If using cola or coffee, drink it 40 minutes prior to event. If using caffeine chewing gum, take it 10 minutes prior to an event. Caffeine Habituation and Withdrawal Lifters who habitually ingest a lot of caffeine might experience less of a strength boost from pre-competition doses. As such, they might want to consider a dose of at least 3 mg per kilogram or higher before a competition. The ergogenic effects of caffeine seem to attenuate after 20 days of consecutive use. This suggests that powerlifters might think about ingesting caffeine only before highest intensity training sessions or competitions to maximize performance. A common practice among powerlifters to maximize the effects of caffeine is to stop all caffeine consumption one week prior to competition and restart on the day of the competition. Too bad the literature doesn’t support it. Besides, caffeine withdrawal can lead to headache, fatigue, decreased alertness, and a depressed mood. It would work better, on competition day, to use the higher doses suggested above, in addition to limiting caffeine ingestion in general (morning coffee, coffee pick-me-ups) on the day of competition. How to Use This Info While Schoenfeld and the other scientists had powerlifters in mind when they compiled this info, anyone who isn’t restricted by the typical PhD’s unwritten code of silence would probably deduce that the findings probably hold true to lifters of all kinds. Training legs today and hoping to set a new PR in weight or reps? Pop a few pieces of caffeinated gum 10 minutes before your workout. The Military Energy Gum (MEG) sold on Amazon contains 100 mg. per Chicletty-looking piece. That means that a 200-pound lifter would need to pop two pieces before a workout to hit the low end of the scientists’ recommended dosage (2 mg./kilogram). Plasma levels of caffeine would peak quickly (with the gum) but would start to wane within an hour or
Origin: Tip: The Best Way to Use Caffeine
Tip: The No-Eye-Contact Butt Exercise You Need
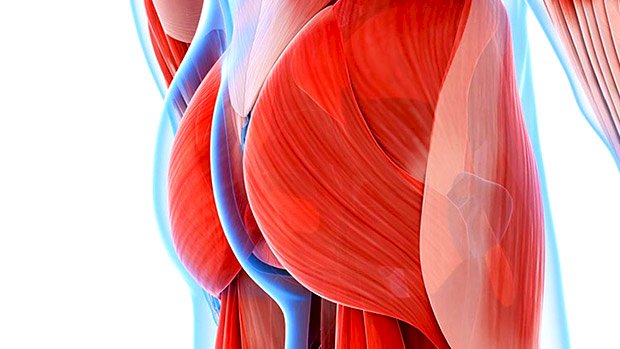 You’ve heard it before: Don’t make eye contact with anyone when using the abductor machine or doing the hip thrust. It’s just… awkward. Well, here’s another glute exercise where you might want to limit eye contact. It might come across a little “suggestive” but the kneeling thrust is a great high-rep backside builder. You’ll need a high-strength resistance band for this one, or double up some lighter ones. Attach your band to the bottom of a rack or anything that’s sturdy. Use a pad for your knees. Set the bench as far away as you need, depending on your band length and resistance. Once you’re in position, the execution is like a barbell hip thrust, but you’ll be kneeling. You’ll be driving your knees down into the pad while pulling down on the bench – a little like a straight-arm pulldown. The pulling-down part works twofold, both to offer support in front and to engage your anterior core. This affects what happens at your hips and further enhances the glute contraction. The bench assists somewhat. The support from the bench also encourages more of a bowing (hinging) movement. Additionally, you seem to get more “cock up” (posterior pelvic tilt) when there’s something to aim for… another reason to limit eye contact. Because band tension increases as it’s stretched, using a strong resistance band will help load your glutes in their fully shortened position. Here’s another way to do them with a band set inside a power rack: The benefits are the same, but this setup will allow you to double up your resistance band and get more load through your hips. Being positioned like this in a rack might provide you with more support. Where there’s more support, there’s more output. One final way to perform this glute exercise is with a set of cables and a dipping belt: The advantage of using the cable is in the constant load throughout the movement (as opposed to a band where the load is varied). There are merits to both forms of resistance, as well as drawbacks. If you’ve already got a monster-strong ass, the heaviest band available might not suffice. Using a dipping belt in the cables might be more uncomfortable or limit range of motion on the way back (if the belt is too thick). Experiment with different setups and see which one feels best. Programming High reps work best. Do 2-3 sets of 20-30 reps for an intense butt pump towards the backend of your workout. It’s no replacement for the big-daddy, barbell hip thrust, but it’s a great
Origin: Tip: The No-Eye-Contact Butt Exercise You Need
Tip: Fix Your Cranky Neck and Traps
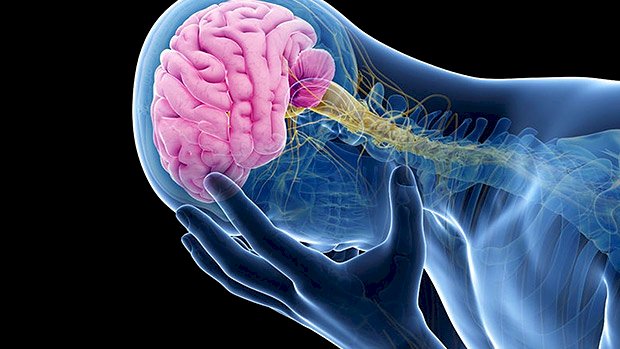
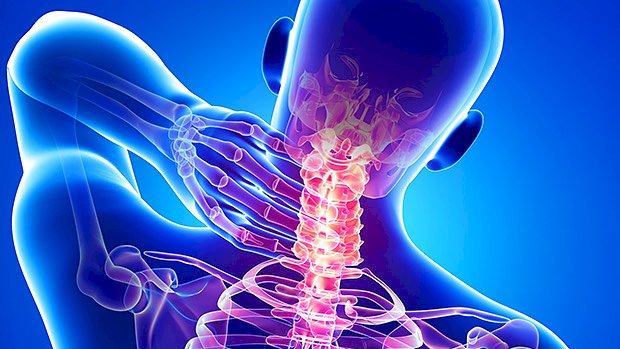 Whether it’s due to explosive Olympic lifting, tons of shrugging, or just straining under the bar, your neck can become irritated due to overactive traps. Although this is a problem in and of itself, it can also lead to worse problems down the road, like tension headaches or migraines. Your upper traps, after all, are attached to the base of the skull. Making things worse, overactive upper traps will “take over” during rows and other pulling exercises which will lead to poorly developed middle and lower traps, rhomboids, and lats. If you’re ready to ditch your neck pain, use these mobility, stretching, and strengthening exercises to loosen your traps and retrain your mid-back. Step 1 – Soft Tissue Work Begin your workout by doing a little soft tissue work on the traps. Releasing your overactive traps first is a must if you want to fix your neck pain. It’s tough to foam roll your traps, so try applying pressure with a barbell. Step 2 – Do Some Light Stretching Once you’ve released your bound-up traps, do the following stretch on your neck/traps to restore your range of motion. Side Tilt Neck Stretch with Shoulder Depression Attach one end of a band to a low anchor and the other end to your wrist to depress one shoulder. Use your other hand to pull your head in the opposite direction. First, bring your chin to your chest, followed by taking your chin toward the ceiling. Stay in the range where you feel the most tension. Step 3 – Strengthen and Activate the Mid-Back The goal here is to both depress and retract your shoulder blades. Strengthening and activating your mid-back will help balance out your upper traps. To make sure your mid-back is doing the work, you’ll want to go much lighter and do more volume than you normally would for these exercises. One-Arm Lat Pulldown Visualize your shoulder blade sliding down your back with each pull. The goal is to pull your traps down by activating your lats. One-Arm Seated Cable Row Visualize squeezing your shoulder blade so that it moves closer to your spine each time you pull the handle towards the bottom of your rib cage. This will keep the shoulder from elevating and the upper traps from taking
Origin: Tip: Fix Your Cranky Neck and Traps
Tip: The 10-Minute Mobility Sequence for Lifters
 You’re probably sedentary. Yes, you. Sure, you hit the gym often, but your joints remain relatively idle as you sit at work, sit in your car, and sit in front of the TV. Swinging your arms between bench press sets isn’t enough to keep your joints healthy and mobile for a lifetime. Can’t scratch your mid-back anymore? Your mobility has slipped. Here’s why mobility matters: Poor neck and thoracic mobility is a strong predictor of neck and shoulder pain (1). Increasing thoracic spine mobility improves forward head posture even when compared to direct neck exercises (2). Improving ankle mobility reduces knee and hip pain, enhances squat depth, improves squat mechanics, and prevents injuries (3). Improving hip mobility increases muscle strength because your nervous system inhibits force when it senses a lack of mobility (4). Improving mobility doesn’t have to be inconvenient. No need to spend an hour aligning your fairytale chakras in some yoga class taught by a hippie. Here are a few exercises you can do quickly to target the most important areas for lifters: 1. T-Spine Mobility You can do these drills literally anywhere: Kneeling T-Spine Rotation and Lateral Flexion Kneel down and place your fingers around your ears. Focus on keeping your hips facing forward. Rotate your chest/thoracic spine one direction. Slowly flex your spine laterally. Once no more range of motion can be achieved, come back to the starting position. Repeat on the other side. Dynamic Wall T-Spine Extension Place your hands fairly high and wide against a wall, window ledge, or Smith machine. Push your hips back as you lower your chest. Take a deep breath at the bottom as you feel the different segments of your spine arch. Flex your spine as you round your back. 2. Shoulder Mobility This is my favorite shoulder mobility drill. It also stretches the pecs while not allowing the spine to compensate. Dowel Dislocate on Incline Bench Lean against an incline bench while standing while holding a dowel or broomstick across your hips. Slowly move the dowel overhead, going as far back as possible while keeping your elbows relatively straight. Hold wider on the dowel if it’s too difficult and adjust narrower if it’s too easy. 3. Hip Mobility These hip mobility drills won’t leave any stones unturned. Hip Mobility Complex Take a seated position. Start with a hamstring stretch with one leg on your thigh, then transition to a “hugging pigeon.” Bring your hands back and go into both internal and external hip rotation. I also like to rotate my spine before coming back to the starting position. Repeat on the other side. Tactical Frog Get your legs into a frog position and your arms into a plank position. Thrust back and forth as you feel your adductors stretch. Drown out any thoughts of bystanders potentially judging you for humping the floor. 4. Ankle Mobility Both of these are wildly effective: Tripod Ankle/Calf Mobility Get into a tripod position with one foot stacked on the other foot’s heel. Drive your heel back as you stretch your calf, then bend your knee and maintain a dorsiflexed position. Repeat for reps before repeating on the other side. Stepback Weighted Ankle Mobility This exercise is harder than it looks, but it’s the best ankle mobility drill I’ve found. Grab some weights. Take one step back and keep both feet flat. Bend the knee of the back foot while hip hinging the weights down. You should feel your back ankle mobilizing. Repeat for reps on both sides. Programming These exercises can be done in a sequence for 3-10 minutes a day depending on your current mobility. The sequence can be sprinkled in during your warm-up, cooldown, or even between
Origin: Tip: The 10-Minute Mobility Sequence for Lifters
Tip: Two Rotational Exercises for a Powerful Core
 Photo Credit: Bear Fitness Rotational power is the forgotten component of most training programs. Whether you’re hitting, throwing, punching, or kicking, almost every sport requires some sort of rotational explosive ability. Use these medicine ball drills to develop a more powerful midsection. Partner Rotational Throw The person performing this drill should kneel with the knee closest to their partner on the ground and be turned sideways to their partner. Have your buddy perform a medicine ball chest pass to your outstretched arms. Brace your core and resist the rotation as you catch the medicine ball. Use your core to twist your body (keeping your arms relatively straight) and fire the medicine ball back at your partner. Bonus points if you knock him over. Don’t have friends? Try this one: Rotational Wall Throw Place your body to the side of a wall. Using your core, powerfully rotate and throw the ball into the wall. Brace your core and catch the ball as it comes back, resisting rotation. Pro Tip: Make sure the wall is reinforced and not drywall so you don’t piss off your local gym owner. Although these drills can be performed at any point during your workout, I’d recommend doing them before strength training. The force production will get your nervous system fired up and ready to lift
Origin: Tip: Two Rotational Exercises for a Powerful Core
Tip: Can You Shrink Your Waistline by Working Abs?
 So I’m doing a set of overhead dumbbell presses at the gym when I overhear a client complaining to her trainer that she needs to “shrink her stomach” for an upcoming high school reunion. Now get this, her trainer – a guy I know and normally respect – didn’t ask about her diet. Nor did he at least march her 10-years-past-high-school cheeks over to the treadmill. Instead, he leads her through a 15-minute ab routine consisting of incline sit-ups, crunches, and (groan), side bends. What’s annoying about this is that the trainer knows that all the ab exercises in the world aren’t going to do a damn thing about a midsection grown soft by a steady diet of wine, gouda cheese, and avocado toast. But then I started thinking about it. Maybe he doesn’t know ab exercises don’t result in spot reduction. And if he doesn’t know, how many other trainers and regular folk don’t know? Maybe it’s one of those myths that still persist despite all contrary evidence, like how you’re supposed to pee on your leg if you get stung by a jellyfish. So I was curious to see if there were any studies to either confirm (ha!) or, once and for all, disprove the notion that ab exercises lead to fat reduction around the waist. There aren’t many that deal with the subject, but the best one seems to have been published in the Journal of Strength and Conditioning a few years ago. Here’s what the researchers did and what they found. Consider it a public service announcement and send it to any trainers, friends, or acquaintances still suffering from Ab Exercise Delusion Syndrome. What They Did The researchers recruited 24 participants (14 men and 10 women) and randomly assigned them to either a control group or an exercise group. Anthropometrics, body comp, and abdominal endurance were tested before and after training. The exercise group performed 7 different ab movements: Bent-Knee Sit-Ups Lateral Trunk Flexion Leg Lifts Oblique Crunches Stability Ball Crunches Stability Ball Twists Abdominal Crunches Each exercise was performed for 2 sets of 10 reps. Subjects trained 5 days a week for 6 weeks. What They Found “Abdominal exercise did not result in change in measures of abdominal fat (android fat measured by DXA, waist circumference, abdominal skinfold) compared to the control group.” The exercise group did, of course, build greater abdominal strength and endurance, though. What This Means to You No matter how much we want it to be true, ab exercises won’t give you a Hymenopteran waist (that’s “wasp-like” to you non-entomologists). Women in particular should take note of this fact because legions of them have fallen victim to doing too much direct ab and oblique work. They’ve bought into the notion of spot reduction but sadly, it’s led to thicker midsections. Why? Because the more you train a muscle, the bigger it gets. That woman who wanted to “tone up” her stomach for her class reunion that I mentioned in the intro? By working her abs hard and long, she’ll likely have even more trouble fitting into that floral bodycon number she picked up at Dress Barn. And, okay, maybe that slightly thicker waist is okay with her when she’s lean, but when she puts on even a little fat, she’s going to look even less hour-glass shaped than before. If you’re like most women, you want a flat, tapered waistline. You get that through a combination of diet, metabolic conditioning, and whole-body exercise – not by doing countless ab exercises. Unless you want your abs to stand out in sharp relief, you should work them briefly, infrequently, and probably without any additional resistance. If, however, you want your abs to pop (like most men), you can add resistance and train them like any other muscle group so that they’ll grow and say
Origin: Tip: Can You Shrink Your Waistline by Working Abs?
