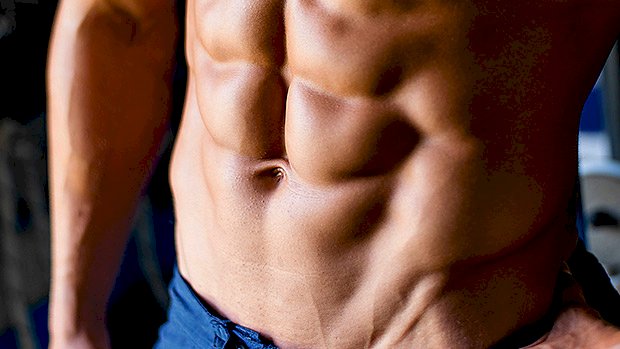
 Drop sets are always part of a bodybuilder’s program, but you don’t see them used often for ab training. Well, you should. As a refresher, a drop set is where you start with a heavier weight or percentage of your own bodyweight, then drop to something a little easier and continue until you reach near-technical failure. Here’s one way to do it for abs: The “Lower” Ab Blast A1. Decline Bench Garhammer Crunch x 8-15 A2. Flat Garhammer Raise x AMGRAP Do three rounds of these. What does AMGRAP mean? As many GOOD reps as possible. Don’t keep cranking away with bad form. Garhammer raise variations are great for hitting the function of the lower portion of your rectus abdominis, working it hard in its active range (through posterior pelvic tilt). They were invented by sports scientist John Garhammer, PhD, and popularized by the late Charles Poliquin. Using them as a drop-set is a good way to combine a more challenging, higher load variation with an easier version. This means you’ll hit the golden rep range for building those abs, achieve a longer time under tension, and fatigue more motor units. If these are too easy, then straighten your knees more. You can also vary the incline of the bench (more incline = harder). Be sure to keep your toes pointed inwards and focus on working the active range at the top – think butt off
Origin: Tip: Garhammer for Strong Abs
Tag: Tip:
Tip: The Oblique Exercise You Need
 Cable chop variations are some of the most effective exercises for building an athletic midsection, making your abs as athletic and strong as they look. Chops help build an efficient power transfer between your lower and upper body, meaning they’re great for athletes. Adding rotation to your training is a must if you want a good set of obliques. Try this drop set: A1. Cable Chop (left): 8-12 A2. Cable Tight Chop (left): AMRAP Rest 30 seconds A3. Cable Chop (right): 8-12 A4. Cable Tight Chop (right): AMRAP AMRAP means “as many reps as possible.” Just make sure they’re GOOD reps. Only rest between A2 and A3. Go straight from one set to the next. Then rest as needed before you start the whole thing all over again. Do three rounds. Start with your standard cable chop setup. Keeping your elbows straight throughout, swipe the cable horizontally. Engage your core and hips in a powerful transfer of movement (think of the whip of a baseball swing). Once you’ve completed your set on one side, continue the set by “dropping” to a stronger chop position. A “tight” chop simply means your elbows are going to come in tight to your ribs. By bending your elbows and bringing the cable in you’ll be able to lift more weight, or in this case get in a few more reps. Complete a drop-set on one side before switching to the
Origin: Tip: The Oblique Exercise You Need
Tip: Best Deadlift For Leg Size & Back Health
 You’ll need a dual-adjustable cable machine like the one in the video. Something like a Cybex Functional Trainer or a Keiser Functional Trainer would work. You’ll also need a bar-style cable attachment. (If you don’t have one of these attachments, you’ll see a workaround below.) The attachment should be set just off the floor. Pick it up and step back a foot or two, which will change the angle of pull from the cable. Engage your lats, push your hips back, and allow the bar to travel in toward the cable machine. Once your hamstrings have gone as far as they can handle, return to the start position. Just think of it as a traditional RDL, but you’ll be forced into a slightly different movement to compensate for the direction of the cable. If you don’t have access to the type of cable attachment shown, here’s an effective way to do it using a barbell. Combo Hamstring RDL Here’s a closer look at how the cable is attached to the barbell using a common handle. (Ankle attachments will also work.) When using the combo (cable and barbell) version you’ll also need to account for the extra weight of the bar. This adds another element to the exercise, where on top of the more horizontal cable load you’ll also be adding to the vertical. You can add weight to the bar here, but keep in mind how this’ll affect the overall profile of the exercise. There are some merits to doing this, but for now let’s stick to the exercise in question where the majority of weight is coming via the cable stack (two cable stacks, technically). Why They Work Due to the cable angle, the exercise is designed so that your hamstrings are likely to give out well before your back does. Your hamstrings are taken into a fully lengthened position under load, while your low back will feel like it’s on vacation. Theoretically, there’s very little sheer or compressive force coming through your lumbar region, while there might even be a little traction of the spine as you reach into the bottom position (depending on the height of the cable). These Romanian deadlifts are anything but an ego lift. They prioritize tension through the targeted muscle. This is good news if size is your priority. When it comes to hypertrophy, your muscles don’t give a damn how much your ego is lifting. Tucked away by layers of connective tissue and skin, they’re blind to what goes on outside. They do recognize tension though – and you’ll get plenty of it with this exercise. You’ll also notice that as your toes get pulled into the floor (resisting dorsiflexion), your calves will become more active. This co-contraction of the gastrocnemius adds to the effect and will make things even harder for your hamstrings. Programming Try these in place of your regular deadlifts as a way to vary the training stimulus or work around a tricky back. They’re also a useful alternative to exercises such as 45-degree back extensions, reverse-hypers, pull-throughs and the like. Sets and reps should be
Origin: Tip: Best Deadlift For Leg Size & Back Health
Tip: The End of Shoulder Pain
 When focusing on upper-body size and strength, lifters usually gravitate toward two moves: the bench press and the shoulder press. But over time, shoulder issues – from annoying niggles to major injuries – can cause lifters to move away from the barbell shoulder press and focus more on bench work. But it’s not difficult to keep track of your shoulder training and avoid problems that may set you back. Check out this diagram: Looking at this, we can easily see that if the muscles at the front of our shoulder (such as pecs, responsible for shoulder protraction) are overdeveloped from benching, your shoulder will end up in a compromised forward position. This concept is often referred to as “joint centration” and is pertinent with the ball and socket joints of the shoulders and hips. If the humeral head isn’t centered in the socket as it moves through different angles, it will start to push and pinch in ways that cause pain and discomfort. Let’s break it down: Think of your shoulder as the centered dot in a circle. To keep it happy all you need to do is make sure you’re doing exercises which take your shoulder in all directions. This doesn’t have to become the basis of your entire workout program. Even a few banded retractions in your warm-ups and cooldowns could be enough to keep your shoulders centered. Some examples of exercises you can use for each direction are: Upwards (Push, Elevation, Traps/Delts): Overhead Press Shrugs Downwards (Pull, Depression, Lats): Pull-Ups Lat Pulldown Forward (Push, Protraction, Pecs): Push-Ups Bench Press Backward (Pull, Retraction, Rhomboids): Face-Pulls Rows Rotation: Banded/Stick Dislocates Dumbbell Shoulder Rotations Skin-the-Cats Frequently missing out on one or more of these directions (or overdoing a single direction) will gradually move the shoulders out of position. This leads to all those common things that lifters struggle with, like neck pain, elbow pain, tendonitis, shoulder pain etc. Rotation is the easiest to throw into your warm-ups, yet the most frequently neglected. Get a thin resistance band and do some dislocates every day! This keeps you on top of your “mobility” but via strength training. So rather than having to do a ton of boring rehab/prehab drills, you’re just using your regular training to keep your shoulders happy. It’s simple enough to remember. Even if you’re following a specialized program that’s heavy in bench pressing, you’ll be able to easily program your assistance exercises and warm-ups by using the diagram. Review your training for the past few weeks using the diagram and the exercise list above. See if you’ve missed anything. Keep it in mind for what you do in future. Provided you have all four directions and rotation in mind, the likelihood of you running into shoulder issues will be severely
Origin: Tip: The End of Shoulder Pain
Tip: How to Fix All Your Biceps Problems
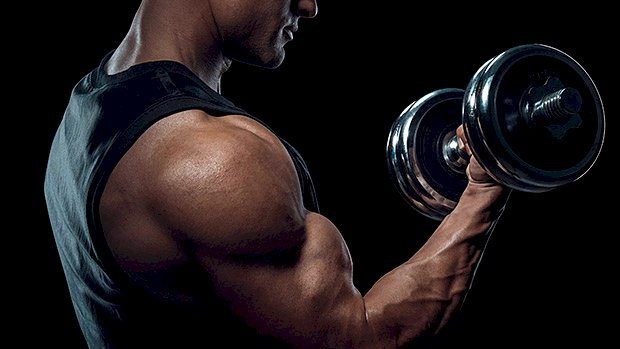 Most guys struggle to build their biceps. This is usually because… They have crappy form. They lack stability. They’re ignoring one of the functions of the biceps. Swinging the weights, leaning back, doing half-reps, and letting the shoulders take over are all common issues. Training like this might boost your ego, but it won’t build your biceps. How To Fix Those Problems The best solution is to create a stable base by strengthening your lower and mid-traps, rear delts, and rotator cuffs so that you’re placing tension on the biceps and making them work to overcome the weight. Want a more immediate fix? Artificially create a position of stability during your curls. Take a look: You can see that I’m getting support from the leg pads of a lat pulldown machine. This will allow you to drive your triceps back into the pad and create a very stable platform to train the biceps. It also makes it harder to cheat your reps. Another problem solved. This all adds up to more tension going where you want it – the biceps. More tension equals more growth. Why the Offset Grip? You already know the biceps bend the elbow. But they also supinate the wrist. Taking an offset grip will cause the weight to shift to one side. Place the thumb-side of your hand up against the end plate of the dumbbell. This means if the dumbbell is pulling you into pronation, your supinators (including the biceps) have to work hard to keep the dumbbell level. You end up working both elbow flexion and supination. This increases the activation of the biceps during each rep. By making these small tweaks, every rep will stimulate the biceps more than the regular, sloppy curls you see in gyms all over the world. Work to develop strength in this exercise and your biceps will grow way more than they were when you were “curling” the 60s. Oh, and if you ever progress to using the 60s for reps on offset supported curls, your arms will be
Origin: Tip: How to Fix All Your Biceps Problems
Tip: This Hybrid Ab Exercise Will Make You Cry
 Eccentric training is an excellent way to tap into those neglected fast-twitch fibers. Using any cable crunch as an example, take the cable further away from your shoulders (overhead) to increase the load via a longer lever arm. To reduce the load, bring your arms closer so your shoulders will shorten the lever arm. By changing the cable position during a cable crunch (further from the torso on the way down) we can increase load in the eccentric or negative phase. A1. Decline Eccentric Cable Crunch: 6-10 A2. Decline Crunch: As many good reps as possible Do three rounds. There should be a “peeling” of your spine as you come up and an unrolling as you come down (almost a crunch/sit-up hybrid). If you’re not used to this type of training, your entire mid-section will feel these for days. You’re
Origin: Tip: This Hybrid Ab Exercise Will Make You Cry
Tip: The Biggest Keto Myth
 “Calories Don’t Matter on Keto!” Wrong. Caloric intake above maintenance will still cause fat gain. One of the most misleading statements about keto diets is that calories don’t matter as long as you’re not consuming carbs. This stems from the insulin-to-obesity theory. It goes something like this… Carbs cause insulin to be secreted. Insulin (the storage hormone) stores those carbs as fat. Eliminate carbs and you’ll stop storing fat regardless of calories consumed. Become a fat-burning machine. It’s true that getting into a state of ketosis will increase fat oxidation. After all, fats and carbs are the main fuels used in the muscles for oxidation during exercise. If you eliminate carbs, then eventually the body is left with no choice but to use fat as the primary source for fuel. Boom! Increased fat oxidation, right? But there’s a difference in fat oxidation and a reduction in fat mass, which can only happen in an energy deficit. And if you’re consuming an excess of calories from fat, then the body will do the same thing with those excess calories from fat as it does with carbs: it’ll store them for later use. The reason that a ketogenic diet works well for some people is that it can increase satiation – the feeling of fullness. This higher degree of satiation can naturally cause some to eat fewer calories, which leads to fat loss despite the fact that they may not be counting calories. It’s Just an Energy Deficit The ketogenic diet will work for fat loss in the same way that every other diet works for fat loss – by creating an energy deficit. You cannot eat “as much as you want” on a keto diet and still lose fat simply because you eliminated a macronutrient source. From the data we’ve seen, keto does appear to increase satiation better than most standard diets, which can help with dietary compliance and naturally reducing caloric intake. However, when calories and protein are equal, it’s not a significant advantage for fat loss (1). On the flip side, the keto diet falls flat on its face when it comes to increasing muscle (2)
Origin: Tip: The Biggest Keto Myth
Tip: The Missing Exercise for a Stronger Bench
 You can’t fire cannons from a canoe and you can’t bench press big weights from unstable shoulders. The external rotators of the shoulders are important for shoulder health. But they also play a role in stabilizing the arms during bench presses and can contribute to a stronger bench. Some guys know all this and do their best ostrich impression. They stick their head in the sand, neglect training external rotation, and play ignorant when their shoulders hurt and their bench stalls. Other guys are more proactive. They do dedicated external rotation work and… still end up with a stalled bench press! Why? They forget one-third of the muscles involved and use exercises which ignore how these muscles actually function during a bench press. The rotator cuff muscles play an important role in shoulder stability. These muscles work like “active” ligaments to maintain proper alignment of the shoulder and reduce excess movement. Two of the four muscles work to externally rotate the upper arm. These are the teres minor and infraspinatus. These both get worked with your classic external rotation, rehab-style exercises. But there’s one other muscle that can contribute to externally rotating your humerus. The Forgotten Muscle By strengthening the posterior (rear) deltoid, you can increase your stability on pressing exercises AND build more impressive-looking shoulders. To make your rear-delt work maximally efficient, combine it with the function of the external rotators during a bench press: isometrically contract to hold the upper arm in position. Don’t go back and forth, externally rotating the shoulder as you do with the pink dumbbells in your typical rehab drills. One Exercise to Do It All Use the supinated-grip rear delt flye: This exercise places you into external rotation and requires you to work to maintain this position while the shoulder moves through flexion and extension. This mimics the requirements of teres minor and infraspinatus during a bench press. Even better, you’re simultaneously training the rear delt and taking it to a fully shortened position. The arm path you take also lines up the fibers of the rear delt optimally to produce force, meaning you get a greater training effect. Hold at the top, where the muscle is maximally shortened and the lever arm is longest. This will place high levels of tension through the muscle and develop the strength required for you to stabilize big weights when benching. Since you’re looking to develop stability to boost your bench press, using higher reps to train strength-endurance is a good choice with this lift. I suggest sets of 12-20 reps with a 2-second peak contraction on every rep. This will develop great isometric strength in the rotator cuff and pack size onto your rear delts. The rear delts have a high proportion of slow-twitch fibers and respond really well to higher reps and long time under tension
Origin: Tip: The Missing Exercise for a Stronger Bench
Tip: A Great Reason to Do Whole-Body Workouts
 Most of the time, whole-body workouts are just something you do when your week is bollixed up with appointments and you can only get to the gym a couple of times. You’re having a root canal on Monday, the twins have oboe class on Wednesday, and your wife needs you to lay out some fresh mulch on Thursday. If you don’t curse your life and run away to Bora Bora first, you’re stuck doing whole-body workouts on the occasional obligation-free day or weekend. Otherwise, you’d sure as hell be hitting the gym four or five time a week and doing upper body and lower body splits. Wonder of wonders, though, a new study suggests that you build considerably more muscle when you do whole body workouts, and it’s largely because the change in the ratio of two directly-oppositional muscle-regulating proteins – myostatin and follistatin – is almost twice as large when you combine upper body and lower body training. What They Did The researchers recruited 40 middle-aged men and randomly assigned them to one of four groups: Upper-body resistance training Lower-body resistance training Combined resistance training (lower body and upper body) Control The three resistance-training groups did three exercise sessions a week for 8 weeks. Blood samples were taken before training began and 48 hours after the last session. What They Found Muscle mass increased significantly in all three resistance-training groups: The upper-body training group gained 0.76 kilograms, +/- .46 kilograms. The lower-body training group gained 0.90 kilograms, +/- .29 kilograms. The combined upper-body/lower-body training group gained 1.38 kilograms, +/- 0.70 kilograms. Clearly, the combined training led to more muscle, but what’s really interesting is how the different training regimens affected a couple of growth-regulating proteins that play a big role in determining how muscular someone (or something) is. You’ve probably heard of myostatin. It’s a growth factor that actually limits muscle growth in humans and other animals. You know those “double-muscled cattle” you sometimes see pictures of, the ones who look like something a CGI artist conjured up to pull Conan’s corpse wagon to the gates of hell? They have a mutation that limits the activity of myostatin, which allows them to grow enormous muscles. Most of us probably wish we had at least a mildly dysfunctional myostatin gene, but there’s another growth factor that works to inhibit levels of myostatin and it’s called follistatin. When levels of follistatin increase, levels of myostatin decrease, thereby allowing more muscle growth (assuming all other factors are optimal). As you probably guessed, resistance training increases levels of follistatin in general, but the researchers in the training study found that while lower-body training increased levels of follistatin (and decreased myostatin) more than upper-body training, whole-body training had almost twice as large an effect on the ratio of follistatin to myostatin. How to Use This Info It looks like the volume of muscle involved in a workout is a factor in determining how much follistatin you produce, which would logically mean that whole-body training increases its levels more than other types of body splits. Of course, like most studies, this one doesn’t perfectly mimic real life. After all, I’ve never met any lifters other than amputees who consistently worked just one half of their body. It could be that when, over the course of a training week or month, the total amount of follistatin produced (and, consequently, the amount of myostatin inhibited) by performing an upper body/lower body split could approximate or equal the amount you’d get from training total body. Regardless, at the very least, this study underscores the value of increased levels of follistatin. It’s possible that you can also increase levels of the protein through diet, too. Egg yolks contain follistatin, but it’s not known for certain if orally ingested follistatin actually leads to additional muscle. Another tactic involves ingesting high levels of epicatechins, a polyphenol found in cocoa powder, dark chocolate, blackberries, and pomegranates. Aside from enhancing mitochondrial biogenesis and improving the skeletal muscles’ response to exercise, increased levels of epicatechins lead to increased levels of follistatin. Like most things that smack of legitimacy, it’s worth a try to up your epicatechin intake while experimenting with a couple of months of whole-body
Origin: Tip: A Great Reason to Do Whole-Body Workouts
Tip: 5 Next-Level Ab Wheel Rollouts
 Fitness gadgets come and go. Only a few stand the test of time. Here’s one gizmo that does: the ab wheel. The ab wheel rollout might be the most comprehensive exercise you can do to strengthen your midsection. It challenges every bit of your anterior core musculature, as well as your lower back, lats, and shoulder complex (to keep you from “breaking” into an overly-extended position). Continuing to build that strength is going to keep your low back healthy. That same strength will help you transfer force from your lower body to your upper body, and vice versa. The stronger your trunk, the more weight it can handle before becoming a weak link in your squat and deadlift. But what happens after you can hammer 10 or 15 solid reps of traditional rollouts? Well, you can continue to add volume, but eventually you’ll see diminishing returns if that’s your only form of progression. Here are five advanced ways to keep moving forward with your rollouts. About 2-4 sets of 5-10 reps will work best. As you get to the top end of that rep range, opt for more challenging version. 1 – Weighted Vest Ab Wheel Rollout Adding a weight vest is one of the simplest ways to increase the difficulty. This is the baseline progression; it can be added to any of the following progressions as necessary. Just throw on a vest. From your knees, squeeze your glutes and abs. This will pull your ribs down and your pelvis under, making a cylinder between your rib cage and pelvis. From there, position your weight on your hands and think about reaching over your head without breaking your cylinder position. Once you get out as far as you can, reverse the motion by pushing your hands down into the floor, as if you were doing a straight arm pulldown. This will keep you from starting the concentric portion of the exercise with a “hips back” action, which takes the tension off. (“Hips back” is an uneducated newbie move, by the way, and you see it all the time in most gyms.) Repeat for 2-4 sets of 5-10. 2 – Knees-Elevated Ab Wheel Rollout No vest? No problem. You can increase the amount of your bodyweight you handle by elevating your knees on a box, just like you’d do for push-ups. More isn’t better here, though a 12-18 inch box works best. It gets awkward if you increase much higher than that. 3 – Paused Ab Wheel Rollout and Eccentric Ab Wheel Rollout Slowing down the tempo or adding a pause is a surefire way to make your rollout more challenging. Try for 5-10 second eccentrics (negatives) or add in a 5-10 second iso-hold at the end position. 4 – Standing Rollout to Wall Moving from kneeling rollouts to standing rollouts is a huge jump, but one way to bridge the gap is by using a wall as a built-in end point. Start a few feet from a wall and perform them the same way you would kneeling, just on your feet. Once you get to the wall, return to the starting position. Start with 5 reps. Once you can do those perfectly, move back 6-12 inches. Start conservatively and brace hard. When you get to the wall, it’s easy to lose tension as you reverse direction. 5 – Medicine Ball Rollout For a new twist, try doing rollouts with a heavy medicine ball. A slam-style ball works best; it doesn’t roll as smoothly, making it more challenging. Using a hand-over-hand action, walk the medicine ball out as far as you can without overextending at your lower back, then return to the starting position. You can use a pretty heavy ball on these. Just be prepared for a more intense triceps and shoulder pump than any of the other
Origin: Tip: 5 Next-Level Ab Wheel Rollouts
