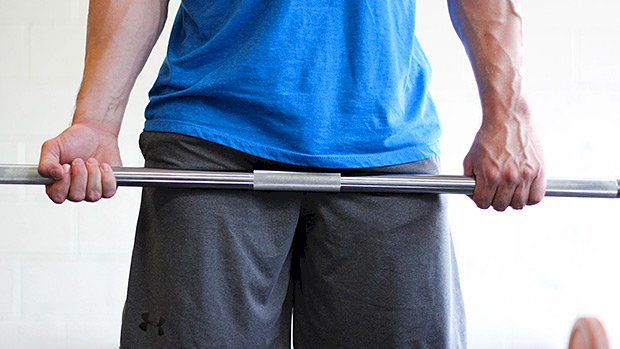
 Strength Basics Getting stronger is pretty simple when you break it down. If you’re doing basic, whole-body compound movements like squatting, hinging (deadlifting etc.), pushing, pulling, and carrying heavy objects, then you’re on the right track. Unfortunately, there are a lot of people out there selling gimmicky programs and exercises that will make you anything but strong. To help you reach your goals and make sure you’re not wasting your time on someone else’s BS, don’t make these mistakes. Mistake 1 – Overcomplicating Exercises When it comes to compound movements, simple is generally better. Holding a kettlebell by the handle overhead with one arm as you do a horizontal banded press with the other arm while standing on one foot on an unstable surface is not “achieving core activation, balance, and coordination.” It’s just making you look like a douchebag. Being a functionally strong human being requires that your muscles work together to lift or resist an external load. If you’re trying to do too many things at once, your body won’t be able to recruit the necessary motor neurons to get your muscles to synergistically fire. If your body can’t get an appreciable amount of muscle involved to lift or resist an external load, then you won’t get strong. It really is as simple as that. Picking simple compound movements like the back squat, trap-bar deadlift, pull-up, and press – and doing them with a lot of weight – will make you infinitely stronger than doing combined exercises such as lunging while doing curls. Trying to do multiple movements in one exercise is like a baseball pitcher thinking he needs to take up juggling in order to throw the ball harder. Confusing your body arbitrarily doesn’t mean you’re getting any closer to achieving your goal. Mistake 2 – Doing Too Much Isolation Work If you’re a natural lifter, you need to start seeing your body as one unit instead of a lot of individual parts. If you’re the person who does chest/triceps on Mondays, legs on Tuesdays, and back/biceps on Fridays, you’re probably not seeing the results you’d like see. It’s not from a lack of effort, but from a lack of good strategy and programming. You’re in a weird situation where you’re both doing too much work and not nearly enough work at the same time. Performing ten different chest exercises for 3-5 sets each on Monday is too much volume that day (if you’re not juicing). At the same time, you’re doing nothing with the chest the rest of the week, so it’s not being worked frequently enough. If you’re on this type of program, your progress is going to stall out quickly. Instead, try to do whole-body lifts three times per week. Not sure where to start? Use the 3 day per week template below. This program will have you doing five exercises per day and will allow you to train your body frequently enough to get some results. You’ll squat, hinge, lunge, push, pull, and carry heavy objects – all the stuff that makes a person strong. Day 1 A1 Back Squat:5×5 A2 Dumbbell Bench Press:5×8 A3 1-Arm Dumbbell Row:5×10 B1 Farmer’s Walk:3×20 yards B2 Pallof Press: 3×10 each side Day 2 A1 Standing Barbell Strict Press:5×5 A2 Pull-Up:5×8 A3 Step-Back Lunges:5×8 each B1 Waiter’s Carry: 3×20 yards B2 Hanging Knee Raises:3×10 Day 3 A1 Trap Bar Deadlift:3×5 A2 Incline Dumbbell Bench Press:5×8 A3 Chest-Supported Row:5×10 B1 Suitcase Carry (a farmer’s walk carrying weight only on one side):3×20 yards B2 Cable Chop: 3×10 each side Mistake 3 – Using Percentage Training (If You’re a Newbie) When you’re just starting out, using a program based off a percentage of your one rep max is a mistake. Asking strong guys what program they’re doing can help you with your goals, but only if you have a similar training background. If you’re a beginner and the person you’re asking recommends a program based off a percentage of your 1RM, you should probably find a new program. New lifters shouldn’t be basing anything off of a one rep max because they don’t have the experience to perform a true 1RM. The first couple of weeks when you begin a weight training program are some of the most fun weeks you’ll ever have. You’ll make tremendous progress because you’re learning to recruit motor neurons to carry out new movement patterns. The strength gains you make for the first 4-8 weeks will come in leaps and bounds, so you shouldn’t be limiting yourself by basing your program off of the perceived 1RM you could do on day one. Instead, try to work up to a weight that causes you technical failure: go as heavy as you can until your technique starts to break down. Do this for approximately 6 months to a year as you vary your exercises and rep ranges. Adopt a program based on percentages AFTER you’ve become proficient at your
Origin: Tip: 3 Strength Training Mistakes to Avoid
Tag: Tip:
Tip: Do These Stretches After Squats
 Save your stretching for post-workout. This is when you want to hold stretches for a longer period of time while your muscles are still warm and receptive. These will help get rid of the kinks in your glutes and help prevent those kinks from cropping up again. Glutes and Hips This is called the standing pigeon stretch. Place one leg across a box at a 90 degree angle. Press your opposite hip forward and rotate the hip that’s on the box backward. Hips and Hip Flexors Do the lizard lunge with external rotation. Place one foot in front of you so that your knee is behind your shin. Extend your opposite leg behind you. Roll to the outside of your foot and press your knee away from your body. Hips and Thoracic Spine Do the squat hold with a reach back. Keeping your heels flat, squat down as deep as you can comfortably hold. While keeping you heels flat, reach one arm up as you try to touch your bicep to your ear. Ankles and Calves Place a resistance band around your ankle and loop the other end around a fixture. Keep your heel flat as you push your knee forward so that it goes past your toes. The band will pull your shin backwards, creating a stretch in your
Origin: Tip: Do These Stretches After Squats
Tip: 4 Minutes to Fitness
 Who among us doesn’t remember dad getting up to go to work in the morning and getting down on the floor before he even took a leak to grunt out some watch-out-for-that-mousetrap push-ups followed by some awkward calisthenics? Sure! The old man had to stay in shape so he could power walk into the office and nail the Willoughby account! Personally, I don’t remember Dad doing anything like that at all, but I did see dads on TV doing this kind of thing, so I have to assume the practice was at least partially based on reality. Oddly enough, it looks like these dads might have been onto something, as a new study has shown that a brief but brutal 4-minute workout, composed entirely of calisthenics, was about as effective a cardio protocol as classic sprint training or high intensity interval training. What They Did Researchers herded up 55 healthy men who were all around 23 years old and split them into three groups for a 16-week study: One group performed high-intensity interval training where they performed 8 20-second bouts of sprinting at 130% of V02 max, each bout interspersed with 10-seconds of slow treadmill walking. A second group ran on the treadmill at 90-95% of VT2 (ventilatory threshold) for 30 minutes straight. The third group did 4 minutes of max effort exercises consisting of burpees, mountain climbers, squat thrusts (done while holding 3 kg. dumbbells), and jumping jacks. Each exercise was done balls-out for 20 seconds with each 20-second bout interspersed with 10-second rest periods. After completing all four exercises, they repeated the entire sequence one more time for a total of 4 minutes of exercise. What They Found After 16 weeks, all groups significantly improved their VO2 max, time to exhaustion (Tmax), VT2, velocity associated with VT2, and time to reach VT2. While the sprint training increased these parameters slightly more than the 4-minute protocol, it could simply be because the group that sprinted on the treadmill was much more easily able to gauge their intensity and their speed, while those doing the calisthenics had to rely on their own un-measured definition of “maximum effort.” Despite the small disparity in results between the sprint group, the steady-state exercise group, and the 4-minute group, the researchers concluded: “Our results demonstrate that HIIT-WB (the 4-minute protocol) can be as effective as traditional HIIT (the sprint workouts) while also being time-efficient compared to MICT (the 30-minute running protocol) to improve health-related outcomes after 16 weeks of training.” What This Means to You If you hate running, don’t have a treadmill in your 100 square foot Japanese micro-apartment, or simply enjoy exercising in your home in your underwear, you might successfully employ a four-minute, mostly bodyweight exercise protocol like the one used in this study. There’s probably no need go get hung up on the specific exercises, though. For instance, if you dislike any of the exercises used in this study, you can easily swap them out for ones you prefer. For instance, the video below shows T Nation contributor Nick Tumminello doing the 4-minute protocol using speed squats, burpees, mountain climbers, and speed skips. Nick doesn’t use 3-kg. dumbbells for any of the exercise, but you could easily do them with the speed squats to more accurately duplicate the protocol used in the
Origin: Tip: 4 Minutes to Fitness
Tip: Do The Gorilla Row
 For building a strong back you can’t leave out rows. But this variation is likely missing from your training, and that’s a shame because you’re going to love it. Here’s how it’s done. Get your feet shoulder-width apart with two kettlebells between them. Hinge at the hip until you’re able to grab the handles of the kettlebells. This should put you in a deadlift position. Keep your knees out and sit back a little in order to engage the glutes and hams. Row one of the kettlebells up towards your hips with a slight rotation in order to allow your elbows to come back farther. Keep a tight grip on the other kettlebell that’s still stationary on the ground. Return the kettlebell back to the ground and repeat on the other side. Keep your back flat and head neutral. You can alternate sides or do all your reps on one side before the other, which makes it convenient if you only have one kettlebell. These are perfect for building grip and back strength. By rowing from a static position, you recruit more motor units which will increase muscle tension and have your lats pumped with blood. It also just enforces a proper hip hinge position. Although it emphasizes the back muscles, you’ll be surprised at how much your legs are actually working while performing this row. Cool Combinations Get creative and combine this row variation with other exercises. Here are two different combos to try: Renegade + Gorilla Row You can do a prescribed amount renegade rows before moving on to gorilla rows, or you can alternate between the two until you reach a total number of reps. I suggest doing all your renegade rows before the gorilla rows since the renegade variation is a bit more complex. Gorilla Row + Deadlift + Farmer’s Walks Try this at the end of the workout. Do between 4-10 reps of gorilla rows, followed by 4-10 reps of deadlifts, and end with a specific distance for your farmer’s walks, like 20 yards. Wait, Why Is It Called the “Gorilla” Row? The exercise came about when doing a combination of kettlebell movements. After I finished them, I lowered the kettlebells to the ground between my feet and found myself in a nice hip hinge with the kettlebells in perfect position to row from a dead stop. So I began rowing and my training partner said, “You look like a damn gorilla.” And that’s where it came
Origin: Tip: Do The Gorilla Row
