 Smashing your triceps with repeated reps of poorly aligned exercises can result in inflammation and elbow pain. Instead, choose exercises that put you in good alignment to build bigger triceps without the unnecessary wear and tear. Think of your elbows like the hinges on your car door. If you repeatedly try forcing movement in a direction the hinges aren’t operational in, well, you’ll end up needing new hinges. That’s what happens with some triceps movements. Golfer’s elbow should be renamed “meathead’s elbow” since it’s more common in lifters than you might think. Let’s fix that. The Triceps Solution “X” cables (or cross cables) are simply where you cross over two cables creating an “X” in the middle. Usually, you just hold the end of the cable. X cables are a good way to align the force through your elbows. Torque and valgus stress on the elbows are more easily managed. X cables can put you in a good alignment to target the long head of your triceps, creating a more elbow-friendly alternative to exercises like skull crushers. Going overhead, you can efficiently target the long head in its lengthened position, loading in the direction of its fibers. (Credit to Coach Kassem Hanson for this one.) For a slight variation, if you have the range to go further overhead, stepping back into the cables will change the feel of the exercise. There’s a bigger stretch, and the point of maximal load is close to full elbow flexion. That means lots of mechanical tension. Guillotine extensions are a good option for overall triceps development and arguably one of the best-aligned triceps exercises to limit elbow stress. You’ll notice how close the cables are to your elbows with these. They somewhat resemble a Tate press, but performed with cables. Just keep your chin up and watch your neck! Using an X cable setup for kickbacks will also target the long head. Here you can place yourself in good alignment to work the long head in a more shortened position, focusing on a good squeeze. Using two ropes can have a similar effect since the direction of force and alignment are close to the X cables setup. It’s also an alternative if you only have use of a single cable (although it does require two ropes). Overhead extensions and kickbacks with a dual-rope setup are all brilliant elbow-friendly options. For a real triceps smoker using either the X cable setup or dual-ropes, here’s a triple-threat exercise to try. Aim for 6-8 reps in each position: Position 1:Step back, stand upright. Here the emphasis is on training the triceps long head in mid to shortened position. Position 2:Kneeling, upright. Emphasis on mid-range. Position 3:Kneeling, leaning forward. Emphasis on mid to lengthened position. If you care about building bigger triceps while keeping your elbows intact, these X cable and dual-rope exercises should give you plenty of ideas to work
Origin: Tip: Big Triceps, No Elbow Pain
Tag: Tip:
Tip: Get Stronger Overhead – 3 Exercises You Need
 Comfortably holding a heavy weight over your head takes some serious shoulder stability and a good amount of mobility through your thoracic spine. You’ll need stable and mobile shoulders to nail a good overhead lockout position with everything from barbell pressing to the Olympic lifts and even handstands. If you’re struggling overhead, try these exercises to strengthen your shoulders and improve your overhead game. 1. Wall-Facing Handstand Do you have the prerequisite mobility and motor control to achieve a good overhead position? This will let you know. The movement requires you to be mobile and strong through your thoracic spine (and stable through your lumbar spine) to get your body up against the wall. It’s great for the upper body because it dynamically challenges you to stabilize your shoulders as you walk yourself towards the wall. It also forces you to learn how to properly brace your core by pulling your ribcage down so you don’t go into excessive lumbar extension during an overhead lift. How to Do It Begin with two hands on the ground and one leg against the wall. Walk your hands backward as you bring your other leg against the wall. Stabilize your lower back by engaging your core and pulling your ribcage down. Walk yourself backward until your nose touches the wall and you’re in a vertical body position. Keep your arms straight and press yourself away from the floor so that you achieve protraction and elevation through the shoulder blades. Hold until you start to lose protraction through the shoulders. 2. L-Sit Alternating Bottoms-Up Kettlebell Press Wow, that’s a long-ass name for an exercise, but it does the job! Pressing and stabilizing heavy weights overhead requires a strong rotator cuff as well as an efficient bar path. This exercise forces your rotator cuff to stabilize your shoulder for the entire press and will teach you how to press weight up and back. It has the added benefit of firing up your nervous system and improving your grip strength since it requires a strong grip to keep the kettlebell upright. Placing yourself in the L-sit position requires more core activation and will keep you from arching your back to complete your reps. How to Do It Begin seated with your legs straight in front of you. Hold two kettlebells upside down with your elbows bent and wrists straight. Pull your ribcage down to brace your core and press one kettlebell up and back. Finish the press with your biceps next to your ear and pause at the top to make sure the kettlebell is stabilized overhead. Slowly lower the kettlebell back down and repeat on the opposite side. 3. Bottoms-Up Kettlebell Swing This is a dynamic lift and requires almost all the muscles in your body to work together to stabilize the kettlebell overhead. This movement is similar to the bottoms-up kettlebell press in how it challenges shoulder stabilization, but it requires more timing and arguably more athleticism since you have to “catch” the weight at the top. Although the movement of the kettlebell will have a significantly bigger “arc” than a barbell, this can be a great tool to get better at the Olympic lifts since it involves hinging the hips and catching the weight overhead in one efficient movement. Your ribcage should be pulled down and you should finish the lift with your biceps next to your ear, pausing for 2-3 seconds before lowering. How to Do It Begin with your feet slightly wider than hip width. Maintain a strong flat back as you hinge your hips back, bringing the kettlebell between your legs. Explosively drive your hips forward, swinging the ‘bell upward. Catch the kettlebell by the handle with your arm straight and biceps next to your ear. Your shoulder should be in a neutral position when you catch the ‘bell. Maintain a neutral spine as you press up on the kettlebell, maintaining tension throughout the entire body. Hold the kettlebell by the handle at a dead stop for 2-3 seconds for the rep to
Origin: Tip: Get Stronger Overhead – 3 Exercises You Need
Tip: Bodyweight-Only Backside Training
 Ignore the name. Gliding hamstring curls are more than just hamstring builders. This bodyweight exercise will light up your hamstrings, glutes, back, biceps and everything in between. The basic setup: Set some suspension handles (rings, Blast Straps, TRX etc.) off the floor around hip height. When you lay down and grip the handles, your shoulders should be clear off the floor. Next, drag over a bench or a box about a body length away from the handles. It’s important that the height of the box is about the same as your grip on the suspension handles. If the box is too low you’ll reduce the effectiveness of the exercise, while a box higher than the handles will further increase its intensity. Grab the handles, dig your heels into the box, drive your hips up, and then glide your butt towards the box. If your hamstrings are deconditioned then don’t be surprised if they cramp up. You have been warned. Use this basic setup if you’re only looking to blast your hamstrings, then progress to the single-keg variation: This is a good way to make your hamstrings feel like they’ve been savagely beaten for days afterwards. A good indicator is whether you can pull your butt towards your heels while maintaining the same degree of hip extension. If your hips are dropping as your hamstrings fully flex, you’re not allowing your hamstrings to be loaded in their fully shortened position. Go back to the basic setup and build some foundation. Ready for more? Add in an isometric row: To step it up a level and hit your entire posterior chain, try adding in an isometric row. Using the same setup as before, perform an inverted row (fat man pull-up) and hold at the top. Pull your shoulders back and flex your biceps hard. Then pull your butt towards your heels. That’s one rep. Although the row changes the angle of pull for the hamstrings, theoretically making it easier, due to the co-contraction of pretty much everything on your backside, the row makes it much harder. As part of a full-body workout, you’ll get a lot of bang for your buck with this one. Up for a challenge? Try this: Try going one leg at a time combined with an isometric row. This exercise can be challenging even for the most advanced athletes. If you can knock out sets of these straight away and live to tell the tale, then my hat’s off to you. Considerations and Progressions Each exercise can be made to work your hamstrings harder by increasing the height of the box relative to the suspension handles. By doing this you’ll somewhat be pulling yourself more vertically. However, if combining this with a row, you should consider how the height of the box will change the angle for your back. The simplest way to increase the intensity is to maintain the same setup, but use a weighted vest as your strength increases. There are more creative ways to increase the difficulty using resistance bands, but this ends up looking like a scene from 50 Shades of Gray. Personally, I’d go there, but you might not want to! If you don’t have access to suspension straps, these can be done in a Smith machine with your hands on the bar. They have a slightly different feel to them, but are still effective. Start with the two-legged versions, with or without the row. Once you can hit 12 good reps then try the single-leg versions. Once you hit 12 reps with these, consider adding extra weight. Try 2-4 sets of 6-12 reps as part of a full-body workout or some lower-body isolation
Origin: Tip: Bodyweight-Only Backside Training
Tip: Better Butts and Bigger Legs
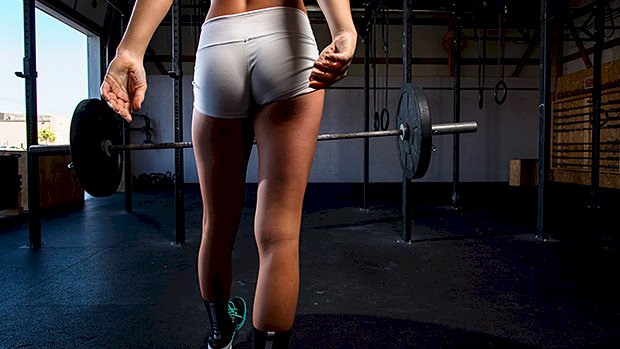
 Single-leg strength is important. Unfortunately, when your goals are more about aesthetics than athleticism, single-leg work doesn’t get much love. But split squats are one of the all-time greats. Many would even argue their superiority over heavy back squats for athleticism. Here are two ways that’ll help you improve single-leg strength, while also packing on some muscle. Split Squats for Quads During standard split squats, at least 70 percent of your weight should be through your front leg. While it’s true that the quads of the back leg would get some loading through knee extension (the back leg somewhat resembles a sissy squat), for most, purposefully loading the back leg isn’t a good idea. Rear-foot elevated split squats take the back leg out of the equation while also shifting weight forward – more weight over the lead leg. Here you can safely and effectively load your quads. Using a squat rack for these is perfectly acceptable (cue the gym police). The rack setup is the most efficient way to do these. Alternatively, a split squat stand, or even some leg extension machines, will allow you to hook your back foot on the support. The advantage of the rack, though, is the additional support it provides. By placing one hand on the dumbbell and the other on the rack you’ll be more stable. More stability means more output, and more load you can put through your quads without worrying about toppling over. Stability is something many meatheads struggle with when attempting split squats. You could also set up behind a bench set on an incline, using the back rest for support. I’ve tried a broomstick with this one too, albeit this has a little less support. All you need is something to hold on to. In addition, having something to grab will allow you to get in a few extra reps. As you fatigue you can grind out more reps with help from the supported arm on both the lifting and lowering phase. You can also use assistance on the lifting portion only (lift with help, lower without), meaning more of an eccentric overload. If you try this approach, good luck standing the next day! The height of the back foot is up to you. Begin with a very low elevation and work up. Going too high can cause knee pain in some, as well as poor pelvic alignment. Keep your abs tight, ribcage down, and try to contract your glute on the backside leg. Start and finish at the bottom of each rep, where you can either drop the dumbbell and switch sides, or place the dumbbell in the other hand and get going again. Split Squats for Glutes Deficit split squats work because they take you further into hip flexion. While it’s true they’re also a horrendous quad-burner, going further into hip flexion will take your glutes into a deeper stretch position. When you stand on the box, either you or the weight should be going below the height of the step. That’s why it’s called a deficit! Specifically, it’ll be the lower fibers of your glute max that’ll get hit hardest – yes, they’re a thing. A study by McAndrew et al. showed that the glutes are comprised of upper (cranial), middle, and lower (caudal) sections, each of which activate differently. While hip thrusts, glute bridges, and cable kickbacks tend to bias more of the upper fibers, “stretcher” type exercises such as split squats, high step-ups, and forward lunges tend to target more of the lower portion of your glutes. If you’re capable of going deep, you’ll stretch and load these fibers even more. You don’t need to have a massive deficit either. Just work within your own range of motion and progress to larger deficits over time. To achieve a slight deficit in split squats, a few heavy plates on the floor work just fine. A foam pad in the middle helps with comfort, while also adding a depth target. Just a gentle tap-and-go on a pad will limit cheating and help you hit the deficit every time. Start and finish in the bottom position where you can get set and grab your dumbbells. Feel free to add some pauses at the bottom portion of each rep too. That’ll really emphasize the stretched position. Your ass will be on fire for
Origin: Tip: Better Butts and Bigger Legs
Tip: The Landmine Exercise You Need for Hammies
 A dumbbell or kettlebell can be a good option for single-sided Romanian deadlifts, but if you’re looking to really load those hamstrings (and glutes), using a landmine offers more stability. The bar stays in contact with the floor throughout the lift. More stability means more output, so it can be a good way to bro-up your single-leg work. Two ways to do it: Landmine Side-Facing RDL Landmine Front-Facing RDL These work well with a variety of rep ranges. Try both options to find the one you like more. Single-leg RDLs are most commonly done with a contralateral load: planted foot with the load in the opposite hand. Contralateral work mostly relies on using an interconnected line of tissues known as the “posterior functional line.” This line connects the glutes of one hip to the opposite side lats, essentially creating an X-shape that crosses the lower back. Why should you care? Well, think about athletes and their sport. Developing stabilization between hip and shoulder is essential. But if you care more about getting bulging hamstrings, contralateral might not be the best option. Ipsilateral means using the same-side arm and leg. It’s more useful when you’re trying to train the muscles of the lead leg, and that hip “snap” from the lead leg you’ll see in some sports. An ipsilateral RDL tends to be more stable and it emphasizes the lead leg’s hamstring
Origin: Tip: The Landmine Exercise You Need for Hammies
Tip: Isolate with Fisherman Rows
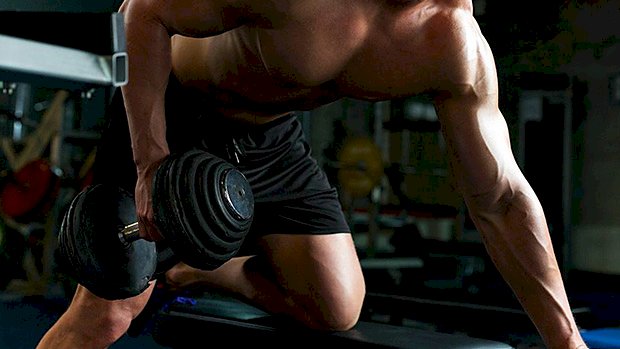 Dumbbell rows are a staple in many programs for unilateral pulling strength and development of the lats. Unfortunately, there are plenty of people who might not have the right conditioning to use the classic single-arm dumbbell row without risk, and others who just plain struggle to get a handle on proper form and technique. For lifters with a history of lumbar issues, the last thing they need is a one-sided load combined with an uneven hip position, which is what happens when they place one leg up on a bench while the other stays grounded. Moreover, finding the right places to put your hands and feet to promote a level hip position to avoid the pitfalls can be frustrating. Even healthy lifters can have trouble finding a position that gives the proper amount of emphasis to the right areas. Solution? Do the fisherman row: The major difference you’ll see right off the bat is the fact that both legs are mounted on the bench, not just one. This immediately stabilizes the pelvis so you don’t have to spend time trying to finding the least objectionable hand, foot, and knee position. Make sure to set up on an angle to the bench so the dumbbell’s path isn’t impeded. Since this setup places the arm a bit farther away from the bench, it also allows you to use a greater rotation at the wrist, which allows you to hit the upper back and lats from a slightly different angle while staying
Origin: Tip: Isolate with Fisherman Rows
Tip: How to Build a Professional Butt
 If standard hip thrusts have lost their oomph, here’s something you should try: isometronics. Isometronics combine the principles of isometric and isotonic muscle contractions to reap the rewards of both. Performing hip thrusts using this technique would look like this: Pick a weight you can barbell hip thrust for 12 reps (your 12RM). Do 10 full reps. On the tenth rep, pause at the top for 10 seconds. Finish with as many partial reps as you can in the bottom position. If you’ve selected the right weight, this will be no more than 4-8 partial reps. Tip: To get the most from it, initiate each rep with a tightening of your glutes and abs before each movement. Now, there are no rules saying you need to use the rep ranges above. At their heart, isometronics are simply a form of drop set. Just work within a rep range that’s in line with your training approach. If you want to go heavy, then drop down to 5-6 reps. If you’re a volume junkie, go for 15-20. It’ll all help build an impressive backside. Not Just for Glutes Isometronics are nothing new. You’ll find evidence of them being used since the 1960s. Classically, isometronics are performed using more of an “overcoming” isometric rather than “yielding” isometric. You’d set up in a squat rack and fire the bar against some pins, pressing as hard as you can. For hip thrusts, I’m sharing a more accessible version, and one that won’t have the gym police bust your ass for being in the squat rack. Isometronics can be done for any muscle you’re looking to get bigger or stronger. Just do your full reps, follow that with an isometric hold in the muscle’s shortened position (where you get the biggest squeeze), and finish with a few partials. These are particularly sadistic for any biceps or hamstring curl variation. Why Isometronics Work You shouldn’t need to be convinced that drop sets are a useful tool for increasing training volume. They also allow you to do more of those “important” reps where you’re able to fatigue the last remaining muscle fibers at the back end of each set. Your glutes need some volume to grow. They also require you to tap into both fast and slow-twitch fibers. It varies depending on what you read, but your gluteus maximus has a 50/50 split in terms of fast versus slow-twitch muscle fibers. As a form of mechanical drop set, isometronics begin with your weakest portion (full range of motion), drop to an isometric hold, then drop again to partial reps in your strongest position. The reason why an isometric hold is stronger than when you’re moving is because your muscles can find an extra 10-15% more force here. This isometric hold alone adds a big dose of intensity to any exercise. You’ll get extra fast-twitch fiber engagement, lots of mechanical tension, and you’ll stimulate hypertrophy. You’d do well finishing each set with the isometric alone, but adding some partial reps will increase time under tension, fatigue even more motor units, and further stimulate muscle growth. Use this technique sparingly. To shock your glutes into growth, do it at the very start of your workout as your key lift, then follow up with some basic sets of deep squats, deadlifts, and the
Origin: Tip: How to Build a Professional Butt
Tip: Squat Day? Do This First
 Squats Feel a Little Clunky? Here’s a quick and easy fix to try: Pump up your hamstrings BEFORE you start squatting. Yes, you read that right. Isolate your hamstrings and chase a pump before you start your first set of heavy squats. Banded hamstring curls work great: Grab a band and loop it around something solid. The band should be around ankle to mid-shin height. Hook your feet into the band the way I’m doing in the video. If you don’t you’ll end up rolling over and the band will slip off. Move far enough away so there’s no slack in the band, but also the resistance is appropriate as you flex your knees. Of course, choosing the right band is key here too. Laying on a foam pad is optional. You can also roll up a towel. This helps with back and pelvic positioning and prevents unwanted movement coming from your lumbar region. Once you’re in place it’s pretty simple. Just pull your heels into your butt, flexing your hamstrings hard. Your goal is to get as much blood in there as you can. Do 2-3 sets of 20-25 reps. Here’s What Happens Any squatting pattern will instantly feel smoother. You’ll hit depth easier, meaning more efficiency and less wasted energy. Any clunky hips or knees you might’ve had before will feel significantly better. And because of all this, you’ll build more muscle and have better longevity in your lifts. Now, I’m not saying this works for everyone. If you’re an elite-level squatter and grooving that pattern regularly, it’ll likely not make much of a difference. It also doesn’t have as much of an effect on low-bar versus high-bar squats. If you’re a more hip-dominant squatter then the hamstring fatigue will likely negate all other benefits. Just remember, this is more of a hypertrophy and longevity technique. If you’re not barbell squatting, these still work great for most heavy knee-dominant
Origin: Tip: Squat Day? Do This First
Tip: Why You Need to Rock n’ Row
 If you want to engage as much of your back musculature as possible during your seated rows (or horizontal pulls in general), it’s imperative you add some movement from the hip joint. I call this “toprock.” By applying a little sway with a neutral spine, you’ll remain safe while keeping the emphasis away from the biceps and away from unwanted shoulder glide once the weight begins to get a little heavy. Think about it: The “intro to training” textbooks says the form police will arrest you if you keep anything other than a completely rigid torso when doing rows, but applying a bit of momentum is perfectly acceptable and isn’t “cheating.” This is me doing what I consider to be a standard set of heavier seated rows: As you can see, I’m maintaining good tension throughout the rep, and never is there any rounding of the lumbar (or thoracic) spine. And, as the video below shows, I believe this same principle should apply to all row variations, within reason:
Origin: Tip: Why You Need to Rock n’ Row
Tip: The Weirdest-Looking Hamstring Exercise
 This exercise is relatively simple, but deceptively difficult for many. If you’ve got good hamstrings then these shouldn’t be a challenge. If your hamstrings or gastrocnemius (the big meaty part of your calf) are a little out of condition though, cramping is common. Dumbbell Hamstring Walk Keep your feet as narrow as possible on the dumbbell and point your toes. Having your feet close together will stop the dumbbell from steering off in one direction. You can also use a foam roller. By plantar-flexing your ankles (like a ballerina) you’ll create a co-contraction of your calves and hamstrings. This co-contraction increases activation of the hamstrings. The active insufficiency of the gastrocnemius muscle causes your hamstrings to work harder. Don’t believe it? Just try any ham curl machine with a plantar-flexed position and note the difference. Walk the dumbbell up to the point just before you lose hamstring tension. You’ll know when. You can even palpate your hamstrings during to check engagement. Walk it back down as far as you can, getting as long as you can with toes pointed. That’s one rep of probably around 6-10 steps. Go for 3-5 full reps and don’t let off the tension. Add reps over time, or try it with a bar across your hips for some extra
Origin: Tip: The Weirdest-Looking Hamstring Exercise
