 Beware of Supernormal Stimuli Foods High reward foods are very calorie dense and often very tasty. They’re generally high in added fats and/or sugar, and the reward properties of these foods may also be enhanced through the use of salt or monosodium glutamate (MSG). High reward foods are “supernormal stimuli,” sometimes called a supernormal releaser. The term, which is from ethology (the study of animal behavior), refers to a behavioral phenomenon whereby animals respond more intensely to stimuli that are exaggerated versions of the normal stimuli with which they evolved (1,2,3). Here’s a fun example. The Australian jewel beetle has a body that’s big, long, and brown. The males are hard-wired to like certain features of the female, namely largeness, brownness, and shininess. So what’s really large, brown, and shiny? A beer bottle. That’s right, the males attempt to copulate with a type of discarded brown beer bottles called “stubbies.” Just as animals respond more strongly, and often preferentially, to the exaggerated (supernormal) stimuli, humans can respond similarly to exaggerated versions of foods. This isn’t to suggest you might mate with a pork chop. It just means these high-reward foods can act as supernormal stimuli and can lead to maladaptive eating behaviors that hinder fat loss and promote fat gain. Here are two of them: Consistent and continued consumption of high-reward foods (the supernormal stimulus) can render whole foods (a normal stimulus) less appealing or unappealing. The influence of supernormal stimuli has changed what people think is a “large” portion size for a single meal. Research in 2006 replicated a study that was done in 1984 in which participants were asked to serve themselves an amount they considered to be a typical portion of each item on a buffet table (4). The 2006 study found that peoples’ perceptions of what they consider to be normal portion sizes have changed in the past 20 years. As you might guess, they’ve grown larger. Much larger. The researchers called this “portion distortion” (5). Exaggerated portion sizes can serve as a supernormal stimulus that distorts your perception of appropriate amounts to eat at a single meal. How to Use This Info Keeping the above two points in mind, not only can high-reward foods cause you to be less satisfied by whole foods (and therefore make adherence to a diet that emphasizes whole foods more difficult), but also more likely to eat larger portion-size meals. Given this phenomenon, it makes sense to minimize exposure to high-reward foods, or at least be continually aware of portion
Origin: Tip: What a Bug Can Teach You About Diet
Tag: Tip:
Tip: 4 Lat-Building Exercises You’ve Never Tried
 Slap some muscle on your back with these innovative moves. Do 3-4 sets of 10-15 reps on each of these. X-Stretch Lateral Lat Pulldown Do you have trouble feeling your lats work? Here’s a surefire way to get them activated, pumped, and ready for gains. What to do Set up a high cable, grab the handle and sit sideways on the ground with your working side closest to it. Using an underhand grip, focus on the negative part of the exercise – the stretch of the lats – by leaning sideways towards the cable machine. Squeeze the lats and sit upright as you pull it back toward you. Palpate (touch) your lat with your non-working hand to help you feel it in the right place. Tip: Remember to keep your chest up throughout the movement. Angled Single-Arm Pulldown You might already do a chest-supported row in your workouts, but what about a chest-supported pulldown? This will put you in a totally different angle than any regular pulldown and hit your lats in a whole new way. What to do Set the handle high on a cable machine. Get an incline bench set up in front of it. Position yourself in a way that allows you to fully stretch your lats when leaning forward and extending your arm overhead, then push your shoulder blade back and down all while creating tension in the lats. Brace your core by hugging the bench with your non-working arm. Don’t allow the shoulder to roll forward (humeral glide). Tip: Squeeze your adductors (inner thighs) together to maintain stability throughout your body. Alternating Side-Dominant Lat Pulldown Take your standard lat pulldown, but emphasize one side per rep for an even stronger contraction. What to do Using an overhand grip, initiate the pull from the shoulder blade – pushing it down and back towards your back pocket. Keep your elbows stacked under your wrists. Keeping your upper back extended and chest up, pull harder with one side, concentrating on feeling your lat contracting on that side. While you focus on one side, allow the opposite side to assist in the movement. Tip: Don’t allow your torso to lean sideways as you perform the movement. Unilateral Chest Supported Row You already know how to do a one-arm row. This variation will help you get an even stronger mind-muscle connection with your working lat. What to do Set up an incline bench to support your torso, about 30 degrees. Anchor your arm to one dumbbell by pushing away from it to create stability throughout your body. Row with the opposite arm and rotate it from neutral to underhand grip. Tip: Squeeze your inner thighs together on the bench to create tension throughout your body.
Origin: Tip: 4 Lat-Building Exercises You’ve Never Tried
Tip: 3 Exercises That Beat Boring Planks
 The front plank is a popular exercise to promote core stability. Fair enough. It has some benefits and there certainly are ways to make it more difficult. The problem is, holding any static position for more than ten seconds is boring and most guys avoid doing them. There’s a better option – something that’s much more challenging. You could hold a plank for just 10 seconds (or less) and then do several more holds interspersed with very short rest periods in-between so that the total time under tension adds up to a minute or longer. That’s where the exercises below come in to play. They provide a more intense static contraction than the standard front plank, and you don’t need to hold each rep for any more seconds than you have fingers on both hands. 1. Ab 45s I first came across this exercise in the book, “Underground Secrets to Faster Running,” by Barry Ross. No matter how strong you think your core is, Ab 45s will humble you! Here’s how you do it. Lie on your back with your knees bent and hook your feet under something stable, like a machine or two heavy dumbbells. Or get a training partner to hold your feet down. Scoot your butt as close to your heels as possible. Extend your arms out fully overhead and keep them in line with your torso throughout the set. Raise your head and trunk up to a 45-degree angle. Make sure to bring your arms along with you, keeping them fully extended and in line with your torso. Hold that position for a solid 5-second count and then lower your head and trunk back to the floor. Take a breath at the bottom and repeat the process. Build up to 5 sets of 5 reps with 5-second holds, and gradually work your way up to holding each rep for 10 seconds. 2. Reclining Field Goals If starting from the bottom-up is too tough, try going from the top-down with this exercise. I discovered this one in Nelson Montana’s e-book, “The Bodybuilding Truth.” According to Montana, abdominal development is genetically determined and classic movements such as sit-ups and leg raises are ineffective for the abs but extremely effective for the psoas (hip flexor) muscles. Montana believes that the abs respond best to contraction, not movement, and are stressed to a much greater degree when attempting to stabilize the core. You’ll understand what “attempting to stabilize” means once you try the exercise. Sit on the ground with your legs bent to about 90 degrees and your feet flat on the floor. Tuck your chin into your chest, round your back, and grasp the outside of your knees. Now lean back until your arms, still holding your knees, are straight. Make sure to keep your chin tucked in and back rounded. Once your arms are fully extended, slowly raise them up until they’re pointed directly overhead. If you find it difficult to maintain balance, you can move your feet out a bit to make it easier. The closer your feet are to your hips, the more challenging the exercise is, and vice versa. Hold the contraction for 5-10 seconds and repeat. Work up to the point where you can do 10-12 reps. This exercise requires no equipment and can be performed anywhere. Drop to the floor right now and give it a shot. You’ll be surprised at how challenging it is. A word of caution: It’s not uncommon to cramp on these isometric exercises. Make sure you’re well hydrated and once you start to struggle, stop. Listen to your body. If you try to push on, you’ll cramp, which is your body’s way of forcing you to stop. Take it slow and gradually ramp it up over time. 3. Superman Back Extensions This is a great antagonist movement for the above moves. Do it on a back hyperextension or glute-ham raise machine. Extend your arms fully overhead and keep them in-line with your torso throughout the set. Raise your upper body up until it’s parallel to the ground and hold that position for a strict 5-count. Then lower back down and repeat. Build up to 5 sets of 5 reps with 5-second holds, and gradually work your way up to holding each rep for 10 seconds. Programming All of these exercises make for great finishers. You can pair the ab exercises with the back extension in a superset fashion, or you can alternate between doing an ab exercise at the end of one workout and the back extension at the end of the next
Origin: Tip: 3 Exercises That Beat Boring Planks
Tip: 3 Ideas to Help You Understand Technique
 The Causes of Bad Technique In my work with athletes over the past 25 years, I’ve isolated only three causes of incorrect technique for any given lifting skill: 1 – You don’t understand what correct technique is. You have sufficient physical attributes to perform the skill, but not the necessary cognitive understanding. 2 – You lack the mobility for the skill in question. During my former life as a martial artist, I totally understood how to kick a 7-foot tall opponent in the face, but (much to my chagrin at the time) I lacked the requisite flexibility. In the gym, sometimes people understand how to arch their low back during a squat, but their hip structure doesn’t allow an arched lumbar spine during a deep squat. This is a problem without a solution, but if it’s short muscles/connective tissue that prevents proper technique, you can work on lengthening those tissues until proper form is possible. 3 – You’re not strong enough to use correct technique. If you have bad technique using a heavy weight, but good technique with a light weight, you understand and have adequate mobility to correctly perform the lift in question. The solution is to get stronger. The Stages of Technique Acquisition I categorize technique acquisition into three successive categories: Incompetent: You don’t understand how to perform the movement correctly. The errors you make are unrelated to how much weight you’re using. Unstable: As long as the weight you’re lifting is well within your abilities, you look great. Once the weight becomes too challenging, however, your technique falls apart. For example, if you’re trying to bench a challenging weight, you cut your range of motion, your ass comes off the bench, yada yada. Stable: Your technique always looks the same, regardless of how much weight is on the bar. If you try to bench more weight than you can handle, you simply miss the rep. A few thoughts on this schema: Having stable technique is only beneficial if it’s stable GOOD technique. If you stabilize poor technique, it’ll be a bitch of a job to relearn it. For lifters at the first two levels, as you pursue ever-increasing challenges (more weight, more reps, etc.), there’s an inevitable tendency for your otherwise good technique to erode. Sometimes this is okay (such as cutting your ROM a bit on benches), and sometimes it’s not (such as rounding your lower back on a heavy deadlift). Either way, if you hit a new lifting PR but did so with shaky technique, dial it back a notch or two and do what I call a “consolidation cycle,” which simply means, take a month or so to hit that PR with form you’re happy with. The Stages of Learning This is a useful way to conceptualize the process of attaining mastery: Unconscious Incompetence – You suck, but you don’t know it. Conscious Incompetence – You still suck, but now you know it. This stage must occur before meaningful change can take place. Conscious competence – Now you’re capable of correct technique, but it takes a lot of mental horsepower and your form is still “unstable” (using the classification scheme I presented above). Unconscious Competence – This is the mastery level. Your technical skills are so refined, so deeply entrenched, you actually find it difficult to do them incorrectly. When someone asks you how to do the skill in question, you struggle because it’s been so long since you’ve given it any thought.
Origin: Tip: 3 Ideas to Help You Understand Technique
Tip: Soreness – Good or Bad?
 Is Soreness An Indicator of a Good Workout? It’s a simple question, but the answer is a little tricky. Generally speaking, no, being sore after a workout doesn’t necessarily mean it was an effective workout. And also generally speaking, no, you don’t have to get really sore to build muscle. But There Are Nuances… As many T Nation coaches have pointed out, there are many levels of soreness. You can feel a little tight or swollen and experience what Christian Thibaudeau calls an “enhanced feeling” in the worked muscles. You definitely know what you trained the previous day, but you’re not really hurting. On the other end of the spectrum, you can find yourself saying “ouch, ouch, ouch” with every stroke of your toothbrush after a tough chest workout. That’s severe soreness. And you can even feel so sore that you can’t train – that’s extreme soreness and a sign that you messed up since that one workout has interfered with several of the following workouts. You should probably experience that “enhanced feeling” a day or two after a tough workout, but you don’t necessarily have to. What all the “soreness is bad” coaches are referring to is that debilitating soreness, which is a sign you may have taken things a little too fast or too far (too many sets/reps, or too heavy a load). Here Comes Another Big But… BUT if you tried a brand new exercise, a new set/rep scheme, or a new tempo (like lowering a weight very slowly), you should probably expect some level of soreness. If you don’t feel something, then you probably sandbagged it. Or maybe you haven’t yet established a good mind-muscle connection with the new exercise or method. What the “soreness is bad” coaches are also saying is that you shouldn’t be chasing soreness i.e. trying your hardest to get sore because you think it’s the only sign of a productive workout. That often leads to switching exercises too often. You never really get to progressively overload the exercise, because the moment the new movement stops making you sore, you switch to something else that makes you hurt again. That’s a mistake. Thibaudeau has even said that when initial soreness stops, the real progress can begin. And let’s not forget that your diet can influence how sore you get from training. If you’ve cut your calories and carbs down low, a familiar workout may get you sore again. But you’re probably not growing from it given the caloric deficit. The Best Sign of Progress… is Progress See how tricky it can be? So the lesson is to expect some “enhanced feeling” or mild soreness, especially after you try something new, but don’t train just to get sore. If you do have some moderate to severe soreness, it’s also a good idea to train that muscle again the next day. Nothing hard, just do a couple of light sets and get a mild pump in the sore muscles. This can accelerate recovery and maybe even lead to more muscle growth. Finally, remember that the best sign of progress is progress. After a few weeks or months, are you lifting heavier, doing more reps with the same weight, or “owning” a weight that used to beat you to death? Are you bigger without being fatter? Then you’ve progressed, whether you felt sore or
Origin: Tip: Soreness – Good or Bad?
Tip: Can Anyone Build 19-Inch Arms?
 Reality Check Here’s a question we received recently: “How often do you have to train each week to get 19-inch arms?” Let me offer some hard-earned perspective. I’ve been lifting for a long time. I was always cursed with crappy arms. The late Charles Poliquin used to call me some German term that translated to “Asparagus Tarzan.” Whether he meant I was a half-naked savage raised in the jungle by a tribe of asparagus or that I had arms like spears of asparagus, I’m not sure, but I think it was the latter. Anyhow, I’ve tried every program, every training style, every trick known to bodybuilding, but my arms are still my worst body part. Part of it’s because my arms are long. Want that box of cereal on the high shelf? No problemo. But filling in that long vista of space between my shoulders and elbows with muscle? Sigh. The only thing that ever worked, remotely, was a piece of advice from again, Charles Poliquin. In his experience, he said that you had to gain roughly 15 pounds of bodyweight for every extra inch you added to your arms. True enough, when I went from my usual fighting weight of 215 to 220 pounds to 235 pounds, my “biceps” (more accurately, my arms) grew about an inch. Still, by his reasoning, I would have had to gain another 15 to 25 pounds to get even close to 19 inches. Wasn’t gonna’ happen. Wasn’t the look I wanted, anyhow. And when I went back to my fighting weight, I wasn’t able to sustain the added size for long, which probably means that some of the added arm size was blubber. What I’m trying to say is that the size of your arms is largely genetically determined. I fully realize that right now there are a bunch of genetically gifted guys reading this that are hollering all kinds of synonyms for bullshit, but these guys know nothing about being a hardgainer. They might suggest that someone like me needs to train more, and if that didn’t work, I need to train less. They might say to lift heavier, lift lighter, do drop sets, work them once a week, work them twice a week, eat more, sacrifice a heifer to the biceps god, and so on. Eff ’em. I’ve tried it all. Most of these guys, however, could fold laundry and still grow giant arms. What I’m saying is that if you’re regular folk and want big(ger) biceps, follow the regular rules of bodybuilding: Train the whole body. Get good at the big lifts. Consistently eat more calories than baseline. Do lots of pull-ups and close-bench bench presses. After all that, if it’s in your genetic cards, you’ll get your 19-inch biceps. If not, focus on less stubborn body parts. But if having huge guns means that much to you, there are always steroids, in which case the old “gain 15 pounds rule” goes out the
Origin: Tip: Can Anyone Build 19-Inch Arms?
Tip: 3 Ways to Get Growing Again
 We get this (extremely vague) question often: “My gains have stalled. What do you suggest?” It’s tough to answer since we don’t know your main goals, your age, or even if you’re a girl person, a boy person, or one of those people who identifies as a lesbian parakeet. But here’s some general advice: 1 – Do the opposite. There are tons of great training programs here on T Nation, but the best one is probably the one that’s the most different than the one you’re doing now. Here’s an example. Back in 2005, not-yet-a-Dr. Chad Waterbury introduced a training system based around doing 10 sets of 3 reps. Not 3 x 10, but 10 x 3. And T Nation readers who adopted the program reported great gains in muscle and strength. Now, there’s more to the program than the set/rep scheme, but doing 10 x 3 was radically different than what most lifters were used to doing. It presented a new challenge, recruited motor units that had been largely dormant, ramped up force production and, in short, “shocked the system” and triggered new adaptations in size and strength. So take a look at how you’ve been training for the past few months. Now, do the opposite: Always do 12-15 reps? Then load up the plates and do 3-5. Always train super heavy for low reps? Then lighten it up and shoot for 60 seconds of time under tension for each set. (Set a timer and try not to poop out your spleen.) Always use barbells because “free weights are best?” Switch to a mostly machine-based program. Always do decline barbell presses? Do inclined dumbbell presses. Train 6 days a week? Train 3. Or vice-versa. You get the idea. Or just adopt someone else’s program. I know, the internet experts often advise people to avoid “cookie cutter” programs, but they can be valuable. Any program from the T Nation archives is probably going to push you harder than you push yourself. And it’s probably going to force you to try some new things. 2 – Do something that excites you. Several T Nation coaches have said it: Training very hard using a substandard program is better than lazily going through the motions on the “perfect” program. Take 6 weeks off from what you “should” be doing and train in way that gets you amped up. Maybe you’ve been training like a bodybuilder because hypertrophy is your main goal, but powerfully swinging around kettlebells looks damn fun at the moment. So do it. (We won’t tattle on you.) You’ll get better in other ways, and after a while you’ll be itching to do slow negatives, set-extending partial reps, and pump workouts again. 3 – Examine your diet. Keep a food log. After a week, figure out the average number of calories you consume per day. Now add around 300 to that. Take tape measurements all over your body. Log your rep PRs at the gym. Readjust that calorie number based on your progress over the next few weeks. Chances are, you just weren’t eating enough. Bonus: Get the edge with a good supplement. Still stuck? First, make sure you’re taking care of peri-workout nutrition. Consider Plazma™, Surge® Recovery, or Surge® Workout Fuel. Check out the details on each one. If that’s taken care of, read up on Micro-PA®. This will activate and amplify muscle cell protein synthesis. Take a serving one hour before your lifting
Origin: Tip: 3 Ways to Get Growing Again
Tip: Soylent Is Way Stupid
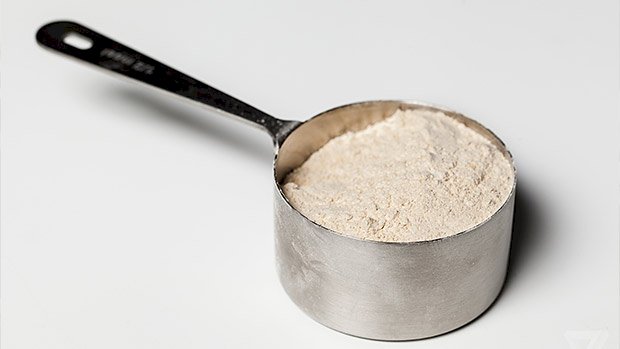 Techies, gamers, Hollywood types, and stockbrokers have embraced Soylent, the new high-tech meal replacement that’s supposed to free busy people from the horrible drudgery of eating. Unfortunately, none of them seem to realize that Soylent is essentially just SlimFast for geeks, nerds, and hipsters, but of course a diet food for fatties just isn’t as cool as a meal replacement for over-achievers who don’t have time for all that dreary cutting and spooning and chewing. Whatever you call it, it’s a piss-poor substitute for food and any techie who’s subsisting on Soylent powders, drinks, or bars for any length of time is introducing nutritional malware into their system. How This Particular Shit Hit the National Fan In January, 2013, Rob Rhinehart was a simple software engineer working in San Francisco’s tech scene, struggling to make his monthly nut. One thing stuck out as he looked at his expenses – the bulk of his paycheck was going to groceries. Goddam food. This bothered him because, like lots of bloodshot-eyed programmers and obsessive types in general, he thought food was a thief of time. “I resented the time, money, and effort the purchase, preparation, consumption, and clean-up of food was consuming… I hypothesized that the body doesn’t need food itself, merely the chemicals and elements it contains. So I resolved to embark on an experiment. What if I consumed only the raw ingredients the body uses for energy?” So Rhineheart flipped through a biochemistry textbook and scanned some U.S. government websites to learn what he thought he needed to know about human nutrition. Based on his brief studies, he purchased 35 chemical ingredients that he deemed necessary for survival. He glopped all the stuff together in water and lived off it for 30 days, after which he reported a host of health benefits, in addition to a much-reduced grocery bill. Jazzed by his concoction, he raised a ton of money through a crowd-funding campaign. By April of 2014, Soylent – named after the all-nutritive wafer made from dried-up dead people in the science fiction movie, Soylent Green – was in full-scale production. The original product was a powder but it’s since branched out to pre-made drinks, bars, and wafers. The product is the darling of the tech industry, having freed workers of what they think of as their whole-food and mealtime prison. It’s since been adopted by the aforementioned Hollywood types, Wall Street masters of the universe, and assorted trend setters and trend followers who yearn to be on the cutting edge of the latest nutrition trend, yet tragically know little about nutrition. And now it’s infiltrated the domains of the common man. Wal-Mart now carries Soylent products, as does 7-Eleven. Well-meaning mothers will soon dole it out to innocent children and mentally pat themselves on the back for being a good parent. Hell, I Wish Soylent Really Was People Companies that made supplements for bodybuilders used to be guilty of the same hubris as Rhineheart, but that was 30 years ago. High-protein meal replacements were incredibly popular, but we soon learned that it took a lot more to make an all-encompassing pre-packaged meal than some protein, a single source of carbohydrate (maltodextrin), and a few vitamins and minerals. Soylent has admittedly improved on the products of the 1990’s by adding fiber and healthy fats, but most of the first few ingredients on the label read like any meal replacement from that era, or really any candy bar or “weight loss” shake you can find in the grocery store: Soy protein isolate High oleic canola oil Maltodextrin Isomaltulose Soluble corn fiber Modified food starch Each powdered packet contains 20 grams of fat, 20 grams of protein, and 39 grams of carbs (of which 15 grams are sugars) for a total of 400 calories. One Soylent bar contains roughly one-fourth of the number of macronutrients of the powder, but they’re intended to be eaten individually as snacks or, alternately, in bulk (4 of them) to make a “complete” meal. If you’re an average sized man, you’d have to down 5 of these shakes a day to give you 2,400 calories. That equates to about 100 grams of fat, 100 grams of protein, and close to 200 grams of carbs, 75 of them from sugar. That’s not an entirely horrible macronutrient comp… for computer programmers and stockbrokers, but it sucks for most athletes. Never mind that its protein source is soy, which is problematic all on its own, but what’s missing from the formulation is more important than what it contains. Soylent’s formula doesn’t have any phytonutrients or antioxidants from plants in it, which, as more and more evidence suggests, form the backbone of real health. It also doesn’t contain anywhere near the amount of essential fatty acids you’d want to see. Furthermore, we only have a basic idea as to how many vitamins and minerals we truly need as a species, let alone as individuals, so making a one-size-fits-alls prescription is just nuts. To be
Origin: Tip: Soylent Is Way Stupid
Tip: Do This Before a Squat PR Attempt
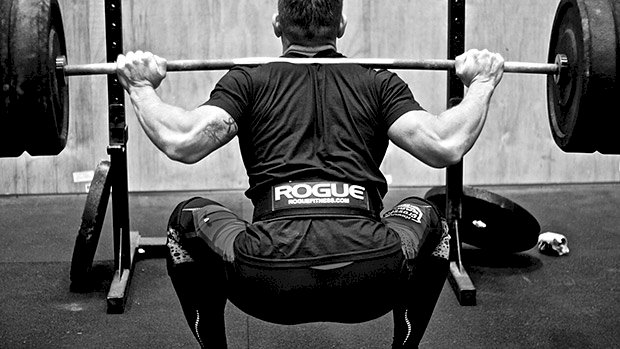 Ready to attempt a new squat PR? Or maybe the plan is to just work up to heavy sets of 3 reps? Well, the worst thing you can do is knock out a few warm-ups sets then go for the big one. To pull off a great back squat, you need to have a tightly squeezed back, a well braced core, and fully firing glutes. Do these three exercises first to make sure your body is primed and ready. Exercise 1: Wide-Grip Lat Pulldown The back squat requires a ton of upper back tightness to distribute force into the bar effectively. And you need a decent amount of shoulder mobility to put you into a position where you can get tight. To squat effectively, you should be squeezing your lats and pulling the bar down into the upper back to keep your torso as tight as possible. Performing some light reps with a wide-grip lat pulldown will not only activate your lats, it’ll also prep your shoulders for the motion needed to pull the bar into your back. You don’t need to go super heavy on these. Just do few sets of 8-12 reps. Exercise 2: Dead Bug The dead bug helps you practice bracing your core. This movement, much like the squat, requires that your core stabilize your lower back while your limbs move. Doing this before your first set of squats teaches you to activate your deep core stabilizers that keep your body from crumpling while under a heavy load. When you do this movement, contract intensely. Do NOT be lackadaisical. Imagine that a motorcycle is about to run over your midsection and you have no choice but to brace. That is how hard you should be bearing down on each rep. Fewer reps are better than a lot of reps as long as they’re done with intensity. Exercise 3: Banded Squats Few people use bands when doing their warm-up sets, but they should try it. Placing a “Slingshot” or hip circle just above the knees is a great way to get extra glute activation before you go for your heavy lift. Having the band around your knees forces you to drive them outward and helps you figure out how to “spread the floor” to get your butt to work for you. Since your glutes are the most powerful muscle in your body, it’s essential you get them firing before going for your big
Origin: Tip: Do This Before a Squat PR Attempt
Tip: A New Variation on Seated Rows
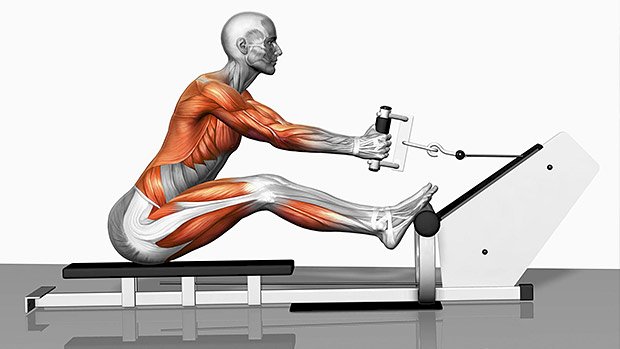 Simply adding a forward lean during seated rows is a great way to target the lats rather than the upper back muscles. The reason? Physics. Leaning your torso forward creates a de facto inverted lat pulldown position, only with stricter form. Leaning back for a standard pulldown – the way it’s normally done – can cause plenty of lumbar and thoracic overextension, which, beyond a certain point, doesn’t do much for back activation. That’s why this seated row modification will isolate the lats a lot more, using much less weight to get there. Since you’re leaning IN and not BACK, you have no room to extend the torso and can focus more on the pump. Get a good stretch after each rep to optimize the length-tension ratio. Chasing volume is the way to go – sets of at least 10-12 reps is
Origin: Tip: A New Variation on Seated Rows
