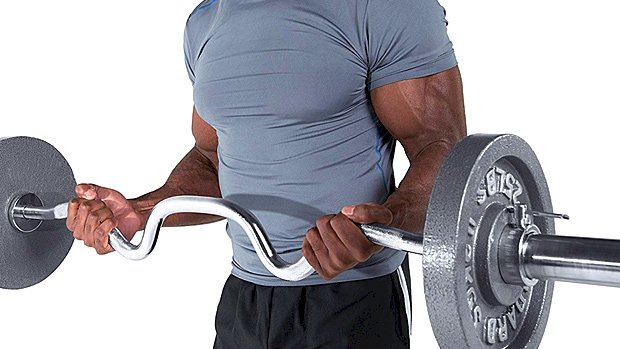
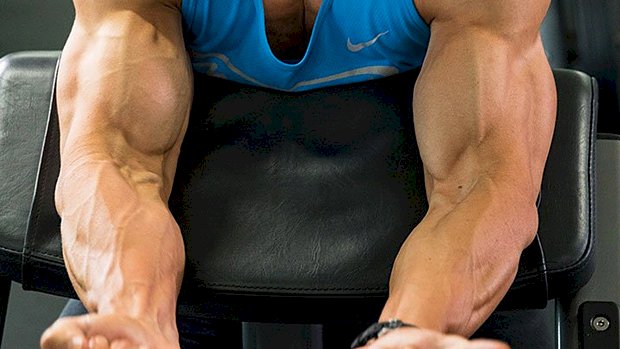
 EZ Does Its This is a mechanical advantage drop set to use after your heavier biceps work. We start with the theoretical weakest exercise and then manipulate leverage and strength curve to pour on more volume and extend the set. The Protocol Bent Over EZ-Bar Spider(ish) Curl:8-12 reps (to failure) Strict EZ-Bar Curl with Shoulder Flexion:Max reps (same weight) Strict EZ-Bar Curl:Max reps (same weight) Cheat EZ-Bar Curl:Max reps (same weight) Do the first variation using weight you can lift for 8-12 reps. From there out, go for maximum reps, always using the same weight. Rest 90-120 seconds and repeat. You’ll likely need to reduce the weight a bit to do a second round. This is metabolic stress work – you won’t need a lot of load and you should only do 2 sets, tops. For the cheat curl, use a little hip hinge and pop up forcefully. Pause the contraction and use a very controlled negative. Here’s an alternative version: This one uses an EZ-bar cable attachment and a low
Origin: Tip: The Toughest Way to do EZ-Bar Curls
Tag: Tip:
Tip: CNS Stress and Deadlifting
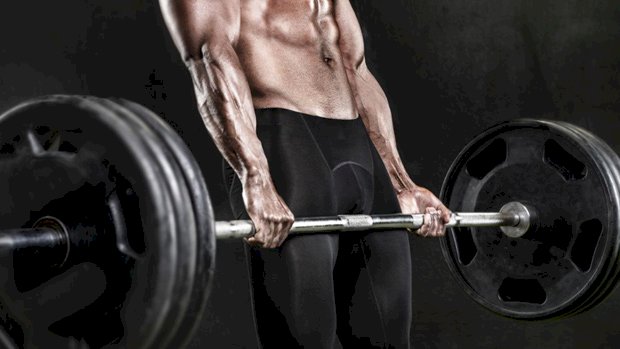
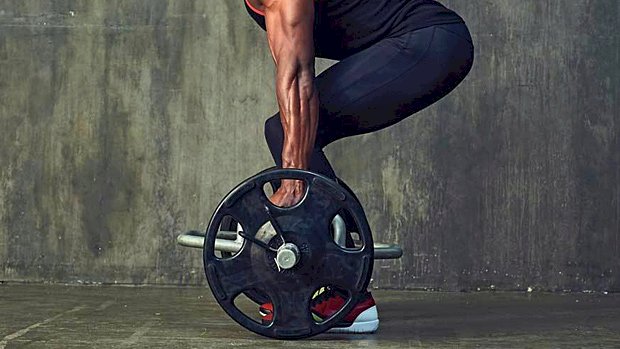 CNS Stress and Trap Bar Deadlifts Are trap bar deadlifts any less demanding on the central nervous system than barbell deadlifts? Well, let’s look at what’s likely to increase the stress on the CNS when lifting. The Weight Lifted:The more weight imposed on your body (tendons, skeletal system, muscles), the greater the demand will be on the CNS. The Work Performed:I’m not talking strictly about volume here, but more about the amount of work you perform when doing a movement. Work is equal to force X distance. That’s why a partial lift is often less demanding on the CNS even if you’re using more weight. The Amount of Muscle Involved:If more muscles are involved at the same time, the CNS will be challenged more. This happens in part because normally more muscles involved means heavier weight, but also because the system needs to work harder to coordinate all of those muscles. The Complexity and Coordination Required:The more difficult the technique is, the harder the CNS will work. Technical Efficiency:The less efficient your technique, the harder your nervous system will work to properly execute the movement. A better engrained motor pattern, and a more efficient movement, is more economical on neurological resources. That’s one of the reasons why elite Olympic lifters with superb technique can snatch and clean Both speed (more precisely, accelerating the bar) and mass moved will increase the demands for force production. Force equals mass x acceleration. So the more force you need to produce, the greater the demands on the CNS. The Perceived Stress:When the body sees a lift as potentially dangerous, either voluntarily or subconsciously, it’ll produce more cortisol which leads to an increase in adrenaline production. More adrenaline production can lead to what we wrongfully refer to as “CNS fatigue” either by depleting dopamine (adrenaline is made from dopamine) or a desensitization of the adrenergic receptors due to overstimulation. Now, using this info, let’s compare the two. Traditional Deadlift vs. Trap Bar Deadlift The Weight Lifted:Pretty much everybody will lift more on a trap bar deadlift, especially if using the high-handle position. So if we’re talking strictly about using a certain percentage of your max, let’s say 85% of your max on that lift, the trap bar “wins” this one. The Work Performed:If you’re using the lower setting of a trap bar, the linear distance travelled will be the same as a conventional deadlift. However, the bar path is much straighter on a trap bar deadlift. So while the distance from point A to point B is the same, the path is “longer” on the conventional deadlift, and the muscles should be under load for slightly longer. I give this one to the conventional deadlift. The Amount of Muscle Involved:Conventional wisdom would say that since you’re lifting more during a trap bar deadlift, more muscle is involved. But that’s not the case. You’re moving more weight mostly because of a better leverage: the center of mass is in line with your body, whereas in the conventional deadlift it’s in front of you. And because of that, the conventional deadlift works the posterior chain a bit more. The trap bar, on the other hand, will work the quads a bit more. I’d say the conventional deadlift tends to recruit slightly more muscle if done properly. Why? Because it recruits the lower and upper back a bit more. So I give this one to the conventional deadlift too. The Complexity and Coordination Required:I have to give this one to the conventional deadlift. Technically speaking it’s a more complicated lift because of the bar path. You must lift up and in a backward arc to pass the knees properly. But you lift in a straight line during the trap bar deadlift. So assuming they’re both done properly, a trap bar deadlift is much simpler than a conventional deadlift. Technical Efficiency:Here it really depends on the lifter. If you’re a master technician on the conventional deadlift it’ll be no more demanding (in this category) as the trap bar deadlift. But because the trap bar is so much simpler and because most people have a very inefficient deadlift technique, this one normally goes to conventional too. But if your conventional deadlift technique is world class then both would be similar. Speed of Execution:This isn’t really lift-specific; it depends on the load and the attempt to accelerate. If you want to be anal about it, the trap bar might be a bit easier to accelerate because of the straighter bar path. Both lifts would be similar in this variable, maybe a short “win” for the trap bar. The Perceived Stress:The conventional deadlift is significantly higher than the trap bar deadlift. The conventional deadlift will load the spine a lot more than the trap bar. That’s because the load is positioned in front of you versus aligned with your body in the trap bar. Axial/spinal loading is one of the greatest stresses your nervous system can be under. So as you can see, a trap bar
Origin: Tip: CNS Stress and Deadlifting
Tip: Nail Both Heads of the Biceps With This
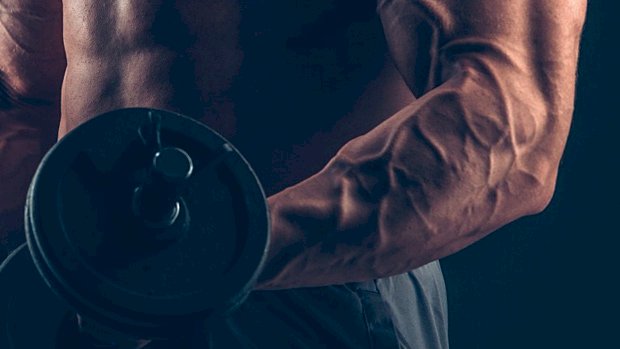 Rise Ups This is a very effective mechanical advantage drop set. You’ll start face down but spin around on the subsequent set, finally ending up standing, hitting both the long and short heads of the biceps hard in the process. Dumbbell Spider Curl:8-12 reps (to failure) Incline Dumbbell Curl:Max reps (same weight, same incline) Strict Standing Dumbbell Curl:Max reps (same weight) Standing Cheat Dumbbell Curl:Max reps (same weight) 90-Degree Isometric Hold:Max time (after last cheat rep) Do the first variation using a weight you can lift for 8-12 reps. Then go for maximum reps on the exercise variations that follow. Do this as a finisher for one or two sets after your heavier biceps
Origin: Tip: Nail Both Heads of the Biceps With This
Tip: How to Diagnose Your Bench Press Problem
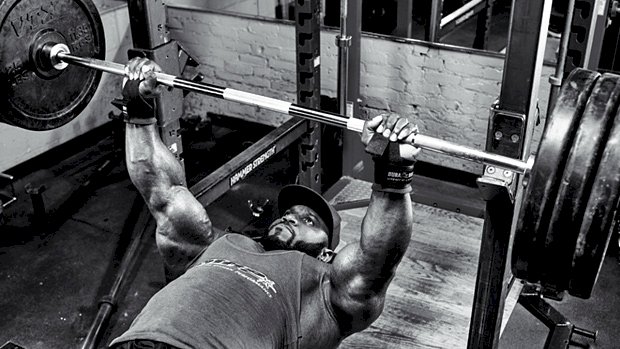 This table lists the most probable issue causing each sticking point on the bench press. Now, there could be something more complex going on, or a technical issue that’s more unique to you. But most of the time, I’ve found that strengthening the sticking point area will solve the problem. So take a look at this table, determine where your sticking point is, take note of the causes, and use the appropriate assistance exercises to strengthen that area. Bench Press Sticking Point Causes Assistance Exercises Breaking off from chest 1. Lats weak or not properly engaged 2. External shoulder rotators 3. Upper traps more dominant than lower traps and rear delts 1. Straight-arms pulldown, Pendlay row, seal row 2. Cuban press, seated dumbbell snatch, external shoulder rotations 3. Trap-3 raise, rear delt machine, Powell raise, victory raise Lower third Pecs Wide-grip bench press, Spotto press, decline bench press, floor press, dumbbell bench press, bench press with Duffalo bar Mid third 1. Anterior delts 2. Rear delts and rhomboids (Shoulder lifts up from bench) 1. Incline bench press, slight incline bench press, lying front raise 2. Bench press with resistance band around wrists, rear delt machine, face pulls Upper third (lockout) Triceps, especially long head Close-grip pin press, lockout bench press, close-grip floor press, close-grip decline bench, overhead triceps extensions If you’re unfamiliar with some of these exercises, use this list: Seal Row A seal row is a chest-supported row (using dumbbells or a bar) using a bench. Elevate the bench on blocks or plates. If you don’t have that setup, a regular chest-supported row will do. Cuban Press Trap-3 Raise Powell Raise Victory Raise Spotto Press Bench Press With Resistance Band Around Wrists Bench Press With Duffalo Bar Once you fix a muscle weakness, it’ll take some time to transfer those strength gains to the bench press. Your body will need to change the intermuscular coordination pattern. Don’t panic if your strength gains in pressing lag a few weeks behind your strength gains in the assistance
Origin: Tip: How to Diagnose Your Bench Press Problem
Tip: Make Room for Big-Bottomed Girls?
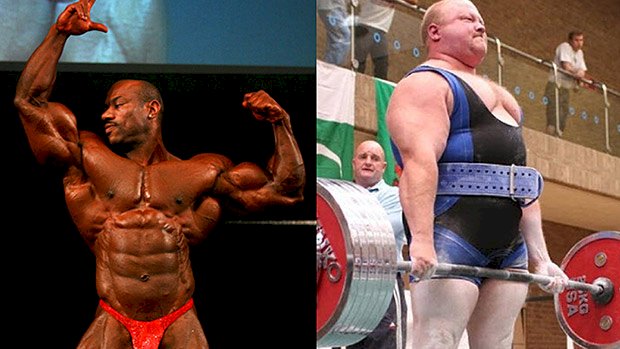
 I’ve judged NPC shows on the regional level in New England for approximately twenty years, as well as a few Fitness America shows and a few other now defunct organizations. Like most old-school purists, I didn’t love the inclusion of new divisions such as bikini and I got all grumpy about dudes wearing long, flamboyant surfer shorts in the Men’s Physique division. Still, while I may have had my issues with the inclusion of those divisions (where’s the muscle?!), I acknowledge that they were at least all based on the foundational concepts of physique sport: proportions, symmetry, and balance. Not so with the new “Wellness” division that makes room for women who have thick legs and glutes but a bikini competitor’s top half. I Like Big Butts But This I’m Not so Sure of Problematic name aside, the Wellness division is not actually new per se; it’s just new to the US. It’s popular in other parts of the world, and I even judged a show in Panama a few years ago that featured that division. While the gals who compete in the Wellness division are stunningly attractive – especially for those who like the look of thicker legs and glutes – it often looks like someone glued together the upper and lower bodies from separate people. It allows these leg/glute heavy women to compete where they may not have done well in say, bikini, figure, or physique. Sound like an unbalanced physique? It is! I’ve since labeled it the Thickness Division. These women don’t represent a proportional, balanced physique, which is the foundational focus of physique sports and what’s supposed to separate them from a basic beauty show or T&A extravaganza. While I, as a man with healthy, functioning sex organs, find thick legs and glutes terribly attractive, my judge brain just says “nope.” When I voiced my objections, one NPC judge responded, “That’s just it. This division is not about symmetry and balance. This division was made for the girls who are more muscular on their lower half. Brazilians, Colombians, and Venezuelans are the perfect athletes for this division.” Translated, that means to hell with proportions and balance. These women can’t fit into the other divisions because they don’t have either the genetics and/or the drive to fit into them, so let’s supply one they can compete in to be more inclusive. Okay. How about a wide-waisted division for guys like me? Or a division for pancake-butt women who can’t grow glutes at all, no matter how hard they try? Maybe even a Dad Bod division? Well truth, as they say, is stranger than fiction because one show has instituted a Dad Bod division. I shit you not. Sure, it’s all in good fun, but where does it stop? Of course, that show isn’t sanctioned by any major organization, but let’s say it was widely popular at that show and it caught on. With our all-inclusive, everyone should get a medal for just participating, striving for mediocrity society, could the Dad Bod division end up in more shows? A few years ago I would have said no, hell no. Today? I’m really not so sure. Heap Big Woman, You Made a Bad Boy Out of Me As far as the inclusion of the big-bottomed Wellness division in the NPC, I fully understand business is business and if they don’t fill seats and have competitors, there’s no NPC. The NPC, like all orgs, is stuck between a rock and a hard place on this type of issue, and this is in no way intended as a negative spotlight on the NPC or powers that be. But, if the essential aspects of the physique sports that have bodybuilding as their underpinning – which is a focus on proportions, symmetry, and overall balance – are abandoned in favor of being more inclusive, it’ll be a short-term gain but a long-term loss. In my admittedly jaded view, it’ll just be another victim of the current trend to allow everyone to compete in a given endeavor whether they should or shouldn’t. For this grumpy, old school purist, that’s truly where bodybuilding will have officially jumped the shark. Now if you’ll excuse me, I’m gonna go look at some more pictures of women from the Wellness
Origin: Tip: Make Room for Big-Bottomed Girls?
Tip: Do This Finisher, Pack on Muscle
 Back Off! Back-off sets are usually the first “finisher” a lifter learns. That makes sense because back-off sets are somewhat instinctive. Even someone who’s never read any articles about lifting will eventually stumble onto the technique all on their own. You do your 3, 4, or 5 heavy work sets and then, maybe having failed to get a satisfying pump, you reduce the weight for a final set and piston away until your gloriously blood-engorged muscles flame out. It’s bodybuilding’s version of an orgasm, complete with an O face. We’ve always assumed back-off sets work because, to a point, more volume is generally good, more time-under-tension is good, and a final set done with lighter weight and a greater number of reps taps into muscle fibers that only participated casually, if at all, in your main work sets. Even so, part of us wondered if these sets really did do anything to make muscle grow, or worse yet, were detrimental to muscle growth because maybe the back-off sets tapped too far into our recovery abilities. To find some answers, I dug up an older study conducted by some Japanese researchers who were also curious about back-off sets. What They Did Goto, Nagasawa, and their colleagues recruited 16 men and assigned them to one of two groups: Hypertrophy/Strength (HS) Hypertrophy/Combination (HC) During the first 6 weeks, both groups did leg presses and leg extensions using a hypertrophy-style regimen to gain muscle (10-rep maxes, short rest intervals, and progressively decreasing loads). After the 6 weeks were up, the HS group continued to work out another 4 weeks, this time performing a strength program where they did 5 high-intensity (90% of 1RM) sets. The HC group also continued to work out for another 4 weeks. Like the HS group, they also did 5 high-intensity sets, but they added a single set of low-intensity, high-rep work (the back-off set). Throughout the study (at weeks 2, 6, and 10), the researchers measured the muscle strength, endurance, and cross sectional area of the participants’ leg muscles. What They Found After the initial six weeks (during which the participants had practiced identical exercise programs), there was, predictably, no significant difference in the percentage changes of all variables between the two groups. After 10 weeks, though, the group that had switched over to the back-off set protocol (HC) showed significantly larger increases in leg press 1RM, maximal isokinetic strength, and muscular endurance in the leg extension. The cross sectional area of the quadriceps muscles of the HC group also “tended” to be larger. The researchers concluded the following: “A combination of high- and low-intensity regimens is effective for optimizing the strength adaptation of muscle in a periodized training program.” How to Use This Info There are various ways to do back-off sets. Powerlifters might do some work sets at 90% of their 1RM and then do a couple of doubles or triples at 90% of their work sets as back-off sets. This is done to build additional strength. Bodybuilders, however, generally drop their working weight by anywhere from 35 to 50% for their back-off set and aim to pump out an additional 25 reps or more until the muscles get all angried up and they can’t do any more. This, hopefully, gets them results similar to those noted in the Japanese study. One back-off set should suffice and while many lifters might choose to do them only on bench presses (mainly because they don’t have the cojones to do them on squats), there’s no real reason, outside your personal recovery limitations, that you can’t do a back-off set for nearly every body part in a workout. Most lifters wait 30 to 60 seconds between their final heavy work set and their back-off set, but many prefer the additional agony imposed by doing a back-off set immediately after the last heavy
Origin: Tip: Do This Finisher, Pack on Muscle
Tip: Your Morning Orange Juice May Be Killing You
 Juiced to the Gills It’s hard to find a woman wearing yoga pants who isn’t carrying a Big Gulp-sized cup of blended fruits and vegetables. They’re practically inseparable – kind of like Thor and his hammer – but there are plenty of men that seem willing to swill this stuff too. They all put their heads on their pillows at night and sleep peacefully, believing that all that juice is helping them thwart a whole spectrum of diseases and ailments, along with making them slimmer with breath that smells like an Air Wick plug-in dispensing the clean scent of fresh-cut hay. They probably shouldn’t sleep so soundly, though. Juicing and plain old fruit juice carries a host of potential problems. Drinking too much of it or drinking it too frequently can make you pre-diabetic, fat or fatter, wipe out the microflora in your gut, and, according to new research, possibly increase your chances of dying by 24%. (1) It’s all because of the sugar they contain and, lest you think that sugar from pulverized fruits and vegetables is somehow better for you, realize this: All sugar, whether it’s from fruit, honey, Coca-Cola, or high-fructose corn syrup (HFCS): “Delivers the same sugars in the same ratios to the same tissue within the same timeframe to the same metabolic pathways.” (2) A Crock Filled With Horse Manure Instead of Honey I know what you’re thinking: “How can honey be just as bad as HFCS? For that matter, how can HFCS be the same as sugar from fruits, regular corn syrup, or table sugar? That’s certainly not what I’ve read.” The simple answer is that what you’ve read is a crock, like when your older brother swore to you that the movie “Ratatouille” was based on a true story. The more complicated answer is that regular corn syrup doesn’t have any fructose in it at all. It’s 100% glucose. By that standard, ANY corn syrup that’s manufactured to contain any fructose is automatically classified as HFCS. Consider that the HFCS most commonly used in industry contains only 42% fructose, while the much-revered-by-granola-crunchers honey contains 49% fructose. (3) Even plain old table sugar is a 50/50 blend of glucose and fructose. And yeah, fructose is metabolized differently and can more directly impact blood sugar than glucose in the short run, but the overall metabolic effects are the same as you get from any type of sugar. All of this begs the question, why then is HFCS so feared? The problem originated with a 2004 study that correlated America’s increasing fatness with the rise in HFCS production, but as we know, correlation doesn’t always mean causation. Hell, you could have made a similar case that America’s fatness was in fact caused by decreased use of the 90’s slang term, “Boo-Yah!” Again, correlation but not necessarily causation. A 2014 review in the journal Diabetes Care tried to smack down the fructose myth by writing: “The belief that sucrose is metabolized differently than HFCS is a myth. No study has shown any difference between the two… nor is there any difference in sweetness or caloric value.” (4) That means that all sugars, regardless of where they come from, can do equal amounts of harm, but juicing in particular poses a litany of unique problems. What’s the Deal with Juices? When you Osterize your fruits, you obliterate all the fiber so that the microflora in your gut have little to munch on. They end up kicking tiny buckets and their bodies are loaded onto the turd train leaving for Porcelain City at 7 AM. Not only that, but the carbs are so bladed up, so cut up into teeny-tiny pieces, that they can actually bypass a lot of the digestive process. That means insulin surges. Big ones. If the surges were tsunamis, your uncle’s goat farm in Nebraska would be washed away. Much of that huge bolus of sugar gets hand delivered to the liver, where it’s converted into fatty acids and then sent to your thighs, butt, waist, or wherever else you don’t want it, for storage. This grinding up also affects the volume of whatever fruit’s juice you’re swilling. Un-pulverized fruits and vegetables take up a lot of space and push against the walls of your stomach, which tells the brain to lay off with any more food. Not so much with juices. You might be able to eat a few whole kiwis, but you can probably drink a considerably larger number of them. More fruit equals more calories. More fruit equals more sugar. And more sugar is, as you know, a problem. You’re probably still clinging to the notion that the sugar in juices can’t be as bad as those in sugar-sweetened beverages like Mountain Dew, Coco-Cola, or Red Bull. They are. In terms of long-term effects on diabetes and overall mortality, there’s no difference between the two categories, at least if you believe the results of the big study I mentioned above. Sugar’s Current Employer is Death Researchers from Emory University, writing in JAMA, detailed the results of a study of 13,400 US adults over a mean of 6 years. (1) They found that each additional 12-ounce
Origin: Tip: Your Morning Orange Juice May Be Killing You
Tip: How to Do a Regular-Guy Deload
 Deloads For Non-Competitors In a perfect world, we’d be able to figure out the exact number of days a week to train, with the exact amount of volume that stimulates growth and improves performance without ever feeling burned out. And in that perfect scenario training would never have to stop. Unfortunately we don’t live in a perfect world, so mental, physical, and emotional burnout from training is a real thing. For the non-competitor (who isn’t trying to time a training/recovery cycle to create supercompensation for competition) what are the benefits of deloading? It gives the sympathetic nervous system a break. It gives the lifter time to reflect on the previous training cycle. That reflection allows for better planning on the next training cycle. It gives the joints and connective tissue a break. You only have so many revolutions in those things. It allows for higher levels of strength and fitness to manifest through the multifaceted elimination of fatigue (systemic, muscular, mental, emotional). Sort of like a mini supercompensation. Here’s some real talk for you. If you don’t pay attention to the signs of being rundown from training, then you’re probably going to end up getting some “forced rest” from injury. Training is a metaphysical undertaking, especially if you’re training hard. That taxes virtually every physiological system you have. So it just makes sense to take some time off to allow for total systemic recovery. So When Should You Deload? Here’s the method I use: Every six weeks, do some self assessments. My self assessment was to ask myself if I was hungry or full. Confused? Lemme explain. If you’re living in primal times and need to find food, then dopamine is going to be elevated because finding food is kind of important when it comes to survival. It’s the neurotransmitter for motivation, achievement, and attainment. Once you get food, and eat a lot of it, your serotonin levels will rise and you’ll feel satisfied. I’m oversimplifying, but the point is that the brain is constantly analyzing in order to assess the risk of pain or injury against the satisfaction of winning or achievement. Your brain knows when you need to rest. If you’re paying attention to that feedback you’ll heed it and rest, not be a dumbass and keep pushing through. At six weeks, I’ll analyze if I feel full or if I’m still hungry. Do I look forward to walking into the gym to load up the bar (hungry), or would I rather be doing anything other than that (full)? Do my joints hurt? Is my perception of effort really high compared to what it was last week or the week before, i.e. “these workouts feel tougher than they did two weeks ago.” When I realize I need to deload, I take at least three complete days off. If I need more, I take it. I’ve taken as much as ten days off. I just didn’t want to go back into the gym during that time. I wait until enthusiasm returns. That means I’m not ruled by the ridiculous notion that all of my gains are going to dry up while I’m resting. Once I start feeling the itch to return to the gym, I don’t. That’s right, I don’t yet. I sit down and write out my potential programming and think about what it is I’d like to accomplish in the next training cycle. After that, I use one to two weeks of break-in training. This is where I slowly ramp the effort and intensity back up. There’s a myriad of ways to deload, but this is the way I’ve found that works best. Regardless of what method you choose, adhere to the full three-days off no matter what your deload protocol might
Origin: Tip: How to Do a Regular-Guy Deload
Tip: What Powerlifters Can Learn From Bodybuilders
 The Tale of Two Pauls I’ve competed in both powerlifting and bodybuilding, and each endeavor taught me a lot about the other. One thing that Powerlifting Paul learned from Bodybuilding Paul was how important it is to train muscles and not just movements. That was a huge lesson. Once I left powerlifting behind and dove back into bodybuilding, I really saw the vast differences in the two. Outside of the fact that you’re using barbells in both, they couldn’t be any more dissimilar. With powerlifting you want to put the body in the most mechanically advantageous position as possible to move the greatest amount of weight. It’s actually quite counterproductive, and I see a litany of competitive powerlifters show up on social media each week with new tears and strains. Powerlifters should have some periods where they think and train like bodybuilders. More muscle means better leverages, and more muscle increases maximum strength potential. When you’re trying to focus on muscular development (bodybuilding), you actually want to put that muscle into the least advantageous position so that it has to work much harder during the movement, i.e locking down the joints in a way that reduces the involvement of other muscle groups. Problem is, most powerlifters become very one-dimensional in their training thoughts. I fell into the same trap. I forgot that despite the fact that maximal strength is largely neural based, the muscles are still moving the weight. Newsflash, right? I continued to suffer from adductor strains when my squat would begin to climb. Simply training the adductors on the “good girl machine” rectified that problem. I had a similar problem later with my quads. Weight would go up, quads would sustain a strain. I knew my quads needed to get stronger, but I was already doing high-bar paused squats with over 600 pounds, and front squats with 455 for reps. Surely I had strong quads. Wrong! Due to years of perfecting my squat for my leverages, I’d really learned how to load up the hips and rely on them to do the brunt of the work. This meant my hips were capable of squatting 635 pounds, but my quads were capable of, well, far less. Which is why anything in that range often resulted in me straining a quad. I decided one day to rectify this and remove my superlative birth-giving hips from the equation. This meant hack squats, where the hips couldn’t contribute as much, and my quads would be forced to bear the brunt of the load. It wasn’t much of a load. I struggled with three plates for a set of ten on hacks. That was a very humbling day. But it also let me know I was on the right track. I knew that if I got strong as hell on hacks, then my quads would be able to contribute to my squat and not be the weak link. I followed up all of my squats with 1-2 sets of hack squats for 10-15 reps. I was living in the “anything over 5 reps is cardio” mantra at that time, so I can’t explain in words how awful this was. After a few months of being diligent with this plan, both my hacks and my barbell squats ascended. I hit a gym-best 660 pound raw squat with good speed months later. My quads stayed attached to the bone, thankfully. 12 Weeks a Year All powerlifters should be training for muscle growth and bringing up weak muscle groups for at least one twelve-week training cycle during the year. I believe both powerlifters and bodybuilders can benefit from having training cycles where they focus on the other objective: Powerlifters should have some pure hypertrophy training cycles to shore up weak links. Bodybuilders should do some training cycles where they focus on getting stronger on a few basic lifts. Doing so will carry over into moving heavier loads in the traditional bodybuilder rep ranges, which should manifest into more muscle
Origin: Tip: What Powerlifters Can Learn From Bodybuilders
Tip: 6 Quick Tips for Complete Pec Development
 Building a Complete Chest I naturally had great shoulder strength early on, and that translated over into virtually all of my pressing (flat, incline, overhead, etc). The drawback? Because I was delt-dominant, my chest lagged behind. There’s always going to be some muscle groups that will be subpar compared to others, no matter how much specialization you do for them. But I do believe in giving everything the ol’ college try. So let’s talk about some principles you should be adding to go from being bird-chested to pectacular. (Totally cheesy, but I’m rolling with it.) 1. Train chest early in the week or whenever you’re fresh. This shouldn’t be an issue with most gym bros. Monday is International Chest Day, after all. 2. Get the chest out in front. With all pressing and flye movements you need to set the scapula deep into retraction and depression. Think about getting the shoulders down into your back pockets, and keeping the sternum high. When you look at this from the side, you’ll see that the pecs get into a deeper stretch, which will increase their activation, and you’ll reduce the involvement of the anterior delts. A little “hack” here is to use a rolled up towel in the middle of your back to facilitate a deeper setting of retraction. The towel is a pretty strong reminder to hold it there as well. 3. Push to the centerline of the body. This can be an internal cue to help establish better mind-muscle connection for the pecs as well. In all of your pressing, think about moving the arms to the centerline of the body to maximize pec activation and shortening. For a lot of guys who press in order to “train the movement” for strength, they simply press straight up. But if you want to get the pecs to contract as hard as possible during a press – and you do for hypertrophy purposes – then think about driving the hands towards the center of your torso. The external cue for this, if you’re pressing with a bar, is to think about bending the bar in half so that it would end up in a “U” shape. Just make sure you hold that deep scapula retraction and depression to bias the pecs in the pressing. Don’t let the shoulders roll forward at any time. 4. Know that leanness matters. There’s no “inner pecs” really. That’d be the sternal area of the pecs. And here’s the real reason why a lot of guys think they need more mass in there: they carry too much body fat to see the separation between the pec muscles. If you want that bad-ass pectoral “split” that runs down the middle, then don’t be fat. 5. Understand arm angles for complete pec development. The pecs have three different areas: the clavicular pec or upper chest where the fibers are attached to the clavicle; the sternal or middle portion of the pecs that attach to the sternum; the abdominal head of the pectorals which originates from the external oblique, often called the lower chest. If you want to bias a certain area of the pecs, you need to be aware of the angle of the humerus to the pecs themselves. This, and not the angle of the bench, will dictate what area of the pecs is the most activated and doing the brunt of the work. Sternal Pecs You hit this area more when the arms drive from the side of the body to the centerline of the torso. Upper Pecs You hit this area more when the arms drive at a 45-degree angle upwards, towards the centerline, in relation to the torso. Lower Pecs You hit this area more when the arms drive towards the hips and the centerline in relation to the torso. Prioritize movements based on what area of the pecs you’re trying to bias over the others. 6. Stress the pecs at different lengths. Not all movements stress the pecs equally in the range of motion. An incline press or flat press stresses the pecs maximally at the mid-point in the range of motion. A dumbbell flye places the greatest amount of torque on them in the bottom position where they’re maximally lengthened. And a pec-deck or cable crossover tends to stress them more in the fully shortened position. It’s a good idea to stress the pecs through all of these different ranges so that no fiber is left behind. So how would this look in program design? Day 1 Hit the sternal pec area: Do the dumbbell bench press for two drop sets of 8/8/8. Take the first 8 reps to failure Reduce the weight Take another 8 reps to failure Reduce the weight Take another 8 reps to failure Repeat one more time Hit the upper and lower pecs: Superset the low-to-high cable crossover with dips. Do 8-10 reps on cable crossovers to failure Do as many reps as you can on dips with bodyweight Repeat one more time Day 2 Hit the upper pecs: Use an incline dumbbell press, barbell press, or Hammer Strength incline press (shown in video). Do 10-12 reps to failure Rest 60 seconds Then try to get half the number of reps you achieved on the first set Rest 3 minutes Repeat one more time (technically this ends up being 4 total sets) Hit the sternal and lower-pecs:
Origin: Tip: 6 Quick Tips for Complete Pec Development
