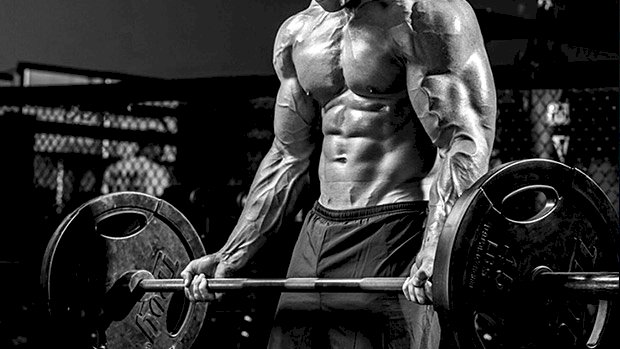
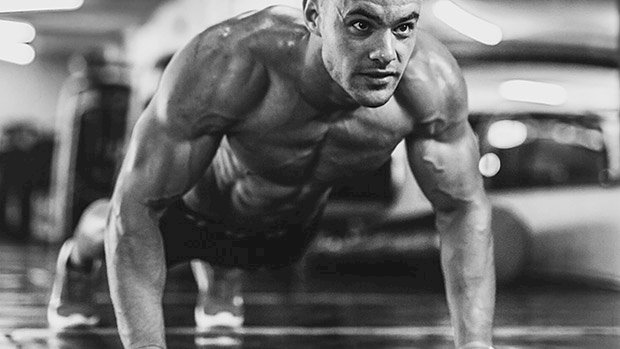
 Arthur Jones (1926-2007) was the inventor of Nautilus machines in the 1970s, and MedX strength-training equipment in the 1990s. If you have read any of Jones’s one-set-to-failure bodybuilding material, you will probably remember his unique way of painting pictures with words. The following paragraphs were taken from his early writings – which detailed the proper way to perform a set of barbell curls. Note: When this material was written, Jones recommended two sets of most exercises. Even so, you will quickly get the feel of how Jones applied high-intensity training. Barbell Curls by Arthur Jones Select a weight on a barbell that you can curl in good form for 6 repetitions. Then, make yourself do 10 repetitions, or tear your arms off at the elbows trying. Keep the lifting strict and emphasize the lowering. Do not just drop the barbell to the bottom. Resist it the entire way. At the bottom, immediately begin another repetition, smoothly. Imagine from a side view, that during each repetition, your head, shoulders, and buttocks remain stable forming a vertical line. No leaning forward or backward, no arching of the lower back, no movement of the head and neck. Only your hands and forearms are tracking up and down. This set should be so hard that the last repetition requires from 3 to 4 seconds on the lifting and another 3 to 4 seconds on the lowering. Afterwards, you should be breathing like a steam engine, dark blue in the face, and so weak that you have to sit down to keep from passing out. The barbell curl is not an arm exercise. At least, it’s not an arm-only exercise – although it will soon give you biceps like a gorilla. Rather, it is an every-damned-thing exercise, if it’s performed properly. Done correctly, and heavily enough, the leverage is so great when the weight is in the halfway position, it works your back as much as a set of heavy deadlifts, and the pull downwards is so strong on your shoulders that it works the entire shoulder girdle intensely. The energy output is so great that it causes you to sound like a locomotive – thus building overall heart and lung efficiency and increasing the rib-cage size nearly as well as a set of breathing squats. Rest, just long enough to get your breathing close to normal and repeat a second set of 8 repetitions with the same resistance. King Kong could not do more than two sets during the same workout. Thus, if you can, then you are not doing them correctly. In fact, if you even consider doing a third set after finishing the second set, then you did not do those two sets properly. You should feel like puking after the second set – and a lot of serious guys do. If you do not, then give up. Get the hell out of the gym. You do not have what it takes to succeed in training. I am not joking about this, not even slightly. Throughout your overall-body routine you must constantly walk a very fine line. The line between sickness and collapse… and simple, but complete exhaustion. You must stay just on the far side of that line, constantly on the bare edge of being nauseated. This is especially true in regard to barbell curls. Outright hard work. That’s my summation of barbell
Origin: Tip: The Barbell Curl That’ll Make You Puke
Tag: Tip:
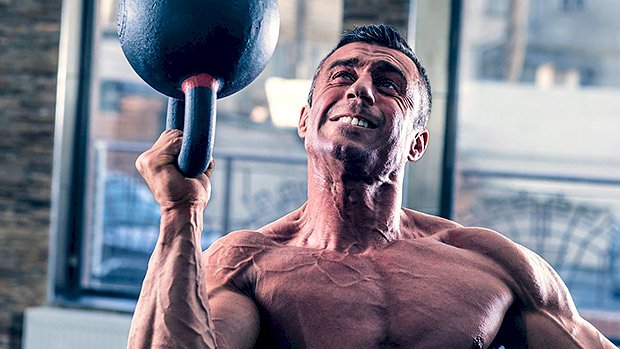
Tip: Can You Boost Testosterone with Diet?
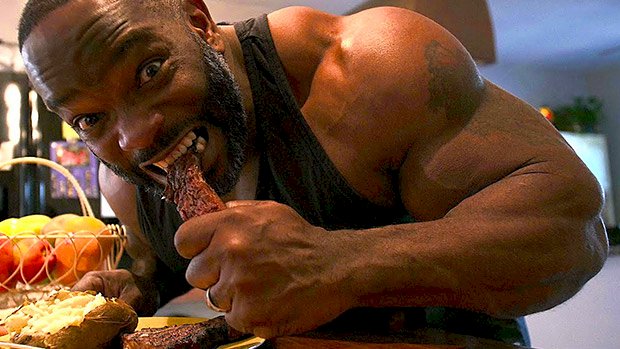 The Testosterone Boosting Diet? Is there a way to boost testosterone, or at least optimize it, via diet alone? First off, think of testosterone like a sex and reproduction barometer. It’s partly responding to the environmental inputs. When it comes to diet, the question is: Is there enough food to drive metabolic demand? Not too little and not too much? If so, bring on the T! The metabolism wants the “goldilocks effect” when it comes to testosterone. This is why fat couch potatoes and ripped, show-ready bodybuilders have no motivation, no desire for sex, and soft, non-responsive, or less reliable erections. So, the first thing to remember is, don’t go too low for too long in any one of the macronutrients (protein, carbs, and fats). That can be a T killer. The second thing is to balance training with recovery. But this topic is a nuanced one, and I don’t want to come down too hard on any one dietary practice. I’ve seen slightly overweight individuals go on keto diets and measure notable positive changes in T levels. I’ve seen that same diet cause issues in libido, muscle gains, and erections. The discrepancy is explained by the individual. If I had to give a general rule of thumb (which is usually dangerous and stupid), I’d say… Don’t go below 20% fat. Don’t go below 30% carbs. Keep your protein above 20%. A 40-30-30 (carbs-protein-fat) ratio if you’re trying to gain muscle or compete in a sport is great. A 30-40-30 macronutrient ratio if you’re wanting to lose fat is good for most. Oh, and some studies suggest that if you’re low in magnesium, zinc, or vitamin D you may get a T boost from supplementation. ZMA® along with appropriate sun exposure and 2000-5000 IU vitamin D daily (take with your biggest meal) may be some good insurance. So to repeat… Stay away from extremes in leanness and extremes in fatness. Stay away from extreme macronutrient and calorie imbalances. Train enough, but not too much. If your T is optimized, you should feel it. Your brain will be focused and driven. Your exercise performance and recovery will be on point. You’ll be lean and feel fit. And your penis will be responsive, recharged, and
Origin: Tip: Can You Boost Testosterone with Diet?
Tip: The Bodyweight Superset for Big Arms
 When most people want to build their arms, they head straight to the EZ-curl bar and the rope pulldown machine. That’s a mistake. For most lifters, chin-ups and dips should form the foundation of their arm training. Here’s a superset that’ll get the job done. Chin-Up and Dip Superset A1 Chin-Up – 4 sets to near failure A2 Dip – 4 sets to near failure No rest between A1 and A2. Rest approximately 2-3 minutes between supersets. This means that you’ll do a set of chin-ups, then immediately do a set of dips without rest. That’s one round and you’ll do three more, resting a couple of minutes between supersets. Perform these exercises to near but not absolute failure. Consistent absolute failure on all sets adds disproportionate fatigue to the training effect. For the chin-ups: Choose a partial or fully underhand grip to emphasize biceps recruitment. Fully extend your elbows at the bottom with control and then reverse direction. Your scapula should move with you and not remain locked in place. Use full available range of motion at the top and bottom under control to avoid needless injury risk. Squeeze at the top and then repeat. For the dips: Use caution as they can put your shoulder in a compromised position and aren’t suitable for those with injured shoulders or poor joint mobility. Ensure the ball of the joint doesn’t glide forward from the socket in the bottom of your dip, which would result in the ball pushing repeatedly against your biceps and rotator cuff tendons. Descend to a depth you can control and then extend elbows to lockout. Some trainers emphasize remaining upright for more triceps focus, but more forward torso lean may allow more shoulder comfort and will still smash triceps while engaging more chest. Remember, classic-era bodybuilders used bodyweight compounds as the foundation of arm training. Though prominent bodybuilders of the ’60s and ’70s lacked the sheer mass (and abdominal distention) of modern pros, Arnold and his contemporaries never lacked for world-class
Origin: Tip: The Bodyweight Superset for Big Arms
Tip: Strict Diets vs. Your Metabolism
 Can You “Break” Your Metabolism? Some people say that a really strict diet – like one you do to get ready for a bodybuilding show – will wreck the metabolism. Will it? Well, it probably won’t… at least not in the way most seem to think. There are definitely some issues you can induce with extreme dieting and exercise, but “wreck” is probably too strong a term. That assumes you broke something. The metabolism doesn’t break. In fact, it’s doing exactly what it’s designed to do. Let’s get some definitions out of the way, because that’s where most of the confusion starts. You’ve likely heard of the admittedly vague and non-medical terms like “adrenal fatigue,” “starvation mode,” and “metabolic damage.” These are more marketing lingo than medical terminology. But that doesn’t mean they don’t have some utility. In medicine there’s often dysfunction before disease. For example, if you have a fasting blood sugar level above 126 on two separate occasions, then I can diagnose you with diabetes. However, if you have a blood sugar above 100 but below 125, what do I call that? You don’t yet have diabetes, but you obviously have some dysfunction. We call these a lot of different things in medicine: prediabetes, dysglycemia, impaired glucose tolerance, or something else. Same thing with the metabolism. When you have difficulty sleeping, insatiable hunger, unstable mood, unpredictable energy, uncontrollable cravings, and you’re no longer responding to the same calorie deficit BUT your blood labs and vitals are all normal, what do we call that? There’s obviously something going on, but we can’t put a diagnosis on it, can we? So, we use some descriptive terms like metabolic compensation, metabolic resistance, metabolic dysfunction, or metabolic damage. Or like you, we just say, “Damn, I think I wrecked my metabolism!” You didn’t. What happened is a predictable phenomenon and we know some (although not all) of what it’s about. Part of it is what research calls “adaptive thermogenesis.” What Happens During Adaptive Thermogenesis A competition diet is well-known for inducing a very wide calorie cap. You cut calories down and you expend a lot of energy through weight training and/or cardio. In the same way not changing your car’s oil or filling up with gas will cause the engine to conk out, the body does not respond well to this large energy discrepancy. In response it will increase hunger, reduce motivation, lower energy and (most insidiously) decrease its metabolic output. It does that in many ways: It reduces resting energy expenditure through downward regulation of thyroid and other hormones. It increases hunger and cravings. It sneakily causes you to move around less the rest of the day. If you normally get up and walk around 100 times per day you’ll find that it’s now only happening 25 times per day. If you move in your sleep that will stop as well. You’ll also burn less during exercise, something research calls “constrained caloric burn.” What’s worse, after the show, when you no-longer have the external motivator and would prefer to eat like a human being, you’re primed to gain all that weight back plus some. I’ve come to call this the “metabolic credit card effect” –– you get short-term results, but you pay steep metabolic penalties later. Anyone that’s seen a first-time figure competitor blow up like a helium balloon post competition knows this well. Is that a wrecked metabolism? I suppose you could describe it that way, but another way to look at it is your metabolism is doing just what it’s designed to do. It feels it needs to recover that debt. After all, it evolved in a feast and famine reality and it thinks it’s doing you a favor by mitigating the famine and maximizing the feast. How to Limit Metabolic Compensation The good news is there are some ways to reduce metabolic compensation. Here are some things to do: Do your best to maintain as much muscle as you can. The metabolic rate will not slow as much and be more resistance to fat regain. This means to make weight lifting the dominant part of your fitness regime during fat loss. Cardio becomes a little more important after weight loss, when the metabolic rate has lessened. You may want to save your cardio for after, rather than during the competition diet. Eat more protein, see the first point above about maintaining muscle mass. And probably increase the amount of protein as a percent of total calories. Do this during, but perhaps more importantly, after fat loss. Cycle the calorie gap, having times where you’re in a strong deficit and other times where you’re in no deficit at all. The recent MATADOR study (minimizing adaptive thermogenesis and deactivating obesity rebound) showed this strategy got better results, had less metabolic adaptation, and much longer lasting results. Don’t eat like an asshole when it all ends. Focus on blander foods and less variety of them. Doing the traditional burger, pizza, and cheesecake binges will trigger the
Origin: Tip: Strict Diets vs. Your Metabolism
Tip: Change Your Attitude About Achy Joints
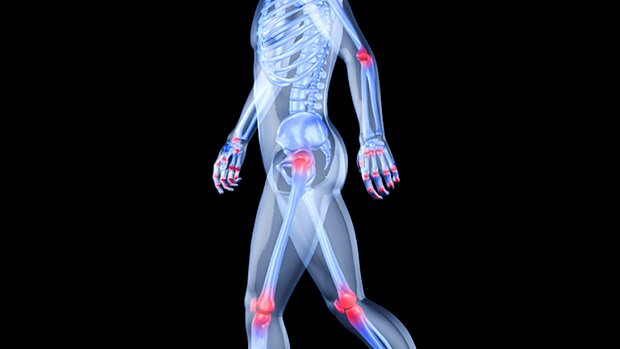 Screw Your Achy Joints If you’re over 40, it’s no excuse to let up. Everyone who’s been doing any serious lifting for at least 10 years wakes up in the morning feeling like they spent the previous day trying to ride the back of Bodacious the bucking bull, and was flung clean over the stands into the deep-fried Twinkie concession stand. Get over it. Sure, you can do your stretching, that hot Yoga where they treat you like a pork dumpling, or whatever rehab exercises fit the situation, but for the most part, you’re always going to hurt. The Two-Part Plan For Recourse 1. Simply get smart about it. Do exercises that don’t hurt the particular joint; use grips or foot positions that allow you to train with no pain; do a reduced range of motion, or lower the weights with a slower tempo. A good 4-second descent should take the strain off any angried-up tendon. And also… 2. Say goodbye to sets under 5 reps. This is your one, big, lifting concession to Father Time. You should forget about doing sets for fewer than 5 reps. There’s just no need to use such heavy weight, and the risk of suffering an injury that you can’t work around, like tearing tendons or ligaments that just aren’t as spry as they used to be, is just too great. No worries, though. You can stay plenty strong by devoting some time to sets of 6 to
Origin: Tip: Change Your Attitude About Achy Joints
Tip: Two Sumo Deadlift Myths, Destroyed
 There are two big reasons to use sumo deadlifts: To build a powerful posterior chain and to lift as much as humanly possible. Training for the former means focusing on glutes and hamstrings, along with upper and lower back muscles. A good hinge pattern hits all of these. But let’s address the second reason. For high-level powerlifting competitors (those trying to lift as much as humanly possible), it’s fine to use any technique within the rules that’ll allow you to lift the most. If this means a squatty sumo, so be it. Adjustments made for a competition squat, bench, and deadlift are to maximize leverages to get the highest one-rep max total possible. But those adjustments are often different from proper training technique, and they’re even counterproductive to maximizing the training effect for strength and hypertrophy. They often create injury risk, accepted by competitors trying to win. Think exorcist-level bench arch or round-back deadlifts. For those of us sumo deadlifting for the other reason, let’s dispel the two biggest myths and fix the flaws in this lift to make it a safer training tool that’ll get us better results. Myth 1 – Your feet need to be as wide as possible. A lot of lifters think their feet need to be spread as wide as the plates will allow, but that’s a good way to drop a plate on your toes. Really, your feet just need to be outside of your arms and hands in order to be a sumo. Take a look. Granted, a wider stance feels great for some and has leverage advantages which shorten the distance from ground to lockout. But some people’s hips just aren’t mobile enough to get into a wider position. Wider isn’t necessarily better. If you get your legs just outside your arms, this is called the “hybrid sumo” or “semi-sumo” and it’s a perfect option to gain the benefits of deadlifting. Some clients I’ve worked with can’t get into a conventional stance (arms outside of legs) without rounding their lower back. This is caused by a limited hip flexion range in a narrow stance, which makes the semi-sumo a better solution. A semi-sumo stance can also prevent knee valgus or inward collapse. This is another common problem that arises when placing your feet too wide. In this case, your knees don’t remain stacked above your feet because your hips can’t externally rotate wide enough. Or it’s possible you aren’t focusing on creating torque with the hips to pull the knees into the wider position. This may lead to knee pain and injury over time if not addressed. Myth 2 – You need to sit low in a squat. Deadlifts are a hip hinge pattern. There will be some people who can squat their sumos and lift more weight while experiencing zero pain. For the rest of us, let’s make a simple adjustment and get a better effect. When lifters set up with low hips that jump up before the weight leaves the ground, this usually indicates a loss of back and core tightness. Your hips and hamstrings are seeking the tension you failed to create during the setup. There’s no problem with beginning in a squat position then pulling the hips high and getting wedged in before lifting, but issues arise when the hips jump in an uncontrolled manner as the lift is initiated. So, when setting up, firmly grasp the bar and pull it into your shins. Pull the shoulder blades together and create a flat neutral spine. Then elevate your hips until you feel coiled tension in your hamstrings. When you feel this tension, your hips are like a loaded spring ready to snap forward and generate more power. In a recent seminar, Tony Gentilcore described this process as creating a “lifter’s wedge.” A Recap and a Few Additions Your sumo deadlift shouldn’t look like a squat. Your hips shouldn’t drop to the level of your knees. Your feet don’t need to be as wide as possible, and your lower back and knees shouldn’t hurt as a result. Now that we’ve got those essentials out of the way, let’s tack on a few other notes: Pull the slack out of the bar. You can do so by pulling on it without enough power to lift it off the ground. This should create tension through your body and a stable spine. Then initiate a smooth but powerful push with your hips forward toward the bar. Lock out by squeezing your glutes under your ribcage and avoid hyperextending your lower back. Control the negative (lowering) portion. Just remember that heavy weight will come down quickly. Some lifters can touch-and-go smoothly between reps with tight form. Others need to reset every rep to maintain good form. Avoid bouncing the weight between reps. Use the style to best maintain excellent form, maximize training effect, and walk away healthy. Avoid rounding at the back. Some lifters argue that a rounded back is safe and makes them stronger. They’re usually referring to some roundness of the thoracic (mid-upper) spine, done by skilled and experienced powerlifters to lift more in training and competition. A practiced core brace with a rounded thoracic spine and flat lumbar is often a
Origin: Tip: Two Sumo Deadlift Myths, Destroyed
Tip: Fix Your Rounded-Back Deadlift
 Rounded deadlifts are an epidemic. You can’t scroll through Instagram for two seconds without seeing some bro attempting a max effort deadlift with their spine bending like a accordion. A little rounding in the thoracic spine is actually okay, but most people round over at the lumbar region which turns an epic one-rep max attempt into a cringy display of a nearly snapped low back. Lumbar flexion during deadlifts occurs because of one of the following (or a combination): Weak or unsustained intra-abdominal bracing Weak spinal erectors Loss of tension in the upper back How to Fix It Here’s an odd trick I learned from powerlifter Greg Nuckols that fixes all of these common causes. (And this trick can be used for the squat as well.) Take a band and anchor it to a heavy weight in front of your deadlift setup. You won’t need a strong band. A light band goes a long way with this drill. Where you anchor the band will depend on how tall you are as well as your deadlift variation. If you’re doing a stiff-legged deadlift or an RDL where you’re more hinged over, you’ll need to anchor the band closer. If you’re doing something more upright like a conventional or trap-bar deadlift, the anchor should be further. Wrap the band around your neck and do a few sets with this setup. You’ll feel your entire posterior chain light up. Why It Works The band will pull on your spine from the top down. The tension reminds you to stay tight while strengthening your spinal erectors. This will fix both low back and upper-back rounding. Thanks to the band, your deadlift is now stable, safe, and no longer a joint-crumbling eyesore. For programming, do these before your actual working sets. Or if you struggle heavily with rounding your back, you can do all your sets with this setup. Your spine will thank
Origin: Tip: Fix Your Rounded-Back Deadlift
Tip: The 50-Rep Leg Day Finisher
 High-rep finisher sets have their place in bodybuilding. And they’re not just for building mental toughness. They also create metabolic stress (the pump) which is one of the primary drivers of muscle growth. Just finish off your workout with one 50-rep set. Use short rest-pauses if needed toward the end: do as many reps as possible, then take 10 deep breaths and go again. Repeat until all 50 reps are completed. Or you can break this into two 25-rep sets with only 30 seconds between the two sets, but the goal is to get all 50 in one shot eventually. Here’s Chelsie Lysenchuk using goblet squats as a leg day finisher: Find a dumbbell that’s a quarter of your bodyweight. So if you weigh 200 pounds, that’d be a 50-pound dumbbell or kettlebell. Now do goblet squats for 50 reps. Remember, this can be a “broken” set. You can stand and catch your breath as needed, but you can’t put the dumbbell down or sit. If you’re truly sadistic, do these in pump/piston rep style where you don’t lock out. Those will hurt a lot and increase the metabolites a hell of a lot faster than doing full-range reps with a lot of breaks during the
Origin: Tip: The 50-Rep Leg Day Finisher
Tip: The Push-Up Variation You’ve Never Tried
 The Staggered Push-Up Usually, all regular bilateral strength exercises are performed symmetrically. In most sports, symmetrical actions and positions seldom happen, especially in contact sports. So you set yourself up for weakness if you only train symmetrical exercises in the gym. There’s no need to go all “sport specific” and perform all kinds of circus acts, but SOME exercises should aim to prepare your body for non-symmetrical impact. For the upper body you can do this with staggered push-ups. Just get into your regular push-up-position, but with one hand placed higher than usual (toward the head) and the other hand placed lower than usual (towards the hip). Staggered push-ups are a great exercise for improved shoulder stability, athletic preparation and performance. Give it a
Origin: Tip: The Push-Up Variation You’ve Never Tried
Tip: Eat More, Train More – The Anabolic Toggle
 How Do You Eat for Muscle Gains Without Getting Fat? First, you have understand that the metabolism is not a great multitasker. It likes to be building up fat and muscle (anabolism) or tearing them both down (catabolism). Trying to do both at once is the metabolic equivalent of patting your head and rubbing your belly. You can do it, it’s just not that easy… unless you’re a beginner or using anabolics. The trick here is to understand you have four different metabolic toggles to pull: 1 – Eat less, exercise more. This will burn fat and muscle because it creates a pretty intense and wide calorie gap through both exercise and food. Think marathon runner or skinny fat. 2 – Eat more, exercise less. This will put on both muscle and fat through creating a calorie gap in the other direction. Think powerlifter or muscle-fat. That latter scenario is what most people try to do when they want to gain muscle. It works, but it often makes you look like you just put a jacket on top of two sweaters. It’s not the best approach or the best look. This is usually creating a 500-calorie surplus or more, and that may be too much if the training isn’t right. 3 – Eat less, exercise less. Think the little old lady in Paris who climbs four flights of stairs six times a day, but eats only half a baguette, a cup each of coffee and wine, a radish, and some cheese. She stays lean because she drives the calorie deficit through diet and moves enough to not become a skeleton. 4 – Eat more, exercise more. That’s the toggle you want. It’s the athlete toggle. Ramp up your food intake to a slight surplus so you can gain some muscle. I suggest somewhere between 15 and 20 times body weight in pounds depending on whether or not you’re a hard gainer. If you tend to get “muscle-fat” easily (like me), stay near 15 to start. Now set your macronutrients to 40-30-30 (carbs, protein, and fat). You’ll need the extra carbs. Insulin is, after all, the most powerful anabolic hormone in the body. If you can’t get that fuel in the cell, you’re not going to grow no matter how much testosterone you have. Now turn on the training intensity like you’re a banshee in a bench, squat, and deadlift competition to the death. Doing things this way will amplify energy flux, reduce fat (or at least minimize its accumulation) and put mechanical pressure on the muscle to grow. If it’s not working, SLOWLY ramp up the calories until it does. My guess is you’ll end up in a slight surplus of 200-400 calories. This is the best way to
Origin: Tip: Eat More, Train More – The Anabolic Toggle
