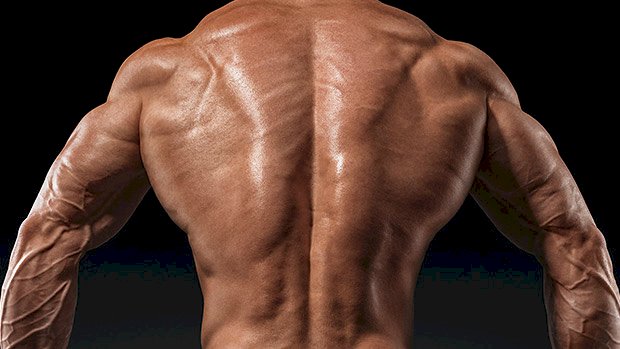
 One of the things that separate the wolves from the sheep in the iron game is back development. A guy who puts in years grinding away on his upper back and lats will end up with a physique that ultimately blows away the one developed by the dude who’s just pressing, flying, and curling his way to mediocrity. So if you’re looking for more to do on back day, add this finisher to the mix. Just do ONE set at the end of your normal back workout. Pulldown Drop Set for Maximum Gains This is an efficient mechanical drop set requiring only a high pulley and a rope attachment. You won’t even have to change the weight. Do the following: Straight-Arm Pulldown:12-15 reps to failure (upright position) Straight-Arm Pulldown:max reps (bent over position) Bent-Over “J” Pulldown:max reps Hybrid Motorcycle Row/Face Pull:max reps Bent-Over Lat Pulldown:max reps Take no rest between exercises. This protocol has a nice flow to it and you’ll appreciate the
Origin: Tip: Pull Your Way to Growth
Tag: Tip:
Tip: The Fastest Full Body Stretch
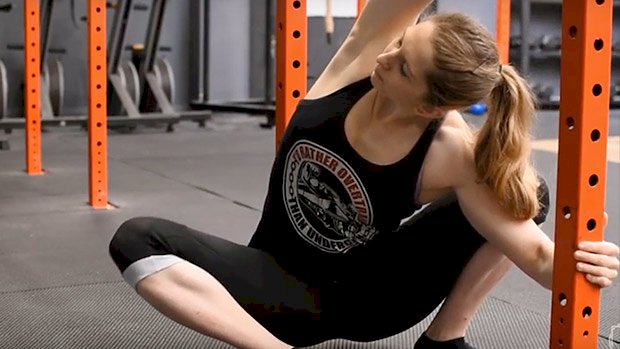 The One Stretch Your Warm-Up Needs Trying to get stronger, bigger, or leaner? Doesn’t matter what your goals are, you need to have a good level of full body mobility to stay injury free in the gym… and to just move well through life. It’s always tempting to skip the warm-ups and stretching, especially when you’re short on time. But at the very least, make sure you address the most commonly stiff/tight areas of the body: Lats Lower Back Hips Knees Ankles This assisted squat stretch hits all of these. And the best thing about it? It takes no energy to do – you don’t even have to hold yourself up! Lats:The crossover reach hits your lats, which is great for your overhead position and overall shoulder mobility. Low Back, Hips, Knees:This is combined with the deep squat which is a great relaxer for the lower back and really helps to open up the hips and knees, especially with the added prying motion. Ankles:Because you’re holding on to a support, you’re also able to focus on dorsiflexion of one ankle at a time. This is crucial for improving your deep squats. Spend 1-2 minutes using this as a warm-up or cooldown stretch with some deep relaxed breathing and you’ll feel
Origin: Tip: The Fastest Full Body Stretch
Tip: The Healthiest Oil for Frying
 When choosing a cooking oil, most health-conscious people obsess about smoke point. That’s the temperature at which a trail of blue smoke wafts upward and triggers the kitchen smoke alarm, causing your poodle and similarly high-strung humans to wet themselves. Smoke point has always been a concern for two main reasons, one taste related and one health related. An oil that’s been pushed to its smoke point and beyond will make whatever food you’re cooking taste like the charred hot dog that your uncle pulled out of the campfire last fourth of July picnic. An oil that’s reached its smoke point was also believed to be well on the way to turning your cooking oil into a toxic stew, full of inflammatory, cell-damaging, and potentially cancer-causing chemicals. Smoke Point Doesn’t Really Matter A lot of physical factors can determine smoke point, things like the amount of oil being used, the size of the frying pan, the air currents, the altitude, the type and source of light, and, most prominently, the amount of free fatty acids (FFA) the oil or fat contains. The more FFA, the quicker it breaks down and starts smoking, but since FFA usually make up less than 1% of the total oil, smoke point is now regarded as a poor indicator of the ability of a fat or oil to withstand heat. What’s of more concern is the production of 4-hydroxynonenal (HNE), which has been implicated in cardiovascular disease, neurodegenerative diseases, and even influencing factors that affect the life and death of cells. HNEs are created when highly unsaturated oils like grapeseed, safflower, sunflower, and rice bran oil are heated, but not necessarily to their smoke point. To make matters worse, you can’t really tell when HNE is being formed as it’s odorless, flavorless, and invisible. That’s why we need to cook with oils with a low level of polyunsaturated fatty acids. Enter, or re-enter, an old favorite, one that’s long been judged to be too “delicate” for frying: extra virgin olive oil (EVOO). Aussie Scientists Burning Oil on the Laboratory Barbie Last year, Australian scientists subjected a number of oils to rigorous testing to see which ones could best withstand the challenges of heat. Their goal was to examine the formation of nasty byproducts like HNE, along with gauging the propensity of these oils to form free radicals. It turns out extra virgin olive oil fared the best, failing to produce a significant quantity of harmful compounds. It also showed an admirable resistance to oxidation. Granted, it didn’t have the highest smoke point, but that didn’t appear to matter. The high smoke-point award went to the second-place finisher: coconut oil. Aside from being the smoke point champion, it also failed to produce a significant amount of harmful compounds. It didn’t do quite as well in the oxidation department as EVOO, though, as it was slightly less resistant to this chemical reaction. The authors wrote: “Reasonable predictors of how an oil will perform when heated have been oxidative stability, secondary products of oxidation, and total level of PUFAs, EVOO has demonstrated to be the most stable oil when heated, followed closely by coconut oil and other virgin oils such as avocado and high oleic seed oils.” How to Use This Info When sautéing or frying, choose extra-virgin olive oil, but if you want to save your EVOO – which is usually more expensive – for drizzling atop your food, opt for coconut oil. You can also use other “virgin” oils (those that were derived by old-fashioned pressing instead of chemical extraction) like avocado oil, those that are high in oleic acids (monosaturated fats) like canola, or those normally non high-oleic cooking oils that have been selectively bred to contain higher amounts of oleic acid than is typical for their species. Examples include high-oleic sunflower oil, high-oleic soybean oil, and high-oleic safflower
Origin: Tip: The Healthiest Oil for Frying
Tip: Easy, High-Protein Hotcakes
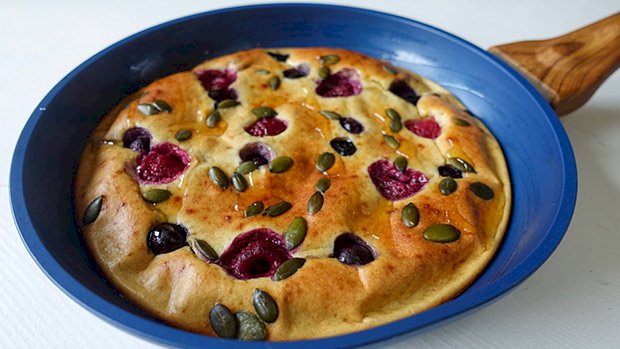 Every so often a recipe comes along that becomes a staple. These sweet potato waffles did a pretty good job of that. Folks everywhere haven’t had another breakfast since their discovery. This baked pancake promises to be another game changer. Cake, In a Pan In some cultures, they’re called “hotcakes.” In others, “skillet cakes.” Whatever name you give them there’s no denying their fluffy pancake texture, guilt-free great taste, and nutrient profile. Eat them for breakfast or dessert, or cut them up into snack-sized portions. Many protein powder recipes can be rubbery and dry, but not these. You’ll get one big fluffy pancake that’ll serve one hungry person or two struggling hardgainers. The whole pancake packs a whopping 53 grams protein, coming from a mix of whey isolate, micellar casein, and eggs. That means a complete amino acid profile with varying degrees of time release. You’ve got a few portions of fruit in there too, as well as over a third of your daily fiber intake in one sitting. This protein pancake will keep you fueled and keep your body running like clockwork. Ingredients 1 Medium ripe banana 1/2 Cup uncooked rolled oats or oat flour 2 Whole eggs 1 and 1/3 scoop (40g) vanilla Metabolic Drive® Protein 1/5 Cup (2.1 oz) zero-fat Greek yogurt 3/4 Teaspoon baking powder 1/2 Cup frozen berries 1 Heaped teaspoon pumpkin seeds (or any other seeds) Few pinches salt Instructions Preheat oven to 360 Fahrenheit or 180 Celsius. Toss all the ingredients into a blender or food processor except the berries and seeds. Blend until well combined with no whole oats visible. Spray an oven-proof skillet with a little low-calorie cooking spray. Pour the smooth batter into the skillet. Throw some berries and seeds on top. You can use fresh berries, but frozen are just as good and keep the pancakes extra moist. Bake on the top shelf for 18-20 minutes or until golden brown. Optional: Serve with a little extra Greek yogurt, honey, maple syrup, or sugar-free syrup. Bonus: Why Pumpkin Seeds? The pumpkin seeds are a nice touch, especially if you’re thinning a little on top. They contain beta-sitosterol which inhibits the 5-alpha-reductase enzyme that converts testosterone to dihydrotestosterone (DHT). Multiple randomized controlled trials in both rats and humans have shown pumpkin seed oil to have antiandrogenic effects and help with male hair loss. For a healthy hormonal profile, pumpkin seeds are a great option. Calories and Macros for the Whole Damn Thing 641 calories 17 grams fat 72 grams carbs 53 grams protein 12 grams
Origin: Tip: Easy, High-Protein Hotcakes
Tip: Climbing Up In Age? Bump Up The Volume
 For people over 40, I’ve suggested giving up on sets of less than 5 reps before. That doesn’t mean falling forever into the sticky 8 to 10 reps mire. Everybody’s been stuck on doing 8 reps forever, mostly because ancient, cave-man lifters began a tradition of doing 8. Doing 6 or 7 didn’t feel like it was hard enough and doing 9 to 10 or more was talking-to-an-insurance-salesman tedious. But I say to you, Horatio, there are more beneficial rep schemes in heaven and earth than are dreamt of in your weightlifting philosophy. You can build plenty of size – perhaps even more size than you thought possible – by doing sets of 12, 15, or even 20 reps, especially since you’ve probably ignored higher rep ranges your entire lifting career. You might incorporate these higher rep schemes into your workout by devoting the first training day (say, for upper body) of the week to sets of 6 to 8, devoting the next training session to sets of 8 to 10, and then the subsequent session to sets of 12 to 15 or more before starting the whole merry-go-round over again. Skeptical of High Reps? Try this protocol out a couple of times before you judge: Pick a weight for just about any exercise that you can do for 20 reps using a one-second concentric (lifting part of the rep) and a two-second eccentric (lowering part of the rep): Do the first set of 20 reps. Rest just 30 seconds. Do the second set of 20 (or as close as you can get to 20). Rest 30 seconds. Do a third set of 20 (or as close as you can get). Stick worked body part in ice to cool the fire. Researchers Fink, Kikuchi, and Nakazato (2018) found this method worked twice as well in building muscle in yes, experienced lifters, than the usual 8-rep sets. Case in point, higher reps work just fine, thanks, and they’re much more forgiving on the
Origin: Tip: Climbing Up In Age? Bump Up The Volume
Tip: Lat Width – The Hard Way
 If you’re after more lat width, this finisher is a monster. Now, it’s not meant to replace heavier, progressive-overload back work. Instead, think of it as metabolic-stress work, which should come at the end of a workout and only be done for a single set. Don’t abuse it; just do it every other week or so. The Rack Pull-Up Marathon This finisher uses the rack pull-up as the foundation and then manipulates leverage and body position to create a nasty mechanical drop set. Set up a bar in a Smith machine or rack at upper-chest height. Set an incline bench out in front of you to prop up your straight legs. When you’re at the top of the pull-up, your thighs should be as close to parallel to the floor as possible. Now do this: Rack Pull-Ups:max reps Modified Behind-The-Neck Rack Pull-Ups:max reps Modified Rack Pull-Ups:max reps Feet-Elevated Scap Depressions:max reps Use straps. Don’t rest between any of the above exercises, outside of what it takes to transition. On the second and third exercises, use as little lower-body assistance as necessary to complete the
Origin: Tip: Lat Width – The Hard Way
Tip: Big Arms, No Weights
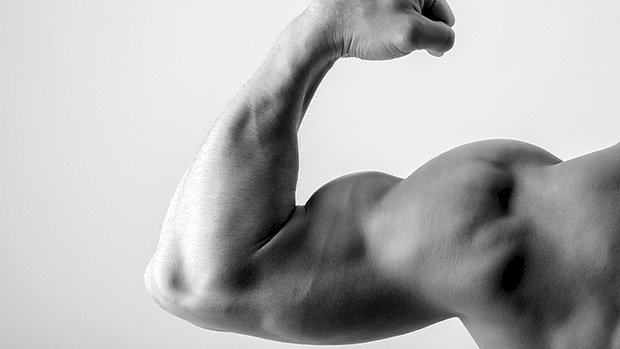 Most gyms now come equipped with suspension straps, but rings also work for this killer superset. Suspension Strap Skull Crusher and Curl A1 Suspension Strap Inverted Skull Crusher – 4 sets of 10-12 A2 Suspension Strap Curl – 4 sets of 10-12 Take no rest between the skull crusher and the curl, then rest approximately 90-120 seconds between supersets. Choose an angle of moderate difficulty until you’ve gained proficiency and can increase the challenge. For the triceps portion:Maintain a stable shoulder angle as you control the descent into end-range elbow flexion, mirroring a skull crusher, and then reverse into elbow lockout and repeat. For the suspension strap curls:Maintain neutral body position with arms extended 90 degrees from your torso. The elbows will try to drop as the more powerful lats instinctively try to turn the movement into more of a row. Defend against this by maintaining strict position of the humeri by elevating your elbows. This keeps tension on your biceps, thus delivering an intense stress and
Origin: Tip: Big Arms, No Weights
Tip: Drop The Bro Splits If You’re Over 40
 Grown Men Don’t Need Bro Splits You’re not 15 anymore. The traditional bro split where you train one body part each workout (usually 5 workouts a week) isn’t efficient or effective, especially for an adult with a job who actually communicates with real-live women in their non-pixilated form. Your muscles recover in about two days, so why let them go fallow for a whole week? Besides, what happens if life intervenes and you miss a day or two one week? That mucks up the whole schedule and you might not train the same body part for another 8 to 10 days instead of 7. A Split That Makes More Sense You’re much better off doing an upper body/lower body split where you work out 4 days (or even 6 days) a week: Monday:Lower Body Tuesday:Upper Body Wednesday:Off Thursday:Lower Body Friday:Upper Body Saturday:Off Sunday:Off As Charles Staley pointed out in his The Single Most Effective Workout Split, this upper/lower split does a couple of things: It makes the best use of time. Since muscles recover in about two days, muscles trained on Monday should be trained again on Wednesday. If you don’t, you’re losing ground. You get to train muscles more often with fewer workouts. With a bro split, you work out 5 times a week and each muscle gets hit once. With an upper/lower split, you work out 4 times a week and each muscle gets worked
Origin: Tip: Drop The Bro Splits If You’re Over 40
Tip: A Quick Fix For Better Lats
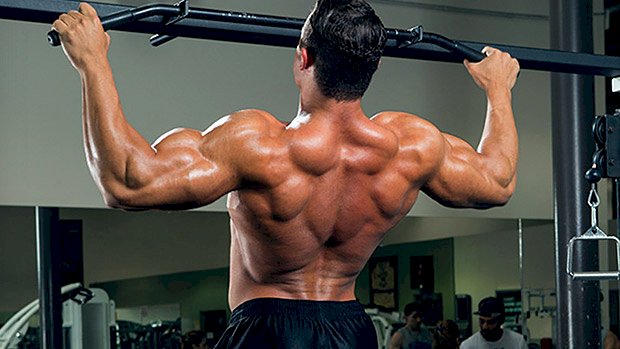 The Problem Lifters often can’t engage their lats while doing pull-ups. As a result, they may experience elbow pain, tendonitis, and neck pain. To top it off, they’ll assume that the pull-up doesn’t add size to the back – because in their case, with their form – it won’t. What could be causing this problem? Well, the obvious answer is that the wrong muscles are getting used and the tension is getting placed on the shoulders and arms instead of the back. The not-so-obvious thing is, when pulling ourselves up, we rely heavily on our grip being at its strongest towards the index and middle fingers, but never really think about how that will impact our shoulder position. The Solution A great coaching cue is to tell people to lift up their index fingers as they perform a set of pull-ups. Not only does this put the shoulders into a better position, it’ll also make it infinitely harder for someone to power through with their biceps, which in turn will make them better at pull-ups and give them stronger, bigger lats. Most people that experience shoulder/arm/neck issues struggle to match their normal max set of pull-ups with the index fingers lifted, so this is a great way to check if you’ve been using the correct muscles. If you’re only one or two reps off that’s fine, but if you find your reps are cut in half or you really struggle to do one, then there’s room for improvement! Regardless of your level, I’d recommend always throwing it into your warm-ups for lat/upper body pulling days because it’s just a great activation tool. By putting focus on the right muscles, hopefully you’ll avoid running into any issues with your pull-ups in the long run. Longevity is the key to
Origin: Tip: A Quick Fix For Better Lats
Tip: The Glute Exercise for Athletes
 The glute bridge is basically a hip thrust performed with your back on the floor instead of on a bench. By using a resistance band as shown in the video below, the exercise will incorporate more of the muscle fibers involved in gait by requiring the hamstrings to contract at both ends. Bilateral Band-Resisted Bridge This changes the exercise into more of a performance-oriented challenge for intermediate and advanced athletes. It does this by increasing the contribution of the body’s deep longitudinal system. This is the line of interdependent muscles from the lower leg to the hip responsible for healthy gait. This modification and its progressions make for a great activation or warm-up for all deadlift and hinge-patterned movements, as well as antero-posterior patterns with contralateral loads. (That’s a bloated way of saying sprints and single-arm dumbbell lunges or step-up variations.) They’re also great for helping to ingrain movement skills such as upper and lower body disassociation and multi-planar hip stability. Here are several ways to make it even tougher: Progressions Band-Resisted Sprinter’s Bridge When performing the exercises, stabilize the foot with a powerful arch by digging the tip of the big toe into the floor. This prepares the lower body for sport and training by exciting the intrinsic foot muscles and calling for greater neural drive into the
Origin: Tip: The Glute Exercise for Athletes
