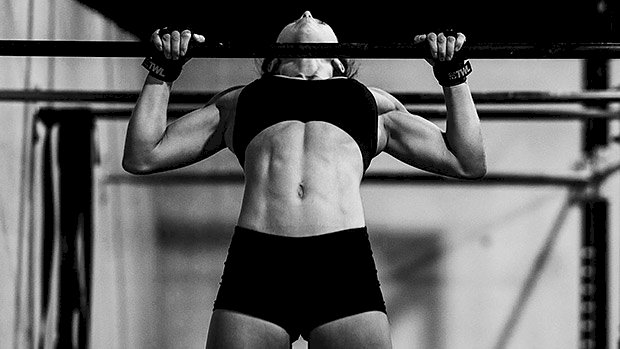
 Pull-ups are great, but many people feel the tension in their arms more than their upper backs. This is suboptimal for back strength and hypertrophy… especially since the pull-up is primarily supposed to be a back exercise. To fix this, just take it through a full range of motion. “But wait, isn’t the pull-up already a full-ROM exercise?” Unfortunately, it’s not. In a typical pull-up, your spine remains relatively neutral. This doesn’t allow the muscles of the upper back to go through their full contractile range of motion. The Solution That’s where the pendulum pull-up comes in. With this variation, you’ll extend and flex your spine at different portions of the rep. Take a look: At the top of the rep, extend your spine and curl your legs up. This allows your shoulders to externally rotate and your shoulder blades to pull tightly down while your chest sticks up. This will fully shorten your upper back musculature. Then, as you lower your body, unbend your legs, round your spine, and hang in a hollow body position at the bottom of the rep. This allows your shoulder blades to fully rotate upwards and lengthen the lats, giving them a nice loaded stretch, which has been shown to increase hypertrophy (1). The flexing and extending of the spine will take the key muscles through their true contractile range of motion. You can do it this way with any grip you like. Don’t Cheat, Bro Be careful though. The line of pull is still very strict. The leg curling is only to maximize muscle contraction. It’s not supposed to help you swing for momentum. If you struggle with staying strict on normal pull-ups, these are probably too advanced for you. If you’re a pull-up stud, give these a
Origin: Tip: Master the Pendulum Pull-Up
Tag: Tip:
Tip: Is Your Tracker Making You Fat?
![]() How accurate are those watches that tell you how many calories you burned during a workout? Well, not really accurate. A friend of mine recently told me that she did a lifting workout that burned 960 calories. And while I’d like to believe that – because it would make lifting the best fat loss tool known to man – it’s simply not realistic. It’s hard to know exactly how many calories you burned during a workout. It depends on the exercises (a squat uses more fuel than a curl), the number of reps completed, the training methods used, and how much muscle you recruited during each rep. For upper body lifts, a hypertrophy set lasting 40-60 seconds might expend 7-10 calories while it can get as high as 40 calories for a set of squats lasting one minute (Victor M. Reis, R. S. 2011. Energy Cost of Resistance Exercises: J Hum Kinet. 29A: 33–39). If you do 4 work sets like that, we’re talking about 160 calories. If you have another big lift in your workout, done with the same parameters, that could add another 160 calories. Then if you have four smaller exercises it could add 350-400 calories. Such a workout would expend 650-700 calories and it’d be one helluva workload. A hypertrophy workout for the upper body could expend 250-400 calories more than your normal caloric expenditure for the duration of the workout. For the lower body, it could burn up to 500-700 calories more than your normal caloric expenditure, and a whole-body workout could be in the 300-500 calorie range. I believe that the caloric expenditure estimated by those watches/apps use mostly heart rate as the measure for energy expenditure. These formulas were developed with cardiovascular exercise in mind. In that type of exercise, the heart rate is directly proportional to the rate of energy expenditure because the heart rate increases only in response to the need of the heart to pump blood to the muscles to supply oxygen to produce fuel. However, with resistance training the increase in heart rate can also be due to a high release of adrenaline. Furthermore, heart rate might spike for the duration of the set and stay elevated because of the adrenaline/neural activation during the rest periods, despite no work being done. As a result, these instruments will dramatically overestimate how many calories you’re burning during a lifting workout. Why Is That a Problem? By giving the impression that you’re burning a metric ton of calories, it might lead you to overeat or overindulge. “I just burned 1200 calories in my lifting workout! I can eat that burger since it only has 600 calories!” No, you can’t. In the grand scheme of things it’s not the end of the world, but it’s still
How accurate are those watches that tell you how many calories you burned during a workout? Well, not really accurate. A friend of mine recently told me that she did a lifting workout that burned 960 calories. And while I’d like to believe that – because it would make lifting the best fat loss tool known to man – it’s simply not realistic. It’s hard to know exactly how many calories you burned during a workout. It depends on the exercises (a squat uses more fuel than a curl), the number of reps completed, the training methods used, and how much muscle you recruited during each rep. For upper body lifts, a hypertrophy set lasting 40-60 seconds might expend 7-10 calories while it can get as high as 40 calories for a set of squats lasting one minute (Victor M. Reis, R. S. 2011. Energy Cost of Resistance Exercises: J Hum Kinet. 29A: 33–39). If you do 4 work sets like that, we’re talking about 160 calories. If you have another big lift in your workout, done with the same parameters, that could add another 160 calories. Then if you have four smaller exercises it could add 350-400 calories. Such a workout would expend 650-700 calories and it’d be one helluva workload. A hypertrophy workout for the upper body could expend 250-400 calories more than your normal caloric expenditure for the duration of the workout. For the lower body, it could burn up to 500-700 calories more than your normal caloric expenditure, and a whole-body workout could be in the 300-500 calorie range. I believe that the caloric expenditure estimated by those watches/apps use mostly heart rate as the measure for energy expenditure. These formulas were developed with cardiovascular exercise in mind. In that type of exercise, the heart rate is directly proportional to the rate of energy expenditure because the heart rate increases only in response to the need of the heart to pump blood to the muscles to supply oxygen to produce fuel. However, with resistance training the increase in heart rate can also be due to a high release of adrenaline. Furthermore, heart rate might spike for the duration of the set and stay elevated because of the adrenaline/neural activation during the rest periods, despite no work being done. As a result, these instruments will dramatically overestimate how many calories you’re burning during a lifting workout. Why Is That a Problem? By giving the impression that you’re burning a metric ton of calories, it might lead you to overeat or overindulge. “I just burned 1200 calories in my lifting workout! I can eat that burger since it only has 600 calories!” No, you can’t. In the grand scheme of things it’s not the end of the world, but it’s still
Origin: Tip: Is Your Tracker Making You Fat?
Tip: How Limb Length Affects Training
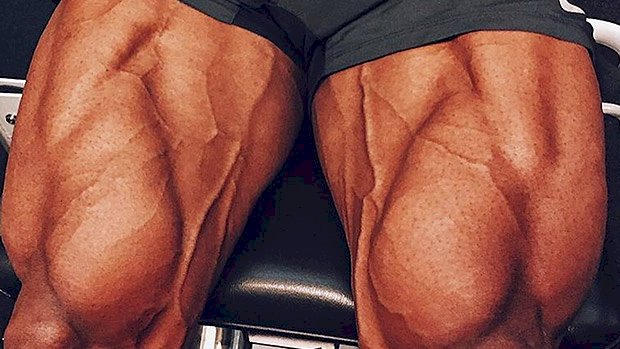
 Can Limb Length Play a Role in Exercise Selection? Yes! Exercise selection is the most important training variable. Imagine if you’re a patient at the doctor’s office and the conversation went like this… Doctor:I’m going to prescribe you 200mg twice a day. Patient:200mg of what, Doc? Doctor:What do you prefer? Which medication do you feel like taking? It doesn’t make sense, right? Well it’s the same with training. Think of sets, reps, and training methods as the dosage and exercises as the medicine. While everybody will improve their body and performance by gradually becoming stronger on the big basics, simply doing those and nothing else will emphasize certain muscles over others, and might not end up giving you the result you’re looking for. Some people will get great pec development from the bench press while others will only grow their triceps and delts. Some will build tremendous quads from back squatting and others will build bigger glutes. Limb length relative to torso length helps determine which muscles receive the most stimulation. Here’s a general overview: Body Type 1 – Long Limbs/Short Torso Tend to progress more easily on pulling movements than on pressing ones Have an easier time getting stronger on the hip hinge/deadlift than on the squat Upper Body Pressing Pecs are the easiest to develop Delts are second Triceps are the hardest to develop Upper Body Pulling Lats are the easiest to develop Rhomboids, rear delts are second Biceps are third Upper traps are the hardest to develop Lower Body Training Glutes are the easiest to develop Hamstrings are second Quads are third Calves are the hardest to develop Body Type 2 – Short Limbs/Long Torso Tend to progress more easily on pressing movements than on pulling ones Have an easier time getting stronger on the squat than on hinging/deadlifting Upper Body Pressing Triceps are the easiest to develop Delts are second Pecs are the hardest to develop Upper Body Pulling Upper traps are the easiest to develop Biceps are second Rhomboid, rear delts are third Lats are the hardest to develop Lower Body Training Quads are the easiest to develop Calves are second Hamstrings are third Glutes are the hardest to develop All of this is true most of the time, but there will be some exceptions. (Arnold, for example, is long limbed and had huge biceps.) That info allows you to better select the assistance work you’re doing in a program by telling you which muscles will need added direct work. For example, I have short legs, so I don’t need any direct assistance work for the quads. They grow just fine by doing squats exclusively and I prefer to invest my training time on exercises that are actually needed to fix a weakness. However, I do need direct glute and hamstring work. You don’t need as much (if any) direct work for the muscles that are the easiest to develop, but you’ll need a lot more for those that are the hardest. Knowing this also helps us better select the big lift variations for our workouts. If I have long legs, the front squat will be better than the back squat for overall development. Why? Because with the back squat I’ll get mostly glutes and some hamstrings while with the front squat I’d stimulate the quads. A heels-elevated back squats would also do the trick. While there’s nothing wrong with good, smart programs you find on the internet, you should still give yourself some leeway in exercise selection: you can respect the spirit of a program while choosing better
Origin: Tip: How Limb Length Affects Training
Tip: How to Get Better Results with Chin-Ups
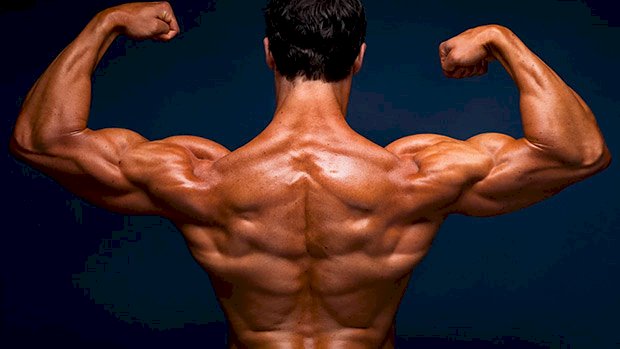
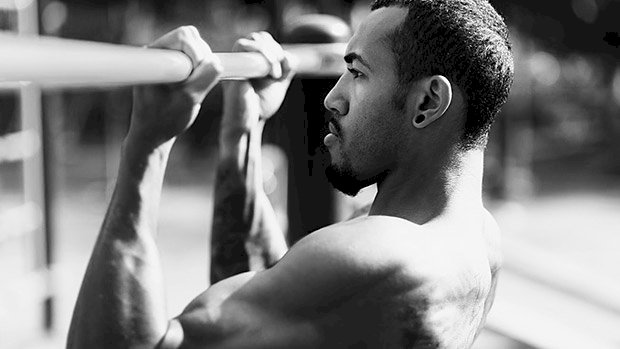 Chin-ups are a classic lat and biceps builder. Rings will amplify your benefits. Here’s Why The supinated grip draws your elbows in. This position is more joint friendly for your shoulders and hammers your lats as shoulder extensors. You get some serious mechanical tension on your biceps. Rings keeps you honest. If you start jerking and kipping, you’ll be swinging around the gym like Tarzan. Free moving handles reduce joint stress. This allows you to do more weight and more volume. Tips Take an underhand, supinated grip. Keep your chest up, shoulders down, and lean back a bit. Focus on driving your elbows down as you lift. Focus on squeezing your biceps as you come to the top. Extend your elbows as you come down, but don’t go limp. Good Alternatives Use the rotating handles that come with some high-end racks, or use the D-handles found at most gyms. All you need is a small chain and carabineer you can pick up from a hardware store. If you have to use a fixed bar, alternate every 1-2 months between supinated and neutral (palms facing each other) grips to reduce the risk of joint
Origin: Tip: How to Get Better Results with Chin-Ups
Tip: Could This Be the Next Super Supplement?
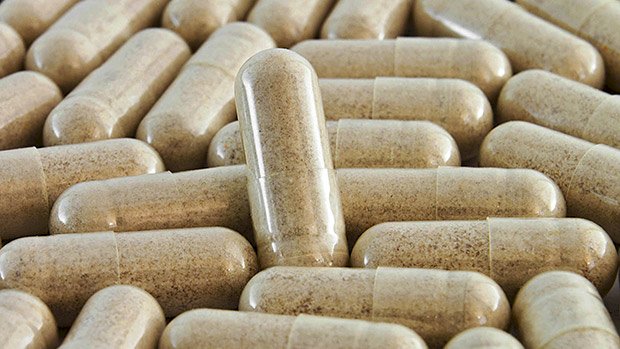 We know through written historical accounts that ancient people and not-so-ancient peoples often used plants and herbs to treat sickness. Through years of trial and error, they were able to figure out which plants had healing powers. What they’d probably stumbled on were plants that had high concentrations of certain natural phenolic compounds, which are more commonly referred to as polyphenols. Institutionalized medicine didn’t pay much attention to them, though, because the things these healers used just didn’t work well enough to inspire interest or confidence. No amount of vile-tasting herbal teas was going to fix diabetes, lower body fat, or prevent heart disease. But science has since been able to identify, extract, and concentrate these plant chemicals and use them in a way that would do all those ancient folk-medicine practitioners proud. Common examples of these polyphenols include resveratrol, green tea extract, quercetin, caffeic acid, anthocyanins like cyanidin 3-glucoside, and the current darling of the polyphenol world, curcumin. But a new player is ready to make its entrance and it might eventually rival curcumin in its accomplishments. It’s called fisetin, and its list of reported and purported benefits is pretty long. What Dose Fisetin Do? Like many polyphenols, fisetin seems to be a utility player, playing nutritional shortstop just as well as it plays nutritional right field. One problem, though – even though over 800 studies have been conducted on fisetin, only one of them involved humans. Most of what we know is based on experiments with mice and rats. Still, if some of the following benefits extend to humans, as they often do with polyphenols in general, then we might really have something: Reduces body fat:Mice gained 75% less weight when they were introduced to a high-calorie diet and given fisetin. The thinking is that fisetin may increase levels of the fat-burning hormone adipokinectin. Helps regulate blood sugar:Diabetic rats and mice fed fisetin experienced insulin and blood sugar levels compatible with healthy mice. Furthermore, it prevented sugar from bonding with proteins, a process known as glycation that contributes to a host of bad stuff like nerve damage, kidney disease, cataracts, and aging of tissues in general. Prevents the growth of various cancers:Like curcumin, fisetin seems to downright hate cancer, holding special grudges against colon, brain, lung, breast, ovarian, pancreatic, and brain cancers. It also seems to protect against prostate cancer by blocking the receptors for DHT. Improves memory and learning:Fisetin improved the memory retention and learning abilities of old rats. Protects your skin:Fisetin slowed the breakdown of collagen in cells exposed to ultraviolet light. Relieves depression and anxiety:Fisetin seems to increase levels of serotonin and noradrenaline, thereby improving mood. Helps ameliorate neurodegenerative diseases:Animal models of Alzheimer’s, Huntington’s, multiple sclerosis, or amyotrophic lateral sclerosis showed marked improvement in such aspects as memory, balance, coordination, and life span when fisetin was introduced. Lowers blood pressure:Fisetin dilates blood vessels, thereby allowing blood to flow through the pipes easier. Helps you handle booze better:Mice that partied too hard were able to process alcohol better. Combats Irritable bowel disease (IBS):When mice with the human equivalent of IBS were given fisetin, inflammation went way down. Fights aging in general:Fisetin seems to be a powerful “senolytic” in that it helps the aging body rid itself of senescent cells (cells that stopped dividing) that normally lead to inflammation and reduced lifespan if left to foster. How Does Fisetin Work? Like most polyphenols, fisetin is a powerful antioxidant, which explains or partly explains many of its effects. Secondly, it blocks an inflammatory switch known as NF-kB. Block this protein complex and you help thwart the evil plans of cancers, allergies, and autoimmune diseases. Fisetin also influences mTOR, a kinase that acts as kind of a cellular switch. Having higher levels of mTOR after a workout is a good thing as it helps you grow muscle, but having perpetually high mTOR levels is associated with a variety of diseases. Fisetin could be used to modulate mTOR levels to your advantage. Is Fisetin Safe? Fisetin, like most polyphenols, seems to only have better angels perched on its shoulders in that it doesn’t seem to have any negative side effects, even at high doses (at least in animal studies). Still, pregnant women and children should heed the usual warnings since we don’t yet know enough about the substance. The good news is that the Mayo Clinic is currently investigating fisetin in three separate studies involving diabetes, kidney disease, and frailty, so we should have more info on its safety and efficacy soon. What Foods Contain Fisetin? Of all foods analyzed for fisetin levels, strawberries contained the most, but
Origin: Tip: Could This Be the Next Super Supplement?
Tip: Box Step-Offs for Big Legs
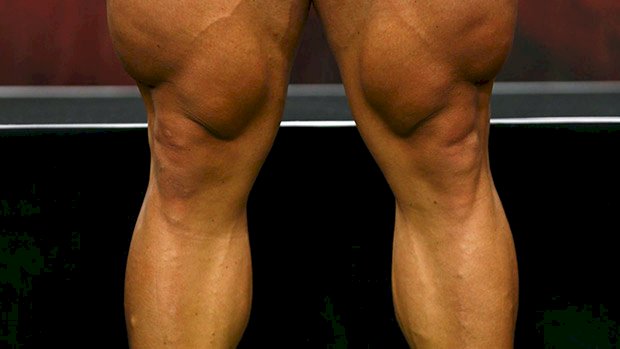
 Stepping off a box shouldn’t just be reserved for your local step aerobics class. With a few minor upgrades, box step-offs can be an effective way to add some frontal plane (side-to-side) loading to your leg day. Not only can they add another direction to your training, but they transfer over well to athletics and they’re a damned effective muscle-builder too. Lots of Ways to Do Them Box step-offs are somewhere in between a lateral lunge and a squat, while the addition of a box takes you further into deficit. The height of the box and degree of deficit are up to you. For those that don’t want much extra range of motion, stepping off a 45-pound plate might be enough. Conversely, for those that want a deep deficit, setting a box and some risers up to knee height would have its advantages. A single dumbbell in the offside hand works great, but most seem to prefer the feel of a kettlebell. This variation is a good starting point for many and allows some respectable loading for even the strongest lifter. It’s not uncommon for someone to get to the point where they can use a third of their bodyweight in one hand. Other effective ways to load step-offs are in a goblet position, front rack position, or with a landmine bar. The landmine can provide an element of stability to the exercise, as it’s one of the most comfortable variations (if you get the setup right). It can be held in the offside hand or in both. A cable seems to work okay too. For complete beginners, a medicine ball or even body weight are just fine to start off with. Just make sure you respect the movement with these rules: 1. A Deficit is for a Deficit Far too many times you see those using a raised platform stop before actually getting into the deficit. The point of a deficit is to increase range of motion. Unless you’re doing a goblet squat, EZ-bar front squat, or are a beginner stepping of a 45-pound plate, the implement you’re using needs to drop below the top of whatever you’re standing on, thus taking you into a deficit! If it doesn’t, then there’s not really much use for the extra height. 2. Put on the Brake As you step sideways off the box, there’s a “braking effect” happening. The offside leg must step off and absorb the impact forces through the abductors, quadriceps, and glutes. This braking effect is a form of eccentric overload, and eccentric overload is good for building muscle. 3. Lean With a Purpose Depending on how you hold the weight, distribution of load and body position change. You can have a more upright torso by using a goblet position or front rack, or slightly more forward-leaning torso with a weight hanging in front. You can even emphasize a forward lean and get even greater hip dominance. Just focus on pushing your butt back more as if you were showing it off to the person behind you. To target the offside leg, hold the weight on that same side of the body. We’re not talking a massive change here, but when the weight is held in one hand, load is shifted away from the nearside leg towards the offside, meaning that as you’re stepping off, the brakes need to work a little harder. That means more eccentric overload on the abductors, glutes, and quads on the offside leg. There tends to be a bigger forward lean in one-handed variations too. Programming Step-Offs Whichever way you perform box step-offs, it’s the combined lateral braking motion and increased hip and knee range of motion that makes this exercise so effective. The decision you need to make is whether you want to load the braking side more (emphasizing the eccentric overload), or if your focus is loading more through increased stretch and range of motion on the nearside leg. Both can be great triggers of muscle growth as well as have carry-over advantages to sport. Pick your weight, sets and reps based on these goals, although generally 2-4 sets of 8-15 reps each side work
Origin: Tip: Box Step-Offs for Big Legs
Tip: Elbows Inflamed? Build Biceps Anyway
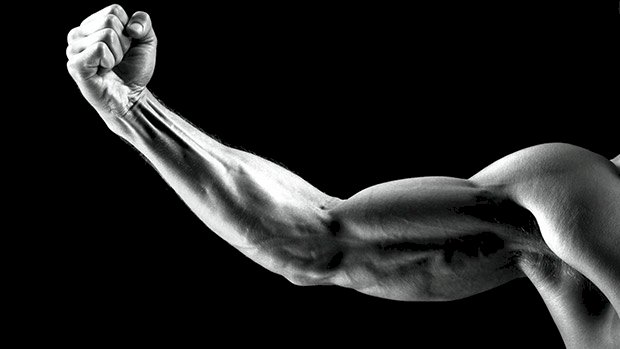
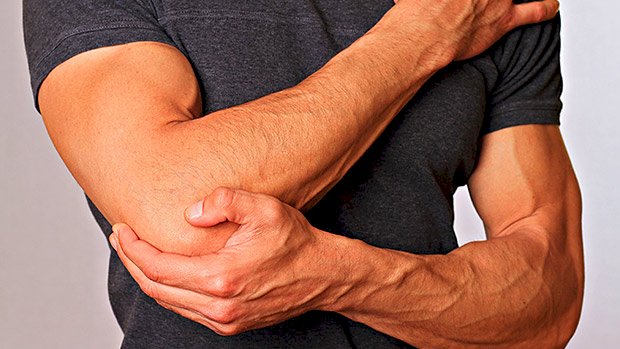 There’s nothing worse for a lifter than dealing with joint inflammation like elbow tendonitis. When the orthopedist tells you the only way to remedy that pain when flexing or extending your arm is rest and recovery, it conjures up images of church lady arms that swing to and fro during heavy clapping. It can take six months or more for tendonitis to go away. Are you really going to stop training your arms for that long? Probably not. The good news is that you don’t have to. You have one more card to play before downsizing your T-shirts to fit your shrinking arms. That card is blood flow restriction (BFR). BFR Brad Schoenfeld covered blood flow restriction (BFR) here and its benefits have been well documented in the research community. Just recently, a meta-analysis was published (Lixandro, 2018) pitting traditional heavy-load training against low-load BFR training to see which was more efficient at growing muscle and strength. Using almost 50 studies, it was determined that low-load BFR was just as effective in terms of hypertrophy as traditional heavy strength training. Sure, strength suffers a great deal in the absence of lifting heavy shit, but at least the sleeves will still hug the arms nice and tight. Here’s How to Do It Place the restriction (wraps or cuffs) directly between the medial deltoid and bicep. Wrap your arms with a perceived tightness of 7/10. This will provide enough pressure to occlude the cephalic vein, but ensure you’re still allowing arterial flow. Check for a distal radial pulse (at the wrist) after you’re wrapped to make sure it’s not too tight. Don’t do the exercise if you can’t find your pulse. Wrap Up and Lift Pain-Free BFR mimics the intensity of lifting heavy without actually lifting anything heavy. The light loads (20-30% of 1 RM) used for standard BFR training will typically allow a lifter to get away with doing movements they otherwise couldn’t do with an inflamed elbow. Additionally, the pooling of blood during a series of BFR curls or extensions creates a cushion of sorts for the elbow that minimizes pain even further. Programming Use BFR up to 2-3 times per week for best results. Try it wherever arm work is programmed in your current protocol and see if you can do it without pain. You probably can. The most heavily researched set/rep scheme is 30-15-15-15. It’s considered the gold standard by practitioners. It looks like this: Set 1:30 reps Set 2:15 reps Set 3:15 reps Set 4:15 reps Take only 30 seconds rest between each set. Unwrap after set 4.
Origin: Tip: Elbows Inflamed? Build Biceps Anyway
Tip: Build Your Back With DUDS
 Try this lat-dominant drop set on back day after you’re done with your heavier, progressive-overload work. Pulling For The Pump Don’t let the “DUDS” acronym fool you: they’re far from a dud finisher. Pick literally any lat pulldown or pullover variation and do this: Do an all-out set to failure (5 to 8 reps). Cut the weight in half and double the number of reps (10 to 16). Immediately cut the weight in half again and double the number of reps (20-32). If you need to take mini 10-second breaks to finish, go ahead. I’d suggest doing it on a well-designed pullover machine. Think of it as metabolic-stress type work, which should come at the end of a workout and only be done for ONE set. Don’t abuse it! Maybe sprinkle it in every other
Origin: Tip: Build Your Back With DUDS
Tip: The Back Finisher You’ve Never Tried
 It’s always a good idea to start your back workouts with the big, basic exercises (rows, chin-ups, pull-ups, lat pulldowns, etc.) and chase rep and/or weight personal records. So, what could your back workouts be missing? Metabolic stress. There are lots of ways to get it in, so try leveling up your lat game with this finisher. All you’ll need is one set. 12 Reps, 3 Exercises, 1 Long Hold If you have access to a dual-adjustable pulley or freedom-type trainer, give this one a shot. You’re going to hold the reps constant from exercise to exercise while also adding a bit of weight at each transition. Do the following: Straight-Arm Pulldown:12 reps (use about a 15-rep estimated max weight) Split Stance High Row:12 reps (add a plate beyond what you used in the first exercise) Half-Kneeling Lat Pulldown:12-plus reps (add a plate beyond what you used in the second exercise) Half-Kneeling Lat Pulldown ISO Hold:max time Take about 10 seconds or so to transition between exercises, recover just a bit and change the weight, with the exception of the last exercise where you’ll take 20 seconds to recover from the previous movement. Try
Origin: Tip: The Back Finisher You’ve Never Tried
Tip: Tall? Squat Like This
 For building mass, squats are king. However, when long-limbed hardgainers try to back squat, it often looks like an ugly good morning. Switching to a safety squat bar (holding the squat rack) is a game changer. The Benefits The padded yoke takes stress off your shoulders. The bar design moves the weight forward like a front squat. This means less stress on your spine and more on your quads. Holding the rack helps you keep a more upright torso. This makes your squat look more like the pretty squats of someone with a good squat structure. It also adds some extra stability to the lift, which lets you lift more weight for more reps. Performance Tips For big legs, don’t sit back like a powerlifter. Instead, spread your knees and sit down. Drive your traps into the bar pad as you come out of the hole. If you start leaning forward to recruit more low back and hips, use your hands to push the weight back over your feet and make your quads do the work. Don’t cheat with your arms. You’re trying to build your legs, not your ego. Good alternatives: Machine squat, leg press, Zercher squat, hip belt
Origin: Tip: Tall? Squat Like This
