 Nutrition One of the functions of cortisol is to maintain a stable blood sugar level – cortisol increases it when it’s too low. One way of minimizing cortisol is… eating carbs! Or more specifically, maintaining a normal blood sugar level. That’s why I don’t like very low-carb diets for people who are chronically stressed. It can easily lead to chronic cortisol production. Sure, you can create glucose from amino acids to maintain a stable blood sugar level. Just because you go keto doesn’t mean you’ll be flooded with excess cortisol. But eating next to no carbs, especially if you’re very active, is likely to lead to higher cortisol levels. A super high-carb diet isn’t better though. It can lead to greater blood sugar swings. But certainly, consuming around 30% of your caloric intake from carbs, ideally low glycemic ones, will help keep cortisol under control. I especially like having carbs around workouts and in the evening to decrease cortisol (and adrenaline). You want to lower cortisol in the evening to facilitate sleep and recovery. Supplements There are many strategies you can use to keep cortisol at bay. You don’t want to completely kill it; you actually need it to train hard. But you must be able to bring it back down when needed. Use workout nutrition. Easily-absorbed carbs during workouts can reduce cortisol by providing fuel. If you have carbs already available, you won’t need to mobilize as much, which will mean there’s less of a need to produce cortisol.This is especially effective when you’re doing a higher volume training plan. Plazma™ is your best option here although Surge® Workout Fuel will also work, though it has fewer of the anabolic amino acids to fuel muscle growth. Use vitamin D. This is especially important during periods of high stress. Vitamin D reduces the impact cortisol has on the conversion of noradrenaline to adrenaline. While it might not directly decrease cortisol, it prevents excessive adrenaline production, which can help prevent CNS fatigue (dopamine or noradrenaline depletion or adrenergic desensitization). Take magnesium post-workout and in the evening. Magnesium decreases the binding of adrenaline to the adrenergic receptors and can help you calm down while protecting your beta-adrenergic receptors (keeping them sensitive). Use rhodiola in the morning. Rhodiola helps keep the stimulatory and inhibitory neurotransmitters in balance and can lower cortisol. I like glycine post-workout and in the evening. Glycine is a neurological inhibitor. It slows the nervous system down when it’s too amped up, which by extension decreases cortisol and adrenaline. Furthermore, glycine increases circulating serotonin (the feel-good neurotransmitter and the mood balancer) and activates mTOR, which will increase the protein synthesis from the workout. For sleep, use Z-12™. It increases serotonin and GABA (gamma-Aminobutyric acid). These two inhibitory neurotransmitters will allow you to have a more restful night, allowing you to restore a more normal cortisol circadian rhythm, dropping it low when it’s needed most.
Origin: Tip: Foods and Supplements That Control Cortisol
Tag: Tip:
Tip: The Landmine Exercise for Athletes
 The Athletic Landmine Mastering the regular landmine lifts instantly makes all other strength and performance training better. It requires the ability to create full body tension from a standing position, which is more “functional” for most athletes. The next progression is to create a more reactive and explosive environment. The ability to decelerate, stabilize, and re-accelerate is key for optimal performance. To do the athletic landmine, start with a regular landmine “full contact twist” before you create a forceful rotation and perform a side shuffle movement starting from the core and hips. The bar coming down to the side will load the hips and core muscles, much like a coil. The purpose is to quickly and precisely stop the barbell/weight, before re-accelerating it to the other side. Even though the exercise isn’t super advanced, safe execution requires a strong core and good timing. Start light and make sure you have the regular landmine move under control. You don’t want to go too heavy here. You won’t get max power output with the heaviest
Origin: Tip: The Landmine Exercise for Athletes
Tip: The No-Cheat Lateral Raise
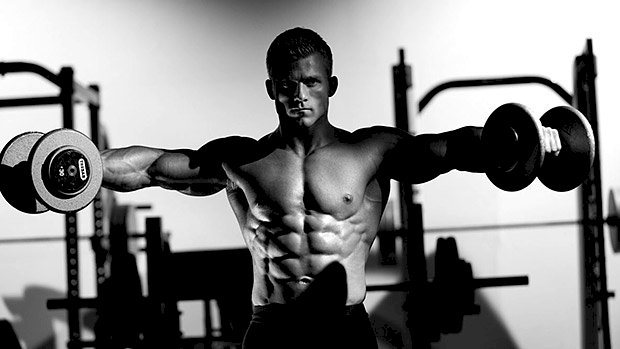 It’s nearly impossible to cheat with these, unlike the standing lateral raise. For lifters having trouble getting a strong mind-muscle connection, the incline version is a better choice. Incline Lateral Raise This exercise will also naturally put the resistance in line with the middle fibers of the delt. When you use a standing lateral raise it’s common (and fairly natural) to work more in the scapular plane, which is slightly safer for the shoulder joint. But it also tends to make it more of an anterior deltoid movement, which we’re trying to avoid since that’s already been covered. Since the resistance is more in line with the middle delt, and you can’t cheat, you’ll naturally bring the dumbbells directly up to your side. This is what makes it a great option for smoking the middle delts. Lastly, if you want to keep tension on the shoulders as much as possible throughout the range of motion, then eliminate the bottom quarter of the movement. The delt itself isn’t very active in the bottom part of the range of motion. It’s the supraspinatus that initiates the abduction of the arm from this position, and then the delt takes over after that. Once you lift the dumbbells to the top on the first rep, lower only about three-fourths of the way down before doing the next rep. Sets & Reps Try these with drop sets or cluster sets. Do 4-6 sets total in the cluster with 10 seconds between each set, going to total muscular failure on the last
Origin: Tip: The No-Cheat Lateral Raise
Tip: The Full-Body Lunge
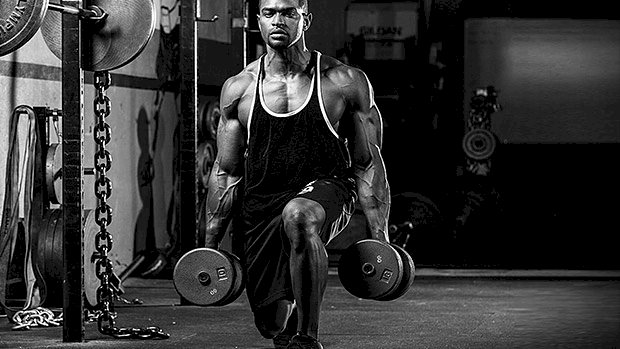 Doing exercises using the Zercher position has been trending lately and for good reason. When you place a barbell in the crook of your elbows and perform traditional compound movements, some cool shit happens. Using this variation for a squat, lunge, or carry is an incredibly effective way to hammer the upper back, traps, biceps, and abs. Getting comfortable with big barbells in the Zercher position will not only build the “yoke,” it develops a bulletproof midsection that can stand up to large loads for standard lifts. The problem with Zercher position exercises is that most lifters are limited by how much they can hold, at least until the upper body muscles catch up to the strength of the lower body. Either the torso or biceps will fail first. This leaves the legs without a great stimulus for strength or hypertrophy. Enter the Zercher Dumbbell Lunge Drop Set A great way around this issue is to use a mechanical drop set of sorts. A typical mechanical drop set involves modifying an exercise after the failure point to make it easier and allow for additional reps. In this case, after you reach failure at the torso/biceps in the Zercher position, you drop the bar, switch dumbbells, and finish off the legs with traditional dumbbell lunges. This allows you to reap all the benefits of using a Zercher position and smash the legs in the same set. How to Do It Do 2 sets of Zercher lunges in your preferred rep range, but leave 1-2 reps in the tank on each set. Place dumbbells that add up to 75% of the total load used for the Zercher lunge close to where you ended the first 2 sets. On the third and final set, take the Zercher lunge to failure, ditch the barbell, grab the dumbbells, and do lunges until form breaks
Origin: Tip: The Full-Body Lunge
Tip: Build Big Shoulders With Bodyweight
 The handstand walk is a long-term skill to acquire, but it’s definitely worth learning. The progressions are quite attainable and provide a unique pump that’ll make your triceps and shoulders burn like nothing else. An added bonus is the open shoulder position, which helps with thoracic mobility. Plus, having your weight on your hands builds a crazy amount of shoulder stability that you just don’t get with barbells. Mastering the Handstand Walk All you need is something to elevate your feet. This could be a box, bench, sofa, bed, chair, etc. Then you have five different exercises: Holding the handstand position, aiming for a vertical torso Shoulder taps Walking from side to side Feet elevated push-ups Pike push-ups Which exercises you use will be based on your individual level and skillset. I recommend practicing each exercise individually until you’re confident. Set markers to hit for each exercise such as: 30 second holds 20 shoulder taps unbroken A 360-degree walk around (both directions) 10 elevated push-ups 5 pike push-ups If you can do these easily then you can start having fun. For example, try using a set of 20-30 shoulder taps as a drop set after heavy presses! The Descending Ladder Workout One of my favorite rep schemes for these movements is a five-round descending ladder: Round 1 10 shoulder taps Walk halfway around the box 5 pike push-ups or elevated push-ups Walk back to where you started (if you initially walked to the right, walk left to go back) Round 2 8 shoulder taps Walk halfway 4 pike push-ups or elevated push-ups Walk back Round 3 6 shoulder taps Walk halfway 3 pike push-ups or elevated push-ups Walk back Round 4 4 shoulder taps Walk halfway 2 pike push-ups or elevated push-ups Walk back Round 5 2 shoulder taps Walk halfway 1 pike push-up or elevated push-up Walk back Aim to break up your sets as little as possible. If you can do all five rounds unbroken – without coming down between the sets – you win! The prize is shoulder gains and a massive
Origin: Tip: Build Big Shoulders With Bodyweight
Tip: The Cure For Stubborn Medial Delts
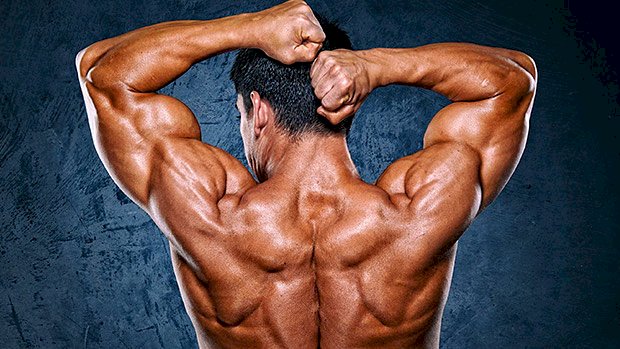
 How To Tell If Yours Need To Growth The medial (side) delts can be stubborn. Stand in front of a mirror and square up to it. Are your shoulders rounded on the sides, almost like a ball cut in half? Or are they shaped more like a 90-degree angle? If they’re more like the latter, that’s a sign you could stand to add a little muscle there. Sadly, for most, it’s a tough area to develop. Throwing in a few token sets of lateral raises a couple times a week won’t cut it. If you want them to respond, you need to get a little creative and be willing to put up with a lot of discomfort. Why? Because the medial delts respond well to extended time under tension and skin-splitting metabolic stress work. You know, the type of stuff that causes burning, searing pain. Metabolic stress – along with mechanical tension and muscle damage – is one of the key drivers of hypertrophy. It’s the key driver that a lot of people forget to use. So, if your shoulders are flat and you covet a cannonball look, try one of the protocols below. Do a different one each shoulder workout, twice a week, for the next 8 weeks. Protocol 1: Progressive Isometrics (Machine Lateral Raise) Progressive isometrics can turn any exercise with a hard contraction in the shortened position into a nightmare (in a good way). With this protocol, pick a lateral raise variation. I prefer cables or a machine over dumbbells. Choose a weight which would make you fail at rep 15. Do one rep and hold it for a one second count at the top. Do two reps then hold it for a two second count at the top. Do three reps then hold it for a three second count at the top, etc. Notice that you’re only holding on the last rep. So you’ll do 10 total reps with a 10 second hold on the final rep. This should be grueling. But it’s not over! At the completion of the set, rest two minutes, reduce the weight by about 10%, and do it again. Protocol 2: Single-Arm Delt Destruction This is probably the nastiest thing I’ve come up with for targeting and thoroughly exhausting the medial delts. Here’s what to do… Behind-the-Back Single-Arm Cable Lateral Raise: Do 12-15 reps to failure Single-Arm Cable Lateral Raise: Do as many reps as possible using the same weight. Same goes for the next three exercises. Single-Arm Cross-Body Upright Row with External Rotation Single-Arm Cheat Cable Lateral Raise Singe-Arm Partial Cable Lateral Raise Don’t rest between exercises, just change positions. Repeat on the other side, rest for a minute, and then repeat for a second set on each arm. Expect about a 20% reduction in reps the second time through. Protocol 3: Dumbbell Drop Set for Delts Grab two sets of dumbbells – one heavy and one half that weight. Now do this: Dumbbell Clean to Ahrens Press with Accentuated Negative Lateral Raise: 6-8 reps to failure Cheat Dumbbell Upright Row: Do as many reps as possible using the same weight (Now move to the light dumbbells.) Dumbbell Lateral Raise: Do as many strict reps as possible Poliquin Dumbbell Lateral Raise: Do as many reps as possible using the same weight. Same goes for the next three exercises. Modified Bent-Arm Dumbbell Lateral Raise Cheat Dumbbell Lateral Raise Cheat Dumbbell Upright Row Rest two minutes Go down five pounds from your heavy set of dumbbells. Repeat. The priority is the first exercise because it sets the tone for the entire protocol. With the Ahrens press, press out at an angle, NOT straight up. Take a closer look. Once you reach full extension, you’ll want to get a 3-4 second negative (lowering) on the lateral raise. Take this exercise to failure until you can’t control the negative any longer. Where To Put These In Your Workouts There are a lot of ways to add them to your training depending on what your program looks like. But an easy way to start adding them in now is to do them twice weekly, and rotate through using a different one each session. Try that for 8 weeks. One day a week, do one of these protocols mid-to-late workout AFTER your heavier, progressive overload work. On the second training day, START your workout with one of these to really dial in the focus on the medial delts before you’re too trashed from your other upper body
Origin: Tip: The Cure For Stubborn Medial Delts
Tip: 4 Unique Exercises for a Stronger Grip
 The strength of your grip is crucial to your athletic and training performance. Whether it’s locking out a PR deadlift, choking out your partner in jiu jitsu practice, or giving a firm handshake upon first meeting someone, a strong grip is the ultimate sign of a strong dude. As an added bonus, training your grip also increases recruitment of the muscles of your rotator cuff, so you get an added benefit of healthier shoulders as well as a vice-like grip. Carries and deadlifts are the obvious (and best) choices for developing a crushing grip, big traps, and girthy forearms. But these heavily loaded exercises are quite taxing on the CNS, so while they should be staples in your program, you can only do them a few times per week with any substantial load. Using a battle rope for these common exercises below will give you a big return on your training investment by: Increasing the frequency with which you can train your grip. Improving your joint positions due to irradiation – when you grip harder, you reflexively contract your rotator cuff, glutes, and abs harder. Better joint positions lead to better muscle recruitment, which means more force development and less wear and tear. There’s nothing wrong with doing these exercises with their traditional tools, but if you want to get bigger forearms, a stronger grip, and healthier shoulders, they’re worth subbing in. 1. Battle Rope Curl Set a battle rope up over a chin-up bar or power rack. Using a neutral grip, keep your upper arms perpendicular to your torso and curl your thumbs to your hairline. Keep your abs braced while contracting your glutes and quads to eliminate cheating. Use these in place of your last biceps exercise of the day or at the end of a pull-focused day for 2-3 sets of 10-12 reps. 2. Battle Rope Triceps Extension This will smoke your abs, triceps, and forearms. Set yourself up with a battle rope over a rack or chin-up bar. Keeping your upper arms perpendicular to your body, bend at the elbows until they pass by your face, but not so far as to lose tension on the triceps, before extending them back out. Brace hard so there’s no lower back extension at any time. The lower the angle, the more of your weight you’ll have to handle. Start conservatively and work your way down closer to parallel to increase the difficulty. Perform 2-3 sets of 10-12 at the end of an upper body or arm day. 3. Battle Rope Face Pull Face pulls are key no matter who you are, but especially if you have shoulder impingement issues. These will give you more activation in your rotator cuff and increase the subacromion space, which will better position the glenohumeral joint, yielding better muscle activation in the rear delts and upper back. Set up as if you were going to do an inverted row, heels in the ground and upper arms perpendicular to your torso. With your elbows wide, drive them back while pulling your thumbs towards your ears. Do 2-4 sets of 10-12 before, between, or after heavy press sets, or at the end of a pull-focused day. 4. Inverted Row Instead of traditional inverted rows using suspension straps, try this variation instead. Drive your elbows back and pull your shoulder blades down into your back pockets, without extending through your lower back. Around 2-4 sets of 10-12 reps is a perfect finishing touch on any pulling-focused training
Origin: Tip: 4 Unique Exercises for a Stronger Grip
Tip: Go Slow, Hold, and Explode
 Eccentric isometrics (EIs) are a movement where the eccentric or negative portion of the lift is lowered in a controlled manner, and then held in that position for a pre-determined time before completing the actual lifting phase of the exercise. Rep Ranges and Tempos Given that EI’s use tempos that aren’t “normal,” it’s best to perform movements in the 1-6 rep range. The eccentric portion should last between 3-6 seconds, with the isometric being held for anywhere between 2-7 seconds. Any less and you’ll negate the benefits from pausing in the lengthened position. Any longer will add to fatigue, again negating the intended outcomes. When it comes to intensity, start conservative and adjust as needed until you’re moving the weight at the pre-determined tempo for the pre-determined number of reps. Generally speaking, finish the set with another two reps in the tank. This is how it would look if you were doing a typical set of EI’s using elevated push-ups with, say, a 55X1 tempo: Elevated Push-Up with Eccentric Isometrics 5:The duration (in seconds) of the lowering portion of the lift. 5:The duration of the isometric hold. X:This means to do the lifting part of the rep as explosively fast as good form allows. 1:The duration of rest at the “top” or “rest” portion of the lift. The Benefits of Eccentric Isometrics Post activation potentiation:EI’s prime the CNS for strength training, thus allowing a greater training effect. Increased proprioception:EI’s tidy up body mechanics and body positioning while improving motor control and neural firing patterns, all of which allow for a greater training effect. Fixes left-right imbalances:Doing EI’s in a unilateral manner does wonders for shoring up strength in a deficient limb. Facilitates immense force absorption capabilities:If you’re a fighter, EI’s teach your body to move efficiently while using the most biomechanically accurate positions. This will allow your body to absorb high-impact force as efficiently as possible. Practical Application To obtain the most bang-for-the-buck, do exercises that involve a significant stretch and muscle lengthening. For instance, any squat variation (like a Bulgarian split squat) works well, as do hinge variations (such as an RDL), pull variations (such as a single-arm lat pulldown), and press variations (dumbbell overhead press, etc). Bulgarian Split Squat – Eccentric Isometric Protocol Feel free to allow creativity to flow. Experiment and see what’s effective. Bilateral and unilaterally based movements are equally effective, but unilateral movements (like single-leg Romanian deadlifts) tend to work well for those who have poor biomechanics when doing bilateral movements. Landmine Squat – Eccentric Isometric Protocol Key Points EI’s improve your power, strength, stability, and movement efficiency. Performing controlled eccentrics and pausing at your biomechanical end-range yields fantastic benefits ranging from performance to longevity. EI’s correct your movement patterns and mobility issues. EI’s teach proper force absorption and efficiency for combat sports. EI’s can be used year-round for a host of bilateral and unilateral exercises. Ideally, the eccentric portion of the movement should last between 3-6 seconds and the isometric part of the movement should last between 2-7 seconds. Whether you’re a wrestler, MMA fighter, a blue belt or just someone that likes to work out, adding EI’s into your plan will turn you into a battle-ready
Origin: Tip: Go Slow, Hold, and Explode
Tip: 3 Meals vs. 6 Meals Per Day
 Meal Frequency Confusion! Here’s a question I recently received: “Some diet experts say that having six small meals a day is outdated. Many recommend three (or fewer) meals instead. But what if I feel uncomfortably stuffed when trying to cram all my calories into three meals? Is there any harm in continuing to eat smaller, more frequent meals if I’m not gaining fat from it?” I understand your frustration. This industry seems to constantly be stuck in a never-ending cycle of black and white advice. One minute something is in vogue and the next it’s not. I will tell you definitely and without hesitation that eating small frequent meals is NOT outdated and is a fantastic strategy for many people. Part of the reason you’re getting the message to avoid small frequent meals is a newfound appreciation for less-frequent eating. We now have plenty of substantial research telling us that there are many different eating regimes that work and have benefits. A quick perusal of the last several years of research will reveal that one meal a day (OMAD) style of eating can work great for some. Different time restricted feeding schedules such as the 16/8 approach – which involves fasting for 16 hours a day by avoiding breakfast – can deliver great results. A more recent study showed skipping dinner may be superior to skipping breakfast. Varied fasting regimes, like the 5-2 plan, where you eat normal during the weekdays and then consume little to no food on the weekends, can be beneficial. All of these studies have created excitement. New information typically generates a novelty bias for a bit. It’s common to overemphasize the new and underappreciate the old, but it doesn’t make a whole lot of sense since new things haven’t been tested by time. Usually, the tried and true is better than the fresh and new. I address all of this to hopefully help allay your concerns and clear some confusion. The current consensus in the nutrition research is still that calories matter most. Sure, we now know hormonal influence are working with calories to impact things like hunger, mood, cravings, and energy, but in the end we must attend to the calorie levels of the individual diets we choose. Calories Are King, But…. There are two things required for sustained fat loss: A calorie deficit Metabolic hormonal balance The calories drive the weight loss. The hormones push that weight loss towards fat loss and sustainability. You need both. Quality and quantity are equally important. It’s impossible to separate the two! The question of eating frequency comes down to the individual. We’re all different. We’re unique in our genetics, psychology, and personal preferences. We should honor that. What all that research above says is, there’s more than one way to skin the calorie and hormone cat. Ultimately, it’s about finding what works for you. Try telling the bodybuilding world from 1960 to 2000 that small frequent meals weren’t ideal. You’d be laughed at and mocked. The small frequent meal approach works fantastically well, but it’s not the only way. Some people do better with different eating frequencies. My advice? Keep doing exactly what you’re doing so long as that regime keeps these things in check: sleep, hunger, mood, energy, cravings (SHMEC), and so long as you’re attaining or maintaining your desired body composition. Why would you change? Your Metabolism is Adaptive Remember, the metabolism is an adaptive system. You want to keep it flexible and healthy. You can do that by keeping it guessing and changing up your eating frequency at times. So, you may benefit even more if, from time to time, you experiment with less frequent eating. It’s the same for those less frequent eaters. They’re far better off deviating occasionally to a more frequent eating pattern. In the end, you should always return to what works best for you. Remember, research is a tool for averages not individuals. The research can get you in the ballpark, but you’ll need to tweak and adjust to get it just right for
Origin: Tip: 3 Meals vs. 6 Meals Per Day
Tip: 4 Questions You Need to Ask Yourself
 You can read all the most cutting-edge research you want to convince yourself that you’re on top of it, but if you’re not 21 anymore or genetically gifted, you’ve got to get real. You’ve got to apply common sense. You’ve got ask yourself some serious questions and accept what might be some inconvenient truths. The answers will do more to determine your ultimate progress than any training program or diet you undertake. Ready? 1 – What’s Your Real Age? I’m 32 years old now, and I started working out properly for size and strength around age 20. The methods my trainer and I used worked well, but I’d be lying to myself if I thought I could handle them now for more than a week. The simple truth is that I just don’t have the same work capacity that I used to, and that seems to be a common theme with people who train through their adulthood. To be clear, not having the same work capacity doesn’t necessarily scream “worse.” It just screams “different.” It means that if you’re not a young stunner anymore, you’d be wise to modify your training program so you can still get away with working hard on a consistent basis – even if that means scheduling shorter workouts, a couple of deload weeks, 15 more seconds of rest between sets, or a little bit lower volume with the heavy stuff. The lesson learned is simple: Respect your calendar age by tailoring your workouts to match the training effect you’re after – not a certain performance number or standard. 2 – What’s Your Injury History? Regardless of whether it’s something like chronic shoulder pain or something serious like a surgically repaired back or knee, these things should be factored in when you’re considering the demands of your program. One-size-fits-all programs don’t “know” what you’ve been through, and clustering up to 90% of your max weight multiple times per week may not be the smartest idea you’ve ever had. Still, there’s encouragement to be found. Never forget that the beauty of training for the long haul is that you have a much less urgent “deadline” to add muscle and strength. You can still do it, as long as you remain realistic and give your body the accommodations it needs. On top of this, you’ve now opened up the possibility of considering other ways to view “progression,” like increasing range of motion, optimizing tempo, and reducing rest intervals. 3 – What’s Your Training Age? Whether you’re 19 with a year of experience, 39 with a year of experience, or 79 with a year of experience, the amount of time you’ve spent as a lifter equates to the same number: 1. That’s a very important factor to consider when taking a rational approach toward seeing goals. A lifter who’s spent 15 years in the gym will react differently to a program for strength and size than a lifter who’s brand new to the game. An overly ambitious program might seem good on paper to the novice lifter, but might prove too advanced and have adverse effects. On the flipside, a simplistic program may have utility for an experienced lifter, but chances are that finally hitting that 400-pound deadlift or squat might require some advanced lifting methods. Respecting the amount of time you’ve spent under the iron is the first step to knowing just what to implement to bring your gains to the next level. And be honest – it’s easy to say you’re advanced. Simply put, if you’re not sure if you are, you probably aren’t. 4 – How “Bad” Are Your Leverages? It’s unrealistic to think that reaching a double-bodyweight squat or deadlift is attainable as a 37 year old who’s 6’6″ and 275. Standards like that are geared toward young, healthy, and most importantly, usually light individuals where relative strength plays a bigger role than absolute strength. The size of the individual is rarely taken into consideration when creating rules for strength training, and many programs make a similar misstep in ignoring a lifter’s individual anthropometry. Having longer femurs and a shorter torso will make a conventional deadlift more of a hassle for a tall lifter than the other way around. By extension, adding mass as a taller lifter may require slightly different approaches because of a defining factor that differentiates a longer-limbed lifter from a shorter one: work. Of course a good lifter will “work hard.” That’s not what I’m talking about. It’s about the actual physics of lifting. Work is calculated as Force x Distance. As such, if a tall lifter and a short lifter are doing squats with the same load to full depth, the taller one will end up doing more work because of how much farther he has to go up and down. That should put into question whether or not chasing a prescribed percentage of max effort lifts with limited rest intervals and plenty of volume will serve a tall lifter the same way it does a shorter lifter. Most often, longer-limbed lifters need to bridge the gap by adding more volume to choice isolation movements that still deliver a lot of bang for their buck, and a bit less volume to big,
Origin: Tip: 4 Questions You Need to Ask Yourself
