 Achy knees are as emblematic of long-time lifters as cauliflower ears are of long-time Jiu Jitsu practitioners. Lift long enough and hard enough and your knees (and possibly other joints) will start to grind away and maybe get peed out and carried to the ocean where they might eventually become part of some distant tropical reef, home to some plucky invertebrate. Okay, that’s probably not how it works. Regardless, some lifters will be luckier than others. Their joints will degenerate, but only to the point where they’ll suffer the occasional grumpy knee, usually caused by a cold front that found Canada too limiting for its ambitions. But plenty of not-so-lucky lifters will spend years inundating themselves with alleged cartilage-rebuilding supplements like glucosamine and chondritin, eventually graduate to NSAIDS and opioids, and finally relent to a total knee replacement and spend the rest of their lives getting felt up by TSA agents at the airport because they lit up the X-ray scanners. Researchers at the University of Alabama at Birmingham might have presented people with bad joints an alternative fate, though. They found that simply going on a low-carb diet decreased pain and inflammation in guys with rickety knees. What They Did The scientists found 21 old guys with bad knees. They took serum samples and put them on one of three diets for 12 weeks: A control diet where they continued to eat as they had been. A low-fat diet that consisted of 800 to 1200 calories a day. A low-carb diet that allowed them to eat as many total calories as they wanted, but that only contained 20 grams of carbohydrates a day. Every 3 weeks, the participants were asked questions relating to functional pain, self-reported pain, quality of life, and depression. After the 12-week diet intervention was over, the researchers drew up a last round of serum samples to compare against the pre-test values. What They Found The guys on the low-carb diet reported reduced pain intensity and unpleasantness during functional tasks, as well as less general self-reported pain, as compared with the control group and the low-fat group. They also found significantly lower oxidative stress in the low-carb group. Their blood samples indicated a reduction in the concentration of TBARS (thiobarbituric acid reactive substances), which are a marker of inflammation. “In only 12 weeks, the quality of life and functional pain of this population were significantly improved, which may have been the result of a reduction in oxidative stress,” concluded the team. What This Means to You The results of this study might reflect a chicken or the egg dilemma. The researchers figured that the low-carb diet caused a reduction in inflammation, which of course resulted in reduced knee pain. However, I wonder if they might be looking at the results through a biologic lens rather than an engineering/physics lens. The low-carb group lost a lot of weight, more – perhaps surprisingly – than the low-fat group. That alone could have caused a reduction in inflammation and a reduction in pain. Consider that every time you take a step, the force on either knee is 1.5 times your body weight. Let’s say you weigh 200 pounds. That means when you walk on level ground, you’re putting 300 pounds of force on your knees. Hell, if you walk up some stairs, the force is 2 to 3 times your bodyweight, and it’s 4 to 5 times your bodyweight when you bend at the knee to pick up your iPhone. Let’s say your Fitbit nags you into taking 10,000 steps a day on level ground. Assuming you weigh that same hypothetical 200 pounds, you’re going to put a cumulative force of 3,000,000 pounds (300 pounds force x 10,000 steps) on your knees during that day. But what if you lost 10 pounds of bodyweight, perhaps through a low-carb diet? That same 10,000 steps would then subject your knees to a total of 2,850,000 pounds, which is a daily reduction of 150,000 pounds of pressure. Of course you’re going to experience less inflammation if you lessen the cumulative load. Of course you’re going to experience less pain. Lose more than 10 pounds and you reduce the total load further. So while the low-carb diet may have reduced inflammation and contributed to the improved quality of life in the gimpy-kneed guys, at least some or possibly a lot of the reduction in inflammation was caused by the reduction in weight. Of course, to joint pain sufferers, the specific reason for any reduction in pain probably doesn’t matter as much as the end
Origin: Tip: Eat This Way to Stop Achy Knees
Tag: This
Tip: Do This Exercise FIRST on Back Day
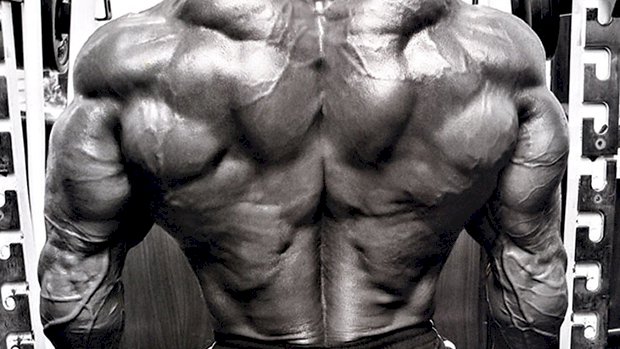 Do a stretch-based back movement before any big pulling exercises on back day. This “primer” exercise reverts your body into a normal posture by getting you into the opposite positions you most likely spend most of your day in. The single most effective movement to prime the back is the straight-arm pulldown and its variations. This movement involves isolating the latissimus dorsi. In most cases, it’s functionally shortened. Doing both an end-range stretch along with a peak concentric contraction works wonders. Straight-Arm Pulldown The straight-arm pulldown is based on internal tension. If you’re using a cable stack, it’s less about the external load you’re placing on the tissues and more about how you’re building and bracing your tension throughout a full range of motion throughout the set. As you’ll see, this movement will be humbling, so make sure you set your ego aside and train this exercise for the feel and
Origin: Tip: Do This Exercise FIRST on Back Day
Tip: This Can Stop Fat Loss
 Gut Dysfunction and Stalled Fat Loss Gut issues are a major source of stress for the body, and digestive issues can stall efforts to lose body fat. Think gut problems aren’t a big deal? They’re a huge deal. Proper digestion and the absorption of nutrients is essential for fat loss. The body is a complex chemical factory that can’t function properly without the right nutrients available. So asking your body to perform when it’s deficient is like expecting your car to run without oil. Luckily there are some basic ways to assess whether digestion is a problem. Study Your Poop The first consideration is the regularity and consistency of your bowel movements. These should be well formed with elimination at least once a day. Constipation and diarrhea are both red flags of digestive issues that need to be addressed. If you experience bloating, excessive gas, or reflux, then it’s likely you’re having difficulty absorbing nutrients and may have bacterial imbalances or food intolerances. Taking antacids or other medications to alleviate these issues will make the problem worse. They’re temporary fixes for deeper issues. Bad Bugs If your diet is low in processed foods and you suffer from these symptoms then testing for bacterial overgrowth, Candida, parasites, and other bugs may be necessary to identify exactly what’s going on. Food allergies and histamine reactions occur frequently when digestion and elimination pathways aren’t performing well. Gluten and lactose sensitivity are common and may have genetic components. If you find yourself becoming itchy, getting hives, urticaria or suffering from other chronic skin conditions, that’ll be another sign that you have bowel problems. Yes, all these things indicate gut dysfunction. Lots of symptoms indicate problems: gas, bloating, even the excessive feeling of fullness. It’s interesting how many people tell me they think those things are normal. So many fit, lean and otherwise healthy-appearing people have chronic gut issues. It’s not something to brush off. Testing and professional consulting from a specialist may be in
Origin: Tip: This Can Stop Fat Loss
Tip: Crush Your Lats With This Exercise
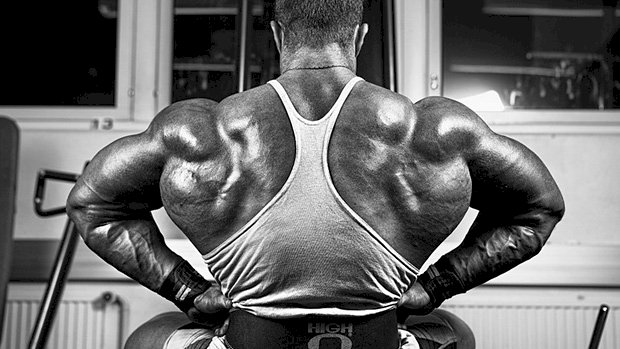 This is one of the very best bang-for-your-buck exercises for increasing strength and muscle mass while also maintaining and even enhancing mobility through the shoulders and back. As anyone who’s tried to stretch a fully pumped muscle knows, this is not a comfortable feeling. That said, this isn’t for beginners. Neutral-Grip Lat Pulldown, Accentuated Eccentric The neutral grip allows the lats to increase their range of motion into a stretch at the top of the movement while also helping the shoulder complex stay in a more centrated position. Both variables are great for longevity, orthopedic health, and muscularity. Rock back a little in this exercise to create almost a high-row angle on the concentric (pulling) portion of the exercise, then come back and normalize your torso position into neutral. Bring your head forward to really stretch through the eccentric (negative) portion of the exercise. If you master this movement, get a partner to force the eccentric by pressing down on the weight stack as you slowly let your hands and arms move up into a straightened position. (See video.) If you’re a sicko who loves the pain, add a 10-30 second forced stretch out of this exact position while maintaining neutral shoulder alignment and stretching through the lats. This will stick a fork in your workout, so program it on the tail-end of an upper body or back-emphasized training
Origin: Tip: Crush Your Lats With This Exercise
Tip: Do This Before Heavy Squats
 This exercise fires up the CNS and recruits a ton of muscle fibers. It’s a great primer exercise that’ll prepare any lifter for a big squat session. The Goblet Jump Squat The most common types of jump squats come with their own set of problems that you won’t have with this version: The barbell jump squat often results in compromised mechanics because of the bar that lands on the spine, which can cause the knees to cave at the bottom of the rep. Even landing properly with a barbell on your back leads to unnecessary stress with each jump. Holding the dumbbells by your side is the most common dumbbell squat jump but it comes with some problems. When you hold the dumbbells by your sides you end up internally rotating your legs to provide room for the dumbbells. Then the knees cave in slightly at the bottom of each rep. This becomes an even bigger issue as you progress to heavier (larger) dumbbells. The Goblet Jump Squat is Better You could load goblet jump squats with any size dumbbell without compromising your mechanics. The front-loading also takes stress off the spine. Weighted jumps are crucial for explosive athletes. Try 3 sets of 5 before your next leg
Origin: Tip: Do This Before Heavy Squats
Tip: Try This Quick & Dirty Calf Fix
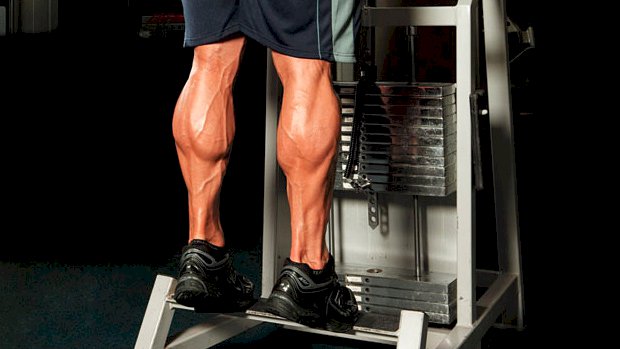 Talk to lifters and bodybuilders about calves and you’ll the hear the word “stubborn” come up often. The calves just don’t seem to want to grow, even if you persuade them with standard resistance training. That’s why many strength coaches employ shock techniques to force breakdown and subsequent muscle growth. Here’s one of those techniques from coach Charles Poliquin. Start at the standing calf-raise machine. Perform eight reps with a two-second pause at the bottom of each rep. Rest 10 seconds. Have a barbell sitting nearby loaded with about 25% of your body weight. Hold it in a squat position and, with minimal knee bend, jump up and down, bounding with the calves on each rep. Do this for 30 reps. “The eccentric damage caused by the landing will favor hypertrophy,” notes Poliquin. Repeat the superset four more times. “If that doesn’t make your calves grow, nothing will!” says
Origin: Tip: Try This Quick & Dirty Calf Fix
Tip: Increase Pull-Up Power With This Simple Plan
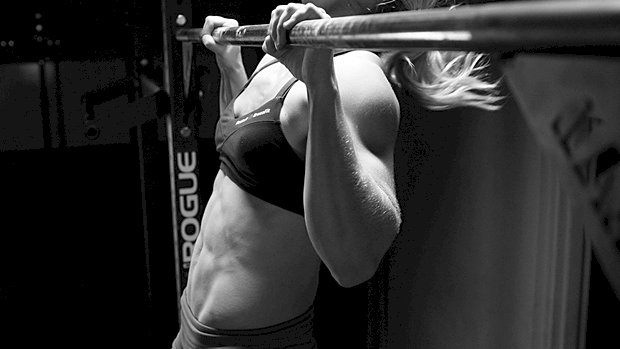 Mini-Sets for Maximum Gains Suck at pull-ups? You need to work them with frequent training. Start every workout with a total of 20 pull-ups done in as little time as possible using “mini-sets” of half your current max effort. Use a clock to track how long it takes and try to beat that time each session. The best strategy is to NOT hit failure on any of the mini-sets since it would require too much rest between sets and thus would take longer to complete. Here’s How It Looks Let’s say your current max is 4 or 5 pull-ups. Start with mini-sets of 2, resting as little as possible between each set – about 20 seconds rest is plenty. When doing the second rep becomes a grind, extend the rest to 30 seconds. When the second rep becomes tough again even with the longer rest, move down to doing sets of 1 with 15-20 seconds of rest until you hit your total (20 reps) for the day. As you get stronger, you’ll be able to use more than two reps for your mini-sets, but be very gradual about increasing them. Monitor the time it takes you to complete 20 reps to gauge if your strategy is adequate. When you increase the reps per set, your total time should continue decreasing. Ideally, in 8 to 10 weeks you’d end up hitting the 20 reps in just two sets of 10 with about 20 seconds of rest. When that happens, you’ll likely be able to hit 15 good pull-ups in a row. Progression Method: 30 Total Reps, Then Add Weight Once you can complete 20 total reps in just two mini-sets with no more than 30 seconds rest, increase the target total to 30 reps and resume the progression. Eventually, when you can hit the 30 reps in just two sets with less than 20 seconds of rest, go back down to 20 total reps, but here’s the killer… add 15 pounds to your waist and resume the progression all over
Origin: Tip: Increase Pull-Up Power With This Simple Plan
Tip: Do This Medball Exercise Before Squats
 Doing an explosive exercise prior to lifting fires up your CNS and gets your body physically ready to lift hard and heavy. Olympic lifting variations are often used, but here’s one that almost anyone can do: the medball thruster. This exercise works great before squatting. Make sure you drive your knees out as you squat down. Utilize the stretch reflex (the bounce you feel at the bottom of the squat) to rocket your body back into a standing position. Once you reach this standing position, continue to explode up while forcefully extending the
Origin: Tip: Do This Medball Exercise Before Squats
Tip: Do Pull-Ups Anywhere Like This
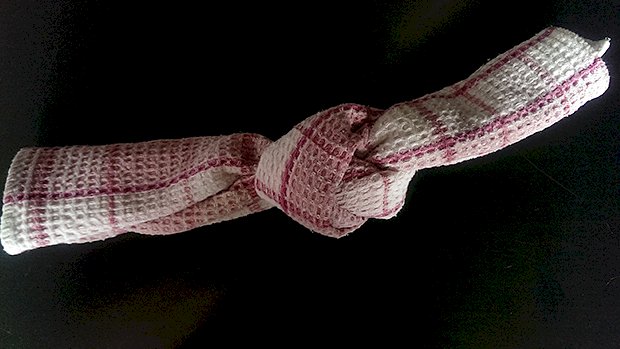 Push-ups, planks, bodyweight squats, and lunges can be done literally anywhere. But pull-ups require something to hang from, and that won’t always be available. If you travel a lot, you know that it isn’t easy to find a gym. If you’re lucky, the hotel you’re staying at has a gym, but you’ll have to be real lucky for that gym to be equipped with a pull-up bar. But there’s still a way you can do pull ups. All you need is a door and a couple of towels. Just follow these steps. Step 1: Tie a knot on one end of each towel. Make sure it’s tight. Step 2: Hang both towels over the door. The knot should be on the inside of the door when closed. Step 3: Close the door so it latches. Make sure the towels are laying flat enough on top of the door to get it to close. Step 4: Use the towels to do pull-ups. Your body will slide up and down the closed door. As a bonus, towel pull-ups really hit your grip and forearms hard. Find yourself a set of towels or rags made from a thin material and keep them in your suitcase. And never skip your
Origin: Tip: Do Pull-Ups Anywhere Like This
