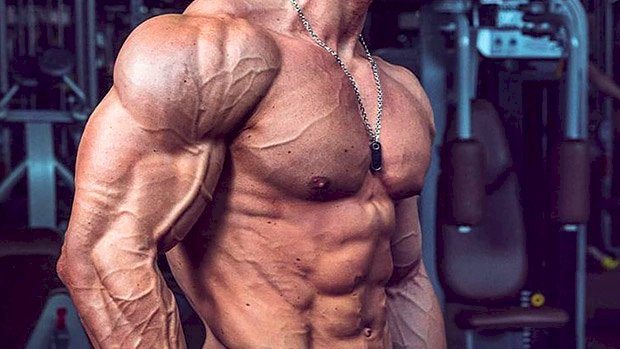
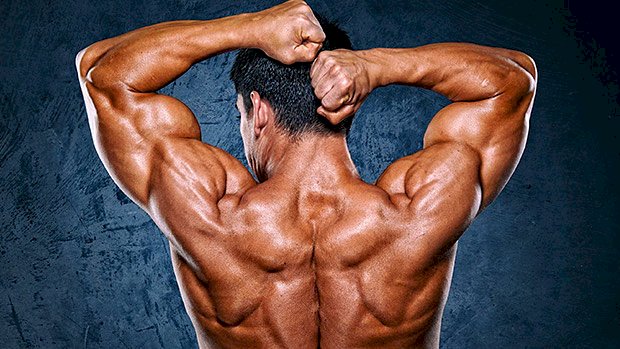
 Editor’s Note: Brush up on the first twenty tips here: 30 Days of Shoulders: 1-10 30 Days of Shoulders: 11-20 Day 21 – Control Slow Before You Progress to Fast A common mistake lifters make when coming back from an injury is progressing too fast. Take the overhead press as an example. Just because your shoulder feels better doesn’t mean you should head to the gym and do barbell snatches paired with handstand walks over broken glass for AMRAP. Pump the brakes. Maybe try something like tempo presses first where you press a pair of dumbbells overhead with a neutral grip (which allows for more external rotation of the humerus and helps open up more space in acromion) and then lower under control for a 3-5 second count… or 10 seconds if you’re a masochistic a-hole. This may be home base for a period of time before you ramp things up to more ballistic/fast movements like the Landmine clean to split press, which I stole from Lee Boyce. Take a look. In short, take your time and control slow before you tackle fast. Day 22 – Remember, Simple Stuff Still Works We’re enamored by bright, shiny objects thinking that if something is new or novel then it must always be better. I disagree. Simple still works, and this is never more apparent than when the discussion of “best rotator cuff exercises” comes up. While current trends point to functional exercises that border on the absurd (which are fantastic for garnering likes on social media and for making me not have enough eye rolls to give) I prefer the more vanilla approach. The side-lying external rotation exercise is the KING with regards to EMG activation of the rotator cuff. Recent research suggests that when you “level up” the drill with a side plank you get even more trunk and infraspinatus activation. I use this often to sprinkle in more rotator cuff work in clients’ programs. More specifically, I’ll usually pair it with a squat or deadlift as a filler. Here’s an example: A1. Deadlift or Squat Variation:5 sets of 5 A2. Side Plank External Rotation:5 sets of 8 per side Day 23 – Do The Wall Press (and Shut Up About Winging) My biggest pet peeve in fitness – other than kipping pull-ups and detox teas – is when fit pros go out of their way to tell people how dysfunctional they are. Case in point: scapular winging. You’re more likely to get struck by lightning while being attacked by a pack of piranhas in a volcano than to have true scapular winging. True scapular winging is a neurological condition where the long thoracic nerve isn’t doing its job properly innervating the serratus anterior. As a result, there’s a lack of congruency between the shoulder blade, the ribcage, and the former peels or “wings” off the latter. Most of the time, what’s perceived as scapular winging can be attributed to lack of tension and poor positioning. The wall press will help you feel the requisite tension required to own the position. By pressing into the wall (and pushing away) you get more serratus activity. To go further down the myth of scapular winging rabbit hole, I’d suggest checking out some of Dr. Quinn Henoch’s stuff on the topic. Day 24 – Do REPs The REP (retraction, external rotation, press) exercise is one of my staples for overall shoulder health. It’s a versatile drill that can be used at any point in a program, but my preference is to use it as a filler of sorts. Key points to consider: Be sure abs and glutes are on (contracted) to prevent any excessive lumbar movement. Slow the eff down! Do it right. 8-10 reps per set should do it. Day 25 – Do The Hinge Band Press This exercise certainly won’t garner a bevy of “likes” and accolades, but it’s one I like a lot because of its practicality. It’s an ingenious way to “groove” overhead pressing mechanics – in terms of scapular movement – in a way that’s less aggressive and more palatable for many lifters. Use it as a filler or as an exercise on its own, but be sure to follow the cues given in the video. If you do it right, and do 10-15 reps, your shoulders will get nice and juicy. (Credit to Dean Somerset for the idea.) Day 26 – Unbalance Your Program to Balance It This likely won’t be a piece of info that wows anyone or wins me any coach of the year awards, but it’s a message that falls on deaf ears much of the time. A logical recommendation for most lifters is to use a 1:1 (push:pull) ratio when designing their own programs. This is fine advice and will likely serve most well in the grand scheme of things. But I’d argue one of the things that causes shoulder pain is programming that includes more pushing exercises compared to pulling. I could use a bunch of fancy-schmancy words here, but the gist of it is that the mirror muscles tend to be overactive/tight, and the muscles we can’t see (upper back) are weak. In this case it’s not uncommon for me to use more of a 2:1 or even 3:1 pull-push ratio to help even things out. This is what I mean when I say it sometimes behooves a
Origin: 30 Days of Shoulders: 21-30
Tag: Shoulders
30 Days of Shoulders: 11-20
 Note: Miss the first ten tips? You bastard. Don’t worry, you can check them out here: 30 Days of Shoulders: 1-10. Day 11 – Fix Your Bench Press Setup I’ve learned from experience that if bench pressing bothers a meathead’s shoulders the last thing you should do is tell him is to stop bench pressing. He’s not going to listen to you. He’d probably rather swallow live bees. That said, for shoulder health the big player that’s often overlooked is the ability for the scapulae (shoulder blades) to move. We want them to retract, protract, upwardly rotate, downwardly rotate, all of it. To lift heavy things, however, we need to pin those bad boys down. Whenever I start working with someone and they mention how bench pressing always bothers their shoulders, rather than bog them down with a litany of corrective exercises they’re not going to do, I’ll instead audit their technique – in particular their initial setup. The shoulder blades should be together and down. This is crucial to help save your shoulders during the bench press and to ensure a more stable base to hoist a barbell off your chest. Day 12 – Guide the Bar During the Bench Press Taking things a step further, I’d be remiss not to also discuss how to unrack the barbell properly. It doesn’t make much sense to spend all that effort to get tight on your setup only to press the barbell off the j-hooks and lose it all. Learning to guide the barbell off the hooks rather than pressing it is a skill and takes some practice to master. It’ll make a massive difference in helping to cement your setup for benching success. Day 13 – Meet the Bar During the Bench Press A common technique flaw with the bench press is people allowing their shoulders to roll forward in the bottom position (or when the barbell approaches the chest). One simple cue I like to use is, “Meet the bar with your chest.” For most people, most of the time, it’s far more advantageous to focus on bringing the chest towards the bar rather than the bar to the chest. This not only helps maintain more of an arch with the upper back (which, not coincidentally, also makes it easier to keep the shoulder blades retracted and depressed or in a stable position), but it also helps reduce the likelihood of the shoulders dumping forward. Day 14 – The Spoto Press The Spoto press is one of my favorite bench accessory movements for a variety of reasons: Stopping an inch or two from the chest reduces the range of motion, so you can think of it as an “invisible 2-board press.” This means it’s a viable pressing option for those with cranky shoulders. It’s an excellent exercise for those who have a tendency of allowing their shoulders to “roll” forward as the bar approaches their chest. The rolling motion places the shoulders in a more anteriorly tilted (unstable) position, which in turn makes you a shitty bench presser. Too many people fail just off the chest, so the Spoto press makes it so you spend more time within the ROM you’re weakest. This variation lends itself well to high(er) reps (8-12) using 65-75% of your 1RM. Side Note: If anyone calls you out for doing half reps when doing this exercise, feel free to drop-kick them in the kidney. And tell them the guy who invented it, Eric Spoto, used this variation exclusively to help build his RAW bench press to a previously held world record of 722 pounds. Day 15 – The Decline Press If a flat or incline bench press bothers your shoulders you’re not doomed to a life of push-up purgatory. Instead, try the decline position. Why? It reduces the degree of shoulder flexion you’re in when you press and helps keep you out of the “danger zone” or pain arc with regards to shoulder flexion. This is huge because it allows for a training effect to be accomplished while using a shoulder-friendly pressing variation. And as Dr. John Rusin has stated, it’s never a bad idea to expose people to different angles of training to better challenge joint centration. Adding some variety in pressing motions can go a long ways in keeping shoulders healthy. The bigger lesson, though, is having a better appreciation that you can always train around an injury. Always. Day 16 – Accessing the Back Squat I like the back squat. However, I’m not married to it and recognize that it’s not a good fit for many lifters. One of the main contraindications would be one’s ability to “access” the shoulder range of motion needed to place a (straight) barbell on his or her back. Back squatting with a straight bar requires a significant amount of shoulder abduction and external rotation. While there are a host of screens, assessments, and correctives that can be used to help someone gain access, the quick drill above works swimmingly. Day 17 – Scrape the Rack Press If I want to introduce more traditional overhead pressing variations into my clients’ programs using a barbell, the scrape the rack press is one of my go-to introductory variations. I like it because I’m able to
Origin: 30 Days of Shoulders: 11-20
30 Days of Shoulders: 1-10
 If you’re reading this right now, chances are… You have two shoulders. One of them doesn’t feel so good. The shoulder is one of the most frequently injured areas of the body. These tips, on top of being gluten free, will help keep your shoulders healthy long-term and help you continue to kick ass and take names in the gym. Day 1 – First Fix These Two Mistakes There are many things to consider when it comes to why someone’s shoulder may be bothering him or her: poor soft tissue quality, programming imbalance, weak this, overactive that, they wore blue on a Wednesday, etc. I don’t know. It’s a lot. But more often than not, it’s how someone performs certain exercises. This factor often gets overlooked. Take the dumbbell row for example. It’s not uncommon to see one or both of these mistakes being made: Too much glenohumeral extension. I call it the “more ROM must be better” scenario. In this situation, each scapula dumps forward putting excessive stress on the bicep tendon. Not allowing the scapulae to move around the rib cage. Let that shit move, yo. Address those two things and your shoulders may not hate you as much. Day 2 – Decide If Overhead Pressing is a Good Fit One simple screen I use to ascertain if overhead pressing is a good fit for someone is to look at his shoulder flexion – his ability to bring his arms overhead. Sometimes you’ll see one or both of these compensations: excessive lumbar extension and/or excessive forward head posture. The culprit could be a few things: Soft tissue restrictions in the lats, pecs, triceps, etc. Or even postural considerations like upper cross syndrome. Although, admittedly, I’ve come to realize this is less of a thing and the culprit is usually addressing postural habits. Insufficient ability to access scapular upward rotation, protraction, or posterior tilt. Lack of anterior core stability or lumbo-pelvic control. Bony restriction, which, unless you’re a wizard, you’re not fixing with any amount of corrective exercise. Note: If you are a wizard, can we hang out? Anyway, if someone exhibits the inability to bring his arms overhead without going into excessive rib flair, it’s likely not going to be in his best interest to hoist a barbell in that direction either. This isn’t to say he’ll never be able to press overhead or, I don’t know, perform barbell snatches paired with handstand walks over broken glass for AMRAP. Never say never. But rather, for the time being, it may be more prudent to opt for exercises that’ll be a better fit. This is a straightforward screen, which gives me important information as a coach, and ammunition to sell the idea that one needs to earn the right to overhead press. Day 3 – Assess, Reassess, and Release Shit If someone’s shoulder flexion is lacking, I’ll use the assess and reassess approach, tossing in a “corrective” layer to see if I can induce an improvement. If it works, cool, I’m the man. If not, well, shit gets awkward and I’ll just start doing shadow puppets. Kidding. I’ll just move onto the next corrective layer. The shoulder blades are at the mercy of the thoracic spine. If that area doesn’t move then it’ll be hard for the scapulae to move as well. The first layer is what I like to call “release shit.” Take a look: In the video I use Acumobility balls to “release” the area and see whether or not I can improve overhead mobility. Day 4 – Getting the Ribcage to Move The shoulder blades are at the mercy of the thoracic spine and, in particular, the rib cage. If that area is incapable of moving (or getting 360 degrees of expansion) then the ability to bring the arms overhead can often be compromised. I know most people don’t have enough eye rolls to give once the topic of positional breathing enters the conversation, but all we’re talking about here is one or two drills. That’s ten or so “breaths” and your shoulders will thank you in the long run. Does this mean you can jump right into barbell snatches, kipping pull-ups, or whateverthefuck? No. These drills allow “access” to overhead ROM via improved position and stability. The appropriate move may mean “fake overhead pressing” like landmine press variations, or maybe controlled tempo dumbbell overhead presses. Either way, these drills may allow a window of overhead training and I believe they’re well worth it. One drill I love is the dead bug because it hammers home the concept that proximal stability equals distal mobility. Watch the video and you’ll see what I’m talking about. Day 5 – Improving Overhead Mobility (Upper Traps) To move the arms overhead it’s important to improve scapular protraction, posterior tilt, and maybe most important of all, upward rotation. Three areas play a role in upward rotation: serratus anterior, upper traps, and lower traps. All act as force couplers to “pull” the shoulder blade into upward rotation as the humerus elevates overhead, kinda like when the Night King pulled a “come at me, bro” pose toward
Origin: 30 Days of Shoulders: 1-10
Tip: Build Big Shoulders With Bodyweight
 The handstand walk is a long-term skill to acquire, but it’s definitely worth learning. The progressions are quite attainable and provide a unique pump that’ll make your triceps and shoulders burn like nothing else. An added bonus is the open shoulder position, which helps with thoracic mobility. Plus, having your weight on your hands builds a crazy amount of shoulder stability that you just don’t get with barbells. Mastering the Handstand Walk All you need is something to elevate your feet. This could be a box, bench, sofa, bed, chair, etc. Then you have five different exercises: Holding the handstand position, aiming for a vertical torso Shoulder taps Walking from side to side Feet elevated push-ups Pike push-ups Which exercises you use will be based on your individual level and skillset. I recommend practicing each exercise individually until you’re confident. Set markers to hit for each exercise such as: 30 second holds 20 shoulder taps unbroken A 360-degree walk around (both directions) 10 elevated push-ups 5 pike push-ups If you can do these easily then you can start having fun. For example, try using a set of 20-30 shoulder taps as a drop set after heavy presses! The Descending Ladder Workout One of my favorite rep schemes for these movements is a five-round descending ladder: Round 1 10 shoulder taps Walk halfway around the box 5 pike push-ups or elevated push-ups Walk back to where you started (if you initially walked to the right, walk left to go back) Round 2 8 shoulder taps Walk halfway 4 pike push-ups or elevated push-ups Walk back Round 3 6 shoulder taps Walk halfway 3 pike push-ups or elevated push-ups Walk back Round 4 4 shoulder taps Walk halfway 2 pike push-ups or elevated push-ups Walk back Round 5 2 shoulder taps Walk halfway 1 pike push-up or elevated push-up Walk back Aim to break up your sets as little as possible. If you can do all five rounds unbroken – without coming down between the sets – you win! The prize is shoulder gains and a massive
Origin: Tip: Build Big Shoulders With Bodyweight
Tip: A New Exercise for Big Shoulders
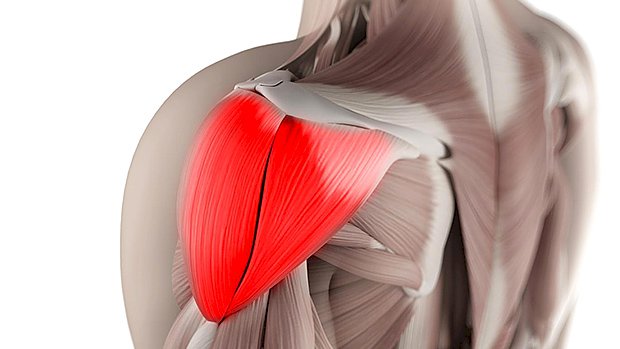
 The delts are one of the most difficult muscle groups to develop. They’re also the most vulnerable to injury. The glenohumeral joint is the primary joint in almost all upper body functions. If you’re looking to press and pull heavy weight, you better have shoulders that are up for the challenge. There are two factors that need to be taken into consideration: You have to use movements that protect the health of the shoulder joint. You have to maximize the muscle recruitment to get them to grow This is often a difficult combination, except in this case. The Neutral-Grip Shoulder Press You’ve used the neutral-grip lat bar for pulldowns. Now try it for shoulder presses. Note that the cable is attached at the bottom of the handle, so you’ll be pushing up, not pulling down. The pulley should be set at about the belly or lower chest level. It’s a great pressing grip: elbows roughly 45 degrees from the body and hands in neutral grip (facing one another). The position of the arm alleviates unnecessary joint pressure to extend shoulder integrity. Begin with 25% of your normal barbell military press for 4 sets of 10. The video shows Musclemania Heavyweight Pro, Fred Shaka, who normally presses 225 pounds for reps, but trains this exercise at 60
Origin: Tip: A New Exercise for Big Shoulders
The 3 Smartest Ways to Train Shoulders
 Stop Pissing Off Your Shoulders Years in the iron game can leave the shoulders beat to crap. The last thing you want to do is to piss off some of the most important joints in the body more than they already are. Your shoulder work should enhance the way this region of the body looks AND functions while improving your performance. Here are three pain-free strategies to decrease joint stress while maximizing the pump effect for growth and strength. 1 – Use Bands With Dumbbells Using bands and chains for accommodating resistance is usually reserved for the big lifts, but they should also be a staple in smart shoulder training. The only problem is the equipment restrictions. Bands are often too thick and chains are too heavy to complete enough full range of motion reps to get a good training effect. The secret is to use the ultra-light, handled bands that have become popular in commercial gyms. These bands have much smaller diameters and thickness, allowing you to apply accommodating resistance when used in combination with dumbbells. Holding the handles of the bands together with the handles of dumbbells works with the lateral raise and its variations. Staying consistent with the light band and increasing the dumbbell poundage allows you to train in strength, hypertrophy, endurance, and metabolic-stress based rep schemes without sputtering out on range of motion or losing control of shoulder stability. Another advantage bands provide during lateral raises is the ability to train explosively without losing shoulder stability at the top of the movement. Because the load is lighter at the bottom of the range when your hands are down by your sides, you’re able to engage the delts more explosively and have the speed of contraction slowed down by the increased resistance through the bands at the top. This is great for targeting the fast twitch motor units in the shoulders while also providing a novel, pain-free stimulus for shoulder training. Remember, train the shoulders explosively with this method. Focus on increasing the contraction speed in the concentric (lifting) part of the movement while slowing down the eccentric (lowering) part of the exercise. Don’t let the bands pull you down fast. 2 – Train Between the Usual Planes of Motion Open up an anatomy textbook and you’ll see that the deltoid is broken down into three distinct fiber orientations: the anterior, lateral and posterior. Though traditional training protocols have called for training shoulder flexion, abduction, and extension, it’s not the most effective way. Sure, isolating different parts of the deltoid is better than just barbell overhead-pressing yourself into an AC joint injury, but let’s try to be better than the industry standard, shall we? Training not only the three cardinal planes of motion, but BETWEEN these planes of motion is pivotal to finding what variation of shoulder raises fits your specific body type, while also taking into account things like functional instability, weakness, or even past injury. This strategy gives you endless angles to emphasize, adding novelty to traditional movement patterns while also minimizing chronic joint stresses commonly associated with sloppy lateral raises and overhead pressing. Check out the dumbbell scaption raise that works between the sagittal and frontal planes, emphasizing fibers between the anterior and lateral heads of the deltoid. Dumbbell Scaption Raise There’s a huge need for posterior and posterior-lateral direct deltoid training as many lifters place too much emphasis on vertical and horizontal pressing. To protect your shoulders and build some muscle in the posterior shoulder area, do 2-3 times more volume on the posterior shoulder than the anterior. 3 – Trigger the Metabolic Pump Effect The shoulders don’t traditionally respond well to heavy-ass loads. The deltoid is comprised of a majority of slow twitch muscle fibers, meaning that the average lifter will be more likely to get results from higher rep ranges of around 12-20 reps. While this is based on individual presentation of fiber and body typing, higher reps can be advantageous to almost every lifter by decreasing external loads placed on the shoulder joint, thus decreasing cumulative joint stress over time. Less weight moved equals less stress on the joints. But this doesn’t give you the excuse to get fluffy with your shoulder training and go light without challenging yourself. Building strength and size in the shoulders requires placing an emphasis not only on progressively overloading staple movements, but also on eliciting a huge metabolic pump effect in the tissues. The pump has been crapped on for decades by elitist powerlifters and strength athletes who are usually chronically injured, but tapping into metabolic stress is one of the most intelligent training variables to exploit for performance, aesthetic, and orthopedic success. There are a few key methods that will increase the metabolic stress of the
Origin: The 3 Smartest Ways to Train Shoulders
