 Comfortably holding a heavy weight over your head takes some serious shoulder stability and a good amount of mobility through your thoracic spine. You’ll need stable and mobile shoulders to nail a good overhead lockout position with everything from barbell pressing to the Olympic lifts and even handstands. If you’re struggling overhead, try these exercises to strengthen your shoulders and improve your overhead game. 1. Wall-Facing Handstand Do you have the prerequisite mobility and motor control to achieve a good overhead position? This will let you know. The movement requires you to be mobile and strong through your thoracic spine (and stable through your lumbar spine) to get your body up against the wall. It’s great for the upper body because it dynamically challenges you to stabilize your shoulders as you walk yourself towards the wall. It also forces you to learn how to properly brace your core by pulling your ribcage down so you don’t go into excessive lumbar extension during an overhead lift. How to Do It Begin with two hands on the ground and one leg against the wall. Walk your hands backward as you bring your other leg against the wall. Stabilize your lower back by engaging your core and pulling your ribcage down. Walk yourself backward until your nose touches the wall and you’re in a vertical body position. Keep your arms straight and press yourself away from the floor so that you achieve protraction and elevation through the shoulder blades. Hold until you start to lose protraction through the shoulders. 2. L-Sit Alternating Bottoms-Up Kettlebell Press Wow, that’s a long-ass name for an exercise, but it does the job! Pressing and stabilizing heavy weights overhead requires a strong rotator cuff as well as an efficient bar path. This exercise forces your rotator cuff to stabilize your shoulder for the entire press and will teach you how to press weight up and back. It has the added benefit of firing up your nervous system and improving your grip strength since it requires a strong grip to keep the kettlebell upright. Placing yourself in the L-sit position requires more core activation and will keep you from arching your back to complete your reps. How to Do It Begin seated with your legs straight in front of you. Hold two kettlebells upside down with your elbows bent and wrists straight. Pull your ribcage down to brace your core and press one kettlebell up and back. Finish the press with your biceps next to your ear and pause at the top to make sure the kettlebell is stabilized overhead. Slowly lower the kettlebell back down and repeat on the opposite side. 3. Bottoms-Up Kettlebell Swing This is a dynamic lift and requires almost all the muscles in your body to work together to stabilize the kettlebell overhead. This movement is similar to the bottoms-up kettlebell press in how it challenges shoulder stabilization, but it requires more timing and arguably more athleticism since you have to “catch” the weight at the top. Although the movement of the kettlebell will have a significantly bigger “arc” than a barbell, this can be a great tool to get better at the Olympic lifts since it involves hinging the hips and catching the weight overhead in one efficient movement. Your ribcage should be pulled down and you should finish the lift with your biceps next to your ear, pausing for 2-3 seconds before lowering. How to Do It Begin with your feet slightly wider than hip width. Maintain a strong flat back as you hinge your hips back, bringing the kettlebell between your legs. Explosively drive your hips forward, swinging the ‘bell upward. Catch the kettlebell by the handle with your arm straight and biceps next to your ear. Your shoulder should be in a neutral position when you catch the ‘bell. Maintain a neutral spine as you press up on the kettlebell, maintaining tension throughout the entire body. Hold the kettlebell by the handle at a dead stop for 2-3 seconds for the rep to
Origin: Tip: Get Stronger Overhead – 3 Exercises You Need
Tag: Overhead
Tip: How to Test & Improve Overhead Flexibility
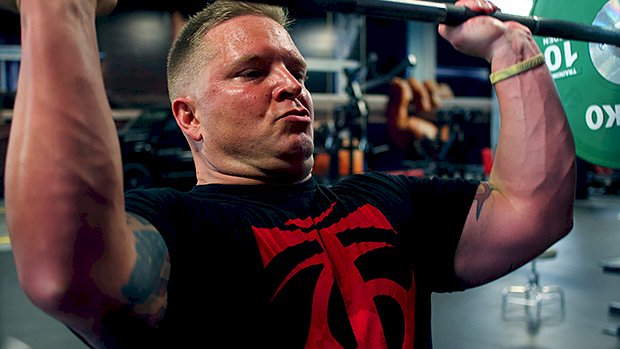
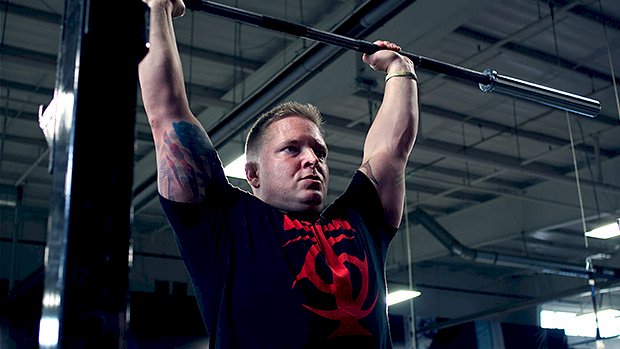 Pain and injury from shoulder pressing are generally caused by not having the requisite flexibility to do the movement safely, such as: Limited shoulder flexion. This causes you to press the weight too far forward, or to have an arch in your lower back to compensate. Limited thoracic/upper back mobility. This restricts scapula movement, again causing the barbell to travel forward. One shoulder has more mobility than the other. This can cause anything from a subtle imbalance to a major twist during pressing. Assess and Fix It One of the most effective ways to test the flexibility required for an overhead press is with this lat stretch variation. Not only does it tell us a lot about our overhead mobility, it’s also one of the most effective ways to achieve a better position. We want to see a straight line through the hands, elbows, and shoulders that continues down the spine when the ribs are tucked down and the abs are engaged. This shouldn’t be uncomfortable and there should be no nipping sensation in either shoulder. Video yourself while you do the test and watch your back to assess your mobility. Here are a few things to look out for: The arms not being in line with the spine: This means limited shoulder flexion. It will hinder your ability to do all overhead movements. An arch in the lower back: This is a common compensation and can make your overhead presses look more like an incline bench press. Generally, this will come down to a bad habit or a lack of thoracic mobility. One arm lower than the other: This indicates that one shoulder is too tight or overused, OR one shoulder has been over-stretched and made too mobile. This is very common for people with past injuries that have gone too far with self-massage. You can now use the assessment exercise as a drill to help fix the problem! Using very light fractional plates, go back into the same position with your arms above your head until you feel a stretch, then maintain it (but don’t force it). If you can manage 30 seconds, that’s great. It’s okay if you need to break sooner; the more you practice the drill the easier it’ll get. Aim for 3-5 sets for 30 seconds at a time. Over the 30 seconds, your shoulders will fatigue, relax, and start to give up that extra range. It’s important to do some light barbell presses right after this drill. Once you’ve created new range it’s more likely to “stay” if you then strengthen it. However, if you know you’re really far off from a good overhead position, just stretching for now is fine. If one shoulder happens to be lower or higher than the other, you need to even those up during this exercise or you could make the problem worse. Ideally, have someone with you to tell you when your shoulders are wonky or uneven. If you have one shoulder that’s too high it might take a while to loosen up, but you can try adjusting your shoulder position to see if that helps. If you have one shoulder that’s too loose, you need to actively lift it up to the straight position and try to maintain it to build stability. For the drill, aim for 10 reps for 3-5 sets. If you find this really challenging, then definitely practice and don’t forget to integrate it into your overhead press afterwards. As with any good mobility drill, once you can do this well and not find it challenging, the frequency you need to use it will dramatically decrease. When your arms are even – with no compensations – then a quick run-through once a month is more than enough. Don’t settle for having bad shoulder flexibility. Take the time to fix it, then you can enjoy your training knowing you have the best possible
Origin: Tip: How to Test & Improve Overhead Flexibility
