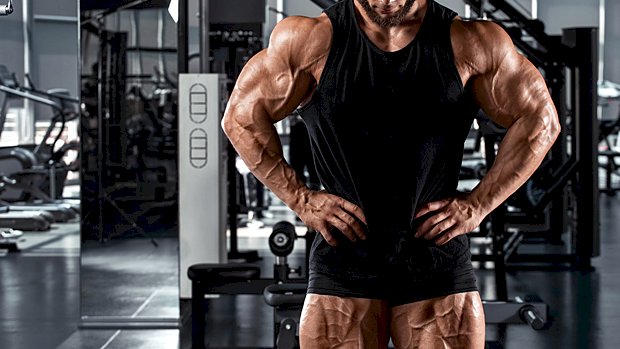
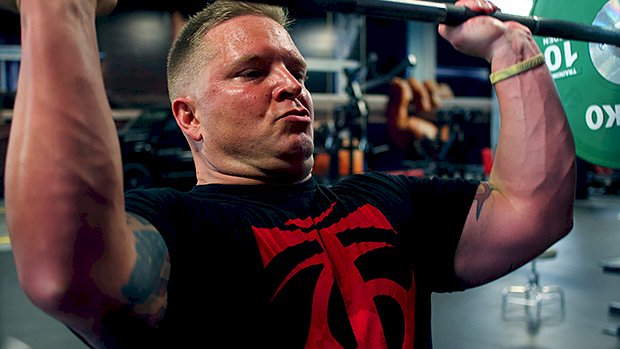
 When you’re trying hard to gain muscle and strength, you must train with a high level of effort, dedication, and intent. You also need a sufficient amount of volume to stimulate physiological adaptations. That type and amount of training can take its toll on both the body and the nervous system. Old injuries can flare up, new ones can start to appear, and delayed onset muscle soreness might linger longer than usual. You might even begin to notice that your libido, along with your motivation to train, plummets. Not surprisingly, your mood might also start to sour. Enter the deload, the solution to all training problems! You decrease training stress by reducing the weights you’re lifting, the number of sets you’re doing, or the days you’re spending in the gym. You can even exchange your exercises for less demanding ones. You do that for a week and then you feel better. Performance starts to go up again. But… What if you’re feeling fine? What if you’re showing no signs of fatigue or stagnation, or no aches or pains? Should you deload just because a training plan instructs you to? Wouldn’t it be more useful to keep training hard and continue to ride the gains train? What does a deload even do, precisely? Let’s consider all those questions, along with examining some of the best ways to accomplish a successful deload. What Happens When You Deload The old theory about deloading has to do with a phenomenon called supercompensation. You overload the body so that there’s a decrement in performance and then you allow it to rest. Nutrient levels and neurotransmitter levels supposedly swing back up and end up higher than they would typically be, allowing you to get a boost in performance. But that only happens to glycogen stores, not to the factors that play a crucial role in lifting performance. As such, the method is moderately useful for endurance sports, but not so much for lifting. Strength training performance is just not as reliant on glycogen stores as endurance activities. And unless your carb levels are extremely low, you likely will not achieve the level of glycogen depletion that would lead to supercompensation. Deloading also doesn’t supercompensate neurotransmitter levels, but it is true that a deload will help if you’re noticing symptoms of fatigue and your performance is going down. It has to do with beta-adrenergic receptor sensitivity. These are the receptors that interact with adrenaline to excite the nervous system. When they’re activated, your mental awareness and focus increases, you’re more competitive and energetic, and your heart beats faster and stronger. Activated receptors also allow your muscles to contract harder and faster so you’re more efficient at executing movements. If your training is excessive, or if the combination of exercise and day-to-day stress is high, cortisol goes up and these receptors can downregulate. This down-regulation means that you lose your capacity to respond to your adrenaline and your motivation, focus, and performance go down. When you include a deloading week in a weight-training program, the beta-adrenergic receptors recover the lost sensitivity and once again respond more strongly to adrenaline. This will increase strength, speed, motivation, and focus, among other things. So Should I Deload? Deloading is a tool. It’s used to recover beta-adrenergic sensitivity reduced by high cortisol levels. If you don’t suffer from such an issue, the deload won’t do anything for your performance. The training factors that can increase cortisol are: Volume. One of the main functions of cortisol is the mobilization of stored energy. More work means a greater need for fuel, which requires a more significant release of cortisol, which then increases adrenaline. Intensiveness. The harder you push a set, the more stressful it becomes. The closer you go to failure, the more cortisol you release. Psychological stress. When a load or an exercise intimidates you, it can also create a stress response that will lead to higher cortisol levels. Examples include attempting a PR or having a previous injury that makes you insecure about doing a movement. Neurological demands. The more familiar and efficient you are with an exercise, the less stressful it is on the nervous system. More complex movements, however, require a greater focus and mental awareness and in turn create stress. Density. Shorter rest intervals also lead to higher adrenaline levels, which require a more significant release of cortisol. A training program that has a high level of several of these factors is more likely to cause “overtraining.” If you only check one or two of these boxes, your chances of getting into an overtraining state are much lower. But let’s look at how the average lifter works out. I’m talking about the regular Joe you see at the commercial gym. They usually do not push hard, using perhaps a RPE (rate of perceived exertion) of around 7. They pretty much stick to “comfortable”
Origin: The Deload: Everything You Need Know
Tag: Need?
Tip: Get Stronger Overhead – 3 Exercises You Need
 Comfortably holding a heavy weight over your head takes some serious shoulder stability and a good amount of mobility through your thoracic spine. You’ll need stable and mobile shoulders to nail a good overhead lockout position with everything from barbell pressing to the Olympic lifts and even handstands. If you’re struggling overhead, try these exercises to strengthen your shoulders and improve your overhead game. 1. Wall-Facing Handstand Do you have the prerequisite mobility and motor control to achieve a good overhead position? This will let you know. The movement requires you to be mobile and strong through your thoracic spine (and stable through your lumbar spine) to get your body up against the wall. It’s great for the upper body because it dynamically challenges you to stabilize your shoulders as you walk yourself towards the wall. It also forces you to learn how to properly brace your core by pulling your ribcage down so you don’t go into excessive lumbar extension during an overhead lift. How to Do It Begin with two hands on the ground and one leg against the wall. Walk your hands backward as you bring your other leg against the wall. Stabilize your lower back by engaging your core and pulling your ribcage down. Walk yourself backward until your nose touches the wall and you’re in a vertical body position. Keep your arms straight and press yourself away from the floor so that you achieve protraction and elevation through the shoulder blades. Hold until you start to lose protraction through the shoulders. 2. L-Sit Alternating Bottoms-Up Kettlebell Press Wow, that’s a long-ass name for an exercise, but it does the job! Pressing and stabilizing heavy weights overhead requires a strong rotator cuff as well as an efficient bar path. This exercise forces your rotator cuff to stabilize your shoulder for the entire press and will teach you how to press weight up and back. It has the added benefit of firing up your nervous system and improving your grip strength since it requires a strong grip to keep the kettlebell upright. Placing yourself in the L-sit position requires more core activation and will keep you from arching your back to complete your reps. How to Do It Begin seated with your legs straight in front of you. Hold two kettlebells upside down with your elbows bent and wrists straight. Pull your ribcage down to brace your core and press one kettlebell up and back. Finish the press with your biceps next to your ear and pause at the top to make sure the kettlebell is stabilized overhead. Slowly lower the kettlebell back down and repeat on the opposite side. 3. Bottoms-Up Kettlebell Swing This is a dynamic lift and requires almost all the muscles in your body to work together to stabilize the kettlebell overhead. This movement is similar to the bottoms-up kettlebell press in how it challenges shoulder stabilization, but it requires more timing and arguably more athleticism since you have to “catch” the weight at the top. Although the movement of the kettlebell will have a significantly bigger “arc” than a barbell, this can be a great tool to get better at the Olympic lifts since it involves hinging the hips and catching the weight overhead in one efficient movement. Your ribcage should be pulled down and you should finish the lift with your biceps next to your ear, pausing for 2-3 seconds before lowering. How to Do It Begin with your feet slightly wider than hip width. Maintain a strong flat back as you hinge your hips back, bringing the kettlebell between your legs. Explosively drive your hips forward, swinging the ‘bell upward. Catch the kettlebell by the handle with your arm straight and biceps next to your ear. Your shoulder should be in a neutral position when you catch the ‘bell. Maintain a neutral spine as you press up on the kettlebell, maintaining tension throughout the entire body. Hold the kettlebell by the handle at a dead stop for 2-3 seconds for the rep to
Origin: Tip: Get Stronger Overhead – 3 Exercises You Need
Tip: The Landmine Exercise You Need for Hammies
 A dumbbell or kettlebell can be a good option for single-sided Romanian deadlifts, but if you’re looking to really load those hamstrings (and glutes), using a landmine offers more stability. The bar stays in contact with the floor throughout the lift. More stability means more output, so it can be a good way to bro-up your single-leg work. Two ways to do it: Landmine Side-Facing RDL Landmine Front-Facing RDL These work well with a variety of rep ranges. Try both options to find the one you like more. Single-leg RDLs are most commonly done with a contralateral load: planted foot with the load in the opposite hand. Contralateral work mostly relies on using an interconnected line of tissues known as the “posterior functional line.” This line connects the glutes of one hip to the opposite side lats, essentially creating an X-shape that crosses the lower back. Why should you care? Well, think about athletes and their sport. Developing stabilization between hip and shoulder is essential. But if you care more about getting bulging hamstrings, contralateral might not be the best option. Ipsilateral means using the same-side arm and leg. It’s more useful when you’re trying to train the muscles of the lead leg, and that hip “snap” from the lead leg you’ll see in some sports. An ipsilateral RDL tends to be more stable and it emphasizes the lead leg’s hamstring
Origin: Tip: The Landmine Exercise You Need for Hammies
Tip: Why You Need to Rock n’ Row
 If you want to engage as much of your back musculature as possible during your seated rows (or horizontal pulls in general), it’s imperative you add some movement from the hip joint. I call this “toprock.” By applying a little sway with a neutral spine, you’ll remain safe while keeping the emphasis away from the biceps and away from unwanted shoulder glide once the weight begins to get a little heavy. Think about it: The “intro to training” textbooks says the form police will arrest you if you keep anything other than a completely rigid torso when doing rows, but applying a bit of momentum is perfectly acceptable and isn’t “cheating.” This is me doing what I consider to be a standard set of heavier seated rows: As you can see, I’m maintaining good tension throughout the rep, and never is there any rounding of the lumbar (or thoracic) spine. And, as the video below shows, I believe this same principle should apply to all row variations, within reason:
Origin: Tip: Why You Need to Rock n’ Row
Tip: The Oblique Exercise You Need
 Cable chop variations are some of the most effective exercises for building an athletic midsection, making your abs as athletic and strong as they look. Chops help build an efficient power transfer between your lower and upper body, meaning they’re great for athletes. Adding rotation to your training is a must if you want a good set of obliques. Try this drop set: A1. Cable Chop (left): 8-12 A2. Cable Tight Chop (left): AMRAP Rest 30 seconds A3. Cable Chop (right): 8-12 A4. Cable Tight Chop (right): AMRAP AMRAP means “as many reps as possible.” Just make sure they’re GOOD reps. Only rest between A2 and A3. Go straight from one set to the next. Then rest as needed before you start the whole thing all over again. Do three rounds. Start with your standard cable chop setup. Keeping your elbows straight throughout, swipe the cable horizontally. Engage your core and hips in a powerful transfer of movement (think of the whip of a baseball swing). Once you’ve completed your set on one side, continue the set by “dropping” to a stronger chop position. A “tight” chop simply means your elbows are going to come in tight to your ribs. By bending your elbows and bringing the cable in you’ll be able to lift more weight, or in this case get in a few more reps. Complete a drop-set on one side before switching to the
Origin: Tip: The Oblique Exercise You Need
Tip: The No-Eye-Contact Butt Exercise You Need
 You’ve heard it before: Don’t make eye contact with anyone when using the abductor machine or doing the hip thrust. It’s just… awkward. Well, here’s another glute exercise where you might want to limit eye contact. It might come across a little “suggestive” but the kneeling thrust is a great high-rep backside builder. You’ll need a high-strength resistance band for this one, or double up some lighter ones. Attach your band to the bottom of a rack or anything that’s sturdy. Use a pad for your knees. Set the bench as far away as you need, depending on your band length and resistance. Once you’re in position, the execution is like a barbell hip thrust, but you’ll be kneeling. You’ll be driving your knees down into the pad while pulling down on the bench – a little like a straight-arm pulldown. The pulling-down part works twofold, both to offer support in front and to engage your anterior core. This affects what happens at your hips and further enhances the glute contraction. The bench assists somewhat. The support from the bench also encourages more of a bowing (hinging) movement. Additionally, you seem to get more “cock up” (posterior pelvic tilt) when there’s something to aim for… another reason to limit eye contact. Because band tension increases as it’s stretched, using a strong resistance band will help load your glutes in their fully shortened position. Here’s another way to do them with a band set inside a power rack: The benefits are the same, but this setup will allow you to double up your resistance band and get more load through your hips. Being positioned like this in a rack might provide you with more support. Where there’s more support, there’s more output. One final way to perform this glute exercise is with a set of cables and a dipping belt: The advantage of using the cable is in the constant load throughout the movement (as opposed to a band where the load is varied). There are merits to both forms of resistance, as well as drawbacks. If you’ve already got a monster-strong ass, the heaviest band available might not suffice. Using a dipping belt in the cables might be more uncomfortable or limit range of motion on the way back (if the belt is too thick). Experiment with different setups and see which one feels best. Programming High reps work best. Do 2-3 sets of 20-30 reps for an intense butt pump towards the backend of your workout. It’s no replacement for the big-daddy, barbell hip thrust, but it’s a great
Origin: Tip: The No-Eye-Contact Butt Exercise You Need
Fear of Muscle: What Women Need to Know
 Although great strides have been made in the war against female fear of muscle, or myophobia (CrossFit deserves much of the credit), muscle is still often regarded with curious suspicion and sometimes outright distrust in female fitness circles. Sure, on some level, most women these days understand that muscle can have value, but there’s still a significant amount of (unnecessary) trepidation about becoming overly muscular. On a certain level, women’s mistrust of muscle makes sense. After all, one of the most immediately recognizable masculine traits is conspicuous muscularity, a trait most women want to avoid. But muscle is certainly not a universally masculine feature. Beyond that, the inescapable truth is that women with the most admired physiques also tend to be significantly more muscular than the average woman. So let’s clear up the misconceptions and concerns that women often have about building muscle. 5 Things Some Women Don’t Understand Muscle is very difficult for women to acquire. This is especially true for women who are older and/or dieting. Any muscle you do gain is acquired very gradually – there will always be plenty of time to apply the brakes if you feel you’re becoming too muscular. Most women find that if and when they do build new muscle, they like it much more than they imagined. But, if they end up not liking it, no problem! It’s very easy to lose. Muscle is what gets (and keeps) you lean. It’s commonly known that men can eat more than women without consequence, even if you match them for bodyweight. More muscle is the main reason why. Muscle and Metabolism Interestingly, many people tend to think of metabolism as a mysterious external force, kinda like gravity – you can’t touch it, you can’t see it, but darn it, it sure comes to a screeching halt right after your 40th birthday, doesn’t it? (Your metabolism, not gravity.) Mmm, not really. “Metabolism” simply refers mainly to your energy expenditure. There are four primary categories: “Basal” metabolism:This is the amount of energy you need to survive. You need a minimal amount of energy to keep all of your organs functioning and to maintain key survival functions such as consciousness, respiration, temperature maintenance, and so on. Non-Exercise Activity Thermogenesis (N.E.A.T.):This is the additional energy you need to perform any and all activity excluding formal exercise. This includes walking, work activities (from relatively sedentary work to manual labor), sitting and rising from chairs, pacing, fidgeting, household chores, literally any activity that isn’t “exercise.” Exercise Activity:The energy you need to perform, and recover from, any type of formal exercise. Thermic Effect Of Food (T.E.F):Whenever you eat food, it requires a certain amount of energy to process (digest, absorb, eliminate) that food. It takes between 5 and 15% of the calories in carbs and fats to process them. Protein requires a bit more work to process, requiring between 20 and 35% of its calories. All that being said, muscle beneficially affects total metabolic rate in three different ways: The training required to build additional muscle requires energy, both to perform, and also to recover from. Once acquired, this new muscle requires you to expend additional energy on a daily basis simply to maintain the new muscle. Both basal metabolism and NEAT increase. When you have more muscle, all activities are easier to perform, making it likely that you’ll do more of these activities, which of course, requires additional energy. So, gaining as much muscle as possible has a powerful impact on metabolic rate. Still, some women might have some psychological barriers to overcome. Why Women Think They’re Getting Too Big When They’re Not The Thanksgiving Dinner Effect Have you ever felt disgustingly fat after a huge holiday feast? Of course you have, but you haven’t gained ANY measurable fat after a single meal, no matter how gluttonous it may have been. But your attention has been diverted to your stomach, because it’s stuffed full of food. So you feel fat. The same phenomenon applies to lifting weights. Both during and after a workout, your muscles will burn from lactic acid accumulation and swell with blood. Both of these phenomenon focus your attention to your working muscles, which are now temporarily bigger due to being pumped. The Knee Surgery Effect I never noticed knee scars until I had knee surgery. But, the very day I got out of the hospital, amazingly, everyone suddenly had knee scars. Well, not really, but it’s just that I suddenly started thinking a lot about knees and knee surgery, which caused me to start noticing people’s knees and their scars. Similarly, when women start training, say, their legs, they often start feeling, noticing, and observing their legs, and often with the suspicion that muscle is being gained. And, needless to say, if a woman experiences a pump for the first time ever, she’s likely to mistake it for
Origin: Fear of Muscle: What Women Need to Know
Tip: 4 Questions You Need to Ask Yourself
 You can read all the most cutting-edge research you want to convince yourself that you’re on top of it, but if you’re not 21 anymore or genetically gifted, you’ve got to get real. You’ve got to apply common sense. You’ve got ask yourself some serious questions and accept what might be some inconvenient truths. The answers will do more to determine your ultimate progress than any training program or diet you undertake. Ready? 1 – What’s Your Real Age? I’m 32 years old now, and I started working out properly for size and strength around age 20. The methods my trainer and I used worked well, but I’d be lying to myself if I thought I could handle them now for more than a week. The simple truth is that I just don’t have the same work capacity that I used to, and that seems to be a common theme with people who train through their adulthood. To be clear, not having the same work capacity doesn’t necessarily scream “worse.” It just screams “different.” It means that if you’re not a young stunner anymore, you’d be wise to modify your training program so you can still get away with working hard on a consistent basis – even if that means scheduling shorter workouts, a couple of deload weeks, 15 more seconds of rest between sets, or a little bit lower volume with the heavy stuff. The lesson learned is simple: Respect your calendar age by tailoring your workouts to match the training effect you’re after – not a certain performance number or standard. 2 – What’s Your Injury History? Regardless of whether it’s something like chronic shoulder pain or something serious like a surgically repaired back or knee, these things should be factored in when you’re considering the demands of your program. One-size-fits-all programs don’t “know” what you’ve been through, and clustering up to 90% of your max weight multiple times per week may not be the smartest idea you’ve ever had. Still, there’s encouragement to be found. Never forget that the beauty of training for the long haul is that you have a much less urgent “deadline” to add muscle and strength. You can still do it, as long as you remain realistic and give your body the accommodations it needs. On top of this, you’ve now opened up the possibility of considering other ways to view “progression,” like increasing range of motion, optimizing tempo, and reducing rest intervals. 3 – What’s Your Training Age? Whether you’re 19 with a year of experience, 39 with a year of experience, or 79 with a year of experience, the amount of time you’ve spent as a lifter equates to the same number: 1. That’s a very important factor to consider when taking a rational approach toward seeing goals. A lifter who’s spent 15 years in the gym will react differently to a program for strength and size than a lifter who’s brand new to the game. An overly ambitious program might seem good on paper to the novice lifter, but might prove too advanced and have adverse effects. On the flipside, a simplistic program may have utility for an experienced lifter, but chances are that finally hitting that 400-pound deadlift or squat might require some advanced lifting methods. Respecting the amount of time you’ve spent under the iron is the first step to knowing just what to implement to bring your gains to the next level. And be honest – it’s easy to say you’re advanced. Simply put, if you’re not sure if you are, you probably aren’t. 4 – How “Bad” Are Your Leverages? It’s unrealistic to think that reaching a double-bodyweight squat or deadlift is attainable as a 37 year old who’s 6’6″ and 275. Standards like that are geared toward young, healthy, and most importantly, usually light individuals where relative strength plays a bigger role than absolute strength. The size of the individual is rarely taken into consideration when creating rules for strength training, and many programs make a similar misstep in ignoring a lifter’s individual anthropometry. Having longer femurs and a shorter torso will make a conventional deadlift more of a hassle for a tall lifter than the other way around. By extension, adding mass as a taller lifter may require slightly different approaches because of a defining factor that differentiates a longer-limbed lifter from a shorter one: work. Of course a good lifter will “work hard.” That’s not what I’m talking about. It’s about the actual physics of lifting. Work is calculated as Force x Distance. As such, if a tall lifter and a short lifter are doing squats with the same load to full depth, the taller one will end up doing more work because of how much farther he has to go up and down. That should put into question whether or not chasing a prescribed percentage of max effort lifts with limited rest intervals and plenty of volume will serve a tall lifter the same way it does a shorter lifter. Most often, longer-limbed lifters need to bridge the gap by adding more volume to choice isolation movements that still deliver a lot of bang for their buck, and a bit less volume to big,
Origin: Tip: 4 Questions You Need to Ask Yourself
9 Underrated Exercises You Need
 You’re probably not taking advantage of these underappreciated exercises, but you should be. They’re surprisingly beneficial. Here’s what to do, why, and some set and rep recommendations for each. 1. Stability Ball Wall Squat By using only a ball, a wall, and a set of dumbbells, this move basically offers the same benefits as a Smith machine squat… but without the Smith machine. Oh wait, you still think the Smith sucks? It’s true, the fixed bar path of the Smith machine isn’t a great way to improve your free-weight squat performance since the two movements involve different mechanics, but not everyone wants to be a powerlifter. And not everyone judges every lower-body exercise by how it relates to their barbell squat. For the purpose of building and strengthening your quads, both the Smith machine squat and the wall squat are great options. Plus, who says you can’t do both? Liking one thing doesn’t mean canceling out the other. These make for a great burnout move towards the end of a workout. Set and Reps: 2-3 sets of 12-30 reps. 2. Chest Supported T-Bar Row Many lifters don’t appreciate the unique benefits this machine offers relative to most other horizontal rowing variations. T-bar rows fit your strength curve more closely than most other rowing exercises. When doing horizontal rowing exercises, the lever arm is at its longest when your humerus is perpendicular to the force vector. So if you’re doing barbell bent-over rows or one-arm rows with your torso roughly parallel to the floor, the lever-arm is at its longest when your humerus is parallel with the floor (in-line with your torso). This is at or very close to the end of concentric portion of the range of motion. But when doing the T-bar row, the weight is getting lighter as you pull it because the higher the angle of the bar (closer to being vertical), the more weight is going into its pivot point, so it offers a mechanical advantage over the load as you pull it in on every rep. Sure, you can do T-bar rows by simply anchoring a barbell in a corner. However, the machine version is far less awkward, and the chest pad support allows you to deal with heavier loads. It also makes it more difficult to cheat. Set and Reps: 3-5 sets of 6-20 reps 3. Angled-Barbell Leaning Press with Band Back in 2011, I coined the term “angled barbell training” to represent the wide variety of great exercise options offered when using the Landmine Device (or with a barbell in a corner). I also co-produced the first DVD on the subject with Bert Sorin, the original inventor of the Landmine. And today the standard angled-barbell (landmine) press is a pretty popular exercise. That said, an underrated version of it is to simply lean your torso forward to change it from a diagonal pressing action to a vertical (overhead) pressing action. This is much like how an incline barbell press creates a different training stimulus to an overhead barbell press. I failed to cover the leaning variation in The Ultimate Guide to Landmine Presses. However, I did discuss the benefit of adding band resistance to angled barbell presses: “As you press the barbell, the weight load actually gets lighter. Since you’re getting stronger as you extend your arm (due to creating a shorter lever arm), it makes sense to add a band for accommodating resistance: the band creates a continually greater resistance challenge as you continually gain a mechanical advantage.” Just like with the standard angled barbell press (where your torso’s more upright), if you’re in a split-stance, you anchor the band underneath your front leg. If you’re in a parallel stance, you anchor the band underneath the same-side foot as the arm you’re pressing with. Set and Reps: 3-4 sets of 6-20 reps each side 4. Cable Chops (Horizontal and Diagonal) Back when I was coming up as a trainer, cable or wood chops were all the rage. Now, you’re hard pressed to find folks doing dynamic rotational training exercises like this, and it’s far more common to see anti-rotation (Pallof) presses, which I believe are overrated. Look at athletes in action and it’s obvious: the torso has an active role in rotational strength and power production in actions like throwing, golfing, batting, punching, etc. And if you want to improve your rotational ability, the principle of specificity dictates that you need to practice dynamic rotational exercises like cable chops. They’re great for teaching your torso and hips to work together to produce rotation. Set and Reps: 2-3 sets of 8-15 reps each side 5. Side-Lying Rear-Delt Flye Exercises like face-pulls, rear-delt flyes, and wide-grip rows maximally load your arms when they’re out to the sides, which is when the posterior shoulder musculature is in a shortened range. However, they neglect to strengthen the aspect of horizontal shoulder abduction when your arm is in front of, or across, your torso – when the posterior shoulder musculature is in a mid to lengthened range.
Origin: 9 Underrated Exercises You Need
5 Foods Lifters Need to Buy From Costco
 Everyone’s done it. You go to Costco to pick up some boneless chicken breasts and some toilet paper and you leave with a 72-pound wheel of cheese, 12 boxes of Nutter Butter cookies, a palette of kitty litter, and a kayak. It’s easy to get swept up in all that raw capitalism, but if you can keep your cool and stay targeted, a lifter can pick up some great healthy or semi-healthy food items at Costco. Here are five of my favorite, off-the-beaten-Costco-path food items that I’ve grown to depend on: 1 – Kirkland Premium Chunk Chicken Breast I know what you’re thinking: It’s just some chicken in a can, fat head. But hear me out because this is a fantastic find. Each jumbo-sized can (12.5 ounces) not only tastes great (it’s seasoned with just a bit of chicken broth, which also makes it incredibly moist), but has nearly 46 grams of protein in it. These are great for when you want to give yourself a super-hefty dose of protein but don’t feel like making a shake or, for that matter, cooking up a dry chicken breast. I also use them whenever I want to drop a few pounds. I just open one up, drain it, dump it onto a paper plate, mix it with just a teaspoon of olive-oil based mayonnaise, and add a little salt. It makes a great, low-cal, zero-carb lunch that tastes surprisingly good. After doing this for about a week or so, I find I’ve dropped about 3-5 pounds with virtually no suffering. Then there’s the phenomenal cost. If you were to buy comparably sized cans at the grocery store, they’d cost you between 5 and 6 bucks each, but Costco sells a six-pack of these bad boys for the amazing price of about 12 dollars – that’s two bucks a can. 2 – Kirkland Brand Organic Olive Oil You might not have known this, but most olive oils you find at the grocery store are either counterfeit or woefully lacking in purity. There just aren’t enough olive orchards around the world to meet the demand, so various manufacturers and distributors doctor up their olive oil with some sort of seed oil and add chlorophyll and beta carotene for color and odor. The scoundrels figure that while some housewife in Idaho may be potato-savvy, she’s olive-oil stupid and won’t know the difference between high-grade olive oil and some stuff that was made with crankcase oil and Uncle Giuseppe’s moustache trimmings. A few years ago, the University of California Davis analyzed 186 extra-virgin olive oil samples taken randomly from shelves and found that 73% of them failed to meet the standards of purity established by the International Olive Council, and the extent by which they failed ranged from 56% to 94%. Enter Costco. To address the shortage of orchards, they bought their own and now produce a really terrific organic olive oil. It’s one of the few widely available brands in the US to actually meet the standards set by the Olive Council. While it might not have the real strong, grassy taste associated with some of the European varieties, it’s more-than-acceptable to most chefs. Samin Nosrat of Netflix’s “Salt Fat Acid Heat” even included it on his list of recommended olive oil brands. Best of all, the price is about 17 bucks for 2 liters, which is roughly 13% of the cost per ounce of one of Nosrat’s other recommendations. 3 – Townsend Farms Frozen Organic Triple Berry Blend If you were to go to the grocery store and buy 3 pounds of fresh blackberries, strawberries, and blueberries, the check-out girl’s gold digger instincts would kick in and she’d follow you home, thinking perhaps that your 2006 Toyota Corolla with the mismatched side panels was just a ploy to throw off fortune seekers. That’s how expensive fresh berries can be, but Costco sells this organic three-berry blend for about 11 bucks. But maybe you’re thinking that you prefer fresh anyhow, since it’s more nutritious than frozen. Not so. A study conducted by Bouzari in 2014 evaluated the amount of riboflavin, beta-carotene, vitamin C, and alpha-tocopherol (vitamin E) in frozen and non-frozen carrots, corn, spinach, broccoli, peas, green beans, strawberries, and blueberries. He and his colleagues found that frozen foods showed a minimal loss of vitamin C compared to big losses in non-frozen, “fresh” varieties. Likewise, frozen peas showed an increase in vitamin C and vitamin E over non-frozen, and the findings were true for fruits and vegetables even if they’d been frozen for 90 days. In other words, as long as the “chain of freezing” wasn’t broken – as long as the berries didn’t melt when the other berry pickers had to pack Reuben’s amputated finger with them en route to the hospital after it was cut off by the conveyor belt – they’re often as good or better than “fresh.” Lastly, you couldn’t pick a much better dietary and nutritional blend of fruits. All three are rich in anthocyanins and very low in total sugars. 4 – Wilcox Hard-Boiled Organic Eggs I can imagine the Wilcox Hard-Boiled Egg rep giving this pitch to Costco execs, only to be met with stony, perplexed,
Origin: 5 Foods Lifters Need to Buy From Costco
