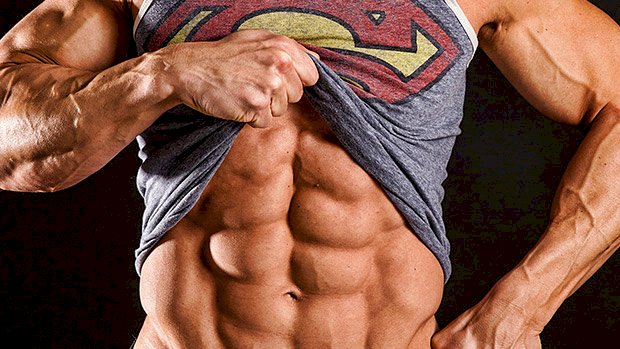
 At some point, you’ll need to add resistance to your ab training to build an actual six-pack. And if you’re like most (somewhat masochistic) lifters, you also probably like that burning feeling you get after a ton of reps. Ab exercises just aren’t satisfying without a strong mind-muscle connection. Drop sets for abs can help you achieve both. You’ll start with a heavier weight or percentage of your own bodyweight, then drop to something a little easier and continue until you reach near-technical failure. Here are five cruel ideas to get the juices flowing. 1 – “Lower” Ab Blast A1. Decline Bench Garhammer Crunch x 8-15 A2. Flat Garhammer Raise x AMGRAP Do three rounds of these. What does AMGRAP mean? As many GOOD reps as possible. Don’t keep cranking away with bad form. Garhammer raise variations are great for hitting the function of the lower portion of your rectus abdominis, working it hard in its active range (through posterior pelvic tilt). They were invented by sports scientist John Garhammer, PhD, and popularized by the late Charles Poliquin. Using them as a drop-set is a good way to combine a more challenging, higher load variation with an easier version. This means you’ll hit the golden rep range for building those abs, achieve a longer time under tension, and fatigue more motor units. If these are too easy, then straighten your knees more. You can also vary the incline of the bench (more incline = harder). Be sure to keep your toes pointed inwards and focus on working the active range at the top – think butt off floor. 2 – Athletic Obliques A1. Cable Chop (left): 8-12 A2. Cable Tight Chop (left): AMGRAP Rest 30 seconds A3. Cable Chop (right): 8-12 A4. Cable Tight Chop (right): AMGRAP Only rest between A2 and A3. Go straight from one set to the next. Then rest as needed before you start the whole thing all over again. Do three rounds. Cable chop variations are some of the most effective exercises for building an athletic midsection, making your abs as athletic and strong as they look. Chops help build an efficient power transfer between your lower and upper body, meaning they’re great for athletes. Adding rotation to your training is a must if you want a good set of obliques. Start with your standard cable chop setup. Keeping your elbows straight throughout, swipe the cable horizontally. Engage your core and hips in a powerful transfer of movement (think of the whip of a baseball swing). Once you’ve completed your set on one side, continue the set by “dropping” to a stronger chop position. A “tight” chop simply means your elbows are going to come in tight to your ribs. By bending your elbows and bringing the cable in you’ll be able to lift more weight, or in this case get in a few more reps. Complete a drop-set on one side before switching to the other. 3 – Leveled-Up Planks A1. Iso Row Plank (left): 10-30 seconds A2. 3-Point Plank (left): 10-30 seconds Rest 30 seconds A3. Iso Row Plank (right): 10-30 seconds A4. 3-Point Plank (right): 10-30 seconds Rest for just 30 seconds between A2 and A3, but for everything else go straight from one set to the next. Then after A4, rest as needed before you start the whole thing all over again. Do three rounds. Are you still busting out traditional planks like your life depends on it? Well, hovering a few inches off the floor on all four limbs probably isn’t going to get you where you want to be. Sure, the plank is one of the most basic of core exercises to develop muscular endurance. And while there’s a lot of evidence this can help you with low-back pain and posture, most of life doesn’t happen planted statically on your toes and elbows. Try increasing the intensity of your planks by adding load and throwing in an anti-rotation component. Resisting extension and rotation will carry over far better to just about everything, from walking to landing a right hook. It’ll also hit those obliques and QL’s (quadratus lumborum) harder too. With an iso plank row, using a wider stance will allow you to use more weight, but feel free to go narrower if you’re chasing more instability. Start with the weight, drop it, then keep holding. It’s that simple. 4 – Ab Rollouts… But Harder A1. Banded Ab Rollout: 6-10 A2. Ab Rollout: AMGRAP Do three rounds and use a band you trust! It’s hard to beat an ab wheel rollout. It’s crazy how something that looks like it belongs on a late-night shopping channel has now become a staple in many strength and conditioning programs. Rollouts require a strong eccentric “braking” action on the way down to eliminate a face plant. Then it requires a co-contraction of your abs, obliques, transverse abs and lats to execute in full. The only downside is the loss of tension and reduced difficulty at the top versus the bottom of a rollout. It’s much harder at the bottom. And while you could technically do a drop-set starting with a weighted vest, or even starting on your toes, using a resistance band helps accommodate
Origin: Nasty Ab Training
Tag: Nasty
Tip: 1 Dumbbell, 4 Nasty Finishers
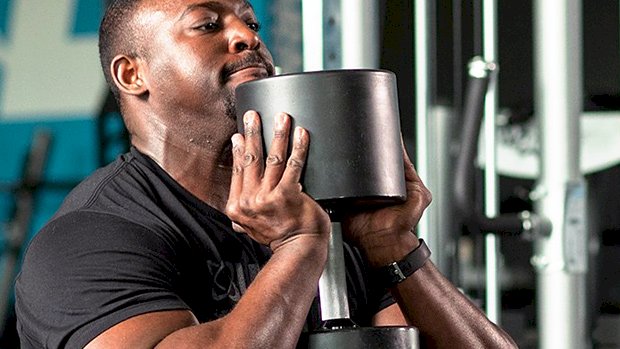 The term “finisher” might bring back memories of Mortal Kombat and Sub Zero freezing opponents solid before punching their heads into tiny ice cubes, but in reality it’s just a short, intense effort at the end of a training session. Finishers are often framed as a great way to build work capacity and torch fat. While that’s not untrue, one of the lesser known benefits of well-designed finishers are their ability to help build muscle. A strategically designed finisher will provide all three of the mechanisms for muscular hypertrophy: mechanical tension, metabolic stress, and muscular damage to particular muscle groups. People often make two big mistakes when doing finishers: They don’t use exercises with enough loading. This basically leads to a glorified step aerobics session. Or… The movements chosen are too complex or loaded too heavily. The quality goes out the window as the heart rate goes up. When too much fatigue sets in, reps get ugly, range of motion decreases, and things go south. You can avoid those drawbacks with these four finishers. They’re made up of movements that are low on the complexity side, but pack a big punch since you’ll likely be able to handle substantial weights for an extended duration. This systemic stress will challenge your lungs and give you the stimulus needed to build more muscle. 1. Goblet Squat + Goblet Carry + Goblet Squat Grab a heavy dumbbell or kettlebell and knock out 10 goblet squats. Without putting it down, walk with it in the goblet position for 40-60 yards, then finish with 10 more goblet squats. Let your heart stop beating out of your chest, rinse, and repeat 2-3 times. Not only does this punish the legs, but with each round taking 75-90 seconds, the upper back and abs get torched from the duration of the hold. Not a challenge? Increase the weight on the next round. 2. Dips + Goblet Squat Countdown Using a dumbbell that’s half your bodyweight, do 10 goblet squats, then 10 bodyweight dips. Then 9 of each, then 8, and continue down to 1. Rest when needed but keep it to a minimum. When you start a set, try to complete all of the required reps. Holding the dumbbell in the goblet position becomes increasingly challenging as the fatigue in the triceps accumulates from the dips. This adds up to a lot of work (55 reps each of dips and goblet squats) in a relatively short amount of time, with constant stress on the triceps throughout, making it a solid choice if getting bigger arms is on your to-do list. 3. Goblet Squat + Hammer Fist Battling Ropes Set a timer for 10 minutes. Grab a dumbbell or kettlebell that you can hit 12-15 goblet squats with. Do 10 goblet squats and 20 seconds of hard rope waves. Work to get as many rounds in as possible. Your biceps, legs, lungs, and forearms will all be equally smoked. Be sure to keep the speed on the ropes going on each round. As fatigue sets in, you’re going to want to slow it down and just keep it moving. Take rest as necessary so you can keep the output level cranked up. 4. Chin-Up + Goblet Squat Countdown Using a dumbbell that’s half your bodyweight, do 10 goblet squats, then 10 chin-ups. Then 9 of each, then 8, and continue down to 1. Again, rest when needed but keep it to a minimum. When you start a set, try to complete all of the required reps. Use Finishers Wisely While finishers are a great exclamation point at the end of a workout, be frugal in how often you use them. Remember, this is a finisher. It’s done after the meat and potatoes of your strength training, so don’t get carried away with the “more is better” approach. When you push the envelope, you need extra recovery or you’re likely to see your performance impacted negatively in subsequent workouts. Think about adding one of these finishers in your last workout before a few days off, at the end of a training block, or at the very least, put an extra emphasis on sleep and recovery after doing one of
Origin: Tip: 1 Dumbbell, 4 Nasty Finishers
