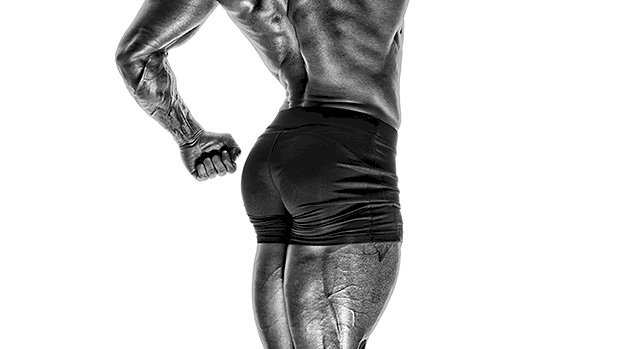
 Here’s a new way to perform back extensions for meatier hamstrings and glutes. Train at home? Train in a gym that doesn’t have a back extension or GHR bench? These exercises are great workarounds. 1. Bent-Knee Glute Extension Taking a few minutes to set this up is worth the glute gains. You can also use a Smith machine, which in a commercial gym setting might be more appropriate. Think of these as 45-degree back extensions. Set a bench to an incline (30-45 degrees works best) and throw a pad on the end for your hips. With this version though, you’ll lock yourself in position with your feet against an immovable bar. Everything about this position screams glutes. Your toes should be turned outwards and hips externally rotated. This frog-like position places a little more emphasis on the glutes as external rotators. (It’s not as ball-crushing as you might think.) Unlike a typical back extension with straighter knees, your knees stay bent to around a 90-degree angle. This slackens your hamstrings and forces your glutes to work harder as hip extensors. It’s one of the reasons why glute bridges and hip thrusts are so effective too. Lock yourself in with your hip crease on the edge of the bench, then execute by driving your hips into the pad. Keep a slight rounding through your thoracic spine and keep your chin tucked. Your arms can be crossed, or you can hold a plate or dumbbell to your chest to add load. A few sets of 15-25 reps will do the trick. 2. Hamstring Destroyer in Rack This exercise was popularized by Eugene Teo. Personally, I have no issues doing more than just squats in a power rack, but doing all your assistance work in there too might grind some gears, so I’d suggest using a Smith machine. Think of this as a horizontal back extension with slightly bent knees. Unlike the previous setup though, you’ll need to be further from the bar so there’s a greater angle at your knees. This will help get rid of the slack and place more tension through your hamstrings. With these you’re looking to maximally load your hamstrings in their mid to shortened position, which is made possible by the combined bent knee and extended hip (your hamstrings do both). These are also made more effective by your body alignment and foot placement. The devil is in the details with this one. Your feet should be parallel and the bar should be closer to your toes (versus mid-foot in the previous version). You need to feel secure, but placing the bar closer to your forefoot will increase recruitment of your gastrocnemius. This co-activation of your calf muscles will have an add-on effect, forcing your hamstrings to work harder. Lock yourself in with your forefoot to the bar and your hip crease on the edge of the bench. Keep a straight back position and initiate the pull with your hamstrings. Press your toes down throughout like you’re trying to calf-raise the bar up (you won’t). Then try not to squirm as your hamstrings and calves want to cramp. These are deceptively difficult. If performed correctly, they will rarely require more than your own bodyweight. Before you start adding load, try some isometric holds in the top position to really intensify things. 3. Glute Destroyer Take the hamstring destroyer, change a few body angles and the way you initiate the exercise, and now you’ve got an effective way to pump some blood into your glutes. Turn your toes outward, set your knee angle to 90 degrees (remember, this slackens your hamstrings), round a little through your thoracic spine, and tuck your chin. Initiate by clenching your butt cheeks and driving your hips into the bench. Imagine someone trying to steal your last dollar from between your butt cheeks in the top position. Your glutes will be active as both hip extensors and external rotators, working them hard in their shortened position. Pump out 2-3 sets of 15-25 reps, adding weight when
Origin: Tip: Monster Glutes, Meatier Hamstrings
Tag: Monster
Build a Monster Squat
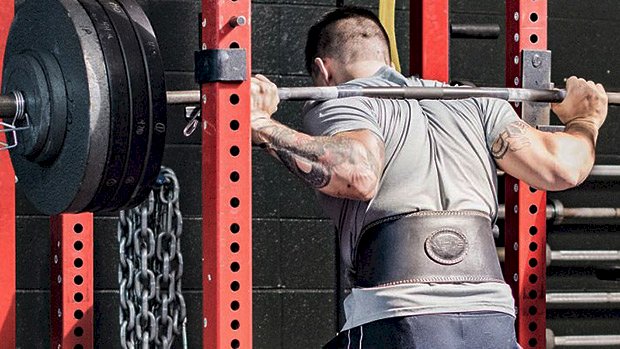 No movement on earth builds more muscle and improves athletic performance better than the squat. But there’s something else that makes the squat king. When you push the human limits of the squat, you enter a realm that only a select few will ever know. It’s a realm where the lift may actually kill you. I remember my first 900 pound single-ply equipped squat. It was the first lift where I thought I could possibly die. That moment was a turning point for me as an athlete. I could have racked the weight and not risked my life. However, I embraced that feeling of life and death and crushed the lift. I was never the same. What are the best ways to build a life-changing squat? Other than simply squatting more often, the best way to strengthen the squat is to pinpoint your weak links and attack them. Pinpointing Your Weak Links There are three major joints required for squatting: the intervertebral joints of the back (lumping all of these joints into one), hips, and knees. So think about the muscles surrounding these joints. Collectively, they’re the spinal extensors, knee extensors, and hip extensors. So the question becomes which group do you need to target and how? We’ll go over a few simple ways of determining the strengths and weaknesses of each, and I’ll give you a few exercises for strengthening them. Once you know your weak links, you can work on the movements that’ll improve them. How? With strategic hypertrophy. Gain muscle size in those areas. Yes, hypertrophy of your weak links can help you build your squat. You can increase the size of your muscles with solid programming and hard work, and you can get more efficient moving heavy weight while squatting. Back – How To Tell If It’s Your Weak Link You’ll never see a great squatter with a weak back. You can get away with weak thoracic spinal extensors in the deadlift, but that simply won’t work in the back squat. If the back flexes, the movement is dead. A bit of thoracic spine flexion has been shown to help the deadlift by lessening the demands on the back. So the easiest way to determine if your back is the weak link is by comparing your deadlift to your squat. If you can deadlift 10% more than your squat, your back probably limits your squat. In a perfect world, the two should be about the same, but I’ll give you 10% to account for leverage advantages that might give you a slight edge in the deadlift (like having long arms). Otherwise, when you look at the mechanical advantages and disadvantages of each movement, they’re pretty equal. For example, the deadlift is a shorter range of motion, and a deadlift can be locked out even after a great deal of spinal flexion (back rounding). But with the squat, an athlete has momentum to drive through the typical sticking point, which occurs a few inches above the typical starting position of a deadlift. Plus the knees are free to move in the squat, allowing the body to call on the knee extensors or hip extensors depending on which is stronger. The deadlift doesn’t have that luxury. Here’s what to do: Front Squat Because the bar is in front of your body, the demands on the spinal extensors are the highest for this squat variation than any other (high bar or low bar). Therefore, the front squat builds a massive back while strengthening the quads. Front Squat Carry With carries, you take the quads out of the equation and you focus on strengthening the back extensors. Good Morning When you incline the torso, you increase the horizontal distance (perpendicular to gravity) between the bar and any intervertebral joint in the spine. You put a lot of stress on the back extensors, causing them to get stronger and bigger. A lot of these movements will double to strengthen other joints. For example, good mornings are great for hip extension… especially as it relates to squatting. The quickest way to stabilize the torso is by learning to brace. You would be surprised at the number of lifters that don’t understand how to brace. Don’t be one of them. How to keep tightness around the spine: Use the Valsalva maneuver. You just breathe as much air as possible into the belly, pressing out against your belt in the front, sides, and even in the back while keeping the mouth shut and not letting any air escape. This technique causes massive amounts of tension around the lumbar spine. Any great strength athlete will tell you that a stable spine is a stronger spine. Get your hands as close as mobility will allow. This will create maximal stiffness in the upper back around the thoracic spine, which is where most of us fail during a squat. Tuck your elbows under the bar. Too many people let their elbows flare out, which also allows the scapula to flare out. When the scapula flares, the back – especially in the thoracic spine area – starts to flex or round. Quads – How To Tell If They’re Your Weak Link If you squat like a stripper (butt flying up out of the hole), there’s a good chance you have weak quads. The
Origin: Build a Monster Squat
