 After 40, Just Give Up After a man turns 40, his muscles atrophy, his strength wanes, and his belly grows. And women over 40? Well, they just wilt like old banana peels. They even have to start buying “mommy swimsuits” at JCPenny, complete with butt-hiding ruffles. At least that’s what a lot of people seem to think. As a T Nation fan, you already know those people are full of shit. Heck, with all we know now about training, nutrition, and supplementation, your 40s and 50s might just be your best years. But there is something that takes a Kamikaze dive in your middle years. After the age of 40 or so, even physically fit men and women start to lose their ability to produce power. And power, not strength, may be the key to longevity. What is Power Exactly? Power is your ability to produce force and velocity. Moving weight fast – be that a barbell or your own bodyweight – recruits a lot of motor units. While strength and power overlap in many ways, power is the rebar in the concrete foundation of athleticism. In the gym, you can get more powerful by doing Olympic-lifting variations, torpedo’ing medicine balls, performing jump squats, and swinging a kettlebell like you’re mad at it. Generally, you use lower loads, but try to move those loads with speed and ferocity. Acceleration is key. Outside the gym, sprinting up a set of stairs relies more on power than strength. “Functional strength” is all the rage, but functional power may be even more important. So what does power have to do with living longer? Let’s ask Mr. Science. The Study Researchers gathered up 3,878 men and women between 41 and 85. This age range was chosen because power starts to diminish after 40. All the participants took a power test, this one involving the upright row. (Maybe not the best exercise choice, but easy enough for non-meatheads to learn.) Then the scientists just sat around for several years. They caught up on Grey’s Anatomy and did some fly fishing. After seven years, they tracked down the study participants to see who died, which must’ve been awkward. The Results In a nutshell, those folks who displayed above-average muscle power in the original test outlived those with below-average muscle power. But those study participants who scored a little below average on the power test were up to five times more likely to suffer an early death. Those who scored WAY BELOW average on the power test were 10-13 times more likely to be chilling out in a coffin or a lovely urn. Researchers concluded that power is strongly related to all-cause mortality. How to Use This Info No, you don’t have to give up your strength or hypertrophy training and become an Olympic weightlifter, a full-time CrossFitter, or a plyo-obsessed skinny guy. The researchers noted that becoming super-duper powerful doesn’t seem to extend your life any further than simply becoming more powerful than the average Joe or Jane. Just be above-average powerful. In the gym, add some power training to what you’re already doing. Try power cleans or some O-lift variations. (I like the easy-to-learn muscle snatch.) Throw some medballs, try to accelerate a lighter bar quickly using the core lifts, and toss in some plyo push-ups, sprints, and jumps. Then tell those people that think life is over after 40 to suck
Origin: Tip: Train Like This or Die Sooner
Tag: Like
Tip: Tall? Squat Like This
 For building mass, squats are king. However, when long-limbed hardgainers try to back squat, it often looks like an ugly good morning. Switching to a safety squat bar (holding the squat rack) is a game changer. The Benefits The padded yoke takes stress off your shoulders. The bar design moves the weight forward like a front squat. This means less stress on your spine and more on your quads. Holding the rack helps you keep a more upright torso. This makes your squat look more like the pretty squats of someone with a good squat structure. It also adds some extra stability to the lift, which lets you lift more weight for more reps. Performance Tips For big legs, don’t sit back like a powerlifter. Instead, spread your knees and sit down. Drive your traps into the bar pad as you come out of the hole. If you start leaning forward to recruit more low back and hips, use your hands to push the weight back over your feet and make your quads do the work. Don’t cheat with your arms. You’re trying to build your legs, not your ego. Good alternatives: Machine squat, leg press, Zercher squat, hip belt
Origin: Tip: Tall? Squat Like This
Tip: Bench Like a Beast Without Shoulder Pain
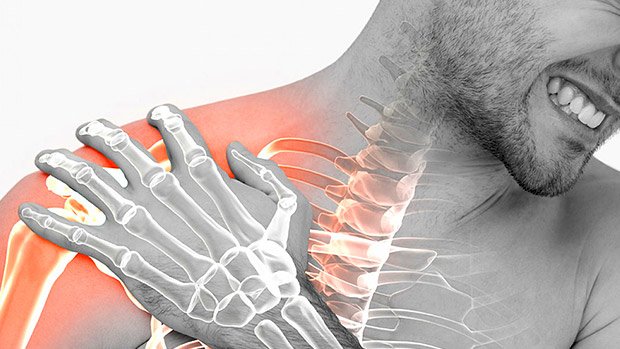 Shoulder discomfort when bench pressing is common among experienced bodybuilders and strength athletes. Most just fight through the pain because they’re afraid they’ll lose size and strength if they give it up. While benching isn’t the only way to grow your chest and triceps, it’s certainly a core upper-body exercise. Fortunately, there are ways you can bench press that help alleviate stress from the shoulder joint. Before we get into those, let’s quickly review why your shoulders might be aching: Benching is an internal rotator-dominant exercise. Many lifters are already very internally rotated since they sit for work at a computer and have weak upper-back muscles. Coupling those issues with the bench press further adds to the shoulder stress. Inefficient warm-up and poor mobility. You have to warm up if you’re going to bench, especially if you don’t want your shoulders to suffer from it. Before you even touch the bar, do some mobility drills to help open up your range of motion, and maybe perform some activation exercises with light bands for the shoulders, triceps, and upper back. 3 Shoulder-Friendly Bench Exercises You can tweak the bench press to greatly reduce the stress on the shoulders and keep the tension on the muscles you’re trying to train the first place. If you’re consistent with your warm-up and mobility drills, but still feel some unwanted tension in the shoulders when you bench, try these variations: 1 – Dumbbell Press with External Rotation This puts less stress on the shoulders as opposed to excessive internal rotation. At the top of the motion, your hands will be facing in toward each other with your shoulders externally rotated. You can turn the palms forward at the bottom or keep them neutral during the entire range of motion. 2 – Slight Decline Bench Slap a plate or two under one end of the bench. This will put you on a slight decline angle, allowing you to use the pecs more effectively while taking any unwanted stress off the shoulders. 3 – Floor Press When people are experiencing shoulder pain during the bench press, it’s usually because their mobility is limited and they’re trying to perform the press through a greater range of motion than their shoulders are ready for by bringing the dumbbells down too far. You can eliminate this completely by doing floor presses either with dumbbells or a bar. Pressing from the floor reduces the range of motion your shoulders have to go through and maintains tension on the
Origin: Tip: Bench Like a Beast Without Shoulder Pain
Tip: Got Angry Knees? Squat Like This
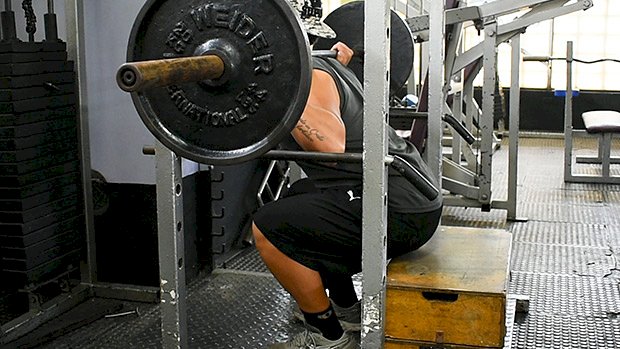 Got achy knees? Give the box squat a try: Set up a box or bench allowing parallel squat depth. Go a little higher if you’re still feeling knee pain, but don’t let it become a way to use too much load through a miniscule, restricted range of motion. If you’re able to use a greater ROM pain-free, go for it. Parallel tends to be a safe starting point for most people. “Grip” the floor firmly with your feet. Torque and rotate your hips externally to pull the knees into alignment with your hips and toes, creating a strong arch. Foot stance varies by individual, so find one that allows comfortable movement and the best range of motion. Keep in mind that the feet don’t need to be placed symmetrically – not everyone has symmetrical hip joints. Aim for a placement that allows you to feel the leg muscles evenly. Maintain external rotation of your hips through the entire rep. This should prevent your knees and ankles from collapsing inward, which would place greater stress on the knee joint and ACL. Maintain vertical shins by sitting back into your hips onto the box. A common issue here is poor ankle dorsiflexion. This can be immediately addressed by elevating your heels with squat shoes or a wedge, but is better managed with ankle mobility work for long-term resolution. By sitting back farther than a regular squat, we reduce the shear force, potentially alleviating the pain. Take a big breath and flex your abs hard to lock in that air and maintain a neutral spine. Brace your core all the way around your spine. Sit in a controlled manner onto the box without disengaging your core or legs and avoid rocking backwards to create momentum for the positive, or lifting, part of the rep. Use a controlled touch or brief pause. For added challenge, sustain a longer pause before the positive rep. Keep the movement strict and avoid failure, which would increase the likelihood of further aggravating your angry
Origin: Tip: Got Angry Knees? Squat Like This
Tip: Spot the Squat Like a Pro
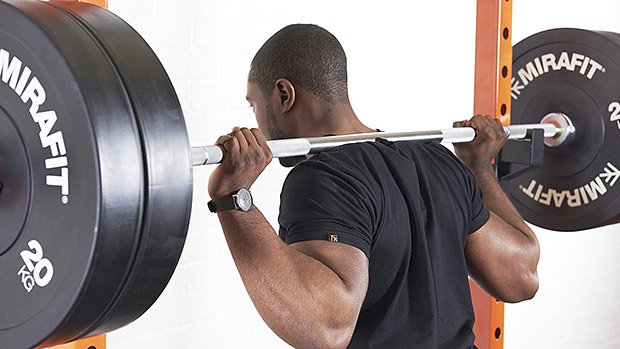 Spotters are often needed during the back squat because many lifters just don’t have experience dumping the bar. Squatting down with a heavy weight and realizing you don’t have the strength to stand back up can be a frightening and potentially dangerous situation, especially if you don’t have safety racks ready. Good Communication First Make sure you ask how many reps the lifter is going for so you’re ready to assist when needed. Make sure you communicate that you’ll be standing close and will under-hook their arms and help them stand back up if needed. This is especially important to mention if you’re a male spotting a female. The Do’s of Spotting the Squat Do make sure you’re standing very close to the person you’re spotting. Although this looks awkward, you need to be there should you see the person start to fail. Do use a double-under hook under the arms to keep the lifter’s chest upright should he start to fail. Do maintain a strong flat back and use your hips to help the lifter back to a standing position. There’s no way you’re going to pull the lifter back up with your biceps alone. Do offer assistance when the bar comes to a complete stop and the lifter starts to drop back down. Make sure you’re using just enough assistance to get them past the sticking point. The Don’ts of Spotting the Squat Don’t have your junk against the lifters butt for the entire duration of the set. You should be close, but this shouldn’t look like you’re grinding at the club. Don’t try to grab the bar when offering assistance. If the person you’re spotting is lifting an appreciable amount of weight this isn’t a good way to help him if he begins to struggle. Don’t assist before you’re needed. That’s annoying and ruins the set. Don’t stand so far back that you won’t be able to offer
Origin: Tip: Spot the Squat Like a Pro
Tip: Do Pull-Ups Anywhere Like This
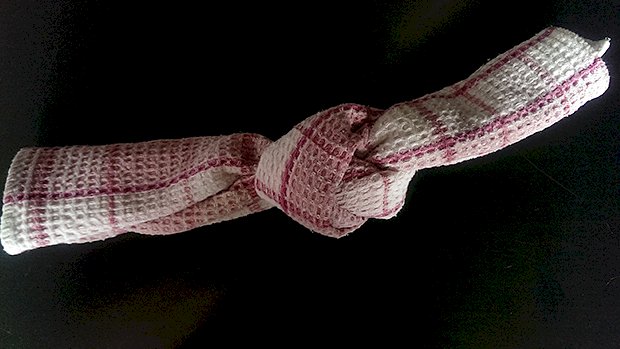 Push-ups, planks, bodyweight squats, and lunges can be done literally anywhere. But pull-ups require something to hang from, and that won’t always be available. If you travel a lot, you know that it isn’t easy to find a gym. If you’re lucky, the hotel you’re staying at has a gym, but you’ll have to be real lucky for that gym to be equipped with a pull-up bar. But there’s still a way you can do pull ups. All you need is a door and a couple of towels. Just follow these steps. Step 1: Tie a knot on one end of each towel. Make sure it’s tight. Step 2: Hang both towels over the door. The knot should be on the inside of the door when closed. Step 3: Close the door so it latches. Make sure the towels are laying flat enough on top of the door to get it to close. Step 4: Use the towels to do pull-ups. Your body will slide up and down the closed door. As a bonus, towel pull-ups really hit your grip and forearms hard. Find yourself a set of towels or rags made from a thin material and keep them in your suitcase. And never skip your
Origin: Tip: Do Pull-Ups Anywhere Like This
