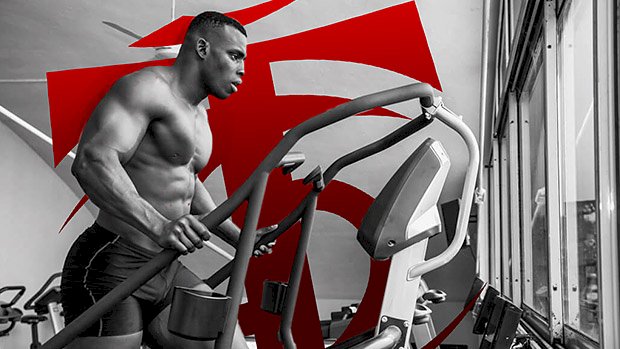
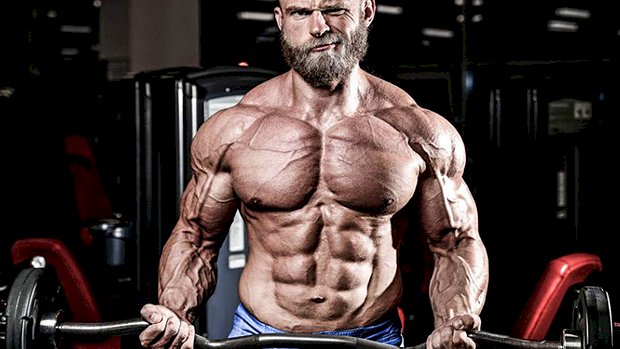
 Figuring out the best way to train for muscle growth and strength is already complex. And it gets even more complicated when you add cardio to the mix. You’ve probably heard or read statements like these before: “Fasted cardio will eat into muscles!” “Low intensity cardio will make you look like a marathon runner!” “Cardio after lifting will negate your gains!” We’ve reached a point where we’re almost scared of doing cardio. We’re afraid of losing our hard-earned muscle. Well, don’t look to “enhanced” bodybuilders for applicable advice. Their use of anabolic drugs counteracts any drawbacks that cardio could have on muscle mass. But don’t throw the baby out with the bath water either. Cardio remains a tool that can help us get leaner and healthier. Let’s look at the best and worst forms of cardio for the natural lifter. Cortisol is Key Cortisol has a significant correlation with muscle mass, albeit an inverse one: the higher someone’s cortisol production is, the harder time he’ll have building muscle and gaining strength. In fact, a higher cortisol level has been correlated with a drop in strength in older individuals (1). And while producing it is necessary for proper human function, too much can kill your gains. It may do so in a few different ways… It can increase muscle catabolism. Cortisol will lead to a breakdown of the tissue to make amino acids that can then be transformed into glucose to be used for energy (gluconeogenesis). That’s one of the main functions of cortisol. It’s not a self-destruct function, but rather, a function designed so that you’ll have fuel when you need it. It may inhibit the immune system. This is important because muscle damage repair (important for growth) is driven by the immune system. By inhibiting the immune system, cortisol can slow down muscle repair and impair growth. It can increase levels of myostatin. Myostatin plays a big role in how much muscle your body will allow you to build. The more myostatin you have, the harder it is to build new muscle. So that means, by increasing myostatin, cortisol can once again diminish muscle growth. An enhanced lifter can handle a lot more cortisol with less negative impact on muscle growth because of the exceedingly high levels of anabolic hormones in his body that can counteract (to an extent) excess cortisol production, at least when it comes to muscle growth. But a natural lifter wants to avoid producing too much cortisol from his cardio work. As such, the best damn cardio for the natural lifter is the one that can deliver results with the least amount of cortisol being released. Two Things Cortisol Does During Training Cortisol has many purposes during a workout. The most important are: It mobilizes energy. It will free up stored glycogen, fatty acids, and even break down muscle tissue to have energy available to fuel muscle contractions. The more energy you need to mobilize, the more cortisol you’ll release. Of course, since the goal of cardio is often to lose fat, you do need to force the body to mobilize some fuel. But too much might offset the fat-loss benefits. It gets us amped up. It increases adrenaline levels by increasing the conversion of noradrenaline into adrenaline. If you need to get amped up, motivated, or are facing something that’s perceived as stressful, you’ll produce cortisol. Doing a high volume of cardio will lead to high cortisol levels and so will pushing to an extremely high intensity level. It helps us maintain blood sugar levels. If blood sugar levels are too low, cortisol and glucagon are released to bring it back up. Why is that important? Because if you exercise in a fasted state, you’ll increase cortisol to a greater extent, especially if you need to mobilize a lot of fuel. “Yeah, but I train fasted and it energizes me!” Of course it does. Go back to what I just wrote – cortisol increases adrenaline levels. Feeling energized is the byproduct of jacking up adrenaline. And while it might make you feel good in the short term, it can do more harm than good if you stay like that for too long or produce it too often. So we have three elements that raise cortisol: Volume or burning a boatload of energy Pushing yourself to the limit Training fasted The Worst Types of Cardio for Natural Lifters The worst types are those that combine a high level of one element or a combination of elements, increasing cortisol above what’s necessary for fat mobilization. 1. Fasted Interval Training Why pick on fasting? Well, I’m not. Taking a 45-minute walk on an empty stomach in the morning is fine, but doing intense intervals fasted in the morning is not. In the first case, sure, you’re fasted (which is one factor to release cortisol) but the intensity is very low (taking a walk can even be calming) and the energy expenditure is low too. A 45-minute walk doesn’t require much glycogen mobilization and doesn’t have a big caloric expenditure. While it’s fasted, the total cortisol output will not be
Origin: The Best Damn Cardio for Natural Lifters
Tag: Lifters
Tip: The 10-Minute Mobility Sequence for Lifters
 You’re probably sedentary. Yes, you. Sure, you hit the gym often, but your joints remain relatively idle as you sit at work, sit in your car, and sit in front of the TV. Swinging your arms between bench press sets isn’t enough to keep your joints healthy and mobile for a lifetime. Can’t scratch your mid-back anymore? Your mobility has slipped. Here’s why mobility matters: Poor neck and thoracic mobility is a strong predictor of neck and shoulder pain (1). Increasing thoracic spine mobility improves forward head posture even when compared to direct neck exercises (2). Improving ankle mobility reduces knee and hip pain, enhances squat depth, improves squat mechanics, and prevents injuries (3). Improving hip mobility increases muscle strength because your nervous system inhibits force when it senses a lack of mobility (4). Improving mobility doesn’t have to be inconvenient. No need to spend an hour aligning your fairytale chakras in some yoga class taught by a hippie. Here are a few exercises you can do quickly to target the most important areas for lifters: 1. T-Spine Mobility You can do these drills literally anywhere: Kneeling T-Spine Rotation and Lateral Flexion Kneel down and place your fingers around your ears. Focus on keeping your hips facing forward. Rotate your chest/thoracic spine one direction. Slowly flex your spine laterally. Once no more range of motion can be achieved, come back to the starting position. Repeat on the other side. Dynamic Wall T-Spine Extension Place your hands fairly high and wide against a wall, window ledge, or Smith machine. Push your hips back as you lower your chest. Take a deep breath at the bottom as you feel the different segments of your spine arch. Flex your spine as you round your back. 2. Shoulder Mobility This is my favorite shoulder mobility drill. It also stretches the pecs while not allowing the spine to compensate. Dowel Dislocate on Incline Bench Lean against an incline bench while standing while holding a dowel or broomstick across your hips. Slowly move the dowel overhead, going as far back as possible while keeping your elbows relatively straight. Hold wider on the dowel if it’s too difficult and adjust narrower if it’s too easy. 3. Hip Mobility These hip mobility drills won’t leave any stones unturned. Hip Mobility Complex Take a seated position. Start with a hamstring stretch with one leg on your thigh, then transition to a “hugging pigeon.” Bring your hands back and go into both internal and external hip rotation. I also like to rotate my spine before coming back to the starting position. Repeat on the other side. Tactical Frog Get your legs into a frog position and your arms into a plank position. Thrust back and forth as you feel your adductors stretch. Drown out any thoughts of bystanders potentially judging you for humping the floor. 4. Ankle Mobility Both of these are wildly effective: Tripod Ankle/Calf Mobility Get into a tripod position with one foot stacked on the other foot’s heel. Drive your heel back as you stretch your calf, then bend your knee and maintain a dorsiflexed position. Repeat for reps before repeating on the other side. Stepback Weighted Ankle Mobility This exercise is harder than it looks, but it’s the best ankle mobility drill I’ve found. Grab some weights. Take one step back and keep both feet flat. Bend the knee of the back foot while hip hinging the weights down. You should feel your back ankle mobilizing. Repeat for reps on both sides. Programming These exercises can be done in a sequence for 3-10 minutes a day depending on your current mobility. The sequence can be sprinkled in during your warm-up, cooldown, or even between
Origin: Tip: The 10-Minute Mobility Sequence for Lifters
10 Rules for Steroid-Free Lifters
 Following the advice of genetically elite lifters is misleading. Many top competitors have excellent physiques in spite of what they do, not because of what they do. There are other types of genetic freaks as well – those who respond extremely well to PEDs. Their receptors have a great affinity for steroids and they seemingly grow non-stop. Does that translate into the kind of expertise that can help the natural lifter? I’ve been on both sides. For years I coached top-level competitors who wanted to become national champions, but I walked away from that world. In the years that have passed, I realized what it’s like to be on the other side of the fence. I’m now a natural, aging bodybuilder with battle scars and training limitations from those hardcore days. This relatively new-found wisdom has allowed me to compile ten principles for the natural lifter who finds it hard to build muscle. If you apply these principles consistently, you’ll absolutely benefit. 1 – Under-training is more effective than overtraining As cool as some hardcore training tactics look, they can quickly take the natural lifter into the overtraining zone. There’s a difference between optimum work capacity and maximum work capacity. There’s often an overemphasis on methods to stimulate growth, but an under-emphasis on rest and recovery. If you leave the gym and have to sit in your car for 5-10 minutes to gather yourself before you even leave the parking lot, you’ve tapped too deeply into stimulus and you haven’t paid relative attention to recovery. It isn’t very sexy to be talking about rest and recovery, but most of the time the non-sexy details are the most relevant for producing results. Under-training allows you to keep showing up. Consistency is more important than intensity. Furthermore, consistency is the building block of intensity – not the other way around. Does this mean it’s okay to never sweat and to sit on the end of a bench scrolling through your phone between sets? Of course not. But real success is less about “giving it all you got” and more about being able to show up every training day in a performance-readiness state. 2 – Do NOT train to failure After I left the hardcore competition world, I had to revisit dozens of my training programs and write them to include fewer sets, along with removing training tactics that took muscles beyond relative failure – which no natural lifter could realistically recover from. I took out heavy negatives, forced reps, strip sets, drop sets, and extended sets. Not only did I remove these tactics, I instructed all clients to avoid training to failure on any working set. You have to pump iron, but you should always leave a good two reps in the tank on every set. This means picking a weight that challenges your target muscles for the reps indicated, but avoids taking you to failure. 3 – Emphasize both intra-workout and inter-workout recovery You have to balance adequate training stimulus with adequate recovery, both within workouts and between workouts: Not enough workouts per week = not enough stimulus. Not enough recovery within and between workouts = overtraining and not enough time to complete an adaptive response. Intra-workout recovery and inter-workout recovery need to reflect one another. “Inter” workout recovery has a lot to do with proper program design. “Intra” workout recovery has more to do with training within optimal work capacity zones and seldom pushing muscles into maximum work capacity zones. For the natural trainee, establishing a consistent training pace and natural workout flow are important. And this has as much to do with intra-workout recovery as it does with the specified training stimulus of exercise selection, sets, and reps. However, the workout pace should never be forced into specific windows of by-the-clock rest intervals. Obviously, it takes a lot more time to recover from a set of high-rep squats or lunges than it does to recover from a set of concentration curls, but using the clock to gauge intra-workout recovery just makes no sense. And neither does following some written-down instruction to rest for a specified time between sets. No coach can know how close you are in the training zone between optimum and maximum work capacity in a given workout, and neither can a coach assume your current conditioning level. Assigning rest times between sets according to the clock or timer is like throwing darts at a dartboard while blindfolded. That’s not exactly a reliable construct. So how then do you know how long to rest between sets? That’s where the next principle comes in. 4 – Determine how long to rest between sets subjectively Your rest between sets should be self-monitored according to the concept of “subjective determination of performance readiness.” After you’ve completed a working set, ask yourself this question: “Can I do my next set with equal or greater intensity than the previous set?” The answer has very little to do with timers or
Origin: 10 Rules for Steroid-Free Lifters
Tip: The Coffee for Lifters Only
 Lifter’s Coffee Experienced lifters need three things in the morning: quality protein to support muscle growth, collagen to soothe and heal those abused tendons/joints/ligaments, and coffee… because coffee is delicious. Protein:You already know why you need protein, and you probably know that a blend of whey isolate and micellar casein is the best all-around choice when it comes to muscle-building protein powders. Collagen:Often made from cow hides, collagen is protein too, but it’s an incomplete protein. However, it’s been shown in studies to beat the pants off glucosamine and chondritin when it comes improving joint health. (See: Fix Tendons and Joints with This Protein.) So while collagen isn’t a muscle-building protein source, it’s still great for people who lift heavy things for fun. Coffee:Besides that whole delicious thing, multiple studies on coffee consumption show that java actually increases the lifespan via several mechanisms, including having protective effects on DNA and reducing inflammation. While all types of coffee can help extend your lifespan, even soulless decaf, light roast coffee may be better than medium and dark roasts. The roasting process reduces the amount of the antioxidant, chlorogenic acid. The lighter the roast, the shorter the roasting time, the less exposure to air, and the more of that good-for-ya chlorogenic acid survives. So let’s put all those things together – muscle-building protein, joint-healing protein, and light roast coffee – to make what I call “lifter’s coffee.” Ingredients 16 ounces of coffee, preferably light roast 1 Scoop (30g) Metabolic Drive® Protein, vanilla 1 Scoop (10g) Vital Proteins collagen peptides, unflavored Instructions Make 16 ounces of coffee as you normally do. Add coffee to blender or a big mug. Add protein powder and collagen powder. Stir with a spoon for 30 seconds or blend until smooth and creamy. You may need to tilt the lid of the blender’s pitcher up a little (or leave the little cap off the lid) to allow steam to escape. Feel free to play around with the amount of coffee you use to get the flavor and texture you prefer. Option:Use chocolate Metabolic Drive® Protein for a mocha drink. Bonus:Depending on the type of coffee you buy, this drink should run you around $2.35, about the same price as a plain coffee at Starbucks. Calories and Macros Calories:147 Protein:30 grams (21 grams from whey isolate and micellar casein) Carbs:4 grams Fat:Less than 1
Origin: Tip: The Coffee for Lifters Only
Top 10 Mass Makers for Lanky Lifters
 You know the typical mass building advice: emphasize big compound lifts and progressive overload. However, using exercises you’re not structurally suited for can quickly turn you into a non-gainer. This is especially true for lanky, long-limbed lifters. If you want build muscle, you need to make every exercise count. Use these effective and structurally-friendly variations of the classic exercises. 1. Safety Bar Squat, Holding Rack For building mass, squats are king. However, when long-limbed hardgainers try to back squat, if often looks like an ugly good morning. Switching to a safety squat bar (holding the squat rack) is a game changer. Benefits The padded yoke takes stress off your shoulders. The bar design moves the weight forward like a front squat. This means less stress on your spine and more on your quads. Holding the rack helps you keep a more upright torso. This makes your squat look more like the pretty squats of someone with a good squat structure. It also adds some extra stability to the lift, which lets you lift more weight for more reps. Tips For big legs, don’t sit back like a powerlifter. Instead spread your knees and sit down. Drive your traps into the bar pad as you come out of the hole. If you start leaning forward to recruit more low back and hips, use your hands to push the weight back over your feet and make your quads do the work. Don’t cheat with your arms. You’re trying to build your legs, not your ego. Good alternatives: Machine squat, leg press, Zercher squat, hip belt squat. 2. Romanian Deadlift with Hook Grip While regular deadlifts are fantastic for building overall strength, Romanian deadlifts rule for packing mass onto your posterior chain. Use a hook grip or straps for this. Benefits EMG research shows it’s one of the best hamstring exercises (1). It’s hard to do, but easy to add 5 pounds a week on for a long time! Great for building your upper back and traps. Keeps continuous tension on the muscles. It’s easier on your lower back than the traditional stiff-legged or straight-leg deadlift because you maintain a neutral low-back position. By starting from a rack at the top, your body structure doesn’t matter. Tips Use straps or a hook grip so you can focus on your hamstrings, use more weight, and get more reps. Take the weight from a rack (or deadlift the first rep if no rack). Unlock your knees, then push your hips back until you get a good hamstrings stretch. Stop the downward movement just before you have to bend at your spine. Resist the urge to let your knees go forward at the bottom. This takes tension off your hamstrings and turns the lift into a quarter-squat holding a barbell. Don’t overdo the hip lockout at the top unless you’re trying to make this a glute exercise. Good alternatives: Trap bar deadlift (touch and go), back extension (45 degree), glute-ham raise. Notes: Using a trap bar for deadlifts will hit your hamstrings less, but they’re still a great total-body mass builder. Back extensions and glute ham raises are also excellent hamstring builders, but they won’t have a huge impact on total-body muscle growth. 3. Chest Dip On Rings With long arms, most hardgainers find that bench presses beat up their shoulders long before they build up their pecs. Chest dips are an amazing mass builder and they can be even better when you do them on rings. Benefits The rings allow you to have the perfect hand position for your individual structure, which reduces shoulder stress. Your chest has to work even harder to keep the rings from moving out. It’s not as unstable as you might think. Because your arms are on the straps, they’ll provide some stability. Tips Wear a long sleeve shirt so the ring straps don’t shred the skin on your upper arms. Test your natural range of motion by standing sideways to a mirror. Lean forward like you’re doing a chest dip. Now bring your elbows back as if doing a dip. Stop when you run out of range. That’s your natural range. Keep the ring height lower so you can bail yourself out with your feet if something goes wrong. At first you’ll be really shaky with these. Don’t worry, your body will quickly figure it out. Just go extra slow while you’re learning the movement. Lean forward as you come down to emphasize your pecs. Squeeze your pecs as you press down on the rings to raise your body. Dips aren’t for everyone. If they bother your shoulders, explore other alternatives. Good alternatives: Chest dip on V-bar setup, dumbbell bench press (flat, low incline or slight decline), weighted push-up. 4. Trap Bar Bent Over Row Bent over rows are a classic upper-back mass builder and they work even better with a trap bar. Benefits The trap bar moves the weight from in front of you back to your midline, which takes stress off your lower back. Because your knees don’t get in the way of the bar, you can use more legs and less low back to support the weight. The neutral hand grip of the trap bar brings the elbows closer
Origin: Top 10 Mass Makers for Lanky Lifters
Tip: The Strength Test Real Lifters Can Pass
 Lead Photo Credit: Daniel Bernhardt The 1RM Trap-Bar Deadlift Test As a serious lifter, you should be able to pass this test: Set up a trap bar with 2.5 times your bodyweight. Now, get one good rep. That’s it. So, a 200 pound man should try to hit a 500 pound trap-bar deadlift. Trap-bar deadlifts aren’t inherently “better” for testing strength than traditional squats or deadlifts, but they have a number of unique benefits. Squats are mostly knee-dominant, with some help from the posterior chain. Deadlifts are mostly hip-dominant, with some help from the anterior chain. There’s definitely overlap between the two, but it’s hard to determine who’s stronger: a guy with a 500 pound squat and a 400 pound deadlift, or a guy with a 400 pound squat and a 500 pound deadlift. A trap-bar deadlift can settle the debate. It’s a hybrid movement that combines the best of the squat pattern with the best of the hinge pattern. Rather than focusing on one side of the body, it requires a great deal of strength from both the posterior and anterior chain. On top of recruiting the entire musculature of the lower half, trap-bar deadlifts require significant upper back and grip strength. Plus, no lift translates more directly to overall athleticism and performance like the trap-bar deadlift. For example, a vertical jump requires exerting maximum force into the ground, which is exactly what it takes to lift a maximally loaded trap bar off the floor. Can’t Do It? Make trap-bar deadlifts your primary strength focus on lower-body days. Squats and conventional deadlifts obviously help, but nothing boosts your trap-bar deadlift more than the lift itself. Heavy singles, sets of 3-5 reps, and dynamic effort sets with bands or chains will go a long
Origin: Tip: The Strength Test Real Lifters Can Pass
5 Foods Lifters Need to Buy From Costco
 Everyone’s done it. You go to Costco to pick up some boneless chicken breasts and some toilet paper and you leave with a 72-pound wheel of cheese, 12 boxes of Nutter Butter cookies, a palette of kitty litter, and a kayak. It’s easy to get swept up in all that raw capitalism, but if you can keep your cool and stay targeted, a lifter can pick up some great healthy or semi-healthy food items at Costco. Here are five of my favorite, off-the-beaten-Costco-path food items that I’ve grown to depend on: 1 – Kirkland Premium Chunk Chicken Breast I know what you’re thinking: It’s just some chicken in a can, fat head. But hear me out because this is a fantastic find. Each jumbo-sized can (12.5 ounces) not only tastes great (it’s seasoned with just a bit of chicken broth, which also makes it incredibly moist), but has nearly 46 grams of protein in it. These are great for when you want to give yourself a super-hefty dose of protein but don’t feel like making a shake or, for that matter, cooking up a dry chicken breast. I also use them whenever I want to drop a few pounds. I just open one up, drain it, dump it onto a paper plate, mix it with just a teaspoon of olive-oil based mayonnaise, and add a little salt. It makes a great, low-cal, zero-carb lunch that tastes surprisingly good. After doing this for about a week or so, I find I’ve dropped about 3-5 pounds with virtually no suffering. Then there’s the phenomenal cost. If you were to buy comparably sized cans at the grocery store, they’d cost you between 5 and 6 bucks each, but Costco sells a six-pack of these bad boys for the amazing price of about 12 dollars – that’s two bucks a can. 2 – Kirkland Brand Organic Olive Oil You might not have known this, but most olive oils you find at the grocery store are either counterfeit or woefully lacking in purity. There just aren’t enough olive orchards around the world to meet the demand, so various manufacturers and distributors doctor up their olive oil with some sort of seed oil and add chlorophyll and beta carotene for color and odor. The scoundrels figure that while some housewife in Idaho may be potato-savvy, she’s olive-oil stupid and won’t know the difference between high-grade olive oil and some stuff that was made with crankcase oil and Uncle Giuseppe’s moustache trimmings. A few years ago, the University of California Davis analyzed 186 extra-virgin olive oil samples taken randomly from shelves and found that 73% of them failed to meet the standards of purity established by the International Olive Council, and the extent by which they failed ranged from 56% to 94%. Enter Costco. To address the shortage of orchards, they bought their own and now produce a really terrific organic olive oil. It’s one of the few widely available brands in the US to actually meet the standards set by the Olive Council. While it might not have the real strong, grassy taste associated with some of the European varieties, it’s more-than-acceptable to most chefs. Samin Nosrat of Netflix’s “Salt Fat Acid Heat” even included it on his list of recommended olive oil brands. Best of all, the price is about 17 bucks for 2 liters, which is roughly 13% of the cost per ounce of one of Nosrat’s other recommendations. 3 – Townsend Farms Frozen Organic Triple Berry Blend If you were to go to the grocery store and buy 3 pounds of fresh blackberries, strawberries, and blueberries, the check-out girl’s gold digger instincts would kick in and she’d follow you home, thinking perhaps that your 2006 Toyota Corolla with the mismatched side panels was just a ploy to throw off fortune seekers. That’s how expensive fresh berries can be, but Costco sells this organic three-berry blend for about 11 bucks. But maybe you’re thinking that you prefer fresh anyhow, since it’s more nutritious than frozen. Not so. A study conducted by Bouzari in 2014 evaluated the amount of riboflavin, beta-carotene, vitamin C, and alpha-tocopherol (vitamin E) in frozen and non-frozen carrots, corn, spinach, broccoli, peas, green beans, strawberries, and blueberries. He and his colleagues found that frozen foods showed a minimal loss of vitamin C compared to big losses in non-frozen, “fresh” varieties. Likewise, frozen peas showed an increase in vitamin C and vitamin E over non-frozen, and the findings were true for fruits and vegetables even if they’d been frozen for 90 days. In other words, as long as the “chain of freezing” wasn’t broken – as long as the berries didn’t melt when the other berry pickers had to pack Reuben’s amputated finger with them en route to the hospital after it was cut off by the conveyor belt – they’re often as good or better than “fresh.” Lastly, you couldn’t pick a much better dietary and nutritional blend of fruits. All three are rich in anthocyanins and very low in total sugars. 4 – Wilcox Hard-Boiled Organic Eggs I can imagine the Wilcox Hard-Boiled Egg rep giving this pitch to Costco execs, only to be met with stony, perplexed,
Origin: 5 Foods Lifters Need to Buy From Costco
Lifters Need to Lift More Often
 Here’s what you need to know… Experts used to think that once-a-week, high-volume training for individual body parts was best. Science now shows that a higher frequency of training works better. In newbies, post-workout muscle protein synthesis (MPS) continues for upwards of 48 hours. But in experienced lifters, MPS only continues for about 16 hours, proving that training frequency needs to be increased. When you work a body part once a week, you spend almost 5 or 6 days not growing. Increasing training frequency to two times a week essentially doubles the amount of time you spend growing. When you increase frequency, you reduce the amount of work you do in a workout. In return, you get better recovery and an opportunity to use more exercise variety. Manipulate Frequency and Volume for Growth Strength How often you train and the total amount of work you do in the gym, otherwise known as frequency and volume, are two of the most important variables you can manipulate for improving muscle growth, strength, and performance. In the past, most experts thought that having once-per week, high-volume training workouts for a particular body part was optimal for growth. Now, science is beginning to reveal that spreading that volume over multiple workouts may be more advantageous for building muscle and improving strength. In fact, new research shows that increased training frequency is almost an imperative for anyone who’s not a rank newbie. Why? It starts with protein synthesis. Protein Synthesis and Muscle Growth In order to fully understand how training frequency influences muscle growth, you need to understand what drives muscle growth and how it changes over time. Currently, the leading theory behind how muscle actually grows is because of something called muscle protein synthesis. (1) When you work out and stress your muscles sufficiently, you up-regulate the process of protein synthesis, which allows the body to combine amino acids into new proteins, i.e., new muscle tissue. However, it’s important to recognize that the process is a rate that diminishes when you become experienced. As a beginner, the amount of time that protein synthesis is elevated in response to exercise is quite long, with some studies showing upwards of 48 hours. That means that as a beginner, your ability to grow new muscle from a single workout can last a few days. (2) New research, however, tells us that as you become more experienced and more resilient to stress, the amount of time the body spends growing muscle from a single workout decreases significantly. In fact, some research shows that for experienced lifters, this rate of muscle building can actually return to baseline within 16 measly hours. (3) This is one of the biggest reasons why it becomes increasingly more difficult to grow as you become more experienced, and all the more reason experienced lifters need to start training more frequently. Bottom Line: The body responds to exercise by increasing protein synthesis. As a beginner, this response is intense and lasts a long time. As you become more experienced, though, this growth response diminishes, making once-a-week single-body part workouts less and less effective. Start Increasing Training Frequency Increasing how often you train certain muscle groups means you’ll have less volume per workout, but you’ll also have the opportunity to incorporate greater volume overall. For example, let’s say you’re a newbie and you train legs once per week and do 8 sets of squats. That’s a lot of sets and chances are you’re exhausted and will remain sore for days afterwards. But if you’re experienced, the actual growth response to that session might be over with by the next day. This means that despite the difficulty of your workout, an experienced lifter might only be growing for a day or so in response. That leaves the rest of the week when those muscles aren’t growing. But let’s say you split the amount of work you did during that single workout over two training sessions. Now you’re doing 4 sets of squats, twice per week. When you make this change, a few things happen. First, you’re reducing the amount of work you’re doing per workout, but what you get in return is a better ability to recover and the opportunity to use more exercises. Consider that in the example you completed 8 sets of squats. By working legs twice a week, you have the opportunity to do 4 sets of squats and maybe 4 sets of leg press, for example. Second, you’re increasing the amount of time you spend growing. If you’re experienced and you hit a certain muscle group only once per week, it’s likely that you’re spending almost 5-6 days without growth. When you increase the frequency that you train certain muscle groups, you’re now essentially doubling the amount of time you spend growing. All together, the benefits of increased frequency means that you can do more work over time, while also spending significantly more time each week growing. Bottom Line:
Origin: Lifters Need to Lift More Often
The 4 Most Common Injuries for Lifters
 Here’s what you need to know… The rate of shoulder injuries rises with excessive reps, excessive machine use, and often bodybuilding-style programming. Lower back injuries increase when flexing or extending the lower back under heavy loads. Keep the spine neutral. Knee injuries are high when the knees don’t track properly throughout the lifts. Keep the knees from collapsing inward if you want them to be healthy. Upper back and neck injuries occur with poor posture. Fix a hunched over back to prevent cervical spine injuries. Lifting Isn’t Dangerous Not inherently at least. And not compared to a number of other types of athletic endeavors. Resistance training is actually pretty safe. What makes lifting unsafe are the missteps, and sometimes just plain idiocy, many individuals bring to the practice. From bastardizing technique and butchering form to pumping ego instead of muscles, some people have given weight training a black eye. If lifting is dangerous in the eyes of the ignorant, we better figure out what exactly “lifting” entails so we can be sure to keep these lifting-phobes a safe distance from the squat rack, bench press, and other physically catastrophic environments. What’s Considered Lifting? We can break lifting down into four major categories: Traditional weight training – bodybuilding The sport of lifting weights – powerlifting, Olympic lifting Sport performance training – athletics Crosstraining – classes and boot camps There’s more, but these are the major players. The Four Most Common Lifting Injuries 4 – Cervical Spine Injury The cervical spine – upper back and neck – is most notably vulnerable to injuries in both the soft tissue and joint structures such as the discs and ligaments due to heavy bracing techniques, poor spinal posture and loads of ugly repeated flexion and extension movements. Soreness and joint stiffness due to bracing in a neutral cervical position under heavy loading is part of the iron game, but flailing your head around and putting undue stresses on intricate body structures is just plain stupid. If you don’t know what I’m referring to, just think of turning the dumbbell shrug movement into a mosh pit at a Slip Knot concert. Don’t be that guy. The most innocent of all just may be transferring poor spinal posture from your daily sedentary life into the gym and not realizing you’re putting yourself at risk. The average American has a forward head posture which causes hyperextension of the upper segments of the cervical spine, and lower segmental flexion. That’s a recipe for a nasty neck tweak on your next squat or deadlift if not corrected. Prevent It Fix your posture. Get a neutral spine. For the cervical spine, I can’t think of a single position that is of more importance than the braced and neutral neck position. Drive your chin directly backwards towards your spine and create a slight downward gaze with your eyes. This position holds true for every single movement, no matter if it’s upper body or lower body specific. 3 – Knee Injury Most assume the knee is highly injurious. There is some truth to this joint being more vulnerable than others due to its anatomical properties and orientation relative to the ankle and hip complexes. But there’s more to the story. First, the structure of the knee joint is very immobile by nature, as it is a hinge joint with only two true degrees of freedom, meaning it only moves into flexion and extension. Less relative motion from the knee in combination with poor gross movement through joints that are supposed to be highly mobile – like the many synergistic joints of the ankle complex in addition to the ball and socket type hip joint – put undue stress over non-contractile tissues like ligaments and cartilage. This kink in the kinetic chain is most notable for lifters in quad-dominant movements like squat and lunge variations. While global instability of the knee joint may be a chicken-or-the-egg argument with the co-morbid factors like stiff and immobile joints above and below the level of the knee, many chronic natured injuries also become symptomatic over the front side of the knee at the patella. Increased tone and tightness through the quads can increase compressional and shear forces through the kneecap, causing increased rates of patella-femoral friction and irritation. Functionally shortened and stiff quads in combination with poor patellar movement is exacerbated with poor squat mechanics such as anteriorly drifting knees and valgus drop, and also in lunge-type movements when the knee joint is forced into terminal flexion. If this sounds like a pretty big problem that most lifters need to address, it is. Pay attention, this simple cue below can clean up your movement and give those pissed-off knees just enough of a break to recover for good. Prevent It Pay attention to knee tracking. There are loads of different lower body movements that involve both the squat and lunge variations. Though each
Origin: The 4 Most Common Injuries for Lifters
Tip: 7 Things Smart Lifters Know
 If you’ve been training for a decent amount of time, you’ve made some mistakes. It’s part of the process. But doing your homework can definitely save you some time and energy. It would be nice if there existed a simple answer or method to get us to our goals in the shortest possible time, but in reality we have to spend time under the bar and learn what makes our unique profile tick. With that in mind, here are some things to avoid, some things to think about, and some ideas to try out. 1 – Sometimes less is more. Try time-capping your training sessions at 60 minutes. Training for longer than 60 minutes might decrease serum testosterone levels and increase cortisol, at least if you’re hitting it hard and not taking 20-minute rest breaks between sets. 2 – Identify and stick to a goal. If you have training ADD then you’ve probably felt like your goals change biweekly. Avoiding this mistake is important if you’re ever going to make progress. Pick your goal and stick to it for at least 12 weeks and then reassess. The same goes for programs. It’s easy to get distracted by the “next best thing,” but that can lead to never knowing if a program is actually the right fit for you. Within 3-4 weeks you should be able to tell if that’s the case, but rotating programs weekly or biweekly won’t serve this purpose. 3 – Narrow your exercise choices. Today we have access to a lot of info, and that can be a handicap. We overthink what exercises to perform. Your workout will be much more efficient if you narrow it down to 4-5 movements and call it day. Your session should consist of a core lift, two to three accessory movements, and some direct ab work. 4 – Realize that not all experts are really experts. Access to information comes very easily on the internet, and if you have a great physique you’re an “expert.” Do your homework on the people you’re taking advice from. Having a great physique doesn’t mean you’re qualified to write individual training programs. 5 – Avoid the “one size fits all” approach. Having a one-size-fits-all program would make life easier, but unfortunately this just isn’t the case. Even if you have a coach, you have to experiment and find out where you’re weakest. Even the best coach may not be able to figure that out. Trying a program you found online is okay, but remember that just because a program worked for your friend doesn’t mean it’ll be the right fit for you. 6 – Do the boring work. Many lifters avoid the work they need the most because it doesn’t look cool on paper. That could be unilateral work, sled work, or weighted carries. This work goes a long way for everyone, regardless of your current level of experience. You’re only as good as your weakest link. If you don’t spend time building your base and bringing up your lagging muscle groups, you run the risk of injury. This work should be as high of a priority as anything else you do. 7 – Always be a student. We’re never done learning. As much as we know, there will always be people that know more. Find experts that know more than you do. Study their work, read their books, and experiment. Successful lifters know that they don’t know
Origin: Tip: 7 Things Smart Lifters Know
