 Here’s a useful way to set up a heavy band, providing both comfort and stability. Simply place a plate over the center of your band and stand on it. Compare doing this to just standing on a band and you’ll instantly feel the difference. The band will also stay closer to shoulder width throughout any exercise. Resistance bands have many uses. One is the ability to accelerate through increasing resistance. This can prime your nervous system, activate high-threshold motor units, and potentiate your whole body for a better workout. Banded single-leg RDLs are an excellent way to prepare for a heavy lower-body workout, especially if you do a few explosive reps, allowing the band to accelerate you back down. This will overload the stretch-reflex mechanism and prime your muscles for a good workout. Because single-leg RDLs done this way provide an element of stability (versus your standard single-leg deadlift) these can also be used as a teaching tool to improve single-leg stability and strength. 2. Banded Split Squat This is an excellent way to warm up your quads and get a bit of blood in there before your heavy lifts. Because of the angle of the band, there’s even greater quadriceps emphasis. As an alternative to the leg extensions and sissy squats, these can make for an excellent assistance exercise for your lower-body workouts. If you’re at home or in your Vegas penthouse suite wondering how you could do these without an Olympic-size plate, all you need is something flat and strong to place over the band. Or you could just step on the band. 3. Banded Pull-Through Cable pull-throughs are on par with 45-degree back extensions and reverse hypers for developing posterior chain strength in a manner that limits load through your spine. Loop a band around a post somewhere and boom… you’ve got yourself an effective pull-through setup. Because of the ascending resistance of the band, doing pull-throughs in this way tends to bias glute activation at the top, although you’ll get a nice stretch and a little load through your hamstrings at the bottom too. Excellent as a warm-up drill, to teach hip hinge technique, or to burn out your glutes. 4. Lateral Kneeling Hip Thrust Open up your tight adductors and wake up your sleepy glutes with these. Here you’re combining a band kneeling hip thrust with a great hip-opening drill. Throw these into your warm-ups for healthy hips and knees. They’ll also work as a high-rep booty-pumper – just don’t make eye contact. 5. Band ISO Bird-Dog A resistance band is one of the best ways to progress and load a bird-dog. So if bird-dogs are a frequent part of your training anyway, here’s how you can make them harder. You’ll be challenging the collapse of your extended arm and leg. This will help fire up everything from your hamstring to your opposing-side shoulder, and everything else in between. Bird-dogs are part of Professor Stuart McGill’s “big three” core exercises. It’s good to add them into your warm-ups, at the end of workouts, or supersetted with other exercises for long-term back health. Add a heavy band like this for a bigger
Origin: Tip: 5 Heavy Band Exercises for Legs & Glutes
Tag: Legs
Tip: 3 New Ways to Blow Up Your Legs
 Whether you use a dedicated landmine device or you just shove a barbell into a corner (against a towel or even an old shoe), this style of training is worth adding to your program. These three variations will smash your lower body, but in a different way than you’re probably used to. Plus, this type of work has transferability to your big lifts. Getting jacked while being more functional? Win-win! Landmine Squat Unlike the goblet squat, the landmine variation changes the strength curve and actually turns the squat into more of a hip-dominant movement. Our society is plagued by lower back problems, which isn’t surprising given our daily postures. Extra work for the posterior chain is always a plus. This isn’t a movement for the faint of heart either. The loading capability will challenge even the most seasoned meathead. Build up to a heavy 8-10 rep set over the course of 5-6 sets. Landmine Reverse Lunge If you’re looking to change up your lunge variation, this is it. The landmine version affects the strength curve differently than a kettlebell or dumbbell pressed against the chest because of the biomechanics of the movement angle of the barbell. You’ll be surprised be the increased level of balance required as well. Try 3-4 higher-rep sets of 8-15 per leg. Single-Leg Landmine RDL The single-leg RDL is a challenging movement for just about anyone. It’s often used as an assessment tool and, as you can imagine, the loading capacity is quite low with it. But with the landmine variation, loading capacity is higher because the level of stability required is lower. Try 3-4 sets of 8-10 reps per
Origin: Tip: 3 New Ways to Blow Up Your Legs
Tip: Better Butts and Bigger Legs
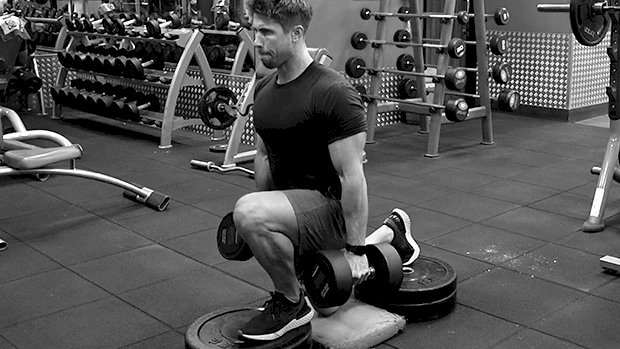 Single-leg strength is important. Unfortunately, when your goals are more about aesthetics than athleticism, single-leg work doesn’t get much love. But split squats are one of the all-time greats. Many would even argue their superiority over heavy back squats for athleticism. Here are two ways that’ll help you improve single-leg strength, while also packing on some muscle. Split Squats for Quads During standard split squats, at least 70 percent of your weight should be through your front leg. While it’s true that the quads of the back leg would get some loading through knee extension (the back leg somewhat resembles a sissy squat), for most, purposefully loading the back leg isn’t a good idea. Rear-foot elevated split squats take the back leg out of the equation while also shifting weight forward – more weight over the lead leg. Here you can safely and effectively load your quads. Using a squat rack for these is perfectly acceptable (cue the gym police). The rack setup is the most efficient way to do these. Alternatively, a split squat stand, or even some leg extension machines, will allow you to hook your back foot on the support. The advantage of the rack, though, is the additional support it provides. By placing one hand on the dumbbell and the other on the rack you’ll be more stable. More stability means more output, and more load you can put through your quads without worrying about toppling over. Stability is something many meatheads struggle with when attempting split squats. You could also set up behind a bench set on an incline, using the back rest for support. I’ve tried a broomstick with this one too, albeit this has a little less support. All you need is something to hold on to. In addition, having something to grab will allow you to get in a few extra reps. As you fatigue you can grind out more reps with help from the supported arm on both the lifting and lowering phase. You can also use assistance on the lifting portion only (lift with help, lower without), meaning more of an eccentric overload. If you try this approach, good luck standing the next day! The height of the back foot is up to you. Begin with a very low elevation and work up. Going too high can cause knee pain in some, as well as poor pelvic alignment. Keep your abs tight, ribcage down, and try to contract your glute on the backside leg. Start and finish at the bottom of each rep, where you can either drop the dumbbell and switch sides, or place the dumbbell in the other hand and get going again. Split Squats for Glutes Deficit split squats work because they take you further into hip flexion. While it’s true they’re also a horrendous quad-burner, going further into hip flexion will take your glutes into a deeper stretch position. When you stand on the box, either you or the weight should be going below the height of the step. That’s why it’s called a deficit! Specifically, it’ll be the lower fibers of your glute max that’ll get hit hardest – yes, they’re a thing. A study by McAndrew et al. showed that the glutes are comprised of upper (cranial), middle, and lower (caudal) sections, each of which activate differently. While hip thrusts, glute bridges, and cable kickbacks tend to bias more of the upper fibers, “stretcher” type exercises such as split squats, high step-ups, and forward lunges tend to target more of the lower portion of your glutes. If you’re capable of going deep, you’ll stretch and load these fibers even more. You don’t need to have a massive deficit either. Just work within your own range of motion and progress to larger deficits over time. To achieve a slight deficit in split squats, a few heavy plates on the floor work just fine. A foam pad in the middle helps with comfort, while also adding a depth target. Just a gentle tap-and-go on a pad will limit cheating and help you hit the deficit every time. Start and finish in the bottom position where you can get set and grab your dumbbells. Feel free to add some pauses at the bottom portion of each rep too. That’ll really emphasize the stretched position. Your ass will be on fire for
Origin: Tip: Better Butts and Bigger Legs
Tip: Strong Legs, Ready-For-Anything Knees
 Sure, some version of the squat and the deadlift should be staples of every program, but they only make you move in the sagittal (forward and backward) plane of movement. They don’t require you to go from side to side. This is a huge missed opportunity for athletes and weekend warriors. No one wants a blown ACL. You want to be able to trust your knees if you need to change direction sideways playing basketball or making a cut on the football field. And you never know when you’ll slip on ice or find yourself having to catch your balance when you’re in an awkward position. Adding simple exercises like the lateral lunge or the goblet variation will help your knees and keep your legs more balanced. Lateral Lunge Stand with your knees and hips slightly bent, feet shoulder-width apart. Keeping your head and chest up, take a slow side-step to the right. Keep your toes pointed forward. Keep the left foot in place and shift your weight to the right leg. Flex the right knee and hip into a lateral lunge. Keep your upper body upright or slightly bent forward. Pause at the bottom. A straight line should form between your right foot, knee, and shoulder. Push your body back to the starting position. Tip: You might not be able to get all the way down like you would with a normal squat. Cool. Go as far down as you can. Once you get a little better at it, add some weight with a kettlebell or a dumbbell. Goblet Lateral Lunge Use the same starting position and movement as the lateral lunge. Keep the weight tucked under your chin like you would for a goblet
Origin: Tip: Strong Legs, Ready-For-Anything Knees
Tip: Box Step-Offs for Big Legs
 Stepping off a box shouldn’t just be reserved for your local step aerobics class. With a few minor upgrades, box step-offs can be an effective way to add some frontal plane (side-to-side) loading to your leg day. Not only can they add another direction to your training, but they transfer over well to athletics and they’re a damned effective muscle-builder too. Lots of Ways to Do Them Box step-offs are somewhere in between a lateral lunge and a squat, while the addition of a box takes you further into deficit. The height of the box and degree of deficit are up to you. For those that don’t want much extra range of motion, stepping off a 45-pound plate might be enough. Conversely, for those that want a deep deficit, setting a box and some risers up to knee height would have its advantages. A single dumbbell in the offside hand works great, but most seem to prefer the feel of a kettlebell. This variation is a good starting point for many and allows some respectable loading for even the strongest lifter. It’s not uncommon for someone to get to the point where they can use a third of their bodyweight in one hand. Other effective ways to load step-offs are in a goblet position, front rack position, or with a landmine bar. The landmine can provide an element of stability to the exercise, as it’s one of the most comfortable variations (if you get the setup right). It can be held in the offside hand or in both. A cable seems to work okay too. For complete beginners, a medicine ball or even body weight are just fine to start off with. Just make sure you respect the movement with these rules: 1. A Deficit is for a Deficit Far too many times you see those using a raised platform stop before actually getting into the deficit. The point of a deficit is to increase range of motion. Unless you’re doing a goblet squat, EZ-bar front squat, or are a beginner stepping of a 45-pound plate, the implement you’re using needs to drop below the top of whatever you’re standing on, thus taking you into a deficit! If it doesn’t, then there’s not really much use for the extra height. 2. Put on the Brake As you step sideways off the box, there’s a “braking effect” happening. The offside leg must step off and absorb the impact forces through the abductors, quadriceps, and glutes. This braking effect is a form of eccentric overload, and eccentric overload is good for building muscle. 3. Lean With a Purpose Depending on how you hold the weight, distribution of load and body position change. You can have a more upright torso by using a goblet position or front rack, or slightly more forward-leaning torso with a weight hanging in front. You can even emphasize a forward lean and get even greater hip dominance. Just focus on pushing your butt back more as if you were showing it off to the person behind you. To target the offside leg, hold the weight on that same side of the body. We’re not talking a massive change here, but when the weight is held in one hand, load is shifted away from the nearside leg towards the offside, meaning that as you’re stepping off, the brakes need to work a little harder. That means more eccentric overload on the abductors, glutes, and quads on the offside leg. There tends to be a bigger forward lean in one-handed variations too. Programming Step-Offs Whichever way you perform box step-offs, it’s the combined lateral braking motion and increased hip and knee range of motion that makes this exercise so effective. The decision you need to make is whether you want to load the braking side more (emphasizing the eccentric overload), or if your focus is loading more through increased stretch and range of motion on the nearside leg. Both can be great triggers of muscle growth as well as have carry-over advantages to sport. Pick your weight, sets and reps based on these goals, although generally 2-4 sets of 8-15 reps each side work
Origin: Tip: Box Step-Offs for Big Legs
Tip: Smoke Your Legs With an EZ-Bar
 Every gym has an EZ-curl bar, and it’s not just for arm day. It’s actually a great tool for lower-body training. Due to the unique shape of the bar, two positions work well: the front rack or front squat position, and the Zercher. The Front Rack Holding the EZ-bar in a California-style (arms crossed) front rack is as comfortable as it gets. Here’s how it looks with a rear-foot elevated split squat: Many struggle with the standard front rack because of mobility restrictions and jacked-up shoulders. The shape of the EZ-bar sits nicely on the shoulders, while the California grip adds to the comfort. The narrow width of the bar also makes it less awkward for beginners, as well as for times when the squat rack is taken up or space is limited. Having an EZ-bar in your garage gym is always a good idea. Benefits of the front rack include a more upright torso, a forward load distribution, greater quadriceps dominance, and solid trunk development. The Zercher Position The shape of the bar fits nicely in the crooks of the elbows, and a little padding increases the comfort of this sometimes-awkward setup. Here’s how it looks with a squat: That anterior load will fire up nearly every muscle in your body. It’s a good position to use if you’re limited on workout time, and it’s great for those involved in MMA and tactical strength and conditioning. In the Zercher position you can squat, lunge, split squat, hip hinge, and do step-ups and loaded carries. Preparation The front rack position is easy. For the Zercher however, you might want to use some elbow or knee sleeves, a towel, or fat grips for added padding. If there’s respectable weight on the bar it can be awkward to pick the bar up and get it into position. You have four options: Sit the bar on a gym bench and load it there. Take it from a kneeling or half-kneeling position. Use free-moving (independent) squat stands. This is the best option for bigger weights. Load the bar while it sits in a preacher bench and take it from there. Set the Zercher position off the floor. You’re also welcome to pick it up like a gorilla if your body allows you to. Exercise Options Zercher Good Morning (Staggered Stance) Front Rack Lunge Zercher Lunge Zercher Split Squat Step-ups and loaded carries also work great with an EZ-bar in either the Zercher or front rack
Origin: Tip: Smoke Your Legs With an EZ-Bar
