 Is Soreness An Indicator of a Good Workout? It’s a simple question, but the answer is a little tricky. Generally speaking, no, being sore after a workout doesn’t necessarily mean it was an effective workout. And also generally speaking, no, you don’t have to get really sore to build muscle. But There Are Nuances… As many T Nation coaches have pointed out, there are many levels of soreness. You can feel a little tight or swollen and experience what Christian Thibaudeau calls an “enhanced feeling” in the worked muscles. You definitely know what you trained the previous day, but you’re not really hurting. On the other end of the spectrum, you can find yourself saying “ouch, ouch, ouch” with every stroke of your toothbrush after a tough chest workout. That’s severe soreness. And you can even feel so sore that you can’t train – that’s extreme soreness and a sign that you messed up since that one workout has interfered with several of the following workouts. You should probably experience that “enhanced feeling” a day or two after a tough workout, but you don’t necessarily have to. What all the “soreness is bad” coaches are referring to is that debilitating soreness, which is a sign you may have taken things a little too fast or too far (too many sets/reps, or too heavy a load). Here Comes Another Big But… BUT if you tried a brand new exercise, a new set/rep scheme, or a new tempo (like lowering a weight very slowly), you should probably expect some level of soreness. If you don’t feel something, then you probably sandbagged it. Or maybe you haven’t yet established a good mind-muscle connection with the new exercise or method. What the “soreness is bad” coaches are also saying is that you shouldn’t be chasing soreness i.e. trying your hardest to get sore because you think it’s the only sign of a productive workout. That often leads to switching exercises too often. You never really get to progressively overload the exercise, because the moment the new movement stops making you sore, you switch to something else that makes you hurt again. That’s a mistake. Thibaudeau has even said that when initial soreness stops, the real progress can begin. And let’s not forget that your diet can influence how sore you get from training. If you’ve cut your calories and carbs down low, a familiar workout may get you sore again. But you’re probably not growing from it given the caloric deficit. The Best Sign of Progress… is Progress See how tricky it can be? So the lesson is to expect some “enhanced feeling” or mild soreness, especially after you try something new, but don’t train just to get sore. If you do have some moderate to severe soreness, it’s also a good idea to train that muscle again the next day. Nothing hard, just do a couple of light sets and get a mild pump in the sore muscles. This can accelerate recovery and maybe even lead to more muscle growth. Finally, remember that the best sign of progress is progress. After a few weeks or months, are you lifting heavier, doing more reps with the same weight, or “owning” a weight that used to beat you to death? Are you bigger without being fatter? Then you’ve progressed, whether you felt sore or
Origin: Tip: Soreness – Good or Bad?
Tag: Good
Tip: The Only Good Smith Machine Exercise
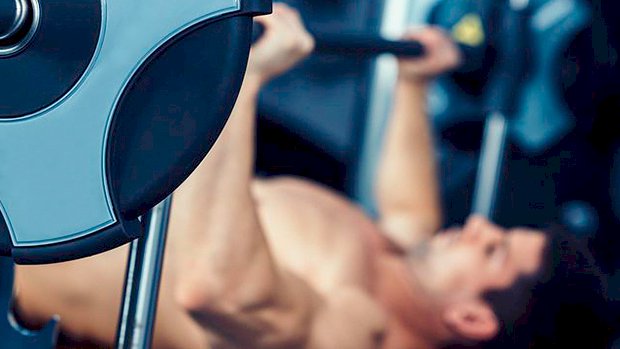 High-tension training methods teach our bodies to exert more force. Plyometrics and the shock method are often used for lower-body power development (depth jumps, loaded jumps, and landing from various heights.) However, very few people use the same methods for the upper body. Such drills can be very effective at improving bench-pressing strength. Example: the ballistic bench press. This is the only exercise in which I consider using the Smith machine effective. The objective is to lower the bar to the chest, throw the load in the air, then catch it and start again. The load you use should be light, because the goal is not to just be explosive, but to be ballistic. Use a weight that’s about 20 percent of your maximum effort. If you bench 300 pounds you’d use 60 pounds for the bench throws. Lower the weight under control, quickly reverse the motion, and toss the bar into the air as hard as you can. But be ready to catch it on the way down unless you want to get decapitated. Note: This won’t work well with Smith machines that use
Origin: Tip: The Only Good Smith Machine Exercise
The Squat: 10 Damn Good Tips
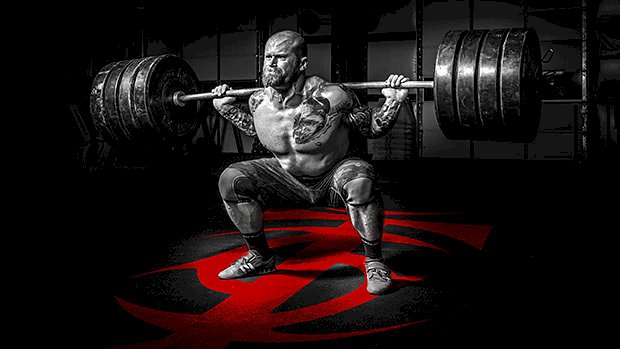 The Question What’s your best squat tip? Bronwen Blunt – Nutrition and Strength Coach Do heavy squat stand-ups. Warm up to about 90% of your max but don’t squat this weight. Unrack it and hold it for 10 seconds then put it back down. Continue to add 5-10% for each set and up to 20% over your 1RM. Be conservative if it’s your first time trying this. This is a way to overload your squats, which will allow your body to recognize and adapt to heavier weights beyond your current capabilities. It stimulates your nervous system and makes you feel more comfortable with heavy weight on your back. Once you become more comfortable with these overloads, your current 1RM is going to feel a lot less taxing. Pay attention to your setup to maintain stability during the movement. Proper breathing and bracing is extremely important to avoid injury. Most people neglect the importance of proper breathing while unracking the bar. It’s a problem that can get you out of position and make or break your squat. – Bronwen Blunt Jake Tuura – Strength and Conditioning Coach Jump first, then squat. For years we’ve known about the benefits of something called “post-activation potentiation.” Get warmed up, then do a heavy, low-volume squat or deadlift. Afterward, do a jump or sprint. What happens? Explosive jumping and sprinting performance increases after the heavy lift. Put another way, loading muscles with high resistance acutely improves explosive muscle action. Heavy helps explosive. But we never look at it the other way. Will explosive help heavy? Research by Masamoto et al. tested this out. They tested the 1RM of several athletes: sometimes they did tuck jumps and drop jumps first; other times they just performed their usual warm-ups first. The result? When they jumped before squatting heavy, they lifted more weight. Next time you’re getting ready for a heavy squat workout, do a few jumps before training. Not only will it develop explosive ability, but it can significantly add poundage to your squat. Joel Seedman, PhD – Strength and Performance Expert Do eccentric isometrics – lower slowly and pause at the bottom. Visually, the squat pattern is simple. However, neuromuscularly and biomechanically it’s actually very complex. It requires a number of precisely executed components to lock the movement in. Some of these include: Set the hips back without bending over. Spread the knees apart but not excessively. Keep a neutral spine while maintaining a very slight natural curvature of the back. Squat somewhere between 90 degrees and parallel (don’t collapse or go ATG). Pull yourself into the bottom position rather than allowing gravity to push you down. Brace the core and tense your abs. Keep the chest out without hyperextending the back. Screw the feet into the floor by pushing slightly more to the outside of the feet. Keep the feet relatively straight and aligned with the each other. Pull the bar into your back by activating your lats. Keep the head neutral (don’t look up but don’t let the head drop). Maintain maximal full body tension each and every rep. Move in a perfectly vertical fashion without shifting horizontally. Load each leg as symmetrically as possible without favoring one side. And this list doesn’t cover everything. So how the heck do you actually learn to squat without going through an exhaustive myriad of endless cues? The answer lies in performing eccentric isometrics. Now I’m not talking about simply collapsing down into the bottom of a squat, then pausing for a few seconds while you hang out on your tendons and ligaments. That’s a bastardized version of an eccentric isometric squat, and it won’t do anything to improve your squat mechanics… not to mention strength or muscular development. Instead, squat with painstaking attention to sensory signals and proprioceptive feedback using Jedi-like focus and intensity. Lower slowly under control, stay tight, then pause in the naturally stretched position while attending to as much somatosensory feedback as possible. Why does it work? Your own body can provide all of the necessary feedback, coaching, and cuing you need. You simply have to learn how to listen to the sensory feedback coming from your proprioceptive mechanisms and you’ll immediately begin to use the “sense of feel” to make subtle adjustments and fine-tune your movement. The best way to do this is through properly executed eccentric isometrics. This also means learning to sense where the natural stopping point and optimal range of motion is, which happens to be somewhere between 90 degrees and parallel. And just in case you were wondering, no, your body is not an exception to the rule. A proper squat including optimal range of motion and ideal joint angles will look almost identical from human to human if it’s performed correctly, regardless of individual anthropometrics. – Joel Seedman, PhD Lee Boyce – Strength Coach and Performance Expert There are two that I recommend. 1 – Squat the bar
Origin: The Squat: 10 Damn Good Tips
