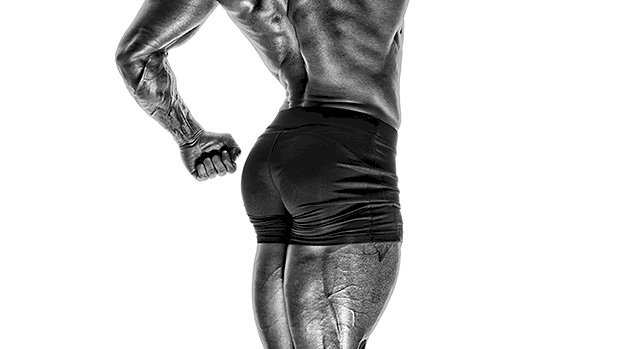
 Here’s a new way to perform back extensions for meatier hamstrings and glutes. Train at home? Train in a gym that doesn’t have a back extension or GHR bench? These exercises are great workarounds. 1. Bent-Knee Glute Extension Taking a few minutes to set this up is worth the glute gains. You can also use a Smith machine, which in a commercial gym setting might be more appropriate. Think of these as 45-degree back extensions. Set a bench to an incline (30-45 degrees works best) and throw a pad on the end for your hips. With this version though, you’ll lock yourself in position with your feet against an immovable bar. Everything about this position screams glutes. Your toes should be turned outwards and hips externally rotated. This frog-like position places a little more emphasis on the glutes as external rotators. (It’s not as ball-crushing as you might think.) Unlike a typical back extension with straighter knees, your knees stay bent to around a 90-degree angle. This slackens your hamstrings and forces your glutes to work harder as hip extensors. It’s one of the reasons why glute bridges and hip thrusts are so effective too. Lock yourself in with your hip crease on the edge of the bench, then execute by driving your hips into the pad. Keep a slight rounding through your thoracic spine and keep your chin tucked. Your arms can be crossed, or you can hold a plate or dumbbell to your chest to add load. A few sets of 15-25 reps will do the trick. 2. Hamstring Destroyer in Rack This exercise was popularized by Eugene Teo. Personally, I have no issues doing more than just squats in a power rack, but doing all your assistance work in there too might grind some gears, so I’d suggest using a Smith machine. Think of this as a horizontal back extension with slightly bent knees. Unlike the previous setup though, you’ll need to be further from the bar so there’s a greater angle at your knees. This will help get rid of the slack and place more tension through your hamstrings. With these you’re looking to maximally load your hamstrings in their mid to shortened position, which is made possible by the combined bent knee and extended hip (your hamstrings do both). These are also made more effective by your body alignment and foot placement. The devil is in the details with this one. Your feet should be parallel and the bar should be closer to your toes (versus mid-foot in the previous version). You need to feel secure, but placing the bar closer to your forefoot will increase recruitment of your gastrocnemius. This co-activation of your calf muscles will have an add-on effect, forcing your hamstrings to work harder. Lock yourself in with your forefoot to the bar and your hip crease on the edge of the bench. Keep a straight back position and initiate the pull with your hamstrings. Press your toes down throughout like you’re trying to calf-raise the bar up (you won’t). Then try not to squirm as your hamstrings and calves want to cramp. These are deceptively difficult. If performed correctly, they will rarely require more than your own bodyweight. Before you start adding load, try some isometric holds in the top position to really intensify things. 3. Glute Destroyer Take the hamstring destroyer, change a few body angles and the way you initiate the exercise, and now you’ve got an effective way to pump some blood into your glutes. Turn your toes outward, set your knee angle to 90 degrees (remember, this slackens your hamstrings), round a little through your thoracic spine, and tuck your chin. Initiate by clenching your butt cheeks and driving your hips into the bench. Imagine someone trying to steal your last dollar from between your butt cheeks in the top position. Your glutes will be active as both hip extensors and external rotators, working them hard in their shortened position. Pump out 2-3 sets of 15-25 reps, adding weight when
Origin: Tip: Monster Glutes, Meatier Hamstrings
Tag: Glutes
Tip: 5 Heavy Band Exercises for Legs & Glutes
 Here’s a useful way to set up a heavy band, providing both comfort and stability. Simply place a plate over the center of your band and stand on it. Compare doing this to just standing on a band and you’ll instantly feel the difference. The band will also stay closer to shoulder width throughout any exercise. Resistance bands have many uses. One is the ability to accelerate through increasing resistance. This can prime your nervous system, activate high-threshold motor units, and potentiate your whole body for a better workout. Banded single-leg RDLs are an excellent way to prepare for a heavy lower-body workout, especially if you do a few explosive reps, allowing the band to accelerate you back down. This will overload the stretch-reflex mechanism and prime your muscles for a good workout. Because single-leg RDLs done this way provide an element of stability (versus your standard single-leg deadlift) these can also be used as a teaching tool to improve single-leg stability and strength. 2. Banded Split Squat This is an excellent way to warm up your quads and get a bit of blood in there before your heavy lifts. Because of the angle of the band, there’s even greater quadriceps emphasis. As an alternative to the leg extensions and sissy squats, these can make for an excellent assistance exercise for your lower-body workouts. If you’re at home or in your Vegas penthouse suite wondering how you could do these without an Olympic-size plate, all you need is something flat and strong to place over the band. Or you could just step on the band. 3. Banded Pull-Through Cable pull-throughs are on par with 45-degree back extensions and reverse hypers for developing posterior chain strength in a manner that limits load through your spine. Loop a band around a post somewhere and boom… you’ve got yourself an effective pull-through setup. Because of the ascending resistance of the band, doing pull-throughs in this way tends to bias glute activation at the top, although you’ll get a nice stretch and a little load through your hamstrings at the bottom too. Excellent as a warm-up drill, to teach hip hinge technique, or to burn out your glutes. 4. Lateral Kneeling Hip Thrust Open up your tight adductors and wake up your sleepy glutes with these. Here you’re combining a band kneeling hip thrust with a great hip-opening drill. Throw these into your warm-ups for healthy hips and knees. They’ll also work as a high-rep booty-pumper – just don’t make eye contact. 5. Band ISO Bird-Dog A resistance band is one of the best ways to progress and load a bird-dog. So if bird-dogs are a frequent part of your training anyway, here’s how you can make them harder. You’ll be challenging the collapse of your extended arm and leg. This will help fire up everything from your hamstring to your opposing-side shoulder, and everything else in between. Bird-dogs are part of Professor Stuart McGill’s “big three” core exercises. It’s good to add them into your warm-ups, at the end of workouts, or supersetted with other exercises for long-term back health. Add a heavy band like this for a bigger
Origin: Tip: 5 Heavy Band Exercises for Legs & Glutes
Tip: Set Your Hammies and Glutes on Fire
 The hip-banded RDL (Romanian deadlift) is a great way to load your hamstrings and glutes. Having a band pulling your hips back promotes correct RDL technique. It can also be a useful extrinsic coaching cue if you’re new to RDLs. Using the setup shown here will enable you to use more band resistance. You’ll be able to double up the band and have more control. Bonus: It seems to promote a better hip hinge – there’s something to hinge (take a bow) over. Of course, the band helps to add horizontal load through the hips, making it a potent butt-builder as well. To develop your hamstrings and the rest of your posterior chain, sets of 6-8 work well. To Hit the Hamstrings Harder:Steer clear of locking out, working a two-thirds movement at the bottom. To Hit the Glutes Harder:Lock out at the top with some posterior pelvic tilt for extra butt
Origin: Tip: Set Your Hammies and Glutes on Fire
Tip: The Secret to Stronger Glutes
 In my early days of training, something that really bugged me was coaches talking about the importance of “torque” and “tension” and “bracing.” To be honest, I had no idea what they meant. As far as I could see, they were just going up and down. It looked the same as what I was doing. Skip forward a few years and I started to pick up what bracing meant: keeping air in the belly to keep the spine safe. It’s a pretty simple concept, but not for someone whose athletic background involved computer games. Skip forward a few more years and I’m coaching. I’m noticing a high number of people, especially those who play sports, commonly getting groin injuries from squatting heavy. What’s going on? I realized that the usual fix for groin issues was to make the glutes stronger. The main exercises prescribed involved a resistance band and abduction. Yes, you will feel your glutes doing those, and they’re great exercises for a burn. But you may have left out an important part of the puzzle: if you constantly leave out the adductors they’ll never be able to compete with the overriding strength of the glutes. The actual issue – an imbalance between two opposing muscles – will never be resolved. This is the idea of torque and tension: opposing muscles having a good relationship with each other so that they work well together to create balanced strength. Throughout all your banded glute rehab exercises, the band is simply playing the role of the adductors. For the glutes to be able to pull outwards during a squat, the adductors have to be strong enough to pull inwards to give the glutes something to work against. If they’re weak, the knees will collapse and you’ll either have a horrendous looking squat or strain your adductors because your glutes overpowered them. Making the glutes even stronger will only make the issue worse. Yes, you may temporarily feel better, but it will be more because you rested your adductor and it healed, not because your glute drills worked. Luckily, there’s an easy fix. Literally all you have to do is take off a few reps of your glute exercises and add in an exercise that involves the adductors, such as a Copenhagen plank or, my current favorite, the adductor bridge (which I’m hoping I invented, but probably didn’t) which we demonstrate in the video. If you teach your adductors to fire with the glutes, they’ll work together more efficiently and you can spend more time getting stronger, rather than having to do rehab drills every couple of months. How to Do the Adductor Bridge Set up in a 90/90 position. (See minute 2:15 in the video.) Place one hand on the floor beside the externally-rotated hip. Press your knee on the internally-rotated leg into the ground. Lift yourself up by pressing through the hand and knee at the same time. Repeat for 10 reps and add pauses at the top for extra fun. Repeat on the other side. Go and lift some weights!
Origin: Tip: The Secret to Stronger Glutes
Tip: The Best Deadlift for Glutes
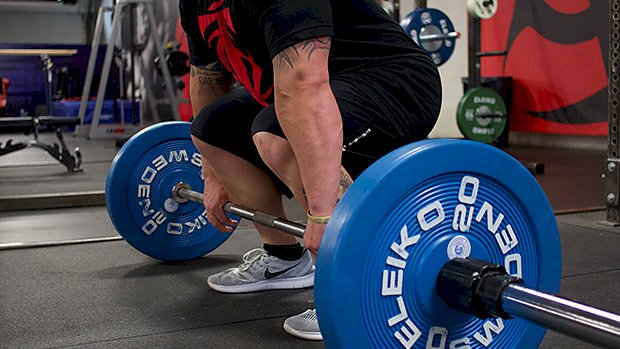 Most lifters have always assumed that the Romanian deadlift (RDL) was a tad better for the glutes and hamstrings than the conventional deadlift (CD) because the quads (specifically, the rectus femoris) play such a big role in the latter. It was a forgone conclusion, like how Eggos are better than English muffins, but no real-deal scientists had ever bothered to compare the two lifts – at least not until some researchers from Western Michigan University looked into it. What They Did The scientists found 21 men with at least three year’s experience with both the CD and the RDL. Each subject had a spider web of needles and electrodes affixed to their rectus femoris, biceps femoris, and gluteus maximus. The lifters then alternated between performing RDLs and CDs, using 70% of their one-rep maximum on both. They all used standard form on both of the lifts, with one exception: While the typical RDL range of motion usually comes to a halt when you start to feel a mild stretch in the hamstrings (which generally happens when the bar travels just south of the knees), the participants in this study were asked to at least attempt to lower the bar to the floor, flexibility permitting. What They Found To no one’s surprise, the CD evoked a much stronger response in the rectus femoris than the RDL – almost double the EMG percentage peak. The researchers also found that the CD caused significantly greater EMG values in the glutes, but this is where we have to take a brief side bar, your honor. Scientists have an entirely different definition of the word “significant” than lay people. In science parlance, significant is kind of a weasel word that just means the amount was large enough to be noticed, or large enough to matter. It’s closely related to the term “statistically significant,” which means a difference that’s unlikely to be caused by random chance. However, if you said you had a significant amount of sex last night, it would likely mean something far different than an amount of sex that, when compared to the amount of sex you normally had, was unlikely to be caused by random chance. So while the CD evoked a “significantly” greater response in the glutes than the RDL, the difference in EMG value in normal, non-science language was just a smidgeon, a duck snort that probably doesn’t matter in the long run. And while the CD came out on top with biceps femoris activation, too, the difference here was even less than we saw with the glutes. In short, the CD definitely caused the rectus femoris, or predominant quadriceps muscle, to work a lot harder. As far as the biceps femoris (the predominant hamstrings muscle) and the glutes, the amount was pretty much a wash between the two lifts. How This Info Might Change Your Training The real eye-opener in this study is just how much the CD relies on the rectus femoris, which presents a potential problem: A lot of us split our leg training as part of a push/pull workout, doing quad dominant movements (like the squat, leg extensions, etc.) on one training day and then doing hip-dominant exercises (deadlifts, glute thrusts, etc.) on another. Since the CD recruits the rectus femoris so heavily, incorporating it into a push/pull workout is problematic. Let’s say your push/pull workout includes squats on “push” day and CD’s on “pull” day. That means you’re working the quads twice as often as you intended. Given this study and the results described in this article, it would be much more logical and efficient to keep the squats in your push workout but replace the CD with the RDL in your pull workout. The glutes and biceps femoris recruitment is virtually the same as with the CD, but you’re getting minimal involvement of the rectus femoris. Max Glute and Biceps Femoris Recruitment with the RDL If you’re going to do RDLs instead of CDs, I suggest you make them count and do them on the Smith machine, as T Nation contributor Paul Carter suggests. (He prefers them to barbell RDLs because the stability afforded by the machine allows you to sit back farther.) Paul also suggests you do them with with a 5-second eccentric to further accentuate the targeted glutes and biceps femoris. To really maximize recruitment, slap a couple of step platforms underneath the bar and stand on them. This will allow you to extend the range of motion (provided your spine is flexible enough). A couple of sets of 10 should more than do the
Origin: Tip: The Best Deadlift for Glutes
The 12 Minute Fix for Abs and Glutes
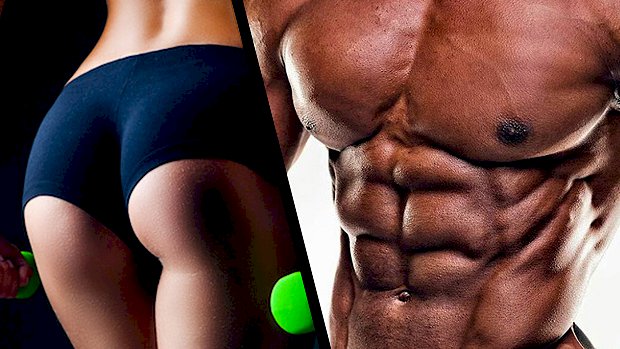 Here’s what you need to know… Too many people waste time working the abs and glutes separately when they could be training them simultaneously. To understand that you can work the abs/glutes/core together, you need to think of the core as a cylinder that wraps around the middle of the body. Joining and working these body parts increases efficiency, along with improving effectiveness and metabolic enhancement. The most effective and efficient way to train abs/glutes/core together is from the plank position. Since much of the core/glutes/shoulder metabolic blast is done from the plank position, there’s also a huge spillover effect to shoulder stabilization as well. Better Abs, Tighter Glutes Most women want nicer abs and round, lifted glutes. Men want one of those things more than the other (so they say), but both men and women want to work the core quickly and effectively. And if they can get some metabolic conditioning in at the same time, it’s a good day. Too bad I see them wasting gym time by training these areas as separate entities when they could instead be capitalizing on how the glutes and core often work in concert. That’s just what the this ab/glutes/core metabolic exercise sequence does. Change the Way You Think About the Core When targeting the core and glutes together for a single training effect and for metabolic optimization, it’s best to think “form follows function.” To really “get” that you can effectively target abs/glutes/core at the same time, you need to think of the core more as a cylinder that wraps around the middle of the body, engaged in the anterior chain, but supported all around the cylinder, from front to back and back to front, and top to bottom. Joining and working them together increases training efficiency not only in terms of saving time, but in terms of targeted effects and metabolic enhancement as well. The Power of the Plank Position The most effective and efficient way to train abs/glutes/core together is from the plank position. No exceptions. That’s what makes this monster metabolic sequence so effective. Additionally, there are huge spillover effects to shoulders as well, as the shoulder muscles go back and forth from unilateral and bilateral stabilization support. The abs/glutes/core sequence was conceived by considering a gymnast on the pommel horse and then tweaking the exercise sequences for overall fitness and body sculpting needs. The Workout Below is the sequence as demonstrated by Kevin Weiss, a two-time World Champion in raw powerlifting. As he says, “Even when training for size, strength, or development, there’s no downside to just ‘a little’ athleticism!” Perform 3-4 rounds. (Four is the max and only for super-beasts). Rest 15 seconds or so between each exercise in the sequence. Here are the exercises in the sequence, broken down: A.Full Sit Outs8-15 reps B.Alternating Contralateral Hand to Toe Touch8-15 reps C.Alternating Contralateral Elbow to Knee Touch8-15 reps D.Alternating Swiss Ball Step Offs8-15 reps E.Dumbbell Overhead Lockoutslow 30 count Exercise Breakdown Full Sit-Outs These engage the muscles and demand recruitment through the speed of execution and kinesthetic awareness of muscles in space. Alternating Hand to Toe Touch The relatively straight leg alters the movement pattern from the full sit outs and adds rotation and keeps muscle recruitment not only engaged, but for lack of a better term, “thinking” about that movement pattern change. This enhances the kinesthetic awareness demands, much as it would for a gymnast on the pommel horse. Furthermore, by keeping the leg relatively straight just like in the full sit outs, we’re still emphasizing longer lever arms, which demand more muscle recruitment and neural activity. Alternating Contralateral Elbow to Knee Touch What we do here is continue the movement pattern in the core cylinder, but we shorten the lever arms (meaning bent knee and touching to elbows, instead of hand to toe). This change still engages substantial effective rotational elements, but now involves the intercostals as well because of the shorter lever arms. Alternating Swiss Ball Step Offs Now the real fun begins. Because of the previous sequences and this change in movement patterns, we see tremendous lower abs and direct glute involvement, too. The nature of this movement is about stabilizing and counteracting the movement of the leg, while the other leg takes on a more kinesthetic demand by contributing to stabilization and balance as well. At this point, the abs and glutes are burning. Dumbbell Lockout Holds This movement completely alters the effects and demands of abs/glutes/core stabilization through an overhead hold. The weight has to be heavy enough to create that demand. This movement acts as a finisher as the shoulders, serratus, paraspinals, glutes, and abs are all contracting hard in order to support the overhead hold. Furthermore, because you’re using the plank position in the first four
Origin: The 12 Minute Fix for Abs and Glutes
