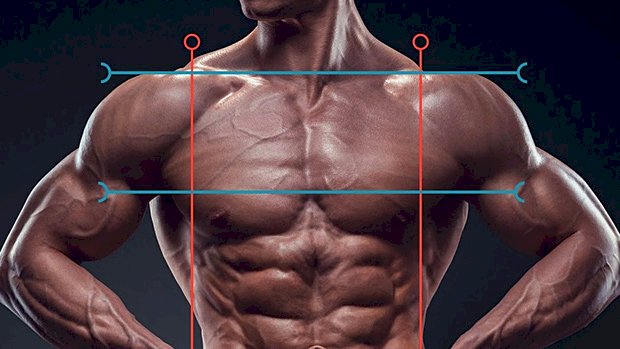
 Whenever my clients ask about muscle imbalances, I jokingly tell them I suffer from them too: I have one strong arm… and one really strong arm! It’s true, though, a person’s dominant side is almost always going to be stronger than their non-dominant side. That means right-handed people are more likely to have weaker left arms. Though some degree of muscular imbalance is inevitable, having a side that’s a little stronger won’t matter much if you have enough strength on your weak, or less strong, side. However, you can and should do your best to keep your muscular imbalances from becoming too exaggerated because… Having a weak side will hold you back from advancing in your training. When one side is weaker, you’re more likely to suffer an injury. When attempting a difficult task, it’s the weak spot that’ll give out first. In fact, overuse injuries commonly occur on peoples’ non-dominant side, even though they use their dominant side more frequently. Having a weak side could ruin your symmetry. Strengthening up your weak side will simply make your body look better. The 5 Fixes Here are some exercises that’ll help you balance things out: 1. One-Arm Pulldown Have you ever noticed how most people at the gym do one-arm rows, but hardly anybody does one-arm lat pulldowns? It’s a shame because the one-arm pulldown is a fantastic exercise to help eradicate left/right pulling imbalances. Even if you do lots of pull-ups and standard two-arm pulldowns, there’s a good chance that you’re relying on your dominant arm to do the majority of the work. By simply swapping the long bar out for an individual handle, you can work one arm at a time and begin to help your less strong side catch up. 2. One-Arm Pull-Up Single-arm pull-ups are also a fantastic way to get yourself evened out. You can start by practicing one-arm hangs as I described in The Ultimate Grip Strength Test and then eventually work your way up to training for a one-arm pull-up. Even if someone’s a little stronger on one side, anyone who’s capable of a full one-arm pull-up using either arm is extremely strong on both sides of the body. 3. Single-Arm Overhead Press Doing barbell presses all the time won’t remedy pushing imbalances. That’s where this exercise come in. Yes, you’ll have to use less weight than you would if you were doing a barbell press, but if you’re willing to put your ego aside in the short term, it’ll have a bigger payoff in the long run. 4. One-Legged Squat Just as we all have a dominant arm, we each have a dominant leg too, though many people will actually be stronger on the leg that’s opposite their dominant arm. It may seem counterintuitive at first, but oftentimes in sports and other activities we post off of our left leg in order to use our right arm (and vice versa). Think of a pitcher in baseball or a boxer throwing a cross. These contra-lateral movements often produce better development in the leg that’s opposite the primary arm. Single-leg squats are the answer to evening out your lower body imbalances, even though the strongest lifters are often humbled by attempting an unloaded, full ROM one-legged squat. Since not everyone’s strong enough to perform a proper one-legged squat, you can practice them with an assist from your arms by holding onto a suspension trainer or a vertical pole. Just make sure you aren’t doing too much of the work with your arms – they’re only there to give the squatting leg just enough help to complete each rep. 5. One-Arm Calisthenics If you’re a calisthenics enthusiast like myself, you can try practicing the One-Arm Push-Up and single-arm wall handstands to keep the pushing power of your left and right sides balanced. Kick up into a two-arm handstand first, then carefully take one hand away and hold the position for as long as you can. Of course, you’ll want to be sure you’re doing the same work for both sides. Unilateral Programming Once you’ve identified your weaker side, you can begin prioritizing it in your workouts. This means training that side first within each session, which will allow you to give it your full energy and attention. That said, you don’t want to hold your stronger side back from progress, either. The best way to focus on your less strong side without babying your stronger side is to perform the same amount of reps on both sides, but spread them out over more sets on the less-strong side. For example, if you can do 3 sets of 10 single-leg squats on your stronger leg, you can try doing 6 sets of 5 reps on your weaker side to allow for more recovery without doing less total work. You’ll still be working your two sides evenly in terms of overall training volume, but you won’t have to sacrifice your form to do so. Though you may never completely even out your two sides, implementing these methods properly will ensure you no longer have a weak side. You’ll have a strong side… and a really strong
Origin: 5 Fixes For Muscular Imbalances
Tag: Fixes
4 Cool Fixes For Awkward Exercises
 Not every great exercise is designed with your individual body type in mind. Whether you’re too big, too small, too tall, or too busted up for a certain exercise, it doesn’t mean you have to skip the lift. All you have to do customize the exercise to make it work for you. Here are four examples. 1 – Use a Decline Bench for Hip Thrusts Hip thrusts can be awkward to set up. Since most gyms don’t own one of Bret Contreras’ patented Hip Thrusters, many lifters resort to getting a flat bench and propping it against a wall or sticking weight plates behind it to keep it from moving. This can work, but when it doesn’t it’s usually because of one of these reasons: The lifter is too short for the bench, so sitting on the floor puts the bench edge high up on his shoulders. That means he has to squirm and writhe to get into position before the first rep, and then do the same to take a seat on the ground after his final rep. The lifter slides on the bench and doesn’t have a consistent point of contact to use as an axis while thrusting. This gets worse if his back is sweaty. The bench itself slides or tips, usually away from the lifter as he progresses through his sets. The lifter struggles to get the right elbow and arm position to hold the bar comfortably. Making the shift from a flat bench to decline bench solves all of these problems. Since the bench is heaviest towards the high end of the decline, it’s much harder to make it shift by pushing against the low end. That’s simple physics. But banking the heavy end against a wall makes it foolproof. Plus, since you’re now using a bench lengthwise and not widthwise, your elbows are free to tuck towards your body and hold the bar in the position that works best for you. Lastly, since the south side of the decline bench typically terminates quite close to the floor, a lifter of any height can comfortably use one. 2 – Got Cranky Joints? Use Fat Grips for Pressing Many people rely on fat grips to increase the difficulty level of pulling exercises like chins, rows, and loaded carries. They’re a tremendous grip-training tool. They have another use, too, that benefits people who suffer from joint stress in the shoulders, elbows, and wrists. These people never consider bar thickness. Bar thickness during pushing movements like strict presses, bench presses, and dips can play a huge role in the amount of joint stress a lifter experiences due to the amount of centralized pressure in the palm of the hand. It takes a few sets to get used to it, but adding fat grips to each of the above movements (and even when pressing dumbbells) can create a world of difference to joint health and happiness. This is due to the added surface area of the handle that’s now spread across a larger percentage of the lifter’s hand. This tip can come in quite handy, especially if you’re a big guy with big hands. The load now diffuses itself over a greater area instead of one specific spot. You’ll notice the difference immediately. 3 – Big Guys, Use Two Ropes for Face Pulls If you’re tall with long arms, or if you’re very muscular, you may have trouble doing face pulls. Since a face pull starts in internal rotation and finishes at or above forehead level, its purpose is to exploit not only the scapular retractor muscles, but also to exploit a rotary component of the shoulder, dominated mainly by the rear deltoid. Guys with longer arms who use a standard rope will be at a much smaller (more acute) elbow angle when compared to shorter-armed guys at the end point of each rep. This difference can hinder how much rotation they can achieve at the shoulder joint, compared to what they could achieve if given the opportunity for a wider grip. The same problem exists for big guys with tight shoulders, pecs, or triceps. Ropes come in varying lengths, but many gyms feature ropes that are fairly short. Home and condo gyms are even worse. Since they usually attach to a carabiner, a smart move would be to instantly increase the length of the ropes by doubling them up. Put two sets of ropes on one carabiner and pull them long. Now you’ve instantly got a double-sized rope to do your pulls. Another benefit comes in the form of physics. Intentionally trying to “spread the ropes” on each rep requires a lifter to create outward (lateral) force at the same time he creates resistance against a horizontal force angle. Because of this, it proves much more challenging for the target muscles (kind of the same way squatting with banded knees works). In short, it won’t take as much weight to get the same result due to your “utilization of space” within your range of motion. As a bonus, all of this applies perfectly to triceps rope pressdowns too. 4 – Use an Incline Bench for Foot-Elevated Split Squats It can be a real hassle for someone who has limited ankle mobility to get to a reasonably comfortable starting position on rear-leg elevated split squats. Many debate between “squishing the bug” on the flat
Origin: 4 Cool Fixes For Awkward Exercises
