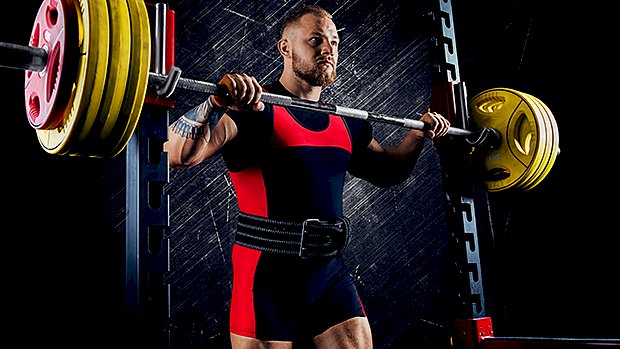
 Squats Feel a Little Clunky? Here’s a quick and easy fix to try: Pump up your hamstrings BEFORE you start squatting. Yes, you read that right. Isolate your hamstrings and chase a pump before you start your first set of heavy squats. Banded hamstring curls work great: Grab a band and loop it around something solid. The band should be around ankle to mid-shin height. Hook your feet into the band the way I’m doing in the video. If you don’t you’ll end up rolling over and the band will slip off. Move far enough away so there’s no slack in the band, but also the resistance is appropriate as you flex your knees. Of course, choosing the right band is key here too. Laying on a foam pad is optional. You can also roll up a towel. This helps with back and pelvic positioning and prevents unwanted movement coming from your lumbar region. Once you’re in place it’s pretty simple. Just pull your heels into your butt, flexing your hamstrings hard. Your goal is to get as much blood in there as you can. Do 2-3 sets of 20-25 reps. Here’s What Happens Any squatting pattern will instantly feel smoother. You’ll hit depth easier, meaning more efficiency and less wasted energy. Any clunky hips or knees you might’ve had before will feel significantly better. And because of all this, you’ll build more muscle and have better longevity in your lifts. Now, I’m not saying this works for everyone. If you’re an elite-level squatter and grooving that pattern regularly, it’ll likely not make much of a difference. It also doesn’t have as much of an effect on low-bar versus high-bar squats. If you’re a more hip-dominant squatter then the hamstring fatigue will likely negate all other benefits. Just remember, this is more of a hypertrophy and longevity technique. If you’re not barbell squatting, these still work great for most heavy knee-dominant
Origin: Tip: Squat Day? Do This First
Tag: FIRST
Tip: How to Get Your Very First Pull-Up
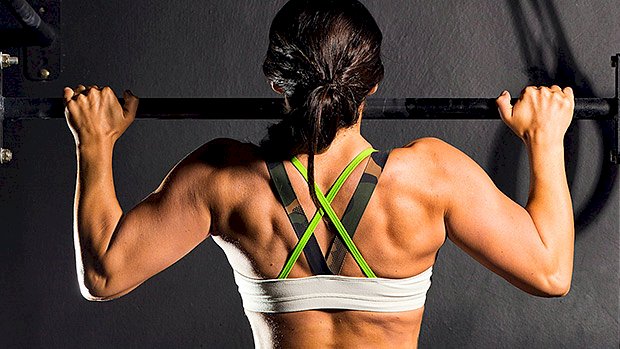 I remember how frustrating getting my first pull-up was. There were times just spent looking up at the bar and wondering why I simply wasn’t moving. The best way I found to finally get my chin over the bar was a combination of similar but easier movements, combined with variations which took away a lot of my bodyweight. Let’s break each of those exercises down: Australian Pull-Ups This is a horizontal row which gets you used to pulling your bodyweight. With your feet on the floor you can easily adjust the assistance you give yourself. The more horizontal you are and the further away your feet are from your hands, the harder it is. The horizontal position should make it a bit easier for you to engage your lats. Try to keep your body straight and not bend at the hip as you pull. Negative Pull-Up This uses the full range of motion of the pull-up, but in reverse! It’s no secret that the eccentric (negative) part of any movement builds a lot of strength, and pull-ups are no different. Learning to control that entire range on the way down will carry over to when you’re going back up. If you jump up and immediately start to fall, build yourself up to a comfortable 10-second hold with your chin over the bar (the “top” of the rep) before you start doing the negative. Low-Bar Pull-Up Like the Australian pull-up, you can adjust how much of your bodyweight you remove by assisting yourself with the feet. Ideally you want to be on the tiptoes or the backs of your toes rather than the ball of your foot, encouraging you to use as little assistance as possible. This is where your technique starts to come into play and you need to focus on engaging your lats for the pull, not using the biceps which is a common beginner mistake. (See A Quick Fix For Better Lats for more info.) Think about pressing into the bar from your lats or “bending the bar.” Play around until you can feel your lats working. Banded Pull-Up These often get a bad rap because when the band is at full extension it will give you the most assistance. This means you get the most help at the bottom of the rep which reduces the need for you to learn how to initiate the pull with your lats. However, they’re great for volume. You just need to be disciplined. Be hard on yourself and only use a band which will allow your 5 reps to be doable, but not easy. Even if you start to only get 3 or 4 reps on your last set, it’s better to push yourself here than simply be bouncing up and down on a band – that will get you nowhere. Eventually you want to be doing these with a very thin band. Once you’re getting close, attempt a rep or two without a band. You might just surprise yourself. The program is simple and organizes the movements into two quick sessions that you can easily fit into your gym schedule: Session 1 Australian Pull-Up:3×10 Negative Pull-Up:5×3 Session 2 Low-Bar Pull-Up:5×5 Banded Pull-Up:5×5 Adjust the assistance of each exercise to reduce your bodyweight so that you can complete all the reps. Your aim over time isn’t necessarily to increase the reps or sets that you do, but instead to improve the movement itself and slowly adding in more of your own weight. For example, you’d aim to get more horizontal on the Australian pull-up, go slower on your negative, use less assistance from your feet on the low-bar pull-up, and use a thinner band on your banded pull-up. Consistency is key. Bodyweight training can be tedious, but the rewards are very satisfying. Pull-ups teach you how to properly engage your lats and give you a ton of shoulder stability for any overhead
Origin: Tip: How to Get Your Very First Pull-Up
Tip: Do This Exercise FIRST on Back Day
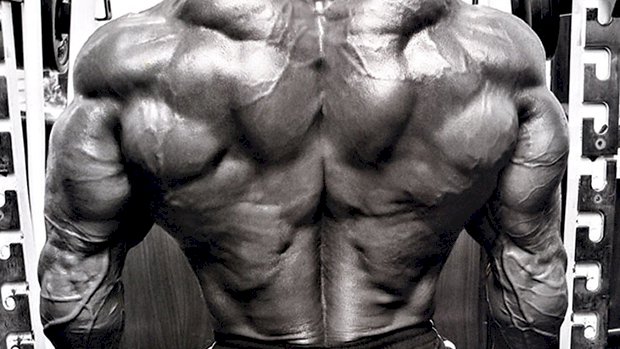 Do a stretch-based back movement before any big pulling exercises on back day. This “primer” exercise reverts your body into a normal posture by getting you into the opposite positions you most likely spend most of your day in. The single most effective movement to prime the back is the straight-arm pulldown and its variations. This movement involves isolating the latissimus dorsi. In most cases, it’s functionally shortened. Doing both an end-range stretch along with a peak concentric contraction works wonders. Straight-Arm Pulldown The straight-arm pulldown is based on internal tension. If you’re using a cable stack, it’s less about the external load you’re placing on the tissues and more about how you’re building and bracing your tension throughout a full range of motion throughout the set. As you’ll see, this movement will be humbling, so make sure you set your ego aside and train this exercise for the feel and
Origin: Tip: Do This Exercise FIRST on Back Day
