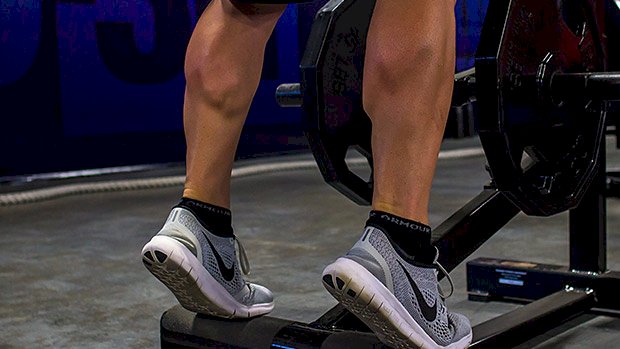
 Even experienced lifters struggle to build their lower legs, but it IS possible to develop them. You’re already familiar with basic straight-knee calf work, like the standing calf raise. And you’re also well aware of bent-leg, seated calf raises. That’s a good start. There’s a reason to do both types: Your calves are made of the gastrocnemius complex and the soleus. Research shows that doing calf raises (ankle plantar flexion) with a straight-knee creates superior gastrocnemius muscle activity, while doing these raises with a bent-knee creates superior soleus muscle activity (1,2,3,4). So it makes sense to do at least one calf exercise in each knee position to maximize your training time and efficiency. But are you stuck in a rut doing the same two lifts over and over again? Most are. Luckily, there are other great calf exercises in both categories that you can add to your arsenal. Get more out of your lower leg work by picking at least one calf exercise from the straight-knee category and one from the bent-knee category. Two Straight-Knee Calf Exercises These two exercises require you to perform a heel raise in a manner that involves propelling yourself forward as well as upwards on each step. The plantar flexion action is more similar to that of walking and running. Dumbbell One-Leg Leaning Calf Raise Stand facing a wall with your feet hip-width apart while holding a dumbbell in your left hand. Place your right hand on the wall at roughly chest height and lean your body forward while keeping your torso, hips, and knees all in a straight line. Bend your right knee and step your left leg backward, placing it as far behind you as possible with keeping your heel on the ground and your left foot pointed at the wall. Your left knee, hip, and torso should all form a straight line. Lift your right foot off the floor while keeping your right knee bent at around a 90-degree angle. While maintaining your body position, lift your left heel as high as you can off of the floor so that you end up on the ball of your foot. Slowly lower yourself until your heel touches the floor to complete the rep. Don’t allow your left foot to rotate outwards at any point. Keep it straight and pointed at the wall throughout. Don’t bounce. Control the lowering (eccentric) portion of each rep by allowing your heel to touch the floor gently – not to fully rest on the floor – until all reps have been completed. Do all the reps on the same side before switching sides. Dumbbell Walking Calf Raise This simply combines a dumbbell farmer’s walk with a calf raise. Stand at one end of the room and hold two heavy dumbbells, palms facing your body by your hips. Walk to the other end of the room. On each step, as soon as your foot hits the ground, quickly lift your heels as high as you can off the floor, ending up on the balls of your feet. Lower yourself down after each step with control until your heel touches the floor to complete the rep. Do the heel raise in a smooth and coordinated action with each step. Two Bent-Knee Calf Exercises It’s important to notice that both of these involve positioning your working side foot closer to you. This increases the range of motion demand, making it more productive. Half-Kneeling Dumbbell Calf Raise Using a mat or rolled towel for comfort. Get in a half-kneeling position with your torso straight and both knees bent 90 degrees. Move your front foot backwards underneath your same-side thigh as far as you can while keeping your heel on the floor and your foot straight. Place the side of a dumbbell, or the bottom of a kettlebell, on top of the knee (not on top of your mid-thigh) of the same foot you just moved toward you. Push your toes into the ground and lift your heel as high as you can off the floor, ending up on the ball of your foot. Slowly lower your heel until it touches the floor to complete the rep. Don’t bounce. Control the lowering portion by allowing your heel to touch the floor gently. Do all the reps on the same side before switching sides. Seated Dumbbell Calf Raise Sit tall on a bench with your feet roughly hip-width apart. Move one of your feet backward underneath your same-side thigh as far as you can while keeping your heel on the floor and your foot straight. Place one side of the dumbbell, or the bottom of a kettlebell, on top of the knee. Push your toes into the ground and lift your heel as high as you can, ending up on the ball of your foot. Slowly lower your heel until it touches the floor to complete the rep. As always, no bouncing.
Origin: 4 Calf Exercises You’ve Never Tried
Tag: Exercises
Tip: Two Rotational Exercises for a Powerful Core
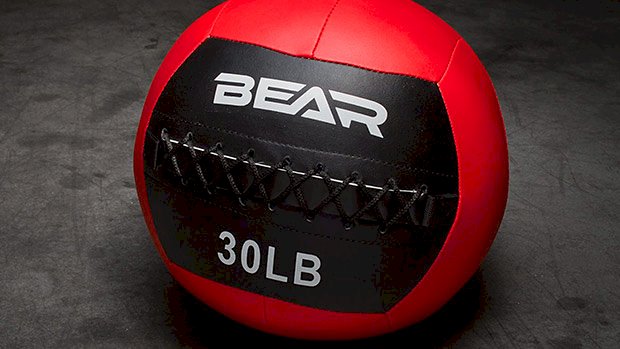 Photo Credit: Bear Fitness Rotational power is the forgotten component of most training programs. Whether you’re hitting, throwing, punching, or kicking, almost every sport requires some sort of rotational explosive ability. Use these medicine ball drills to develop a more powerful midsection. Partner Rotational Throw The person performing this drill should kneel with the knee closest to their partner on the ground and be turned sideways to their partner. Have your buddy perform a medicine ball chest pass to your outstretched arms. Brace your core and resist the rotation as you catch the medicine ball. Use your core to twist your body (keeping your arms relatively straight) and fire the medicine ball back at your partner. Bonus points if you knock him over. Don’t have friends? Try this one: Rotational Wall Throw Place your body to the side of a wall. Using your core, powerfully rotate and throw the ball into the wall. Brace your core and catch the ball as it comes back, resisting rotation. Pro Tip: Make sure the wall is reinforced and not drywall so you don’t piss off your local gym owner. Although these drills can be performed at any point during your workout, I’d recommend doing them before strength training. The force production will get your nervous system fired up and ready to lift
Origin: Tip: Two Rotational Exercises for a Powerful Core
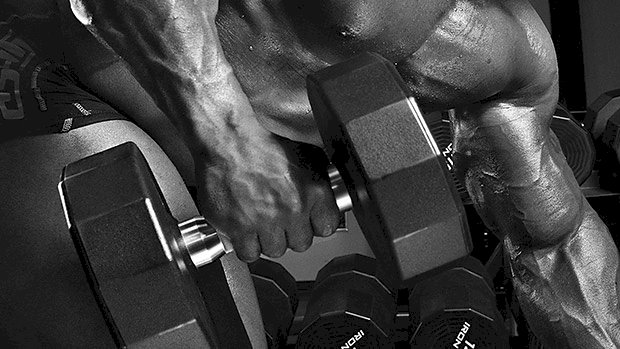
Tip: 4 Unique Exercises for a Stronger Grip
 The strength of your grip is crucial to your athletic and training performance. Whether it’s locking out a PR deadlift, choking out your partner in jiu jitsu practice, or giving a firm handshake upon first meeting someone, a strong grip is the ultimate sign of a strong dude. As an added bonus, training your grip also increases recruitment of the muscles of your rotator cuff, so you get an added benefit of healthier shoulders as well as a vice-like grip. Carries and deadlifts are the obvious (and best) choices for developing a crushing grip, big traps, and girthy forearms. But these heavily loaded exercises are quite taxing on the CNS, so while they should be staples in your program, you can only do them a few times per week with any substantial load. Using a battle rope for these common exercises below will give you a big return on your training investment by: Increasing the frequency with which you can train your grip. Improving your joint positions due to irradiation – when you grip harder, you reflexively contract your rotator cuff, glutes, and abs harder. Better joint positions lead to better muscle recruitment, which means more force development and less wear and tear. There’s nothing wrong with doing these exercises with their traditional tools, but if you want to get bigger forearms, a stronger grip, and healthier shoulders, they’re worth subbing in. 1. Battle Rope Curl Set a battle rope up over a chin-up bar or power rack. Using a neutral grip, keep your upper arms perpendicular to your torso and curl your thumbs to your hairline. Keep your abs braced while contracting your glutes and quads to eliminate cheating. Use these in place of your last biceps exercise of the day or at the end of a pull-focused day for 2-3 sets of 10-12 reps. 2. Battle Rope Triceps Extension This will smoke your abs, triceps, and forearms. Set yourself up with a battle rope over a rack or chin-up bar. Keeping your upper arms perpendicular to your body, bend at the elbows until they pass by your face, but not so far as to lose tension on the triceps, before extending them back out. Brace hard so there’s no lower back extension at any time. The lower the angle, the more of your weight you’ll have to handle. Start conservatively and work your way down closer to parallel to increase the difficulty. Perform 2-3 sets of 10-12 at the end of an upper body or arm day. 3. Battle Rope Face Pull Face pulls are key no matter who you are, but especially if you have shoulder impingement issues. These will give you more activation in your rotator cuff and increase the subacromion space, which will better position the glenohumeral joint, yielding better muscle activation in the rear delts and upper back. Set up as if you were going to do an inverted row, heels in the ground and upper arms perpendicular to your torso. With your elbows wide, drive them back while pulling your thumbs towards your ears. Do 2-4 sets of 10-12 before, between, or after heavy press sets, or at the end of a pull-focused day. 4. Inverted Row Instead of traditional inverted rows using suspension straps, try this variation instead. Drive your elbows back and pull your shoulder blades down into your back pockets, without extending through your lower back. Around 2-4 sets of 10-12 reps is a perfect finishing touch on any pulling-focused training
Origin: Tip: 4 Unique Exercises for a Stronger Grip
15 Exercises for a Powerful Upper Body
 The Need for Speed Speed work is most often used by those wanting to build power and explosiveness. When it comes to upper-body power training with bands (dynamic effort) a lot of non-powerlifters copy what they see powerlifters doing – attaching Superbands to each side of a bar and doing fast bench presses. That’s fine. However, you don’t need to just use a barbell to do power training with bands. In fact, it makes more sense to do multi-angled speed work for both pushing and pulling actions. Here are a variety of banded power training exercises for non-powerlifters: 1 – Speed Press These are JC Bands, but you can do these exercises by anchoring regular bands or bands with handles to a stable piece of equipment. This allows you to keep the bands longer, which creates a smoother, less drastic resistance change as they lengthen. Using a split-stance provides a better base of support so you’ll be able to generate maximum force. Press until just before your elbows fully extend, and allow your elbows to travel just beyond your torso on each rep. Sets and reps: 3-5 x 8-12 seconds of as many reps as possible (AMRAP) Use a band tension and stand at a distance that allows you to move at a pace of at least 3 reps per second. 2 – Alternate-Arm Speed Press Press until just before your elbow fully extends, and allow your elbow on your back arm to travel just beyond your torso. Be athletic by using a little rotation at your torso and even your lower body. Make sure they work together in a smooth and coordinated manner. Sets and reps: 3-4 x 6-8 seconds AMRAP, per stance Move at a pace of at least 3 reps per second. 3 – Speed One-Arm Press If you’re pressing with your right arm, stand in a split-stance with your left leg in front. Be athletic by using a little rotation, shifting weight at your torso and lower body to work together in a coordinated manner. Sets and reps: 3-4 x 8-12 seconds AMRAP, each side Perform at least 2 reps per second. 4 – Speed Incline Press Keep the bands in contact with the top of your arms. You want the pressing action of your arms to be in line with the angle of the bands, which should be set at roughly 45-degrees. Switch lead legs on each set, but it doesn’t matter if you end up doing one more set on one stance versus the other. (That goes for most of these exercises.) The lower body is doing less than when doing the alternate-arm versions because there’s no rotational element involved. Sets and reps: 3-4 x 8-12 seconds AMRAP Move at a pace of at least 3 reps per second. 5 – Speed Incline Alternate-Arm Press Press each arm at the same angle as the band. Press until just before your elbow fully extends, and allow the elbow of your back arm to travel just past your torso. Sets and reps: 3-4 x 6-8 seconds AMRAP, per stance Do at least 3 reps per second. 6 – Angled Barbell Speed One-Arm Press In my Ultimate Guide to Landmine Presses, I talked about using a band to perform presses. You can also use the band for dynamic effort reps by performing angled barbell presses as fast as you can. Sets and reps: 3-4 x 8-12 seconds AMRAP, each side Use a band for tension and stand at a distance that allows you to move at a pace of at least 2 reps per second. 7 – Angled Barbell Speed Leaning One-Arm Press This variation is more like an incline pressing action, whereas this leaning torso version is more like an overhead press. For both versions, make sure the band is anchored on your same-side foot directly underneath your pressing arm. Same sets and reps as above. 8 – Speed One-Arm Overhead Press You can use a Superband for this but here I’m using an NT Loop because I designed it to be a far more comfortable and stable band to place around your limbs, waist, or hips. Sets and reps: 3-4 x 8-12 seconds AMRAP, each side Move at a pace of at least 2 reps per second. 9 – Speed Row Make sure not to alligator-arm this. Using a split-stance provides a better base of support. Pull until your elbows travel just beyond your torso, and extend your arms just before your elbows fully extend on each rep. Switch lead legs on each set. Sets and reps: 3-5 x 8-12 seconds, AMRAP Do at least 3 reps per second. 10 – Speed Alternate-Arm Row Pull until your elbows travel just beyond your torso, and extend your arms just before your elbows fully extend on each rep. Use a little rotation at your torso and even your lower body so they work together in a smooth manner. Sets and reps: 3-4 x 6-8 seconds AMRAP, per stance Do at least 3 reps per second. 11 – Speed One-Arm Row If you’re pulling with your left arm, stand in a split-stance with your right leg in front. Sets and reps: 3-4 x 8-12 seconds AMRAP, each side Do at least 2 reps per second. 12 – Speed Overhead Pull Anchor the bands at around bellybutton height and hinge forward at your hips so your torso is roughly parallel to the ground. This allows you to use a vertical pulling action like a lat pulldown. On all of
Origin: 15 Exercises for a Powerful Upper Body
5 Violent Core Exercises
 To build a strong, athletic body you can’t skip out on core training. It may be the one thing that’s holding back your progress. But to train the core for performance, you need to address its main functions. The 3 Main Functions of the Core: Transfer force between the feet and hands Transfer force where you want the force to go Transfer force without energy leaks When you’ve trained the core the way it’s meant to be trained, you’ll run faster, jump longer and higher, throw further, strike harder, and simply be a strong, resilient beast in your sport. A strong core will also keep your spine and body healthier. It’s vital for both performance and health. The Top Exercises You can perform thousands of different ab and core exercises. But I’m a strong proponent of keeping the spine rigid while the hips, legs, and arms move. This doesn’t mean that I’m against spinal flexion, sit-up variations, etc. I simply see more direct carryover to performance from training the ability to let the hips, shoulders and arms do the movement while the spine stays mostly rigid. 1 – The Athletic Plank The regular plank is a fine exercise to teach core stability and the ability to generate full body tension. (If you’re going to do them, look up the RKC version.) Once you’ve mastered the regular plank, it’s time to introduce a more reactive version. During functional movements and sports, the core has to respond, not simply work in and from a passive position. This exercise will teach you to respond and react by creating stability and stiffness. To do it, start by moving the hips up and down slowly. Then “jump” up so the feet lift from the floor. When you land, you instantly want to stick the landing in a regular tight plank position. When you’ve got this down, jump and land in a rotated position, switching sides from rep to rep. To be explosive you have to be able to go from ON to OFF and back to ON again. The faster you can go from active to relaxed, and from relaxed to tight, the better it is for your athletic ability. Master this and your performance will increase. 2 – The Bulletproof Side Plank This is the plank’s forgotten sidekick. That’s not good because too much focus on the front side of the body (by doing only regular planks) will lead to a big gap in your core strength. Without directly loading the sides, you’ll leave a hole in your performance. You’ve probably never done REAL side planks. I can say this because I’ve watched hundred of athletes do them and they all compensate, rotate, and/or flex their hips. Why? Because their core muscles are weak in this area. Most people struggle with the bulletproof side plank in the beginning because it forces you to use the right muscles. It’s simply hard to cheat this exercise! With the bulletproof side plank, your heels, butt, and shoulders must be touching the wall. Your elbow can be placed a bit out from the wall for stability. The head will preferably touch, but if you have neck issues it can remain wherever it’s most comfortable. The first step is to be able to hold the position for at least 30 seconds. When this is mastered, add lateral movement as shown in the video. This is a great way to train the lateral core and hip strength and stability. 3 – Dumbbell Core Rotation Once you’ve mastered the moves above, you’re ready for rotations. Rotation – and the ability to be its master – is the foundation for athletic performance and a healthy body. Most injuries and compensations happen because force is “leaking out” in movements. This leaking is often a result of training mainly in the sagittal and frontal plane. For example, if you only train squats, deadlifts, lunges and side lunges, you set yourself up for failure. These are all good, but without a strong focus on rotation you self-sabotage your performance. Training rotation will automatically train and teach anti-rotation as well, especially if you’re turning up the volume (the speed of execution). To do the exercise, stand upright with a dumbbell in each hand, placed in a neutral hammer, curl-like position. From here, start to swing the dumbbells from side to side in a circular motion. The point is to accelerate, decelerate, and re-accelerate with the whole body and core engaged. The great thing about it? It instantly teaches the importance of where the rotation force is coming from – the feet. A common cause of many problems is a lack of proper “rooting” of the feet. This exercise will reveal it. You can either do this exercise with a “core” focus, which means you’ll mainly focus on the abs/low back area, or you can integrate more hips in the movement. In the former version, the feet are locked on the ground at all times. In the latter version, you allow your heels to come off the ground, creating movement throughout the balls of your feet. Obviously your whole body is working in both versions, but you can direct the focus where you need it. Start with feet locked in. 4 – The Athletic Landmine
Origin: 5 Violent Core Exercises
16 Unstable Exercises That Actually Work
 From Rehab Clinic to Your Gym If you mention “unstable” and “training” in the same sentence, there’s a good chance some knowledgeable meathead will stuff you into a locker. And for the most part, doing so is warranted. BOSU balls, wobble boards, and other unstable shenanigans belong in a physical therapy office, not a gym – and therein lies the problem. The unstable surface training (UST) craze began in clinical rehab settings after showing some promise in treating particular ankle issues. As is often the case, though, something that was useful within a single context took off and weaseled its way into the mainstream. Hipsters doubling as personal trainers began putting their clients on balance boards and Swiss balls while they juggled kettlebells and talked trash about egg yolks. The problem is, UST doesn’t hold any water outside of the physical therapy realm. As a matter of fact, multiple studies chastise its use for injury prevention as a whole, limiting its efficacy to individuals with a history of ankle sprains. Other studies have found that people who train on unstable surfaces are more likely to experience significant injuries. Does that mean that UST is more likely to contribute to injuries? You can be the judge. If there’s one thing that the research undoubtedly proves, though, it’s that training on a STABLE surface is the clear king for getting bigger, stronger, and more athletic. But not all unstable training is created equal. Some unstable training methods and exercises can provide unique benefits that, when implemented properly, can stimulate newfound gains in strength, hypertrophy, and performance. To reap the unique benefits that certain forms of instability can provide, give the following methods and exercises a go. 1 – Use Unstable Exercises as Primers in a Warm-Up To get bigger and stronger, your training should be centered around exercises that can be sufficiently loaded and progressed over time. For the most part, exercises that fail to meet these two criteria serve little to no purpose for gains in strength and size. But there are a number of unstable exercises that can be valuable when used as “primers” prior to your regular training. Why? When performing certain exercises with slight instability, each rep reinforces proper movement mechanics, improves intra- and inter-muscular coordination, forces joint stabilization, and grooves stability. By checking these boxes, your muscles and nervous system get to a place where they’re better equipped to handle heavy loads with pristine technique. Here’s a few examples of how to get primed to lift using unstable surfaces: Chaos Push-Up One of the recurring themes of intelligent unstable training is a constant demand for core stability and control, and the chaos push-up is no exception. On top of pushing the anterior core to the max, it targets the entire musculature of the upper body while strengthening the scapula and shoulder stabilizers. Since the oscillations are significant, chaos push-ups require a slow tempo and perfect mechanics, which translates to increased shoulder stability and better pressing mechanics. Half-Kneeling Bottoms Up Kettlebell Press Who said unstable training has to involve fancy equipment? By nature, holding a kettlebell in a bottoms-up position is inherently unstable. This will improve your pressing mechanics, help you build healthier shoulders, and get a slight pump. And as an added bonus, the half-kneeling position requires full-body tension in order to resist extension, rotation, and lateral flexion at the spine. The only bad news is, you’re going to have to check your ego and use lighter weights. Because of the movement’s unstable nature, a high demand is placed on maintaining stability in the shoulders, forearms, and hips. Single-Leg Stability Ball Hamstring Curl Relax, tough guy. The stability ball isn’t completely worthless. The benefits of these curls are two-fold: First, they train knee flexion (working leg) and hip extension (elevated leg) simultaneously, unlike most hamstring exercises that focus on one or the other. Second, the unilateral aspect of the movement requires balance, stability, and control. Plus, you’ll elicit a brutal hamstring pump that will prime your knees and low back for optimal function prior to squatting. Rear-Foot Elevated Split Squat With this variation, you’ll place your back foot on a band. Why the band? Well, when doing rear-foot elevated split squats, most lifters allow their back leg to take on a large part of the work. While that isn’t necessarily bad when the goal is overall load, using a band to elevate the back foot forces the front leg to work in isolation. At the same time, the band necessitates tri-planar balance and hip stability, similar to a pistol squat or one-leg squat to bench/box. Unlike those two movements, though, the rear-foot elevated split squat actively engages the hip flexors and forces a deep stretch. The result: healthy hips,
Origin: 16 Unstable Exercises That Actually Work
The 5 Greatest Rowing Exercises
 Are you a powerlifter? Increase your row and you’ll bench more. Do you fight? A stronger row means harder strikes and a tighter defense. Just training for life? A stronger row will improve shoulder health, posture, and general performance. Done correctly, the row variations below are probably all you’ll ever need in this exercise category. So whether you need to build a foundation, work around a low back or shoulder injury, or simply have forgotten the basics, one or all of these exercises will literally get your back on track. 1 – T-Bar Row The T-bar row is a true classic and one of the best overall row exercises. Yes, it’s the one you saw Arnold perform in Pumping Iron. It requires you to use your lower back and hips to stabilize the trunk while you perform rows using your upper back muscles. So, in addition to building pulling strength and your upper back, the T-bar row also develops lower back strength and stability. Start with a light load and place your body in a tight and stable position. Focus on generating force from the ground (by pressing the heels out to the sides to activate the hips) and keeping the abs engaged (pull the ribs down and hold what’s in effect a plank position). That’ll force you to pull with the right muscles instead of just compensating with your lower back. 2 – Chest-Supported Dumbbell Row Besides being more low-back friendly, the chest support makes it hard to cheat and use momentum. This annoying fact will damage a lot of egos and is probably the reason why some lifters often prefer seated cable rows – they make it easy to use a lot of body English. To do the chest-supported row, you need to actually support yourself with your chest and not just lie flat down on the bench. Take a look at how I place my hips in the video and you’ll notice that I adopt a solid stance, thus creating tension from the feet, through the hips, through a stable spine (ribs down, abs engaged to not hyperextend and “leak force”), all the way to the chest. You need a tight body position to get the most out of the exercise and pull with the muscles that are supposed to be doing all the pulling. Too many people mess this up and wobble all around. 3 – One-Arm Dumbbell Row This is probably the best overall barbell/dumbbell row exercise. Sure, it builds your ability to lift things from the ground, but it also improves your defensive abilities against an opponent who’s trying to pull you down or knock you off balance. It does all that by enhancing thoracic spine rotation and extension while building stability in the rest of the body. You really have to use all your core muscles to fight the body’s inclination to rotate and side-shift, meaning you’ll create actual, real-life, functional core strength. Even though this is a classic, many butcher it by failing to achieve full body tension, which leads to energy leaks. Aside from keeping a solid stance, the most important technical aspect is to push the supporting hand hard into the bench while you pull. This “diagonal” tension makes the lift stronger and safer. 4 – Inverted Row Most people struggle to perform this correctly because it requires being able to activate the right muscles. If you can’t pull yourself all the way up to touch the bar, you simply lack upper back strength, period. If this applies to you, no wonder your shoulders hurt when you do bench press, push-ups, or pull-ups. Another great aspect of the inverted row is the need for posterior chain involvement. The entire backside needs to be activated at the same time, which is different from a lot of movements where you just focus on the plank and the “front core.” Getting used to stabilizing your backside in this way will improve your performance in other lifts and activities as well. Oh, and it’s one of the safest pulling exercises you can do when your low back is messed up. 5 – Standing One-Arm Cable Row The ability to perform resisted diagonal and rotational movements is crucial to human functions like walking, running, climbing, and throwing. The trouble is, regular/classical strength training lives primarily in the land of bilateral and symmetrical loaded exercises, with little thought given to rotation. Obviously, some exercises include anti-rotation tendencies, but few traditional exercises involve actual rotation qualities. The standing cable row is a great introduction to rotational training. While the main focus is on the row, it will improve and train thoracic/upper body mobility and core/hip stability. This makes the body more fluid and
Origin: The 5 Greatest Rowing Exercises
9 Underrated Exercises You Need
 You’re probably not taking advantage of these underappreciated exercises, but you should be. They’re surprisingly beneficial. Here’s what to do, why, and some set and rep recommendations for each. 1. Stability Ball Wall Squat By using only a ball, a wall, and a set of dumbbells, this move basically offers the same benefits as a Smith machine squat… but without the Smith machine. Oh wait, you still think the Smith sucks? It’s true, the fixed bar path of the Smith machine isn’t a great way to improve your free-weight squat performance since the two movements involve different mechanics, but not everyone wants to be a powerlifter. And not everyone judges every lower-body exercise by how it relates to their barbell squat. For the purpose of building and strengthening your quads, both the Smith machine squat and the wall squat are great options. Plus, who says you can’t do both? Liking one thing doesn’t mean canceling out the other. These make for a great burnout move towards the end of a workout. Set and Reps: 2-3 sets of 12-30 reps. 2. Chest Supported T-Bar Row Many lifters don’t appreciate the unique benefits this machine offers relative to most other horizontal rowing variations. T-bar rows fit your strength curve more closely than most other rowing exercises. When doing horizontal rowing exercises, the lever arm is at its longest when your humerus is perpendicular to the force vector. So if you’re doing barbell bent-over rows or one-arm rows with your torso roughly parallel to the floor, the lever-arm is at its longest when your humerus is parallel with the floor (in-line with your torso). This is at or very close to the end of concentric portion of the range of motion. But when doing the T-bar row, the weight is getting lighter as you pull it because the higher the angle of the bar (closer to being vertical), the more weight is going into its pivot point, so it offers a mechanical advantage over the load as you pull it in on every rep. Sure, you can do T-bar rows by simply anchoring a barbell in a corner. However, the machine version is far less awkward, and the chest pad support allows you to deal with heavier loads. It also makes it more difficult to cheat. Set and Reps: 3-5 sets of 6-20 reps 3. Angled-Barbell Leaning Press with Band Back in 2011, I coined the term “angled barbell training” to represent the wide variety of great exercise options offered when using the Landmine Device (or with a barbell in a corner). I also co-produced the first DVD on the subject with Bert Sorin, the original inventor of the Landmine. And today the standard angled-barbell (landmine) press is a pretty popular exercise. That said, an underrated version of it is to simply lean your torso forward to change it from a diagonal pressing action to a vertical (overhead) pressing action. This is much like how an incline barbell press creates a different training stimulus to an overhead barbell press. I failed to cover the leaning variation in The Ultimate Guide to Landmine Presses. However, I did discuss the benefit of adding band resistance to angled barbell presses: “As you press the barbell, the weight load actually gets lighter. Since you’re getting stronger as you extend your arm (due to creating a shorter lever arm), it makes sense to add a band for accommodating resistance: the band creates a continually greater resistance challenge as you continually gain a mechanical advantage.” Just like with the standard angled barbell press (where your torso’s more upright), if you’re in a split-stance, you anchor the band underneath your front leg. If you’re in a parallel stance, you anchor the band underneath the same-side foot as the arm you’re pressing with. Set and Reps: 3-4 sets of 6-20 reps each side 4. Cable Chops (Horizontal and Diagonal) Back when I was coming up as a trainer, cable or wood chops were all the rage. Now, you’re hard pressed to find folks doing dynamic rotational training exercises like this, and it’s far more common to see anti-rotation (Pallof) presses, which I believe are overrated. Look at athletes in action and it’s obvious: the torso has an active role in rotational strength and power production in actions like throwing, golfing, batting, punching, etc. And if you want to improve your rotational ability, the principle of specificity dictates that you need to practice dynamic rotational exercises like cable chops. They’re great for teaching your torso and hips to work together to produce rotation. Set and Reps: 2-3 sets of 8-15 reps each side 5. Side-Lying Rear-Delt Flye Exercises like face-pulls, rear-delt flyes, and wide-grip rows maximally load your arms when they’re out to the sides, which is when the posterior shoulder musculature is in a shortened range. However, they neglect to strengthen the aspect of horizontal shoulder abduction when your arm is in front of, or across, your torso – when the posterior shoulder musculature is in a mid to lengthened range.
Origin: 9 Underrated Exercises You Need
6 Exercises for Pain-Free Shoulder Training
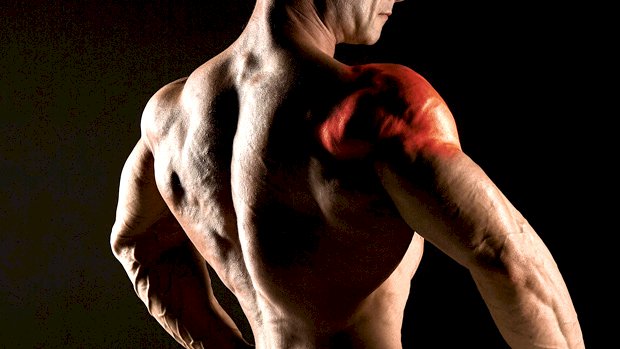 When dealing with a shoulder injury or shoulder dysfunction, you’ve got one task (other than diagnosing the injury or guessing the source of the pain): Pick the right exercises to optimize the results as best you can while avoiding pain or excessive inflammation. Here are some options. 1 – Rack Viking Press Assuming your gym doesn’t have a Viking press machine, the rack Viking press is a great alternative. It’s a pain in the ass to set up, but if you’re willing to go to the trouble, it can be an effective way to load the shoulders while still being relatively shoulder friendly. Many lifters find the Viking press to be an effective way to get strong overhead while avoiding existing shoulder issues. The advantage? It allows you to change your pressing angle to one that suits your anatomy by adjusting the height of the furthest safety pin (the one the bar is pivoting on). Pressing either overhead or horizontally with a neutral grip offers some shoulder-saving benefits too. It limits elbow flare and offers a more stable position for the shoulder to press from. More neutral-grip pressing like this could be the one simple change you make that gives immediate benefits to your shoulder health and performance. 2 – Landmine Single-Arm Press When experiencing shoulder pain, limit the amount of work you do above 90 degrees of shoulder flexion, especially if it’s a pain trigger. The angle of pressing here is effective for hitting the shoulders while the neutral grip adds to the shoulder-friendly nature too. It’s not often mentioned, but the landmine offers another benefit to cranky shoulders. The thickness of the end of the bar is like that of a fat-grip barbell. Many who experience shoulder pain claim to have less pain when using a thicker barbell. We’re not sure why, but it might similar to what we see with bottoms-up kettlebell pressing where there’s an irradiation effect with increased shoulder muscle activation. 3 – Elbow Gripped Lateral Raise Iso Overhead pressing can be a pain and inflammation trigger, but so can more isolated shoulder exercises like conventional lateral raises. Switch to performing lateral raises in the scapular plane of motion. Instead of lateral raises to the side (frontal plane), try shifting the angle 30 degrees forward. Not only do the deltoid and supraspinatus have a more direct line of pull in the scapular plane, there’s also increased activity of the external rotator muscles. If using the scapular plane isn’t enough to ameliorate pain, then you can try gripping some dumbbells in your elbows and doing iso holds instead (see video). This works great for clunky shoulders, but it’s also an excellent option for anyone who just wants to get their shoulder pump on. Bringing the dumbbells in simply shortens the moment arm and takes the wrists and elbows out of the equation. This makes it kinder on the shoulders while also helping those who have dodgy wrists or lateral elbow pain (golfers elbow). If you really want to blow up your delts, try this: A1 Lateral Raises (Scapular Plane):12-15 reps. Superset with… A2 Elbow-Gripped Lateral Raises, Max Iso:Hold for as long as possible using the same weight. Repeat for 2-3 sets, then struggle with the steering wheel to drive home. 4 – Pronating Dumbbell Press Swapping a barbell with dumbbells is an easy way to help prevent pain because the dumbbells offer freer motion and more natural shoulder movement. The space underneath the acromion process is already pretty tightly packed when you go overhead, and using a stiff barbell with an overhand grip doesn’t help. That’s not to say a barbell military press should be labeled as bad, but like most everything else, it has a time and a place. While you’re experiencing pain, though, switch to dumbbells, along with choosing a neutral or pronating grip. Adding a 1-second pause at the bottom of each rep is also a good way to minimize shoulder stress while forcing more muscle contractile components to do the lifting. 5 – Accentuated Eccentric Landmine Push Press The angle of pressing here is also relatively safe for most, providing you’re okay with the explosive nature of this move. If you’re not ready for this, just scale it back a bit by pressing with two hands and lowering with one. You’ll still get the eccentric overload, but it’ll be a little less “jerky” on the shoulder. 6 – Eccentric Lateral Raise Start doing your lateral raises in the scapular plane as explained earlier, but then combine it with some eccentric loading and you’ll get one heck of a shoulder-friendly isolator. Bending the elbows on the concentric (lifting) portion shortens the moment arm from the dumbbell to the shoulder, making the weight a little easier to handle. This also gives you the chance to focus on lifting with the elbows for pure isolation of the delts. On the way down, the moment arm lengthens to a more disadvantageous position, weight-wise, thus providing some eccentric (negative)
Origin: 6 Exercises for Pain-Free Shoulder Training
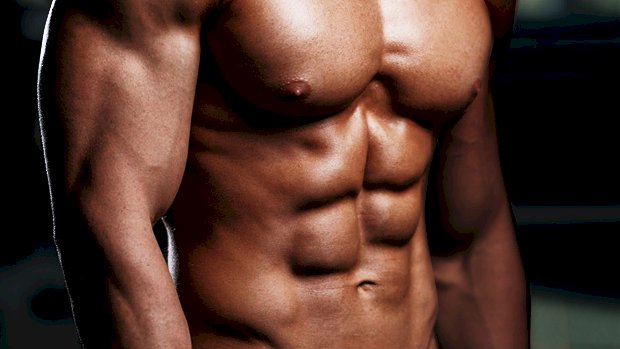
9 Superior Exercises for Abs and Obliques
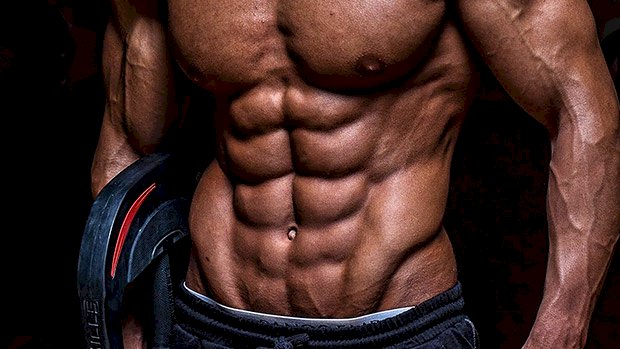 You’ve seen them before: Planks and anti-rotation or Pallof presses. They’re isometric exercises that require your abs and obliques to work by preventing your torso from side bending or twisting. They’re fine exercises, especially if you’re a beginner in your first weeks of training, or even if you’re an advanced lifter who simply enjoys them. Problem is, they’re overrated, and as a result, overused. The good news? You won’t need to do them if you’re already doing the upper-body exercises highlighted below. If you find planks and anti-rotation presses just as exciting as watching grass grow, you can swap them out for other things. The exercises listed here are more interesting and efficent options, and just as effective at creating an anti-spinal movement challenge on your abs and obliques. When it comes to program design and exercise selection, I follow the principle of minimizing redundancy and maximizing efficiency. These exercises minimize redundancy because they’ll give you the same core training benefits as side planks and anti-rotation presses, plus help you maximize your training efficiency by challenging your upper-body pushing musculature. Better Anti-Rotation Exercises These variations create a significant anti-rotation challenge on your torso. So if you’ve done them in your workout already, the Pallof press is just, well, redundant. 1 – Lock-Off Push-Up Can’t do a one-arm push-up yet? Try this. It’s a little easier to master than the one-arm push-up. Press up with one hand on top of the platform, kettlebell, or medicine ball. At the top of the push-up, lock off by fully straightening the elbow of the arm resting on the platform or ball. Place the other arm at your chest and pause for one or two seconds at the top of each rep, then slowly lower yourself. Do half the reps with your right arm elevated and the other half with your left arm elevated. Don’t allow your shoulders or hips to rotate at any time; keep your torso parallel to the ground throughout. 2 – One-Arm Cable Press This is one of the most underrated exercises. You likely don’t see it used in your gym or promoted online nearly as much as Pallof presses. The one-arm cable press places just as much, if not more, of an anti-rotation demand on your hips and torso musculature. For one thing, you can use heavier loads due to the split-stance position. And it gets more done than the Pallof press because it also involves the upper-body pushing musculature, plus the calves and hamstrings of the back leg, which prevent you from being pulled backward. It’s also not as boring to perform as the Pallof press. With the cable handle in your left hand and your elbow at roughly a 45-degree angle from your body, split your stance by putting your left leg behind your right. Keep your front foot flat and your back heel off the ground. Press the cable straight out in front of you. Slowly reverse the motion and bring the handle back toward you in a row-like motion while extending the opposite arm. Don’t allow your shoulders or hips to rotate more than a few degrees. Lean slightly forward to move heavier loads. To prevent the cable attachment from digging into your arm, use an extender strap (which can be purchased at a store that sells rock-climbing gear) between the handle and the cable attachment. You can also do this exercise with your lead leg on the same side as you pressing arm. This increases the demand on your torso muscles since the cable is trying to turn you in the opposite direction of your foot. Therefore, it can’t help you as much as when the cable is pulling your towards you back leg. 3 – Cable Bar Press Since it’s a variation of the one-arm cable press, it offers the same benefits, but also adds an element of reciprocal movement for your opposite arm. You’ve got to pull the bar as your pressing arm pushes it. The same general set-up and coaching tips from the one-arm cable press also apply here. As with the one-arm cable press, you can also do this exercise with your lead leg on the same side as your pressing arm, further increasing the demand on your torso. However, the tradeoff in doing so is that you can’t use as much weight. 4 – Reciprocal Cable Push-Pull If you don’t have cable bar, you can use this variation, which involves a reciprocal push-pull motion that also lights up your torso muscles to resist rotation. Once again, you can do this with your lead leg on the same side as your pressing arm, which will further challenge your core to maintain your torso position. 5 – One-Arm Push-Up The one-arm push-up is an advanced exercise, partly due to its high demand on the torso. However, there are ways you can gradually progress to doing your first one. And if you’re already a pro, there are ways to make it even more challenging. My guide on one-arm push-ups will tell you everything you need to know. Exercises that Replace Side Planks These exercises can effectively replace side-planks
Origin: 9 Superior Exercises for Abs and Obliques
