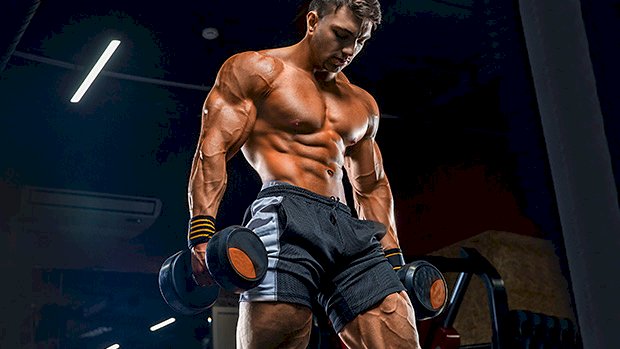
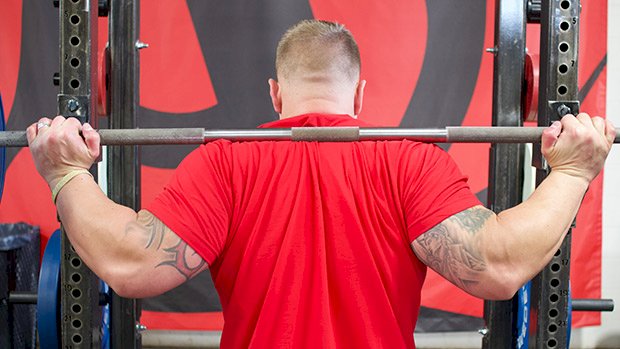
 Combination exercises have a bad reputation among serious lifters, but not all of them suck. The good ones hit more muscles, make you train at a higher heart rate, and force you to expend more calories. Why Most Combos Don’t Work Think of the lunge with a bicep curl: a popular combination exercise featured in every mommy-blogger routine. Sure, it’ll help burn some calories, but since when should the weight you use for bicep curls be the same as it is for a lunge? Common combination exercises attempt to kill two birds with one stone. But in reality, all they do is kill one bird and partially wound another. Effective combo exercises do a better job at matching exercises so that each one is more evenly stimulated by the same weight. They also add variety and help you build some athleticism while keeping your heart rate up. Hit your muscles efficiently and burn more body fat with these smart combination exercises: 1 – Deficit Reverse Lunge + Single-Leg RDL If your single-leg strength and stability need some work, then combining reverse lunges with a single-leg RDL would be a great way to start. Adding a deficit to the reverse lunge upgrades the difficulty, but you can always start without one. You can also go the other route and use the deficit for the deadlift component too, if you have the range of motion. The horizontal nature of this exercise can help you develop athletic speed and help you prevent hamstring injuries. If you’re just after aesthetics though, this has you covered too. Develop that glute and upper hamstring area (some call it the “glute-ham tie in”) and get a great butt pump with this killer exercise. 2 – Landmine Lawnmower This one has many names, but we’ll call it a “lawnmower” since it loosely resembles starting up an old lawnmower… albeit one that needs some forceful encouragement to get it going. The combo is highly transferable to athletic movements too, teaching an efficient lower to upper body power transfer. You’ll recognize the hip snap on the back leg in many power-based sports. To nail this lift, think of it kind of like a sumo deadlift mixed with a high-pull that goes into a rotational press. You’ll burn a ton of calories while satisfying your inner athlete. 3 – Split Squat + Iso Split Squat Row Both reverse lunges and split squats work similar muscles, but the joint loading mechanics differ. During reverse lunges, the hamstring of the lead leg also contributes to a “braking” effect. In general, split squats are a regression of reverse lunges, since you have a better opportunity to reinforce hip, knee, and ankle mechanics in a more controllable position. Combining a split squat with a cable or band row increases the quad loading on the lead leg since the force is pulling you forward. The row is also a good opportunity to hit your back without adding too much complexity. You can add the row in at the top of the movement or, for more difficulty, add it while holding the bottom position. You’ll get a lot out of these if your job requires you to sit all day. While the split squat will help open your tight hips, the row will combat hunched-over shoulders. Try these to combat your gorilla posture while smoking your quads. 4 – Reaching Rear-Foot Elevated Split Squat + Row Split squats can be progressed into rear-foot elevated split squats (RFESS), emphasizing greater load on the lead leg. Kind of like in the previous exercise, you simply add a horizontal row. But on this one, you reach forward and add more load through the hips, which is somewhat of a deadlift-squat hybrid. The reach forward will also load your lats more in their lengthened position. So as you hit the bottom and reach, you’ll be emphasizing hip engagement and a stretch of the lats. As you come up, you’ll be targeting mid-back and quads. The height of the cable can change the feel of the exercise too, so feel free to play with it. This exercise is the definition of “bang for your buck.” It’s got a moderate-high complexity, but with a high return. If you’re looking to hit it all, then grab a cable or band and give them a go. 5 – Rear-Foot Elevated Split Squat + Foot-Elevated RDL Staying with the RFESS theme, here’s another way to use them to hit your entire lower body. This one is starting to make its rounds in corrective exercise circles as a more complex rehab progression. As a combination exercise to hit your quads and hamstrings, it’ll really light up some weaknesses. 6 – Box Step-Off + Deficit Reverse Lunge Box step-offs are a good way to load a squat pattern while moving in the frontal plane. There are many options too. You can use a landmine, dumbbells, kettlebells, or a goblet position. And, of course, you can use them to build big legs. Combining box step-offs with another deficit exercise – a reverse lunge – will hammer your lower body even harder. Granted, in our “killing two birds” analogy you’re really just killing the same bird twice here. But if you’re looking to add
Origin: 10 Combo Exercises That Aren’t Stupid
Tag: Exercises
Tip: 5 Heavy Band Exercises for Legs & Glutes
 Here’s a useful way to set up a heavy band, providing both comfort and stability. Simply place a plate over the center of your band and stand on it. Compare doing this to just standing on a band and you’ll instantly feel the difference. The band will also stay closer to shoulder width throughout any exercise. Resistance bands have many uses. One is the ability to accelerate through increasing resistance. This can prime your nervous system, activate high-threshold motor units, and potentiate your whole body for a better workout. Banded single-leg RDLs are an excellent way to prepare for a heavy lower-body workout, especially if you do a few explosive reps, allowing the band to accelerate you back down. This will overload the stretch-reflex mechanism and prime your muscles for a good workout. Because single-leg RDLs done this way provide an element of stability (versus your standard single-leg deadlift) these can also be used as a teaching tool to improve single-leg stability and strength. 2. Banded Split Squat This is an excellent way to warm up your quads and get a bit of blood in there before your heavy lifts. Because of the angle of the band, there’s even greater quadriceps emphasis. As an alternative to the leg extensions and sissy squats, these can make for an excellent assistance exercise for your lower-body workouts. If you’re at home or in your Vegas penthouse suite wondering how you could do these without an Olympic-size plate, all you need is something flat and strong to place over the band. Or you could just step on the band. 3. Banded Pull-Through Cable pull-throughs are on par with 45-degree back extensions and reverse hypers for developing posterior chain strength in a manner that limits load through your spine. Loop a band around a post somewhere and boom… you’ve got yourself an effective pull-through setup. Because of the ascending resistance of the band, doing pull-throughs in this way tends to bias glute activation at the top, although you’ll get a nice stretch and a little load through your hamstrings at the bottom too. Excellent as a warm-up drill, to teach hip hinge technique, or to burn out your glutes. 4. Lateral Kneeling Hip Thrust Open up your tight adductors and wake up your sleepy glutes with these. Here you’re combining a band kneeling hip thrust with a great hip-opening drill. Throw these into your warm-ups for healthy hips and knees. They’ll also work as a high-rep booty-pumper – just don’t make eye contact. 5. Band ISO Bird-Dog A resistance band is one of the best ways to progress and load a bird-dog. So if bird-dogs are a frequent part of your training anyway, here’s how you can make them harder. You’ll be challenging the collapse of your extended arm and leg. This will help fire up everything from your hamstring to your opposing-side shoulder, and everything else in between. Bird-dogs are part of Professor Stuart McGill’s “big three” core exercises. It’s good to add them into your warm-ups, at the end of workouts, or supersetted with other exercises for long-term back health. Add a heavy band like this for a bigger
Origin: Tip: 5 Heavy Band Exercises for Legs & Glutes
10 Game-Changer Biceps Exercises
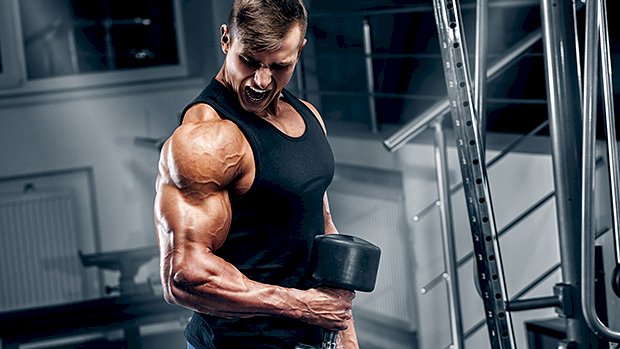 The best way to encourage your muscles to get bigger and stronger is through application of kaizen, which is Japanese for “continuous improvement.” You apply this principle by trying to increase the weight or number of reps at every opportunity, no matter how small the increase might be. While this principle definitely works, your progress will likely stall at a point. To bust through the plateau, you’ll need to change the stimulus in some way. That usually means switching the exercise, the angle, the resistance profile, or the technique. With that in mind, here are ten plateau–busting biceps exercises for when the basics stop working. 1 – Kneeling Landmine Reverse Curl Don’t knock this setup until you’ve tried it. It can be a useful way to train your biceps in their weakest position, along with being a real plateau buster. From a tall-kneeling position, grip the bar from a point directly in front of your junk, down the midline of your body. Keep your elbow tucked and wrist neutral as you curl. Your fist should travel slightly outside the line of your shoulder, allowing you to feel an intense biceps and forearm contraction at the top. Try to crush your forearm against your biceps. If a full length Olympic bar is too heavy, start with a 5-foot Olympic bar or shorter EZ-curl bar. The palms-down (pronated) grip emphasizes the brachialis and coracobrachialis portion of the upper arm. The fat grip of the bar benefits the movement too, requiring your forearms to do a lot more work. 2 – Hammer Curl 6/6/12s You’ll be doing a mechanical drop-set, transitioning from a seated hammer curl to a standing hammer curl, and then finishing with a higher-rep pump. There’s not much to dislike about this one. A1. Seated Hammer Curl, 6-8 reps (no rest) A2. Standing Hammer Curl, 6-8 reps (same weight, no rest) A3. Band Hammer Curl, 12-20 reps These also work well with an underhand grip. 3 – Rack Landmine Reverse Curl This one’s like the kneeling landmine reverse curl, but you set yourself up in a rack using the pins. I first remember seeing this being performed by John Meadows and it’s since become a personal favorite. When you compare it to the landmine setup described earlier, this version has a slightly different feel to it, though the benefits are the same. Try both and play around with angles and body position until you find the version that aligns your shoulders, elbows, and wrists the best. And yes, this does technically count as using the squat rack to curl, albeit you’re actually outside of it so you get a pass! 4 – One-Arm Supported Hercules Curl A Hercules curl typically has you set up between cables set to a high position and performing a curl that somewhat resembles a front double biceps pose. It’s a good one for training the long-head of the biceps in their shortened position. Enter the one-arm supported version where we use a bench for additional stability and support for the elbow and shoulder. The angle of the cable is key. The cable load is greatest when the angle of the cable is roughly 90 degrees to the forearm (due to leverage factors), so play with the cable height and bench angle to help you get the best feel. 5 – Back–Facing Preacher Hammer Curl Sit backwards on the preacher bench and keep your upper arms fixed against the pad. This eliminates cheating and keeps your humerus directly perpendicular to the floor, allowing you to really isolate the tension. You can also do this movement by sitting backwards in a lat pulldown machine, where you can adjust the height of the knee pads to fit the height of your upper arms. The surprising thing is how comfortable these two setups are! 6 – Dumbbell Curl Triple-Threat Triple-threat protocols add volume to your workouts, increase training variety, and give you insane pumps. Here’s one that Christian Thibaudeau has shared before. Each position has a purpose and applies load to the biceps at a different point. This is typically done with dumbbells, but works great with an EZ-bar too. Try 5–7 reps in each position: A1. Leaning Back Biceps Curl:The point of maximal loading (PML) is in the bottom portion of the curl. Same weight, no rest. A2. Standing Upright Biceps Curl:The PML is around the middle of the curl. Same weight, no rest. A3. Leaning Forward Biceps curl:The PML is closer to the top of the curl. Put them all together and you’ve got one killer biceps movement. 7 – Kettlebell Pistol Hammer Curl While some common biceps exercises fall short in maintaining tension throughout the movement, kettlebell curls are an exception. They also help to emphasize an elongated eccentric contraction, which causes lots of micro–trauma that’s essential for muscle growth. As a result of the high tension, kettlebells also produce an occlusion–type effect, whereupon the restricted blood flow acts as another kind of hypertrophy stimulus. This move specifically targets the brachialis and brachioradialis in the top portion of the movement.
Origin: 10 Game-Changer Biceps Exercises
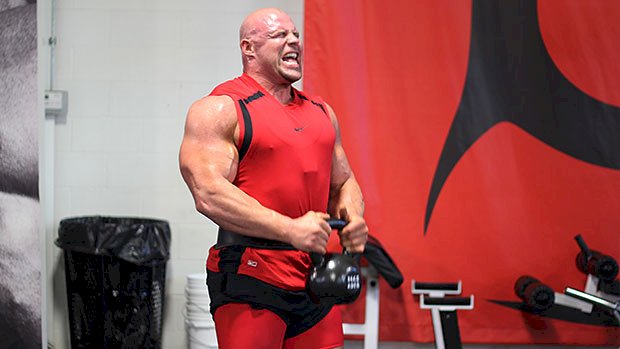
Tip: Get Stronger Overhead – 3 Exercises You Need
 Comfortably holding a heavy weight over your head takes some serious shoulder stability and a good amount of mobility through your thoracic spine. You’ll need stable and mobile shoulders to nail a good overhead lockout position with everything from barbell pressing to the Olympic lifts and even handstands. If you’re struggling overhead, try these exercises to strengthen your shoulders and improve your overhead game. 1. Wall-Facing Handstand Do you have the prerequisite mobility and motor control to achieve a good overhead position? This will let you know. The movement requires you to be mobile and strong through your thoracic spine (and stable through your lumbar spine) to get your body up against the wall. It’s great for the upper body because it dynamically challenges you to stabilize your shoulders as you walk yourself towards the wall. It also forces you to learn how to properly brace your core by pulling your ribcage down so you don’t go into excessive lumbar extension during an overhead lift. How to Do It Begin with two hands on the ground and one leg against the wall. Walk your hands backward as you bring your other leg against the wall. Stabilize your lower back by engaging your core and pulling your ribcage down. Walk yourself backward until your nose touches the wall and you’re in a vertical body position. Keep your arms straight and press yourself away from the floor so that you achieve protraction and elevation through the shoulder blades. Hold until you start to lose protraction through the shoulders. 2. L-Sit Alternating Bottoms-Up Kettlebell Press Wow, that’s a long-ass name for an exercise, but it does the job! Pressing and stabilizing heavy weights overhead requires a strong rotator cuff as well as an efficient bar path. This exercise forces your rotator cuff to stabilize your shoulder for the entire press and will teach you how to press weight up and back. It has the added benefit of firing up your nervous system and improving your grip strength since it requires a strong grip to keep the kettlebell upright. Placing yourself in the L-sit position requires more core activation and will keep you from arching your back to complete your reps. How to Do It Begin seated with your legs straight in front of you. Hold two kettlebells upside down with your elbows bent and wrists straight. Pull your ribcage down to brace your core and press one kettlebell up and back. Finish the press with your biceps next to your ear and pause at the top to make sure the kettlebell is stabilized overhead. Slowly lower the kettlebell back down and repeat on the opposite side. 3. Bottoms-Up Kettlebell Swing This is a dynamic lift and requires almost all the muscles in your body to work together to stabilize the kettlebell overhead. This movement is similar to the bottoms-up kettlebell press in how it challenges shoulder stabilization, but it requires more timing and arguably more athleticism since you have to “catch” the weight at the top. Although the movement of the kettlebell will have a significantly bigger “arc” than a barbell, this can be a great tool to get better at the Olympic lifts since it involves hinging the hips and catching the weight overhead in one efficient movement. Your ribcage should be pulled down and you should finish the lift with your biceps next to your ear, pausing for 2-3 seconds before lowering. How to Do It Begin with your feet slightly wider than hip width. Maintain a strong flat back as you hinge your hips back, bringing the kettlebell between your legs. Explosively drive your hips forward, swinging the ‘bell upward. Catch the kettlebell by the handle with your arm straight and biceps next to your ear. Your shoulder should be in a neutral position when you catch the ‘bell. Maintain a neutral spine as you press up on the kettlebell, maintaining tension throughout the entire body. Hold the kettlebell by the handle at a dead stop for 2-3 seconds for the rep to
Origin: Tip: Get Stronger Overhead – 3 Exercises You Need
The 7 Best Strength Exercises You Don’t Do
 Getting stronger requires more than just adding plates to the same three lifts. It requires some actual thought when it comes to exercise selection. Here are the seven most strategic lifts you’re probably not doing. We’ll go over what they target and how they’ll make you stronger on the big three. 1 – Belt Squat Targeted Muscles: Quads How It Helps: If your hips shoot up and your chest falls forward during the squat, this can help prevent that. Strength development occurs primarily as a result of neural adaptations (1). Heavy-load resistance training produces greater strength gains when compared to low-load resistance training (2). Unfortunately, training at high intensities generates significant fatigue which can become an obstacle and even lead to overreaching if left unchecked (3). When we look at primary exercises where the lower body plays a major role, like the deadlift and squat, a significant contributor to fatigue is axial loading (4). Axial loading is where your spine is under a compressive load such as a barbell squat. However, the belt squat allows you to bypass axial loading. This makes it an excellent exercise for developing strength because you can maintain high intensities without generating nearly as much fatigue when compared to a barbell squat. 2 – Floor Press Targeted Muscles: Chest, shoulders, triceps How It Helps: Ever get stuck at the midpoint of the bench press? This’ll help with that. The sticking point on the barbell bench press for most lifters occurs at the midway point (about 6-8 inches off the chest). It’s a common problem. During the typical powerlifting setup, your back is arched and you use leg drive, which generates an impulse force to rapidly develop momentum to initiate the lift. This is great in competition where you need to use every advantage, but in training we can eliminate these benefits strategically to improve bench press performance. The floor press forces you to remain flat and doesn’t allow for leg drive. And since the bottom end of the floor press and the sticking point of your competition bench press are generally the same, you can train your sticking point directly while simultaneously increasing your raw strength. 3 – Reverse Hyper Targeted Muscles: Low back, hamstrings, glutes How It Helps: Guilty of rounding the low back during deadlifts? These have your back. The reverse hyper was introduced by Louie Simmons. It’s gained popularity, but there are still a surprising number of people who are unaware of this exercise. Strength athletes generally train movements to build strength, not muscles. But this can become a limiting factor. For example, if an athlete’s quads can generate 600 pounds of force but his or her low back can only brace 400 pounds, the rate-limiting factor is the low back. This is where adopting more of a bodybuilding approach can be highly beneficial to specific athletes. The reverse hyper directly trains your glutes and hamstrings but primarily targets your low back (5). Training your low back can improve your ability to brace during heavy squats and deadlifts. An additional upside is that the exercise has a low fatigue cost and actually has restorative properties due to the decompression that occurs during the movement (5). 4 – Safety Squat Bar (SSB) Squat Targeted Muscles: Quads and core How It Helps: Hips shooting up during the squat? Chest falling forward? Here’s an exercise that’ll help prevent it. This is an effective variation of the low-bar squat. A common error many lifters make is the chest-fall pattern: their hips shoot up and their chests fall forward as they stand up with the weight. It almost looks like a good morning. This is most often associated with weak quads. But a SSB squat distributes load differently than a traditional low-bar squat which alters the torque requirements. Because of your upright position, the SSB squat requires more torque from the knees compared to a standard low-bar squat (6). So this exercise puts you into a more quad-dominant movement pattern to preferentially train your deficiency. Because you can’t grip the bar as you normally do, your upper back isn’t as tight, so this exercise also increases your upper back and core strength. 5 – Band Pressdown Targeted Muscles: Triceps How It Helps: This is another preventative exercise for those whose bench press gets stuck at the midpoint. Supplementary work for strength development is often written off because it’s not specific. Big mistake. Increasing your muscle fibers’ cross sectional area directly relates to increased force production (7). And since the triceps play an important role in the bench press, they often require additional work. To understand the benefits of the band pressdown over other triceps exercises, we need to understand torque. Torque is a twisting force that tends to cause rotation (8). This diagram shows the action of a triceps pressdown. The linear force (the external load of the cable
Origin: The 7 Best Strength Exercises You Don’t Do
11 Ab Exercises You’ll Love to Hate
 After grinding through a lineup of taxing multiple-joint exercises, pushing sets to the limit, and trying to set PRs, ab work is the last thing lifters want to do. But don’t leave the gym just yet. Building and strengthening the abs can shore up weak links, prevent injury (particularly in the low back), lead to bigger lifts in the gym, and give you a carved-up mid-section. Here are some no-nonsense ab and core exercises you’ll love to hate: 1. Super Abs Alternate between a weighted over-the-knees crunch variation and a reverse crunch. Start with five reps on everything and try to progress to 8 or 10 reps over time. Use a 10-15 pound kettlebell or dumbbell. Finish with a 10 to 20-second hollow body hold and a 10 to 20-second RKC plank where you tense your body as hard as possible and drive your elbows back to your toes. If you love the “burn,” this should blow your hair back. I came up with this twelve years ago to keep my personal training clients (who were all about the abs) paying me. I ended up really liking it since you only need one or two rounds. If you hate ab work, at least it will be over quickly. 2. Super Abs 2.0 Here’s a harder version which includes hollow body holds after every crunch/reverse crunch transition. 3. Stability Ball Serratus Crunch and Chop The serratus crunch is pretty effective on its own, but the ball increases the range of motion. While this will fry your abs, you’ll also benefit from the serratus activation, which is key for shoulder health and scapulae stability/mobility. The chop makes it even harder as you change the length of the lever arm. Do 2-3 sets of 8-10 reps and you won’t need any more than about 10-15 pounds. 4. Stability Ball Serratus Crunch (Progressive Isometrics) This version isn’t necessarily harder, just different. Do a rep and hold the contraction, protracting the shoulder blades hard up top for one second. Do the second rep and hold the contraction for two seconds. On the third rep, hold for three seconds. Continue until you’re trashed and hit failure. Two sets should be plenty. 5. Weighted Dynamic Hollow Body Hold If you’re not doing hollow body holds, now’s a good time to start. Getting into and maintaining a posterior pelvic tilt will do wonders for your core strength, and I’ve found the variations of this exercise make my low back feel great. If this is too demanding, a basic version where you hold a static position (hands behind the head or across the chest) without added load will do just fine. The key is to keep your shoulder blades off the floor the entire time, and keep your low back pinned to the floor. Adjust the height of your legs as needed. Adding a dynamic or weighted element will increase mind-muscle connection and force you to maintain the correct positioning. You won’t need more than 10 pounds on each end. This is NOT a high-rep exercise. 6. Serratus Hollow Body Crunch This is a variation of the hollow body hold with the addition of spinal flexion and serratus activation. Don’t rush these. Break it up slowly and methodically and transition smoothly. 7. Anti-Rotation Hollow Body Hold and Chop This progresses the hollow body hold by adding an element of anti-lateral flexion and rotation into the mix. You won’t need much added resistance. A very light mini-band or maybe one plate on a weight stack will be more than enough. 8. Anti-Rotation Serratus Hollow Body Crunch and Chop This is another hollow hold variation. You just add spinal flexion and serratus activation. Move slowly and methodically. 9. Countdown Barbell Rollout Rollout variations are hard enough on their own, but if you want to up the ante, try these in countdown fashion: Roll to point where you don’t fall into spinal extension (if you feel it in your low back you’re going too far) and come back in as normal. Do four reps. On the fourth rep, hold for four seconds in the fully extended position. Do three more normal reps and hold the third one for three seconds. Do two reps and a two-second hold. Do one rep with a one-second hold. This turns out to be a 10-rep set. If you’re not completely taxed by the last rep, continue doing normal reps until you are. You won’t need more than one set of this. In the video, I made it harder by adding a slight decline. 10. Tall-Kneeling Anti-Rotation Landmine You’ll be hard pressed to find a better anti-rotation exercise. By kneeling, you cut off your base of support, making it more difficult. Keep your pelvis underneath you and squeeze the hell out of your glutes. Don’t allow the weight to rotate you; keep your shoulders square. 11. Off-Bench Side Plank Side planks are fine. That said, I’ll rarely have clients do them since most people just butcher them (not getting their hip bone up high enough) or complain of shoulder pain. This version eliminates both of those issues and you’ll immediately feel your obliques firing if you make an effort to keep your torso up. Check out the video
Origin: 11 Ab Exercises You’ll Love to Hate
Tip: 4 Exercises You Aren’t Doing (But Should)
 If you have a decent training program, you’re likely doing some variation of the squat, deadlift, overhead press, and pull-up or row. What’s missing? The exercises that help you become more proficient at these lifts. Here are four exercise that’ll increase your mobility, improve your balance, and strengthen your underused muscles. 1 – The Dumbbell Sumo Plié Squat How To Do It Get in a wide stance with your toes pointed out and heels planted firmly into the ground. Hold a dumbbell at crotch height and squeeze your shoulder blades tightly together to establish a strong, flat back. As you squat down, drive your knees out and back. At no point should your knees roll forward, nor should there be any space between your crotch and the dumbbell. Come to a full pause at the bottom and focus on the stretch through the inner thigh. Maintain tightness as you straighten your knees and come back to a standing position. Why You Need It The sumo plié squat is an excellent way to gain mobility in your squat and train your glutes and adductors to fire simultaneously. The relationship between the adductors (inner thigh muscles) and glutes play a huge role in stabilizing the knee when squatting. Your adductors pull your leg in toward the body and your glutes are responsible for hip extension, abduction, and external rotation. When your adductors are overly tight or weak and your glutes aren’t firing properly, your knees will cave in under a heavy load. This generally happens when these muscle groups aren’t in sync and you have improper timing when recruiting the glutes or adductors. 2 – The One-Arm, One-Leg RDL How To Do It Start with both feet together and shoulder blades tightly squeezed. Hinge at the hips by bringing one leg back. This should be the leg on the same side as the arm that’s holding the weight. Maintain a neutral head position by keeping your chin tucked and focusing on a spot on the floor about a foot away from your grounded leg. Stop the movement when your hand is even with the knee of your grounded leg. Use your glutes to drive your hips forward and come back to a standing position. At no point should there be any rounding in your lower back. Why You Need It This will help prevent your hips from shifting during the deadlift, which is common. Most of us have one leg that’s stronger than the other, so compensation will naturally occur under a heavy load. If you’re not sure what this hip shifting this looks like, here it is: To avoid a hip shift, strengthen your hinge pattern unilaterally to reduce muscular imbalances. The one-arm, one-leg RDL not only strengthens your glutes, hamstrings, and spinal erectors, but also improves pelvic stability and balance. 3 – Pike Push-Up How To Do It Begin on all fours with your legs straight, hips elevated, and palms slightly turned in. Bend at the elbows and lower your head down toward the floor as you keep your hips high. Once the top of your head reaches the floor, “scrape” your nose along the ground and continue moving forward. Pause when you feel yourself about to fall forward. Drive back to the starting position by keeping your nose right next to the floor for as long as possible. The goal is to drive yourself directly backward creating upward rotation through your shoulder blades. For shoulder health, drive your elbows out when lowering and tuck them in towards the body as you become more parallel with the ground. Why You Need It It’ll help your overhead press. The overhead press requires lots of mobility through the thoracic spine to get the bar into a proper finishing position. You drive the bar up and backward, then fully lock out the elbows with the bar above the head. Many people can’t get into this position because they lack the mobility or kinesthetic awareness to create upward rotation and elevation of their shoulder blades. The pike push-up addresses a lack of mobility because you have to press yourself back toward your legs to complete a rep. This forces your shoulder blades to upwardly rotate and elevate when completing the press. 4 – The 45-Degree Inverted Row How To Do It Set a bar up a little above waist height. Hold it using an underhand grip and position your body at about a 45-degree angle in relation to the bar. Use a supinated grip (palms up) so that your elbows are forced into your sides when pulling. Pull yourself up towards the bar so that your upper abdomen/ribcage comes into contact with it. Lower yourself down slowly, focusing on maintaining tightness through your core. Why You Need It The mid-back is often neglected during pulling exercises. Too often, people overuse their upper traps when rowing or their biceps when doing chin-ups. This decreases the amount of strength they could actually get out of their lower traps, rhomboids, and lats. To get your back to grow, you need to make the line of pull easier and work your muscles from a different angle. The 45-degree inverted row allows you to focus on
Origin: Tip: 4 Exercises You Aren’t Doing (But Should)
Get Bigger, Feel Better: 7 Smart Exercises
 What’s the point of being big and strong if you’re always hurting? Nobody cares about your deadlift numbers if you throw out your back every time you sneeze. And your barrel chest isn’t very impressive if you can’t lift your arms high enough to put on deodorant. Sure, various bumps and bruises are inevitable, but training should enhance your quality of life, not detract from it. Most of us begin lifting because we want to feel better, look better, and get strong. But why do so many of us forget about the “feel better” part? It doesn’t mean you need to stop training hard. Strength and muscle are the cornerstones of resilience and longevity, and the best prehab and rehab method is smart training. Choose exercises that build strength and muscle while simultaneously improving overall function. Here are seven of the best muscle-building, joint-sparing exercises that all lifters should be doing. 1 – Dumbbell Squeeze Press The barbell bench press is the king of all upper-body exercises, but it has a couple of drawbacks. For starters, it’s not that great for pec development. Since the bar inevitably hits the chest on each rep, it restricts a full range of motion. So the pecs offer little to no help after the first third of the movement. It’s also notorious for wrecking many lifters’ shoulders. While the dumbbell bench press is a worthy alternative, the squeeze press has shoulder-saving, hypertrophy-inducing benefits too. It involves squeezing two dumbbells together as hard as possible throughout the duration of each rep. The squeeze press has three advantages: It creates maximum tension. As opposed to relying on gravity alone, the squeeze press adds “inward” tension that amplifies the involvement of the chest, reinforces a strong mind-muscle connection, and lengthens time under tension to a skin-splitting degree. It helps with bench press mastery. It’s a good teaching tool for the barbell bench press. For most lifters who aren’t strength coaches, the classic cues that accompany the barbell bench press are gibberish. The squeeze press is arguably the best non-verbal tool for reinforcing factors like elbow positioning, full-body tension, lat involvement, and “bending” the bar. It’s shoulder and wrist-friendly. The neutral grip and constant inward tension allow for more “wiggle room” in terms of external rotation and promote optimal shoulder packing/centration of the glenohumeral joint. Plus, the squeeze press doesn’t require heavy loading to produce a meaningful training effect, which makes it a good option for lifters training around shoulder pain. 2 – Barbell Overhead Shrug There’s no denying that upper traps – the type that resemble two softballs on each side of the neck – puts the finishing touch on the power look. Problem is, most lifters train the upper traps solely via scapular elevation, or “shrugging,” despite the fact that their most vital function is upward rotation. Since upward rotation is one of three movements that the shoulder blades need to go through to lift the arms overhead, it’s pretty important. Most go-to trap exercises – namely, the barbell shrug and its derivatives – can do more harm than good for those who struggle with bad posture and overly depressed scapulae. In particular, there are three red flags that occur upon the descent of a shrug: 1. The bar/dumbbells pull the shoulder blades down into scapular depression. 2. The upper traps are lengthened, which makes them less effective upward rotators. 3. The downward rotators of the scapulae become overactive. Combine that with how they’re most often performed – through a small ROM and with unnecessarily heavy loads – and the result is internally rotated shoulders, an inability to lift the arms overhead, and, consequently, a laundry list of postural problems, mobility limitations, and shoulder pain. Overhead shrugs are a better way to train the traps. Here’s why: They work the traps in alignment with their most vital function: upward rotation. Since the upper arms are abducted above 90 degrees, the overhead shrug puts the scapulae in an upwardly rotated position while still allowing for the same “shrugging” motion to occur. They’re an exceptional trap builder. One of the best ways to hypertrophy a muscle is to isolate it while doing its true function. The overhead shrug fits the bill perfectly since it minimizes levator scapulae activity, a “shrug” muscle commonly associated with shoulder dysfunction, and isolates the upper traps more effectively. They’re a game changer for shoulder health and performance. Overhead shrugs can be a godsend for individuals who can’t lift their arms overhead since they strengthen all of the muscles that work on the scapulae (the upper, middle, and lower traps, as well as the serratus anterior) while promoting optimal overhead mechanics. 3 – Two-Arm Landmine (or Viking) Press Most lifters have no business pressing a barbell overhead. Due to mobility limitations, a weak anterior core, poor
Origin: Get Bigger, Feel Better: 7 Smart Exercises
Hamstring Hammering: 6 New Exercises
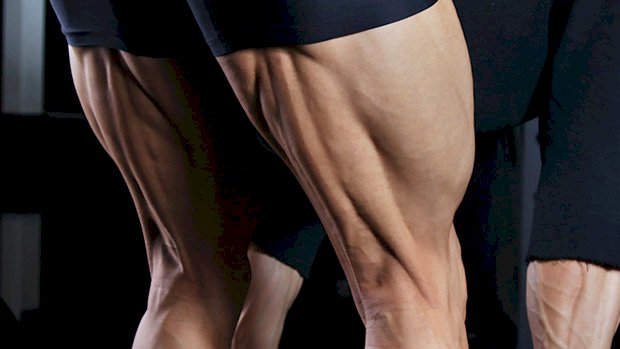 A great set of hamstrings will always stand out. Building them can even help protect the knees and prevent injuries. Here are some new moves that’ll add more meat to your hamstrings. 1 – Slider Hamstring Curl with Eccentric You’ve probably heard of Nordic curls and the benefits of controlled eccentrics (lowering slowly), particularly for hamstring injury prevention. Well, this is a good alternative that benefits your hamstrings in a similar fashion. Exercises such as these also tend to bias more biceps femoris (both short and long head), which is useful for “outer” hamstring development. The lifting portion is a glute bridge – much easier to do with a heavier weight because you’re at a greater mechanical advantage. On the way down, you do something that resembles a leg curl, which is possible with the use of sliders. During this part, the hamstrings are at a mechanical disadvantage so more work is required from them at the same relative load on the way down. The result of all this? An overload of the hamstrings during the eccentric portion of the lift. Sliders work well here, as does a hockey slide trainer, a Sorinex glute-ham roller, or even just a pair of socks on a slippery surface. Like Nordic curls, these can mess up your hamstrings for days, so watch the volume. Just 2-3 sets of 5-8 reps with a controlled negative work best to start. Add an extra set or two as your hamstrings become more accustomed. 2 – Dumbbell Hamstring Walk This exercise is relatively simple, but deceptively difficult for many. If you’ve got good hamstrings then these shouldn’t be a challenge. If your hamstrings or gastrocnemius (the big meaty part of your calf) are a little out of condition though, cramping is common. Keep your feet as narrow as possible on the dumbbell and point your toes. Having your feet close together will stop the dumbbell from steering off in one direction. You can also use a foam roller. By plantar-flexing your ankles (like a ballerina) you’ll create a co-contraction of your calves and hamstrings. This co-contraction increases activation of the hamstrings. The active insufficiency of the gastrocnemius muscle causes your hamstrings to work harder. Don’t believe it? Just try any ham curl machine with a plantar-flexed position and note the difference. Walk the dumbbell up to the point just before you lose hamstring tension. You’ll know when. You can even palpate your hamstrings during to check engagement. Walk it back down as far as you can, getting as long as you can with toes pointed. That’s one rep of probably around 6-10 steps. Go for 3-5 full reps and don’t let off the tension. Add reps over time, or try it with a bar across your hips for some extra nastiness. 3 – Band Prone Hamstring Curl When choosing exercises, one of your main considerations should be the muscle length you’re training them in. Exercises that train muscles in their longest position (think hips bent with knees straight) do a great job, but so do exercises that train them in their shortened position (think hips straight with knees bent). Banded hamstring curls put your hips in a straightened position, working through knee flexion. With this position and the ascending band resistance, these load the hamstrings most in their shortened position. Because of this, these do a crappy job of training your hamstrings in their lengthened position, but the squeeze and pump you get more than make up for it. Combine them with something more hip-dominant (like RDLs, back extensions, pull-throughs, etc.) to cover all bases. Sets of 20-30 reps work well towards the back end of a workout. Or you could start with them – your squats will feel smoother after you get a hamstring pump using these bad boys. 4 – Landmine Single-Leg (Ipsilateral) RDL Landmine Side-Facing RDL Landmine Front-Facing RDL These work well with a variety of rep ranges. Try both options to find the one you like more. Single-leg RDLs are most commonly done with a contralateral load: planted foot with the load in the opposite hand. Contralateral work mostly relies on using an interconnected line of tissues known as the “posterior functional line.” This line connects the glutes of one hip to the opposite side lats, essentially creating an X-shape that crosses the lower back. Why should you care? Well, think about athletes and their sport. Developing stabilization between hip and shoulder is essential. But if you care more about getting bulging hamstrings, contralateral might not be the best option. Ipsilateral means using the same-side arm and leg. It’s more useful when you’re trying to train the muscles of the lead leg, and that hip “snap” from the lead leg you’ll see in some sports. An ipsilateral RDL tends to be more stable and it emphasizes the lead leg’s hamstring more. A dumbbell or kettlebell can be a good option, but if you’re looking to really load those hamstrings (and glutes), using a landmine offers more stability. The bar stays in contact with
Origin: Hamstring Hammering: 6 New Exercises
Tip: Are Single-Joint Exercises Worthless?
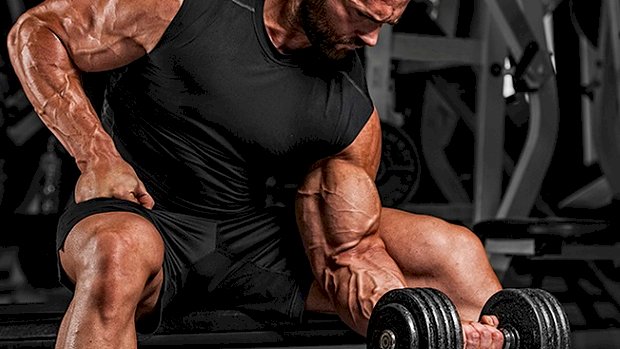 The Dawn of 30-Minute Workouts? When I first started lifting weights, I lifted for two hours a day, six days a week, because that’s what Joe Weider told me to do. Those weren’t his direct instructions, but that’s what was implied by the workouts of the professional bodybuilders featured in his flagship magazine, Muscle & Fitness. The trouble was, neither me nor any of the other poor newbies that followed that training template knew that all those freaks were on steroids. It just wasn’t talked about… ever. As such, we didn’t know that the drugs allowed them to get away with training so much and that we should have been following an entirely different set of rules. My two-hour workouts probably slowed my progress more than enhanced it, but worse than that was all the stuff I missed out on from being in the gym all the damn time. Missed parties! Missed weddings! Even missed funerals (sorry Ma, sorry Pa, sorry Aunt Trudy, sorry Duke)! I had so little spare time that the only woman whose touch I knew all those years was the female powerlifter whose calloused hand would sometimes brush against mine when she spotted me. For all that, I’ve often wished I’d put an axe in Joe Weider’s chest. Man, I’d do it now if I knew where he was buried and was willing to put up with all the flak from the woke people who’d be offended by my belated act of vengeance. Anyhow, as I grew more knowledgeable, my workout periods shrank by at least half and I made a lot more progress. Thank you, exercise science. But what’s this? A new study says I could probably halve my gym time AGAIN. It actually says that if I do multi-joint exercises, then all my single-joint exercises (biceps curls, triceps extensions, etc.) are a waste of time. That means no direct biceps work and no direct triceps work, among other things, and the findings even apply to steroid users, too. Could this be the dawn of 30-minute workouts? What They Did Brazilian scientists rounded up 30 male bodybuilders, each of whom had been training for at least three years. They split them up into four groups. The first group trained the primary muscle groups with nothing but standard multi-joint exercises for 8 weeks. The second group did the same multi-joint exercises for 8 weeks but added a few single-joint exercises to the mix. Now here’s where it got interesting. The third group mirrored the exercise protocols of the first group (nothing but multi-joint exercises) and the fourth group mirrored the workouts of the second (multi-joint exercises and single-joint exercises), but these two groups combined training with weekly injections of 600 mg. of a testosterone ester and 200 mg. of stanozolol. The workouts programs were fairly sophisticated. Each lifter worked out 6 days a week and they were required to vary rep ranges and rest intervals from week to week. A typical Monday/Thursday workout consisted of the following: A. Barbell Bench Press B. Incline Barbell Bench Press C. Military Press D. Pulley Elbow Extensions Since elbow extensions are a single-joint exercise, they were excluded from the workouts of both the natural and the steroid-assisted multi-joint exercise groups. Each lifter was also required to take in 2.5 to 3 grams of protein per kilogram of bodyweight. What They Found Adding single-joint movements to their workouts was pretty much a waste of time in both the “natural” group and, surprisingly, the steroid group. Those who did biceps curls made virtually the same amount of progress in both strength and size as the lifters who stuck to multi-joint movements. Those who did triceps extensions didn’t get any stronger – in their triceps or in their bench – than the lifters who didn’t do them. The steroid users, of course, made far greater gains overall than the natural lifters. The researchers wrote the following in their conclusion: “The addition of single-joint exercises to a resistance training program that already contains multi-joint exercises brings no additional benefit in terms of muscle performance and anthropometric changes in trained men, whether they are using anabolic steroids or not. “These results might help to design more time-efficient resistance training programs, since it suggests that trained men can save time not including single-joint exercises in their routines and still achieve optimal results.” What to Make of This Info I gotta tell you, the results of this study are a little disconcerting. Do we accept the results of this one study and stop doing direct work for biceps and triceps? Do we kick leg extensions to the training gutter? How about leg curls? At the very least, the study’s results probably still don’t apply to the pro bodybuilders that mucked up my early training days or their current counterparts. Unlike the steroid users in this study who used less than a gram of steroids a week, modern pros often use upwards of 3 grams a week. They’re so roided up that they almost undoubtedly still benefit from any and all
Origin: Tip: Are Single-Joint Exercises Worthless?
