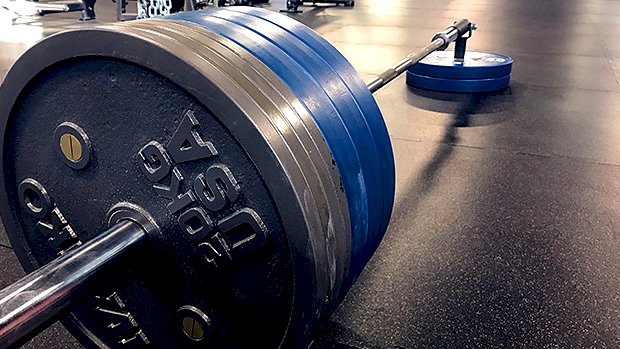
 A dumbbell or kettlebell can be a good option for single-sided Romanian deadlifts, but if you’re looking to really load those hamstrings (and glutes), using a landmine offers more stability. The bar stays in contact with the floor throughout the lift. More stability means more output, so it can be a good way to bro-up your single-leg work. Two ways to do it: Landmine Side-Facing RDL Landmine Front-Facing RDL These work well with a variety of rep ranges. Try both options to find the one you like more. Single-leg RDLs are most commonly done with a contralateral load: planted foot with the load in the opposite hand. Contralateral work mostly relies on using an interconnected line of tissues known as the “posterior functional line.” This line connects the glutes of one hip to the opposite side lats, essentially creating an X-shape that crosses the lower back. Why should you care? Well, think about athletes and their sport. Developing stabilization between hip and shoulder is essential. But if you care more about getting bulging hamstrings, contralateral might not be the best option. Ipsilateral means using the same-side arm and leg. It’s more useful when you’re trying to train the muscles of the lead leg, and that hip “snap” from the lead leg you’ll see in some sports. An ipsilateral RDL tends to be more stable and it emphasizes the lead leg’s hamstring
Origin: Tip: The Landmine Exercise You Need for Hammies
Tag: Exercise
Tip: The Weirdest-Looking Hamstring Exercise
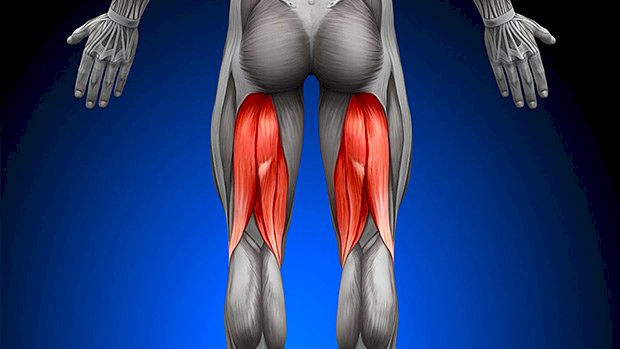 This exercise is relatively simple, but deceptively difficult for many. If you’ve got good hamstrings then these shouldn’t be a challenge. If your hamstrings or gastrocnemius (the big meaty part of your calf) are a little out of condition though, cramping is common. Dumbbell Hamstring Walk Keep your feet as narrow as possible on the dumbbell and point your toes. Having your feet close together will stop the dumbbell from steering off in one direction. You can also use a foam roller. By plantar-flexing your ankles (like a ballerina) you’ll create a co-contraction of your calves and hamstrings. This co-contraction increases activation of the hamstrings. The active insufficiency of the gastrocnemius muscle causes your hamstrings to work harder. Don’t believe it? Just try any ham curl machine with a plantar-flexed position and note the difference. Walk the dumbbell up to the point just before you lose hamstring tension. You’ll know when. You can even palpate your hamstrings during to check engagement. Walk it back down as far as you can, getting as long as you can with toes pointed. That’s one rep of probably around 6-10 steps. Go for 3-5 full reps and don’t let off the tension. Add reps over time, or try it with a bar across your hips for some extra
Origin: Tip: The Weirdest-Looking Hamstring Exercise
Tip: The Oblique Exercise You Need
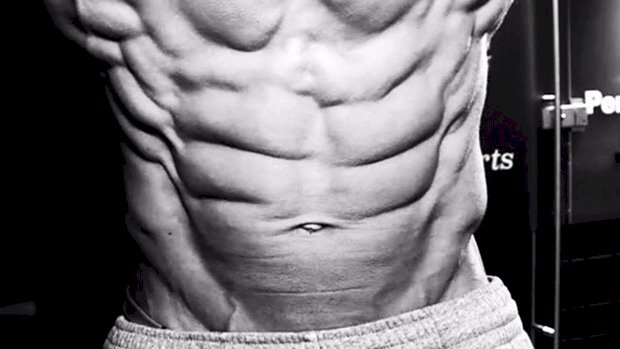 Cable chop variations are some of the most effective exercises for building an athletic midsection, making your abs as athletic and strong as they look. Chops help build an efficient power transfer between your lower and upper body, meaning they’re great for athletes. Adding rotation to your training is a must if you want a good set of obliques. Try this drop set: A1. Cable Chop (left): 8-12 A2. Cable Tight Chop (left): AMRAP Rest 30 seconds A3. Cable Chop (right): 8-12 A4. Cable Tight Chop (right): AMRAP AMRAP means “as many reps as possible.” Just make sure they’re GOOD reps. Only rest between A2 and A3. Go straight from one set to the next. Then rest as needed before you start the whole thing all over again. Do three rounds. Start with your standard cable chop setup. Keeping your elbows straight throughout, swipe the cable horizontally. Engage your core and hips in a powerful transfer of movement (think of the whip of a baseball swing). Once you’ve completed your set on one side, continue the set by “dropping” to a stronger chop position. A “tight” chop simply means your elbows are going to come in tight to your ribs. By bending your elbows and bringing the cable in you’ll be able to lift more weight, or in this case get in a few more reps. Complete a drop-set on one side before switching to the
Origin: Tip: The Oblique Exercise You Need
Tip: This Hybrid Ab Exercise Will Make You Cry
 Eccentric training is an excellent way to tap into those neglected fast-twitch fibers. Using any cable crunch as an example, take the cable further away from your shoulders (overhead) to increase the load via a longer lever arm. To reduce the load, bring your arms closer so your shoulders will shorten the lever arm. By changing the cable position during a cable crunch (further from the torso on the way down) we can increase load in the eccentric or negative phase. A1. Decline Eccentric Cable Crunch: 6-10 A2. Decline Crunch: As many good reps as possible Do three rounds. There should be a “peeling” of your spine as you come up and an unrolling as you come down (almost a crunch/sit-up hybrid). If you’re not used to this type of training, your entire mid-section will feel these for days. You’re
Origin: Tip: This Hybrid Ab Exercise Will Make You Cry
Tip: The Missing Exercise for a Stronger Bench
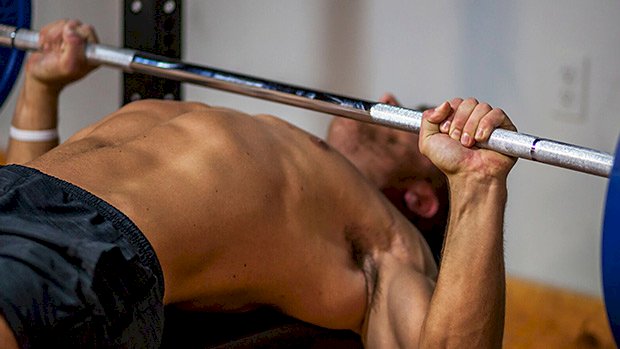 You can’t fire cannons from a canoe and you can’t bench press big weights from unstable shoulders. The external rotators of the shoulders are important for shoulder health. But they also play a role in stabilizing the arms during bench presses and can contribute to a stronger bench. Some guys know all this and do their best ostrich impression. They stick their head in the sand, neglect training external rotation, and play ignorant when their shoulders hurt and their bench stalls. Other guys are more proactive. They do dedicated external rotation work and… still end up with a stalled bench press! Why? They forget one-third of the muscles involved and use exercises which ignore how these muscles actually function during a bench press. The rotator cuff muscles play an important role in shoulder stability. These muscles work like “active” ligaments to maintain proper alignment of the shoulder and reduce excess movement. Two of the four muscles work to externally rotate the upper arm. These are the teres minor and infraspinatus. These both get worked with your classic external rotation, rehab-style exercises. But there’s one other muscle that can contribute to externally rotating your humerus. The Forgotten Muscle By strengthening the posterior (rear) deltoid, you can increase your stability on pressing exercises AND build more impressive-looking shoulders. To make your rear-delt work maximally efficient, combine it with the function of the external rotators during a bench press: isometrically contract to hold the upper arm in position. Don’t go back and forth, externally rotating the shoulder as you do with the pink dumbbells in your typical rehab drills. One Exercise to Do It All Use the supinated-grip rear delt flye: This exercise places you into external rotation and requires you to work to maintain this position while the shoulder moves through flexion and extension. This mimics the requirements of teres minor and infraspinatus during a bench press. Even better, you’re simultaneously training the rear delt and taking it to a fully shortened position. The arm path you take also lines up the fibers of the rear delt optimally to produce force, meaning you get a greater training effect. Hold at the top, where the muscle is maximally shortened and the lever arm is longest. This will place high levels of tension through the muscle and develop the strength required for you to stabilize big weights when benching. Since you’re looking to develop stability to boost your bench press, using higher reps to train strength-endurance is a good choice with this lift. I suggest sets of 12-20 reps with a 2-second peak contraction on every rep. This will develop great isometric strength in the rotator cuff and pack size onto your rear delts. The rear delts have a high proportion of slow-twitch fibers and respond really well to higher reps and long time under tension
Origin: Tip: The Missing Exercise for a Stronger Bench
Tip: The No-Eye-Contact Butt Exercise You Need
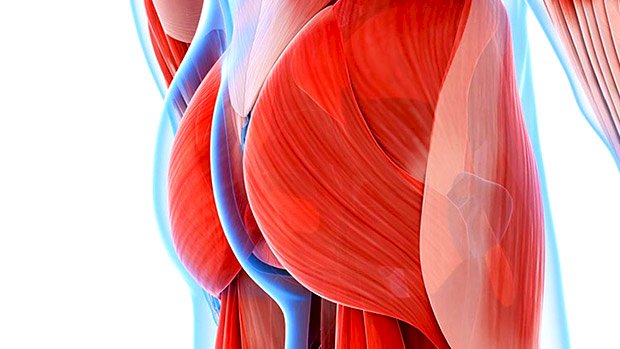 You’ve heard it before: Don’t make eye contact with anyone when using the abductor machine or doing the hip thrust. It’s just… awkward. Well, here’s another glute exercise where you might want to limit eye contact. It might come across a little “suggestive” but the kneeling thrust is a great high-rep backside builder. You’ll need a high-strength resistance band for this one, or double up some lighter ones. Attach your band to the bottom of a rack or anything that’s sturdy. Use a pad for your knees. Set the bench as far away as you need, depending on your band length and resistance. Once you’re in position, the execution is like a barbell hip thrust, but you’ll be kneeling. You’ll be driving your knees down into the pad while pulling down on the bench – a little like a straight-arm pulldown. The pulling-down part works twofold, both to offer support in front and to engage your anterior core. This affects what happens at your hips and further enhances the glute contraction. The bench assists somewhat. The support from the bench also encourages more of a bowing (hinging) movement. Additionally, you seem to get more “cock up” (posterior pelvic tilt) when there’s something to aim for… another reason to limit eye contact. Because band tension increases as it’s stretched, using a strong resistance band will help load your glutes in their fully shortened position. Here’s another way to do them with a band set inside a power rack: The benefits are the same, but this setup will allow you to double up your resistance band and get more load through your hips. Being positioned like this in a rack might provide you with more support. Where there’s more support, there’s more output. One final way to perform this glute exercise is with a set of cables and a dipping belt: The advantage of using the cable is in the constant load throughout the movement (as opposed to a band where the load is varied). There are merits to both forms of resistance, as well as drawbacks. If you’ve already got a monster-strong ass, the heaviest band available might not suffice. Using a dipping belt in the cables might be more uncomfortable or limit range of motion on the way back (if the belt is too thick). Experiment with different setups and see which one feels best. Programming High reps work best. Do 2-3 sets of 20-30 reps for an intense butt pump towards the backend of your workout. It’s no replacement for the big-daddy, barbell hip thrust, but it’s a great
Origin: Tip: The No-Eye-Contact Butt Exercise You Need
Tip: Easy Ways to Do the Hardest Ham Exercise
 Notorious Nordics Build larger, stronger, and more injury-resilient hamstrings with Nordic hamstring curls. People who perform Nordics experience fewer hamstring strains and other injuries, making this movement a valuable part of an athlete’s program. Be warned: Nordics cause serious muscle damage and deep soreness. Nordics are usually performed with a partner holding your ankles, but here are some alternatives when working out solo. A leg extension or hamstring machine will work well if there’s adequate space in front of the machine. The padded roller offers a perfect resting point for your heels. A Smith machine works great too if the bar can lower to the ground. Use a foam pad on the bar to rest your calves against. Load the bar with enough weight to hold it in place. How to Do Nordics Begin in an upright position with knees flexed to 90 degrees and heels or base of calves resting against the padded machine. Bret Contreras recommends dorsiflexing your ankles (raising the foot upwards towards the shin) to place the calves in an elongated position. Maintain neutral hips throughout the movement. Place your hands in front, ready to catch your body at the bottom position. Slowly lower yourself through the eccentric (negative) phase of the movement until you can no longer maintain control. Emphasize tension through your hamstrings during the slow negative. Absorb the bottom of the movement by decelerating your momentum in the push-up negative, then quickly transition into an explosive push-up. Re-engage your hamstrings by curling yourself upward as the push-up momentum brings you high enough to safely load the hamstrings with your bodyweight. Begin the negative portion of the next rep. If you don’t yet have the upper-body pushing power to propel the explosive push-up, decelerate the negative portion carefully and pause. Hand walk yourself back into the starting position and repeat negative-only reps. Take into consideration your bodyweight and torso length. Heavier and longer lifters will find this more challenging. Not strong enough yet? You can use a band to help out: A few individuals will possess the strength-to-bodyweight ratio to perform a full range of motion positive and negative. Use a weighted vest if you’re a bad-ass. Sets, Reps, and Sore Knees Aim for 3-4 sets of 5-8 reps. Begin conservatively to get comfortable and avoid disabling soreness. (After your first workout with these, you’re probably screwed regardless.) Increase as you tolerate more volume. Perform Nordics later in your workout to avoid massively fatiguing your hamstrings before lower-body compound movements. Don’t be afraid to use some padding for your knees. Focus on the pain in your hamstrings, not the pain in your
Origin: Tip: Easy Ways to Do the Hardest Ham Exercise
Tip: The Landmine Exercise for Athletes
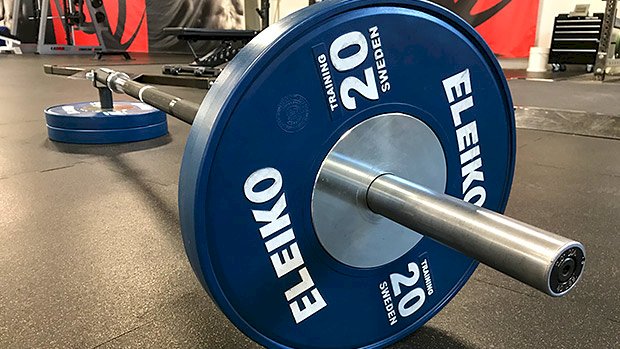 The Athletic Landmine Mastering the regular landmine lifts instantly makes all other strength and performance training better. It requires the ability to create full body tension from a standing position, which is more “functional” for most athletes. The next progression is to create a more reactive and explosive environment. The ability to decelerate, stabilize, and re-accelerate is key for optimal performance. To do the athletic landmine, start with a regular landmine “full contact twist” before you create a forceful rotation and perform a side shuffle movement starting from the core and hips. The bar coming down to the side will load the hips and core muscles, much like a coil. The purpose is to quickly and precisely stop the barbell/weight, before re-accelerating it to the other side. Even though the exercise isn’t super advanced, safe execution requires a strong core and good timing. Start light and make sure you have the regular landmine move under control. You don’t want to go too heavy here. You won’t get max power output with the heaviest
Origin: Tip: The Landmine Exercise for Athletes
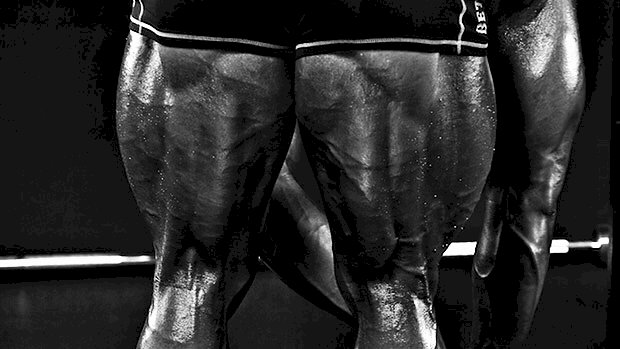
Tip: The Exercise To Do Before Deadlifting
 Many lifters have trouble engaging their hamstrings when deadlifting. They lack “hamstring awareness.” This usually ends up going one of two ways: They don’t feel like they’re getting any benefits from it and decide deadlifting isn’t for them… which is hugely upsetting. They carry on anyway, their form breaks down easily, and they put up with constant back pain after every deadlift session. If you’re someone who struggles with one of these issues, here’s a great way to become more aware of the hamstrings AND make them infinitely stronger. The Hamstring Slider Place a few furniture sliders or similar on a smooth surface and press your heels into the ground to lift yourself up as much as you can. Now curl your legs up towards you while keeping your hips completely extended. This exercise leaves no room for compensation. If you do them right you can’t avoid feeling your hamstrings. The harder these are for you, the less hamstring awareness you have. Ideally, everyone should aim to build themselves up to doing 3 sets of 15 reps with minimal rest. Use this exercise as a deadlift warm-up and primer. After, set up for your deadlift and see if you can you use your hips in a way that makes you feel aware of your hamstrings before you lift. It’s very important to have this feeling nailed down; many people can look like their back is straight when actually their lower back is doing a ton more work than it should. Building good hamstring strength and awareness now will help you keep making gains in the long
Origin: Tip: The Exercise To Do Before Deadlifting
Tip: The Ultimate Triceps Isolation Exercise
 This triceps extension variation is much different from others because it allows you to focus solely on building and strengthening the triceps. CJ Extension Other variations force you to unknowingly compensate by contracting the abs, lats, pecs, and even traps. They disperse the workload to the other muscles and ultimately postpone your goal of strengthening the triceps. The CJ variation should be considered one of your go-to movements when training triceps. Here’s how to do it: Lay flat on the ground with feet planted on the floor (similar to how you would start a sit-up). With the cable machine back above the head, pull the rope out so that the elbows are near the side of your body. From this position, extend the rope down to the hips, spreading the hands out to each side, allowing you to lock out the arms. Return to the starting position and repeat for 15-25 reps.
Origin: Tip: The Ultimate Triceps Isolation Exercise
