 You’ll need a dual-adjustable cable machine like the one in the video. Something like a Cybex Functional Trainer or a Keiser Functional Trainer would work. You’ll also need a bar-style cable attachment. (If you don’t have one of these attachments, you’ll see a workaround below.) The attachment should be set just off the floor. Pick it up and step back a foot or two, which will change the angle of pull from the cable. Engage your lats, push your hips back, and allow the bar to travel in toward the cable machine. Once your hamstrings have gone as far as they can handle, return to the start position. Just think of it as a traditional RDL, but you’ll be forced into a slightly different movement to compensate for the direction of the cable. If you don’t have access to the type of cable attachment shown, here’s an effective way to do it using a barbell. Combo Hamstring RDL Here’s a closer look at how the cable is attached to the barbell using a common handle. (Ankle attachments will also work.) When using the combo (cable and barbell) version you’ll also need to account for the extra weight of the bar. This adds another element to the exercise, where on top of the more horizontal cable load you’ll also be adding to the vertical. You can add weight to the bar here, but keep in mind how this’ll affect the overall profile of the exercise. There are some merits to doing this, but for now let’s stick to the exercise in question where the majority of weight is coming via the cable stack (two cable stacks, technically). Why They Work Due to the cable angle, the exercise is designed so that your hamstrings are likely to give out well before your back does. Your hamstrings are taken into a fully lengthened position under load, while your low back will feel like it’s on vacation. Theoretically, there’s very little sheer or compressive force coming through your lumbar region, while there might even be a little traction of the spine as you reach into the bottom position (depending on the height of the cable). These Romanian deadlifts are anything but an ego lift. They prioritize tension through the targeted muscle. This is good news if size is your priority. When it comes to hypertrophy, your muscles don’t give a damn how much your ego is lifting. Tucked away by layers of connective tissue and skin, they’re blind to what goes on outside. They do recognize tension though – and you’ll get plenty of it with this exercise. You’ll also notice that as your toes get pulled into the floor (resisting dorsiflexion), your calves will become more active. This co-contraction of the gastrocnemius adds to the effect and will make things even harder for your hamstrings. Programming Try these in place of your regular deadlifts as a way to vary the training stimulus or work around a tricky back. They’re also a useful alternative to exercises such as 45-degree back extensions, reverse-hypers, pull-throughs and the like. Sets and reps should be
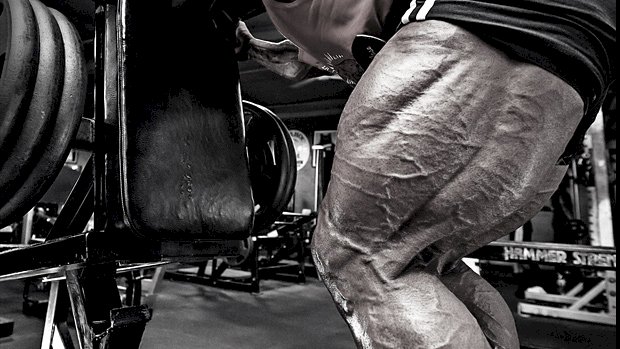
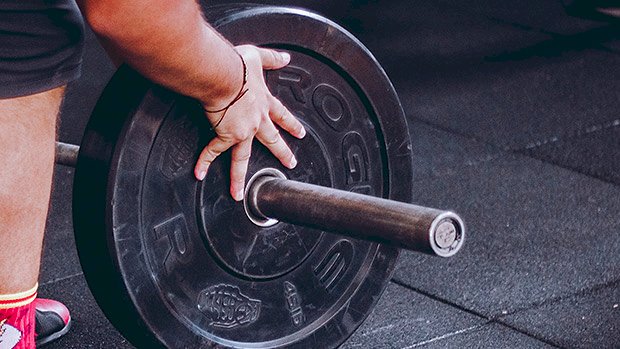
Origin: Tip: Best Deadlift For Leg Size & Back Health
Tag: Deadlift
Tip: The Best Deadlift for Glutes
 Most lifters have always assumed that the Romanian deadlift (RDL) was a tad better for the glutes and hamstrings than the conventional deadlift (CD) because the quads (specifically, the rectus femoris) play such a big role in the latter. It was a forgone conclusion, like how Eggos are better than English muffins, but no real-deal scientists had ever bothered to compare the two lifts – at least not until some researchers from Western Michigan University looked into it. What They Did The scientists found 21 men with at least three year’s experience with both the CD and the RDL. Each subject had a spider web of needles and electrodes affixed to their rectus femoris, biceps femoris, and gluteus maximus. The lifters then alternated between performing RDLs and CDs, using 70% of their one-rep maximum on both. They all used standard form on both of the lifts, with one exception: While the typical RDL range of motion usually comes to a halt when you start to feel a mild stretch in the hamstrings (which generally happens when the bar travels just south of the knees), the participants in this study were asked to at least attempt to lower the bar to the floor, flexibility permitting. What They Found To no one’s surprise, the CD evoked a much stronger response in the rectus femoris than the RDL – almost double the EMG percentage peak. The researchers also found that the CD caused significantly greater EMG values in the glutes, but this is where we have to take a brief side bar, your honor. Scientists have an entirely different definition of the word “significant” than lay people. In science parlance, significant is kind of a weasel word that just means the amount was large enough to be noticed, or large enough to matter. It’s closely related to the term “statistically significant,” which means a difference that’s unlikely to be caused by random chance. However, if you said you had a significant amount of sex last night, it would likely mean something far different than an amount of sex that, when compared to the amount of sex you normally had, was unlikely to be caused by random chance. So while the CD evoked a “significantly” greater response in the glutes than the RDL, the difference in EMG value in normal, non-science language was just a smidgeon, a duck snort that probably doesn’t matter in the long run. And while the CD came out on top with biceps femoris activation, too, the difference here was even less than we saw with the glutes. In short, the CD definitely caused the rectus femoris, or predominant quadriceps muscle, to work a lot harder. As far as the biceps femoris (the predominant hamstrings muscle) and the glutes, the amount was pretty much a wash between the two lifts. How This Info Might Change Your Training The real eye-opener in this study is just how much the CD relies on the rectus femoris, which presents a potential problem: A lot of us split our leg training as part of a push/pull workout, doing quad dominant movements (like the squat, leg extensions, etc.) on one training day and then doing hip-dominant exercises (deadlifts, glute thrusts, etc.) on another. Since the CD recruits the rectus femoris so heavily, incorporating it into a push/pull workout is problematic. Let’s say your push/pull workout includes squats on “push” day and CD’s on “pull” day. That means you’re working the quads twice as often as you intended. Given this study and the results described in this article, it would be much more logical and efficient to keep the squats in your push workout but replace the CD with the RDL in your pull workout. The glutes and biceps femoris recruitment is virtually the same as with the CD, but you’re getting minimal involvement of the rectus femoris. Max Glute and Biceps Femoris Recruitment with the RDL If you’re going to do RDLs instead of CDs, I suggest you make them count and do them on the Smith machine, as T Nation contributor Paul Carter suggests. (He prefers them to barbell RDLs because the stability afforded by the machine allows you to sit back farther.) Paul also suggests you do them with with a 5-second eccentric to further accentuate the targeted glutes and biceps femoris. To really maximize recruitment, slap a couple of step platforms underneath the bar and stand on them. This will allow you to extend the range of motion (provided your spine is flexible enough). A couple of sets of 10 should more than do the
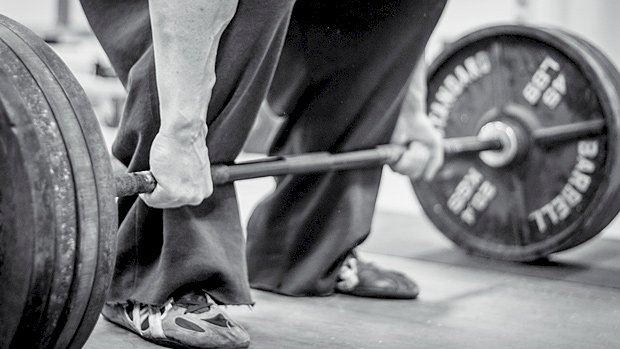
Origin: Tip: The Best Deadlift for Glutes
The Missing Deadlift Variation
 The one-leg deadlift is an incredible exercise that can boost symmetry and build single-leg strength – all while minimizing loading. That means it’ll take good care of your low back, strengthen your core, and make you a sugar-footed ninja. Too bad that it’s so often a disaster. It’s time to lay down some guidelines for perfect execution and fix some common problems. 1 – The Problem of Balance Back in 2000, a major fitness magazine showcased a version of the one-legged Romanian deadlift (RDL) where the rear leg was lifted way off the ground, sort of like one of those old drinking-bird toys. The rest of the world just seemed to follow suit without really questioning why. Here’s the thing, though – the one-legged RDL wasn’t designed for balance training; it’s for building single-leg strength. The “rear leg lifted high” variation might be fine for warm-ups and general mobility, but when it comes to strength training, you’re better served by stripping the balance demands away and focusing on strength. The Fix Keep your rear foot on the ground using the kickstand method: Here are three effective alternatives: Drag it In this variation, you’ll keep your rear foot lightly touching the ground and slide it straight back. Your challenge is to slide the foot straight back without any weight transfer on it. Float it Here you have two options for keeping weight off of the passive leg – either by setting up a “kickstand” as shown in the first video or by using one of Ian King’s original variations. Get it out of the way Clear the passive leg without giving up balance by doing the corner-leg version. 2 – The Problem of Hip Rotation Even though the hips are supposed to remain level (indeed, countering the forces of rotation provides much of the value here), almost everyone will externally rotate the unloaded leg. This is usually due to a lack of awareness, but may also be the result of insufficient hip internal rotation. Most of the rear-foot-on-the-ground variations described above will deal with this but there’s some additional work to be done. The Fix Pause after the eccentric (lowering) portion of the lift to check your position. Are you able to tell whether you’re level? To check in on position, make sure the rear knee and foot are both pointed down toward the ground. Also, make sure that your thighs are touching or – to bastardize a deadlifting cue from the great Ed Coan – “seal up your taint.” 3 – The Problem of Initiating Lift-Off with the Back Initiating the lift with leg drive is something that should be happening with any deadlift variation. However, once the one-legged RDL became known as a functional training exercise, people stopped (or never started) caring about great fundamental mechanics, which is pretty ironic. It’s common to see people arch their backs to get the weight moving. This compensation is an easy trap to fall into – especially when you’re holding a teeny, tiny weight. The Fix Oscillate the first 2 inches of the lift. This surprisingly challenging drill requires you to flex and extend the knee with a tiny range of motion. You’ll practice initiating the movement and reversing it over and over again with only a 2-inch range of motion. If you’re doing this right, your low back will be silent and your quads will be screaming. 4 – The Problem of Lateral Shift and Rotation You might be able to execute very clean reps with a light load. However, you can do all sorts of things with a light load. Once you put some real weight in your hands – particularly with a barbell – you might notice that countering any extra movement becomes more difficult. The Fix Shift the load laterally. This is a subtle tweak that can make a big difference. When you’re on one leg, your center of mass has to be stacked. But it can’t be stacked on top of air. For proper alignment, you have to do two things: Shift your bodyweight laterally to stack your center of mass over the middle of your planted foot. Line up the middle of the bar with the middle of your shin (on the loaded leg). 5 – The Problem of Insufficient Demand Once your form is in place, don’t forget to load the movement. The Fix Add load and/or range of motion. If you’re going to push boundaries, your first step is to figure out where those boundaries are. While adding weight is an obvious choice, you may also want to add range of motion by growing this into a hybrid movement – somewhere between an RDL and a full-range of motion deadlift. You can do this simply by completing the RDL (hinge) portion of the movement and then adding some knee flexion. To make balance even less of a factor, you can perform this as you would a rack pull. This will allow you to load things up with a barbell and reset your balance and positioning at the bottom of every rep. Is the RDL Really Worth the Trouble? In spite of the huge value of the one-leg RDL (and variations), I actually spent a long time not programming it. The time involved in getting
Origin: The Missing Deadlift Variation
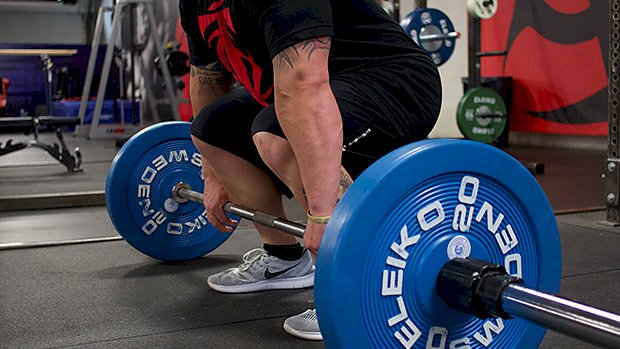
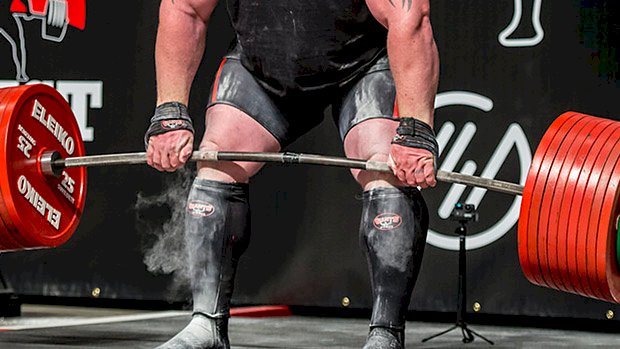
Tip: Two Sumo Deadlift Myths, Destroyed
 There are two big reasons to use sumo deadlifts: To build a powerful posterior chain and to lift as much as humanly possible. Training for the former means focusing on glutes and hamstrings, along with upper and lower back muscles. A good hinge pattern hits all of these. But let’s address the second reason. For high-level powerlifting competitors (those trying to lift as much as humanly possible), it’s fine to use any technique within the rules that’ll allow you to lift the most. If this means a squatty sumo, so be it. Adjustments made for a competition squat, bench, and deadlift are to maximize leverages to get the highest one-rep max total possible. But those adjustments are often different from proper training technique, and they’re even counterproductive to maximizing the training effect for strength and hypertrophy. They often create injury risk, accepted by competitors trying to win. Think exorcist-level bench arch or round-back deadlifts. For those of us sumo deadlifting for the other reason, let’s dispel the two biggest myths and fix the flaws in this lift to make it a safer training tool that’ll get us better results. Myth 1 – Your feet need to be as wide as possible. A lot of lifters think their feet need to be spread as wide as the plates will allow, but that’s a good way to drop a plate on your toes. Really, your feet just need to be outside of your arms and hands in order to be a sumo. Take a look. Granted, a wider stance feels great for some and has leverage advantages which shorten the distance from ground to lockout. But some people’s hips just aren’t mobile enough to get into a wider position. Wider isn’t necessarily better. If you get your legs just outside your arms, this is called the “hybrid sumo” or “semi-sumo” and it’s a perfect option to gain the benefits of deadlifting. Some clients I’ve worked with can’t get into a conventional stance (arms outside of legs) without rounding their lower back. This is caused by a limited hip flexion range in a narrow stance, which makes the semi-sumo a better solution. A semi-sumo stance can also prevent knee valgus or inward collapse. This is another common problem that arises when placing your feet too wide. In this case, your knees don’t remain stacked above your feet because your hips can’t externally rotate wide enough. Or it’s possible you aren’t focusing on creating torque with the hips to pull the knees into the wider position. This may lead to knee pain and injury over time if not addressed. Myth 2 – You need to sit low in a squat. Deadlifts are a hip hinge pattern. There will be some people who can squat their sumos and lift more weight while experiencing zero pain. For the rest of us, let’s make a simple adjustment and get a better effect. When lifters set up with low hips that jump up before the weight leaves the ground, this usually indicates a loss of back and core tightness. Your hips and hamstrings are seeking the tension you failed to create during the setup. There’s no problem with beginning in a squat position then pulling the hips high and getting wedged in before lifting, but issues arise when the hips jump in an uncontrolled manner as the lift is initiated. So, when setting up, firmly grasp the bar and pull it into your shins. Pull the shoulder blades together and create a flat neutral spine. Then elevate your hips until you feel coiled tension in your hamstrings. When you feel this tension, your hips are like a loaded spring ready to snap forward and generate more power. In a recent seminar, Tony Gentilcore described this process as creating a “lifter’s wedge.” A Recap and a Few Additions Your sumo deadlift shouldn’t look like a squat. Your hips shouldn’t drop to the level of your knees. Your feet don’t need to be as wide as possible, and your lower back and knees shouldn’t hurt as a result. Now that we’ve got those essentials out of the way, let’s tack on a few other notes: Pull the slack out of the bar. You can do so by pulling on it without enough power to lift it off the ground. This should create tension through your body and a stable spine. Then initiate a smooth but powerful push with your hips forward toward the bar. Lock out by squeezing your glutes under your ribcage and avoid hyperextending your lower back. Control the negative (lowering) portion. Just remember that heavy weight will come down quickly. Some lifters can touch-and-go smoothly between reps with tight form. Others need to reset every rep to maintain good form. Avoid bouncing the weight between reps. Use the style to best maintain excellent form, maximize training effect, and walk away healthy. Avoid rounding at the back. Some lifters argue that a rounded back is safe and makes them stronger. They’re usually referring to some roundness of the thoracic (mid-upper) spine, done by skilled and experienced powerlifters to lift more in training and competition. A practiced core brace with a rounded thoracic spine and flat lumbar is often a
Origin: Tip: Two Sumo Deadlift Myths, Destroyed
Tip: Fix Your Rounded-Back Deadlift
 Rounded deadlifts are an epidemic. You can’t scroll through Instagram for two seconds without seeing some bro attempting a max effort deadlift with their spine bending like a accordion. A little rounding in the thoracic spine is actually okay, but most people round over at the lumbar region which turns an epic one-rep max attempt into a cringy display of a nearly snapped low back. Lumbar flexion during deadlifts occurs because of one of the following (or a combination): Weak or unsustained intra-abdominal bracing Weak spinal erectors Loss of tension in the upper back How to Fix It Here’s an odd trick I learned from powerlifter Greg Nuckols that fixes all of these common causes. (And this trick can be used for the squat as well.) Take a band and anchor it to a heavy weight in front of your deadlift setup. You won’t need a strong band. A light band goes a long way with this drill. Where you anchor the band will depend on how tall you are as well as your deadlift variation. If you’re doing a stiff-legged deadlift or an RDL where you’re more hinged over, you’ll need to anchor the band closer. If you’re doing something more upright like a conventional or trap-bar deadlift, the anchor should be further. Wrap the band around your neck and do a few sets with this setup. You’ll feel your entire posterior chain light up. Why It Works The band will pull on your spine from the top down. The tension reminds you to stay tight while strengthening your spinal erectors. This will fix both low back and upper-back rounding. Thanks to the band, your deadlift is now stable, safe, and no longer a joint-crumbling eyesore. For programming, do these before your actual working sets. Or if you struggle heavily with rounding your back, you can do all your sets with this setup. Your spine will thank
Origin: Tip: Fix Your Rounded-Back Deadlift
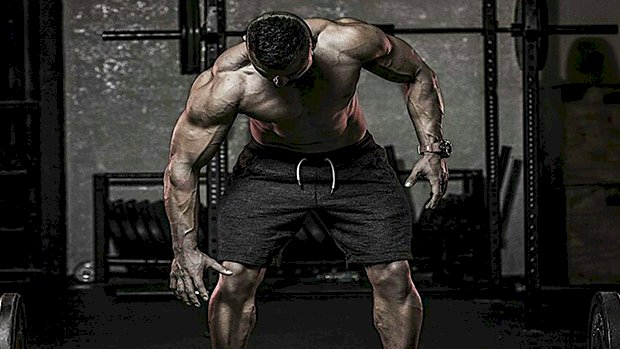
The Missing Half of Your Deadlift
 When JL first started powerlifting, he sucked at the deadlift, so he sought out the best. Chuck Vogelpohl became his training partner and his understanding of the deadlift changed forever. Sprinkle in a lot of coaching time with Louis Simmons, Dave Tate, Steve Goggins, and Eddie Coan, and JL turned into a professor of the deadlift. His best pull in a meet is 804 pounds and you don’t pull over 800 pounds without picking up a few tricks of the trade. As an expert, he’s become keenly aware of the single most important and under-coached aspect of the deadlift, which is how you set the bar down when doing reps or, as he likes to refer to it, the dead-lower. It’s the thing that almost all lifters are f*cking up and the reason their pull is stuck. So set yourself up for success by mastering the fundamental concepts that have been hiding from you in plain sight. Once you master the initial setup and the basic mechanics of the lift, you’ll quickly see that the greatest opportunity to improve comes from putting the bar down better. Mistakes Made When Lowering the Bar If you’re not methodical about the way you put the bar back down, you’re messing with your next rep. At best, you’re being inefficient. At worst, you’re putting unnecessary stresses on your joints and practicing sloppy mechanics. And that’s just not how people get strong and then stay strong. Here’s a list of the most common technical errors you’ll see when it comes to lowering the bar, or the steps that immediately precede it. Mistake 1 – Trying to be a gymnast When you’ve reached lockout, do you stop moving, or do you continue to extend through the spine? If you keep moving, be aware you get no extra credit for doing a back bend at the top of your deadlift. Just f*cking stop when the hips reach extension. The deadlift is a simple movement. Your hips move, your knees move, and even your ankles move. But nobody said anything about your lumbar spine. The truth is, many people fake hip extension by cranking on their lower back. Think of it this way: If your hips have stopped moving but you’re still driving forward, that’s how you know it’s your back moving. This nasty habit releases both lat and anterior core tension so that the big muscles that keep you safe are now relaxed. This increases your risks without any further improvement in performance. It’s not a great trade-off, especially since it’ll compromise your next dead-lower before it’s even started. Think of this as setting up the setup for your setup. Mistake 2 – Squatting the bar down from the top Quad-dominant people love to do this, but shooting your knees forward is a sign of a weak posterior chain and it’s a good way to hurt your back. If you’re intent on moving anything truly heavy, you need to keep it as close to your center of mass as possible. Shooting the knees forward and sliding the bar down the quads like they’re a ramp will launch you into shitty deadlift land. That makes things less efficient and compromises your ability to move some real weight around. What you want to do is hinge back and once the bar has cleared the knees, you squat down. The video contrasts “ramping the bar” with good form: Mistake 3 – Forgetting to squat in the bottom Telling people to squat at the bottom has helped us teach thousands of people to dead-lower correctly. A deadlift is nothing more than a Romanian deadlift (RDL) until the bar passes the knees, at which point you squat. As with any squat, the knees and butt must move down. People confuse this and forget the squat part, which causes major issues. Look at it this way: Assuming you’re not a contortionist, forgetting to squat down will exhaust your range of motion at the hips before the bar has touched down. With no more hip flexion to give, further movement has to come from somewhere. And if your hips and knees aren’t moving BUT the bar is still travelling down, that’s your spine doing the work, homie! You can’t lift massive loads safely if the movement comes from the sacroiliac (SI) or lumbar spine instead of the hips. You’ll also have to readjust everything to be in good position to pull your next rep off the floor; either that or crush your back picking it up in the same way you just set it down in. That’s more work, or more wear and tear, to get the same job done. The Rules on Dropping the Bar (Don’t be a Douchebag) You’re 40% stronger eccentrically than concentrically. This means if you’re not strong enough to lower the bar correctly, you shouldn’t be picking that weight up anyway. Now, if you’re in a meet or going for a max attempt, we’re cool with you letting all the tension out and doing a controlled drop before you celebrate a massive PR. This will happen at most four times per year. Generally speaking, though, don’t be a douchebag and drop the bar from the top. We don’t care if you have bumpers on the bar (which just means you aren’t very strong because you can’t go over 500 with bumpers), but don’t ever, ever, let go of
Origin: The Missing Half of Your Deadlift
Tip: 3 Squat and Deadlift Challenges
 Bodyweight Barbell Squat x 50 The fifty-rep set is mental and physical warfare. Performed once or twice per month, this test crushes training plateaus and builds serious mass on your legs. How to Do It: After a warm-up, load up a barbell with your approximate body weight, throw on some music, and start squatting for as many reps as you can. A good goal is 50 reps. This test is brutal. Use safety racks, a spotter, and plan extra recovery afterwards. How to Get Better: This test is easier for smaller guys. That’s just physics. But, regardless of size, the best way to improve endurance and relative strength is to get brutally strong. Focus on improving your one-rep max, then add one or two high-rep drop sets with your bodyweight every other week to finish off your legs. Front Squat Your 5RM Back Squat The front squat builds a steel-clad physique and incredible lower body strength just as well as the back squat. The front squat reinforces posture and adds mass to your upper back since your elbows stay elevated and your thoracic extensors work double time to hold position. Now, in the back squat we’ve all seen what happens when someone rounds their back, yelps like a kicked puppy, and jacks up their spine. No such issue on the front squat. If you round, the bar drops forward, and the lift ends without harm to your lower back. The trouble is, we’re all naturally stronger in the back squat, but most lifters are embarrassingly weak in the front squat due to poor strength in the anterior core and thoracic extensors. A good goal is to do a single front squat using the same amount of weight as you can back squat for 5 reps. Here’s the simple math: Take your back squat max and multiply it times .85. That will give you your back squat 5RM or close to it. For example, if your back squat max is 405 pounds, multiply that by .85 to come up with 345 pounds. Your goal is to front squat 345 pounds for one rep, or work your way up to it. Deadlift Sadiv Sets Sadiv sets are an advanced training method designed to boost your deadlift, test mental grit, and add tons of muscle to your posterior chain. Sadiv sets are a high volume, high-intensity monster of a deadlift workout. Beginners or the weak-minded need not apply. (Don’t even attempt this unless you’re deadlifting 1.5 to 2 times your bodyweight.) Here’s what to do: Set a timer for 12 minutes and load the bar with 60% of your 1RM. Perform as many reps as possible during the 12-minute span, shooting for at least 20 reps. If you don’t get 20 good reps, decrease the weight. Perform each rep as a single, resetting between each rep and pulling with perfect form. This means taking the slack out of the bar, keeping your hips back, your back flat, your chin down, and driving your heels into the earth. Perform each rep with max speed from the floor – leg drive is key. Once fatigue sets in, it’s vital to set up each lift like it’s a max attempt, brace the core, and drive the bar. Can you beat 20 reps with solid
Origin: Tip: 3 Squat and Deadlift Challenges
Tip: The Recovery Intrusive Deadlift
 Don’t Do High Volume or High Rep Sets The deadlift is a “takes more than it gives” movement. It’s recovery intrusive, possibly more than any other compound movement. No lift causes a greater degree of “workout hangover” than heavy and hard deadlifting. Why? Most coaches say it’s because of the direct attachment of the hands to the bar, and the effect that has on the spine and autonomic nervous system. They also believe this causes a high degree of stimulation to the sympathetic nervous system, depressing the parasympathetic nervous system, causing a massive inroad to systemic recovery. All of this is theory, but it feels true. Especially after a heavy day of deadlifting. But theory aside, science shows us that volume isn’t actually the driver for strength gains. The neurological adaption to moving loads with greater speed, or moving greater intensities in a lift, are the primary drivers for strength improvement. There’s literally zero reasons to be doing highly-volumized deadlift routines. Same for trying to do high-rep (12-plus) working sets of deadlifts. Both will drive recovery into the ground. Do Sets of 3 to 5 Reps If you’re looking to build maximal strength in the deadlift then sets of three to five should be your bread and
Origin: Tip: The Recovery Intrusive Deadlift
