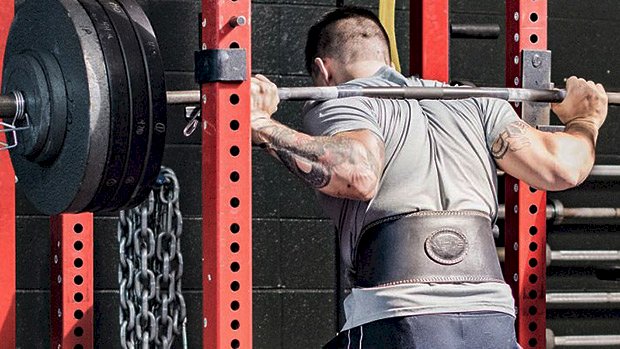
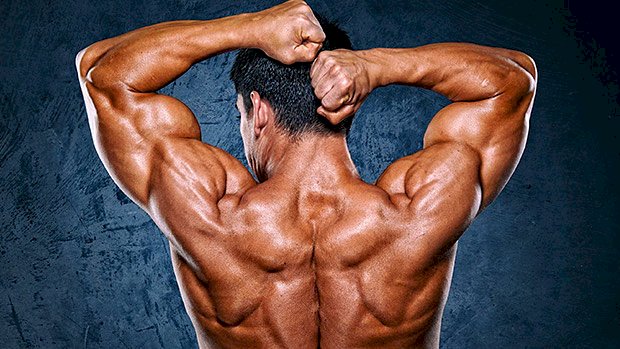
 No movement on earth builds more muscle and improves athletic performance better than the squat. But there’s something else that makes the squat king. When you push the human limits of the squat, you enter a realm that only a select few will ever know. It’s a realm where the lift may actually kill you. I remember my first 900 pound single-ply equipped squat. It was the first lift where I thought I could possibly die. That moment was a turning point for me as an athlete. I could have racked the weight and not risked my life. However, I embraced that feeling of life and death and crushed the lift. I was never the same. What are the best ways to build a life-changing squat? Other than simply squatting more often, the best way to strengthen the squat is to pinpoint your weak links and attack them. Pinpointing Your Weak Links There are three major joints required for squatting: the intervertebral joints of the back (lumping all of these joints into one), hips, and knees. So think about the muscles surrounding these joints. Collectively, they’re the spinal extensors, knee extensors, and hip extensors. So the question becomes which group do you need to target and how? We’ll go over a few simple ways of determining the strengths and weaknesses of each, and I’ll give you a few exercises for strengthening them. Once you know your weak links, you can work on the movements that’ll improve them. How? With strategic hypertrophy. Gain muscle size in those areas. Yes, hypertrophy of your weak links can help you build your squat. You can increase the size of your muscles with solid programming and hard work, and you can get more efficient moving heavy weight while squatting. Back – How To Tell If It’s Your Weak Link You’ll never see a great squatter with a weak back. You can get away with weak thoracic spinal extensors in the deadlift, but that simply won’t work in the back squat. If the back flexes, the movement is dead. A bit of thoracic spine flexion has been shown to help the deadlift by lessening the demands on the back. So the easiest way to determine if your back is the weak link is by comparing your deadlift to your squat. If you can deadlift 10% more than your squat, your back probably limits your squat. In a perfect world, the two should be about the same, but I’ll give you 10% to account for leverage advantages that might give you a slight edge in the deadlift (like having long arms). Otherwise, when you look at the mechanical advantages and disadvantages of each movement, they’re pretty equal. For example, the deadlift is a shorter range of motion, and a deadlift can be locked out even after a great deal of spinal flexion (back rounding). But with the squat, an athlete has momentum to drive through the typical sticking point, which occurs a few inches above the typical starting position of a deadlift. Plus the knees are free to move in the squat, allowing the body to call on the knee extensors or hip extensors depending on which is stronger. The deadlift doesn’t have that luxury. Here’s what to do: Front Squat Because the bar is in front of your body, the demands on the spinal extensors are the highest for this squat variation than any other (high bar or low bar). Therefore, the front squat builds a massive back while strengthening the quads. Front Squat Carry With carries, you take the quads out of the equation and you focus on strengthening the back extensors. Good Morning When you incline the torso, you increase the horizontal distance (perpendicular to gravity) between the bar and any intervertebral joint in the spine. You put a lot of stress on the back extensors, causing them to get stronger and bigger. A lot of these movements will double to strengthen other joints. For example, good mornings are great for hip extension… especially as it relates to squatting. The quickest way to stabilize the torso is by learning to brace. You would be surprised at the number of lifters that don’t understand how to brace. Don’t be one of them. How to keep tightness around the spine: Use the Valsalva maneuver. You just breathe as much air as possible into the belly, pressing out against your belt in the front, sides, and even in the back while keeping the mouth shut and not letting any air escape. This technique causes massive amounts of tension around the lumbar spine. Any great strength athlete will tell you that a stable spine is a stronger spine. Get your hands as close as mobility will allow. This will create maximal stiffness in the upper back around the thoracic spine, which is where most of us fail during a squat. Tuck your elbows under the bar. Too many people let their elbows flare out, which also allows the scapula to flare out. When the scapula flares, the back – especially in the thoracic spine area – starts to flex or round. Quads – How To Tell If They’re Your Weak Link If you squat like a stripper (butt flying up out of the hole), there’s a good chance you have weak quads. The
Origin: Build a Monster Squat
Tag: Build
Tip: How to Build a Professional Butt
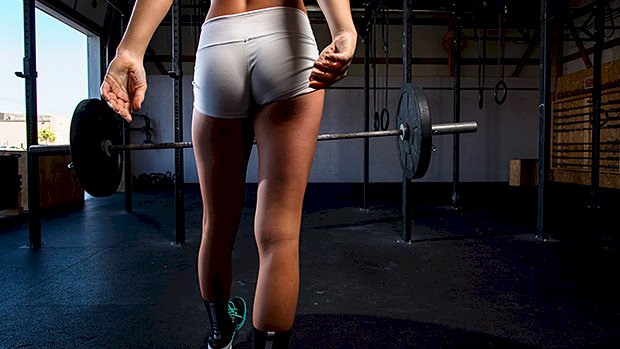 If standard hip thrusts have lost their oomph, here’s something you should try: isometronics. Isometronics combine the principles of isometric and isotonic muscle contractions to reap the rewards of both. Performing hip thrusts using this technique would look like this: Pick a weight you can barbell hip thrust for 12 reps (your 12RM). Do 10 full reps. On the tenth rep, pause at the top for 10 seconds. Finish with as many partial reps as you can in the bottom position. If you’ve selected the right weight, this will be no more than 4-8 partial reps. Tip: To get the most from it, initiate each rep with a tightening of your glutes and abs before each movement. Now, there are no rules saying you need to use the rep ranges above. At their heart, isometronics are simply a form of drop set. Just work within a rep range that’s in line with your training approach. If you want to go heavy, then drop down to 5-6 reps. If you’re a volume junkie, go for 15-20. It’ll all help build an impressive backside. Not Just for Glutes Isometronics are nothing new. You’ll find evidence of them being used since the 1960s. Classically, isometronics are performed using more of an “overcoming” isometric rather than “yielding” isometric. You’d set up in a squat rack and fire the bar against some pins, pressing as hard as you can. For hip thrusts, I’m sharing a more accessible version, and one that won’t have the gym police bust your ass for being in the squat rack. Isometronics can be done for any muscle you’re looking to get bigger or stronger. Just do your full reps, follow that with an isometric hold in the muscle’s shortened position (where you get the biggest squeeze), and finish with a few partials. These are particularly sadistic for any biceps or hamstring curl variation. Why Isometronics Work You shouldn’t need to be convinced that drop sets are a useful tool for increasing training volume. They also allow you to do more of those “important” reps where you’re able to fatigue the last remaining muscle fibers at the back end of each set. Your glutes need some volume to grow. They also require you to tap into both fast and slow-twitch fibers. It varies depending on what you read, but your gluteus maximus has a 50/50 split in terms of fast versus slow-twitch muscle fibers. As a form of mechanical drop set, isometronics begin with your weakest portion (full range of motion), drop to an isometric hold, then drop again to partial reps in your strongest position. The reason why an isometric hold is stronger than when you’re moving is because your muscles can find an extra 10-15% more force here. This isometric hold alone adds a big dose of intensity to any exercise. You’ll get extra fast-twitch fiber engagement, lots of mechanical tension, and you’ll stimulate hypertrophy. You’d do well finishing each set with the isometric alone, but adding some partial reps will increase time under tension, fatigue even more motor units, and further stimulate muscle growth. Use this technique sparingly. To shock your glutes into growth, do it at the very start of your workout as your key lift, then follow up with some basic sets of deep squats, deadlifts, and the
Origin: Tip: How to Build a Professional Butt
Tip: The Surefire Way to Build Biceps
 To build your biceps, like any muscle, you’ll need to work them through their full contractile range. This means doing a variety of exercises that’ll overload them in all positions: shortened, lengthened, and mid-range. Incline dumbbell bicep curls are what most people use for the lengthened position, which makes sense at first. Only problem is, they don’t overload the lengthened position. At the bottom, the biceps are stretched but there’s no lever arm. As you curl, the lever extends further away from the body increasing the amount of mechanical work being done by the biceps. So, while you may fully lengthen the biceps into a loaded stretch, you haven’t overloaded this portion of the range. The mid-range is where most of the work is being done. The Solution: Low-Cable Curls The line of pull from the low cable means that the biceps are working hard out of the starting (lengthened) position. The resistance profile of the lift also does a good job of mimicking that of the muscle throughout the entire range. At the bottom, the lengthened position is challenged. As you curl up into the mid-range (your strongest position), the lever lengthens slightly, then at the top (weaker position) the lever drops off a little. This makes the exercise extremely effective throughout the entire range because it places optimal levels of tension at each point on the strength curve. Nothing Is Perfect The one drawback of this exercise (compared to the incline dumbbell curl) is a lack of stability. Sometimes when people first try the low-cable curl, they struggle to keep their shoulders stable. This causes them to start swinging their shoulders or shrugging up, which creates momentum and takes tension off the biceps. Try to “lock the shoulders down” to focus all of your attention on the biceps. With incline dumbbell curls, you have a bench to drive into and provide artificial stability throughout the shoulders. This makes it easier to focus on only working the biceps. So I often teach people the incline dumbbell curl first to build a habit of putting the biceps in a lengthened position while also programming some scapular stability work. Then they progress to the low-cable curls for enhanced biceps growth once they can control the
Origin: Tip: The Surefire Way to Build Biceps
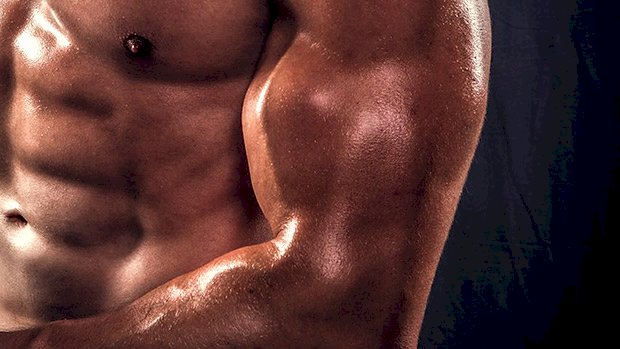
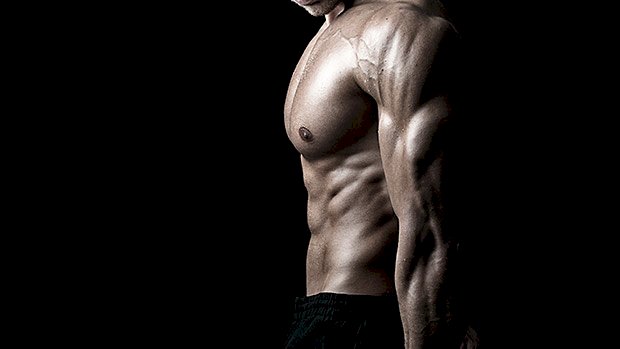
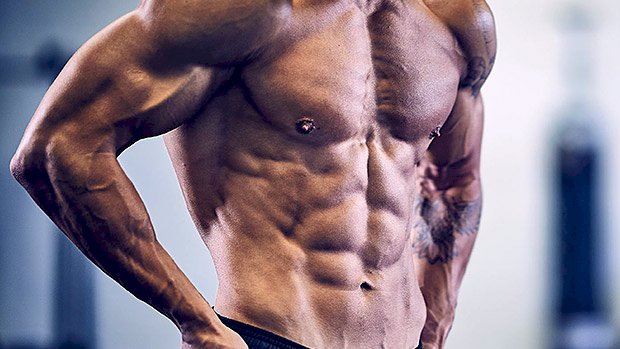
How To Build Superhero Muscle
 When a Hollywood actor bursts onto the big screen with some new muscle, there’s always a lot of hoopla surrounding what he did to obtain that look. The usual drivel from spaghetti-armed twat-waffles revolves around what his cycle looks like. Never mind that in some cases, like with Hugh Jackman, it took these actors years to transform their physiques into something respectable for the silver screen. And here’s a fun fact – a lean physique looks visibly larger onscreen than a gluttonous hot dog eating dad-bod. A lean 180 pounds on the big screen is far more appealing and actually looks more jacked than 240 pounds of neck rolls and love handles. I’ve talked with various Hollywood trainers, and there’s a “recipe” they all use to get their clients looking jacked for their roles. And it actually doesn’t involve growth hormone, testosterone, or clenbuterol. Sure, if the actor is overweight, the coach must work on getting him lean. If he’s needing more muscle, the goal must be to gain a few pounds of lean mass while keeping fat gain to a minimum. But there’s more to it than that. And this is what the average lifter can focus on if he’s wanting to achieve the superhero or action star look. Building the Top Shelf There are three areas of musculature coaches prioritize to get that “quickly jacked” look for their clients. It’s the top shelf of the torso: the traps, delts, and upper chest. Bringing up these areas as quickly as possible will give that “woah, he musta done a cycle!” look to their clients. When you combine that with a fairly lean physique, it pops on the big screen, and usually gives people the impression that the actor gained more muscle than he actually did. And yes, it can do the same for you. But first, you have to get your body fat low enough to show those muscles off. So before we get into the building portion, let’s talk about diet and cardio. Superstar Nutrition Believe it or not, the coaches that deal with these celeb clients aren’t surfing through PubMed to find the latest research to get their clients looking sharp. Here are the sentiments I’ve heard: “If they need to bulk up, I have them eat more and do very little cardio with a lot of heavy lifting.” “If they need to get lean, I keep all their food clean, feed them a lot of extra protein, and have them do extra cardio to get the fat off.” It’s almost like they took this approach right out of the Bro Bible… you know, the one that people slam all the time for being based on trial and error rather than studies. The truth is, bro-diets work. They don’t actually go against any science and they keep the process very simple. One other thing – the gaining phase was only implemented if the actor was lean to begin with. If not, it was accomplished before the force feeding began. Their guidelines are very much like stuff you’d read out of old muscle mags: Eat minimally processed foods and cut the junk out. Eat a significant amount of animal protein at each meal for fat loss and mass phases. Aim for five meals a day regardless of whether they’re in a fat loss or mass phase. During fat loss, carbs are minimized and kept to around the training window (before, during, and after). During fat loss phases, vegetables were increased at most meals for satiety. During a mass phases, carbs were increased, but not by a ton. Strangely enough, there was no talk of counting calories. As long as food was kept to minimally processed sources, it was simply increased or reduced in serving size for each goal. In other words, in the fat loss phase they simply reduced overall quantity of foods, rather than focusing on exact calories and macros. Before all the calorie and macro counting, this was also how Arnold and company approached their mass gaining and fat loss phases. I’m big on counting calories and macros, but I also know that if you’re simply selecting nutrient dense, minimally processed foods, you’ll often end up in an energy deficit, especially if you’re minding your portions, lifting, and doing some cardio. What About Cardio? There were a few approaches. Since there’s no fat loss benefit or advantage of HIIT over steady state moderate intensity cardio (1), they simply went with the one the client preferred. Trainers prescribed more cardio during fat loss phases and less during mass phases. It was never completely taken out during either time, just increased or reduced to reach the goal. For fat loss, a daily cardio session that was separate from the lifting was the norm. Ten to fifteen minutes of it post-weight training was commonly used during mass gaining phases. Training for the Yoked Look As noted, bringing up the traps, delts, and upper chest was the focus in all scenarios. Let’s break it down: For the Upper Chest As you might expect, trainers prescribed a lot of incline chest work. This meant incline pressing variations, incline flyes, and cable work. The two best variations here are the low-incline Smith machine press and the
Origin: How To Build Superhero Muscle
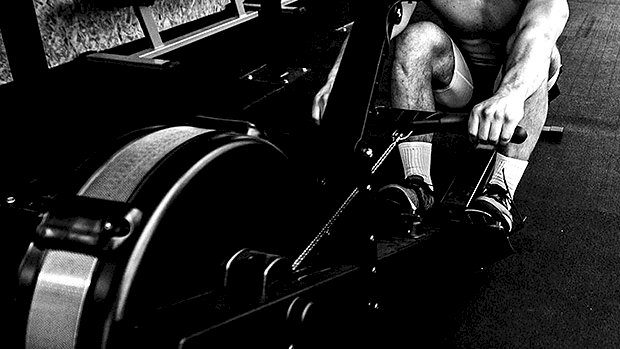
Tip: Do Sprint Snacks to Build Conditioning
 Metabolic conditioning, cardio, aerobics, HIIT, or whatever you want to call it, is to weightlifting what flossing is to dental health. You know, good for us. Still, it’s a grim, joyless, kind of disgusting semi-compulsory act. Granted, we’re not getting drool and masticated burrito bits all over our fingers when we do cardio, but none of us started lifting weights so we could spend hours running or peddling to nowhere on machines, or flogging Mother Earth with old ropes your gym manager stole from the USS Ronald Reagan. Still, we have to do conditioning work, both for health and to improve work capacity. There may, however, be a way to make it more palatable. Scientists have found that doing short sprint “snacks” separated by an hour or more worked just as well as doing them together in one session. In other words, you could do short bouts of peddling or running or presumably any HIIT-type training modality throughout the day when you had a minute to spare and you’d accrue the same benefits as if you’d done them all at once in one tedious, mind-numbing session. What They Did Scientists at the University of British Columbia recruited 28 healthy, young, inactive adults and randomly assigned them to one of two groups that performed 18 training sessions over 6 weeks. One group did traditional sprint interval training (SIT) that involved doing three 20-second bouts of full-out cycling, each 20-second bout interspersed by 3-minute rest periods. The other group did sprint “snacks” (SS) consisting of three, separate 20-second full-out bouts each interspersed by 1 to 4 hours of rest. What They Found As far as cardiorespiratory fitness, both the SIT group and the SS group increased their absolute VO2 peak with no difference between groups. Both groups also showed similar improvement in their 150 kilojoule (kj) cycling time trial. How to Use This Info If you’re somebody who hates doing cardio, you can use the results of this study to make it more palatable. Say for instance you’ve got a stationary bike at home. You can hop on the thing any old time when you’ve got a few seconds to spare, like when you’re waiting for your toast to pop up. Simply get on the bike (or treadmill, or whatever apparatus you use), go balls out for 20 seconds, and then resume whatever you were doing. Then, when similar opportunities present themselves throughout the day, whip out another couple of 20-second high-intensity efforts. Similarly, you could do a single 20-second burst as part of your warm up for your workout and then do another an hour later when you’re finishing up, then doing a third bout later on at home. If we believe the results of this current study, the effects on cardiorespiratory fitness would be the same as if you’d done all three bouts at the same time. It Controls Appetite, Too This type of exercise may also suppress appetite. In a separate study, sport scientists at the University of Birmingham found that high-intensity cycling protocols (4 x 30 seconds) also reduced levels of the hunger hormone ghrelin while increasing levels of the satiety hormone GLP-1. Of course, unlike the “sprint snacks” described in the British Columbia study, the appetite-suppressed subjects did their high-intensity bouts all at once, but it’s likely that even one high-intensity bout would have similar effects on hunger hormones, albeit to a lesser
Origin: Tip: Do Sprint Snacks to Build Conditioning
Tip: Build Big Shoulders With Bodyweight
 The handstand walk is a long-term skill to acquire, but it’s definitely worth learning. The progressions are quite attainable and provide a unique pump that’ll make your triceps and shoulders burn like nothing else. An added bonus is the open shoulder position, which helps with thoracic mobility. Plus, having your weight on your hands builds a crazy amount of shoulder stability that you just don’t get with barbells. Mastering the Handstand Walk All you need is something to elevate your feet. This could be a box, bench, sofa, bed, chair, etc. Then you have five different exercises: Holding the handstand position, aiming for a vertical torso Shoulder taps Walking from side to side Feet elevated push-ups Pike push-ups Which exercises you use will be based on your individual level and skillset. I recommend practicing each exercise individually until you’re confident. Set markers to hit for each exercise such as: 30 second holds 20 shoulder taps unbroken A 360-degree walk around (both directions) 10 elevated push-ups 5 pike push-ups If you can do these easily then you can start having fun. For example, try using a set of 20-30 shoulder taps as a drop set after heavy presses! The Descending Ladder Workout One of my favorite rep schemes for these movements is a five-round descending ladder: Round 1 10 shoulder taps Walk halfway around the box 5 pike push-ups or elevated push-ups Walk back to where you started (if you initially walked to the right, walk left to go back) Round 2 8 shoulder taps Walk halfway 4 pike push-ups or elevated push-ups Walk back Round 3 6 shoulder taps Walk halfway 3 pike push-ups or elevated push-ups Walk back Round 4 4 shoulder taps Walk halfway 2 pike push-ups or elevated push-ups Walk back Round 5 2 shoulder taps Walk halfway 1 pike push-up or elevated push-up Walk back Aim to break up your sets as little as possible. If you can do all five rounds unbroken – without coming down between the sets – you win! The prize is shoulder gains and a massive
Origin: Tip: Build Big Shoulders With Bodyweight
Build Muscle Anywhere, Anytime
 The idea that bodyweight exercises can build muscle might seem foreign to some people. After all, most people’s concept of bodyweight exercises are the stuff you see on cheesy workout DVDs. The truth is, bodyweight exercises can be extremely effective for building muscle, when done correctly. Muscles respond to force. When you lift weights, your body generates force to fight against resistance and create tension. That’s how the process of hypertrophy (muscle growth) begins. But what if you don’t have access to weights? Can you still create enough resistance and tension to build muscle? Absolutely. Here are some key bodyweight exercises you can do anywhere, anytime to help you build muscle. Then we’ll dig into the science. Push-Up Variations Push-ups are the bodyweight king when it comes to building a bigger chest and arms. Here are a few challenging variations: Full Stop Push-Up Get into a push-up position, bring your chest down onto the floor and come to a full stop. While keeping your core engaged and your back straight, push yourself up from the floor to full extension. Full stop push-ups eliminate any potential momentum or cheating during the exercise, putting sole emphasis on your chest to push yourself up from the floor. Isometric Push-Up These minimize momentum and add a pause. Bring your chest down toward the floor and come to a full stop two inches above the ground. While keeping your core engaged and your back straight, push yourself up from the floor to full extension. Eccentric Push-Up Slowly lower yourself to the bottom position and hold for about 5 seconds. Explode back up to full extension. You’re going to be feeling the time under tension while you lower yourself and then apply as much force during the concentric phase. Maintain proper form. Tiger Push-Up This is an amazing variation for the triceps. It’s almost like the Russian dip exercise, but on the floor. Set up in a push-up position with your hands about shoulder width apart. From there, shift your bodyweight back and come down to your elbows. You should be on your forearms with your hips raised up slightly higher than your starting position. Shift your weight forward onto your hands and push yourself up to full extension. Repeat for 10 reps and tell me how your triceps feel. Joe D. Pec Poppin’ Push-Up I’m borrowing this from Joe DeFranco because it’s a good one. When you’re in the starting position, think of pulling yourself to the floor by pushing your hands down and back into the floor. This helps you control the eccentric/negative phase and keep your shoulders set in place. When you get to the bottom of the push-up, press back up and hold. When your arms are fully extended, try to squeeze your hands together as hard as you can without moving them. Maintain this hard contraction for about 3 seconds. You won’t need to do these for more than 10 reps if you’re doing them right. Upper Back Exercises Isometric Y-W-T Lay on your stomach and extend your arms out into a Y formation with your thumbs turned up to the ceiling, squeezing your shoulder blades together as hard as you can for about 3-5 seconds. Pull your elbows back down towards your ribs so your arms are in a W formation and hold again for 3 seconds, squeezing as hard as you can. Finally, extend your arms out into a T position with your thumbs still pointed to the ceiling and squeeze as hard as you can for 3 seconds. That’s one rep. Do 6-8 of those and you won’t need any more. Another way to do this exercise would be to hold each position on its own for 30-40 seconds and rest for about 20-30 seconds before going again. No matter which way you do it, the idea is to contract your upper back muscles and squeeze your shoulder blades together as hard as you can to create an isometric contraction. Handcuffs This is the best bang for your buck when it comes to bodyweight exercises for the shoulders and upper back. It can also be a great warm-up for the shoulders while stretching the pecs. It also fires up the small upper back muscles we tend to neglect during heavy rowing exercises. There’s no way you can cheat this move or use momentum to your advantage, something that you often see when people do weighted back exercises like rows and pulldowns. Start in a prone position by laying on your stomach with your hands behind your lower back (like you’re being handcuffed). Extend your arms out straight by hinging at the elbow and begin to bring your arms to a Y position. Keep them locked and keep your thumbs turned up toward the ceiling. From there, do the same motion coming back, trying to make as big of a circle as you can coming around, and return to your starting position with your hands placed behind your lower back. You’re then going to retract your shoulder blades. While keeping your hands on your lower back, bring your shoulder blades back down, and repeat this entire motion for 10-15 reps. Legs You might think there’s no way to
Origin: Build Muscle Anywhere, Anytime
Tip: Elbows Inflamed? Build Biceps Anyway
 There’s nothing worse for a lifter than dealing with joint inflammation like elbow tendonitis. When the orthopedist tells you the only way to remedy that pain when flexing or extending your arm is rest and recovery, it conjures up images of church lady arms that swing to and fro during heavy clapping. It can take six months or more for tendonitis to go away. Are you really going to stop training your arms for that long? Probably not. The good news is that you don’t have to. You have one more card to play before downsizing your T-shirts to fit your shrinking arms. That card is blood flow restriction (BFR). BFR Brad Schoenfeld covered blood flow restriction (BFR) here and its benefits have been well documented in the research community. Just recently, a meta-analysis was published (Lixandro, 2018) pitting traditional heavy-load training against low-load BFR training to see which was more efficient at growing muscle and strength. Using almost 50 studies, it was determined that low-load BFR was just as effective in terms of hypertrophy as traditional heavy strength training. Sure, strength suffers a great deal in the absence of lifting heavy shit, but at least the sleeves will still hug the arms nice and tight. Here’s How to Do It Place the restriction (wraps or cuffs) directly between the medial deltoid and bicep. Wrap your arms with a perceived tightness of 7/10. This will provide enough pressure to occlude the cephalic vein, but ensure you’re still allowing arterial flow. Check for a distal radial pulse (at the wrist) after you’re wrapped to make sure it’s not too tight. Don’t do the exercise if you can’t find your pulse. Wrap Up and Lift Pain-Free BFR mimics the intensity of lifting heavy without actually lifting anything heavy. The light loads (20-30% of 1 RM) used for standard BFR training will typically allow a lifter to get away with doing movements they otherwise couldn’t do with an inflamed elbow. Additionally, the pooling of blood during a series of BFR curls or extensions creates a cushion of sorts for the elbow that minimizes pain even further. Programming Use BFR up to 2-3 times per week for best results. Try it wherever arm work is programmed in your current protocol and see if you can do it without pain. You probably can. The most heavily researched set/rep scheme is 30-15-15-15. It’s considered the gold standard by practitioners. It looks like this: Set 1:30 reps Set 2:15 reps Set 3:15 reps Set 4:15 reps Take only 30 seconds rest between each set. Unwrap after set 4.
Origin: Tip: Elbows Inflamed? Build Biceps Anyway
Tip: Build Your Back With DUDS
 Try this lat-dominant drop set on back day after you’re done with your heavier, progressive-overload work. Pulling For The Pump Don’t let the “DUDS” acronym fool you: they’re far from a dud finisher. Pick literally any lat pulldown or pullover variation and do this: Do an all-out set to failure (5 to 8 reps). Cut the weight in half and double the number of reps (10 to 16). Immediately cut the weight in half again and double the number of reps (20-32). If you need to take mini 10-second breaks to finish, go ahead. I’d suggest doing it on a well-designed pullover machine. Think of it as metabolic-stress type work, which should come at the end of a workout and only be done for ONE set. Don’t abuse it! Maybe sprinkle it in every other
Origin: Tip: Build Your Back With DUDS
Tip: Over 40? Build Your Work Capacity
 Conditioning Matters Even More Now I realize there are some differences between 25 and 40, and probably a lot of differences between 25 and 50, but not as many as you might think, especially if you have at least 10 years’ worth of training experience. But you can’t train hard if merely pulling your pants on makes you wheeze. You need to do cardio or metabolic conditioning or whatever term you feel comfortable with. How do you expect to work hard if your lungs don’t have the sass to carry on? Moreover, your cellular batteries – the mitochondria – start to wear out, get lazy, take extended vacations in Cabo, or die as you get older. They need a kick in the pants so they get to multiplying, and that’s what intense exercise provides. Fear not, though, because you don’t have to devote hours and hours to all that tedious, conventional aerobic training stuff where you sit on a stationary bike for an hour as your panini-ed prostate swells up to the size of one of those sand-filled Bulgarian bags. Options That Don’t Suck At least three times a week, get on the treadmill, rower, or yes, stationary bike for a measly 10 minutes for some HIIT-style training. Focus on all-out efforts of 20 seconds, followed by 60 seconds of “active recovery.” On a treadmill, that might mean setting the speed at a leisurely 3 miles per hour and then cranking it up as fast as your little stubby legs allow for about 20 seconds, after which you’d drop the level back down to 3 again for a minute or two before you do another round. You could do the same thing on a stationary bike or rower, or you might prefer short sprints followed by walking-recovery periods. Alternately, you can crank up the incline on the treadmill to the Himalaya setting, or as high as it goes, and trudge uphill, Sherpa like, for 30 to 60 seconds before zeroing out again. This type of training has been shown to increase mitochondria. That, coupled with the increase in endurance you’ll experience, will allow you to lift as hard as you need
Origin: Tip: Over 40? Build Your Work Capacity
