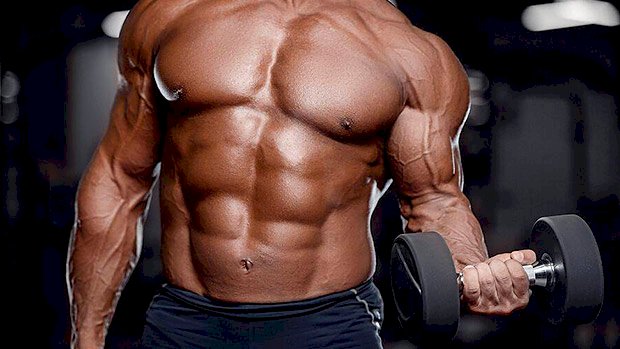
 In Olympic weightlifting, the word “tonnage” is used to indicate how much total weight was lifted during the session. We also call it the “volume of work.” Tonnage is important, but when it comes to hypertrophy and the natural lifter, there’s an optimal dose. If a natural lifter goes overboard on volume, he or she will burn out their nervous system or skyrocket their cortisol – both of which will make gains stall. But I developed a system for natural lifters using high volume. Before we get to it, let’s take a look at who we’re talking about here and what their bodies do. 4 Kinds of Lifters Different people are stimulated by different types of training: 1 – Volume People Lifters who naturally prefer to perform a greater number of sets to achieve muscular stimulation. They normally don’t push each set as hard to be capable of doing the planned volume without crashing. If you follow the various experts, Dr. Mike Israetel, Pat Davidson, and John Meadows fall in that category. For them, gradually increasing volume over time is the main driver of hypertrophy. 2 – Intensity People These are people who prefer to do fewer work sets, but push these extra hard – to failure (or very close to it) or even beyond. Dr. Scott Stevenson, Dorian Yates, Mike Mentzer are good examples. Paul Carter’s preferred style is also more slanted toward intensity than volume. 3 – Load People These people are mostly about adding weight to the bar. We’ll find them more often among the powerlifting crowd, or they see themselves more as powerbuilders. In that category we can have a wide variety of approaches, from linear progression/progressive overload to the conjugate model. But they have one thing in common: strength is the number one goal. Think: Jim Wendler. 4 – Process People They’re all about precision. Perfecting their technique, writing down everything, analyzing data, and seeing a well-planned program deliver results is what they train for. They’re all about minutia and often suffer from paralysis by analysis. We don’t have that many of them among bodybuilders or strength athletes. Sure, many lifters love geeking out over technique and data, but it’s not their number one priority. Note: This type tends to be common among keyboard warriors who love to argue about everything and then need studies to allow themselves to try something new. When Hypertrophy Is The Main Goal Among those who are mostly interested by muscle gain, we have mainly the volume and intensity people. The intensity people tend to kill themselves and get worse results when they go higher volume because they can’t scale down their effort. They are all-out or nothing. And if they force themselves to “stop short” they don’t feel satisfied and it kills their motivation. The volume crowd often burn out on high intensity programs because of the high adrenaline/cortisol it produces. They’re often unable to reach the required level of intensity to make low volume work and, even if they do, the low volume is unsatisfactory and kills motivation. Cortisol – Enemy Number One Cortisol is the enemy of the natural lifter trying to get jacked. It can limit muscle growth, if chronically or excessively elevated, by: Making protein breakdown higher than protein synthesis Increasing myostatin levels (which inhibits muscle growth) Inhibiting the immune system (muscle damage repair is driven by the immune system) Reducing nutrient transport to muscles There’s a strong connection between training volume and cortisol production. One of the functions of cortisol when training is the mobilization of stored energy so that you have enough fuel for your workout. The more volume you do, the more fuel you require and this means more cortisol release. Understandably that’s one of the reasons why, if you reach a certain amount of volume in a workout, results will start to diminish. However, intensity (and load) can also increase cortisol. See, we often call cortisol the stress hormone, but “readiness hormone” would be more accurate. Basically, cortisol’s purpose is to put you in a physical and mental state to be able to fight or run away. It mobilizes energy so that you don’t run out of fuel in the middle of the fight, but it also increases mental alertness and focus, blood flow (to deliver oxygen to the muscles), and muscle contraction strength. The latter three are done indirectly via an increase in adrenaline levels. So let’s get into that. How Cortisol Increases Adrenaline It does so by increasing the amount of the enzyme responsible for converting noradrenaline into adrenaline (Phenylethanolamine N-methyltransferase). The more a situation requires alertness and drive, the more adrenaline you’ll produce which means that cortisol goes up too. In lifting, the more threatening a set is, or the closer to your limit you go, the more adrenaline/cortisol will be released. A “death set” will spike adrenaline a lot more than a set with 3-4 reps in the tank. A max effort lift will also
Origin: The Best Damn High Volume Workout Plan for Natties
Tag: Best
Tip: The Best Power and Conditioning Test
 The Test Hop on a stationary bicycle, like an Assault or Airdyne bike, and go hard for 1.5 miles. To pass the test, you need to finish in 3:30 or less. The Reasoning If your anaerobic power is lacking, you’re going to have a tough time pushing through multiple hard sets of a lift, let alone an entire training session. If your aerobic capacity is non-existent, you’re going to have a hard time recovering in both the short-term (between sets/exercises) and the long-term (between training days). Since the test is short, yet long enough to tap into the aerobic system, you’re simultaneously testing both qualities. As a refresher, anaerobic power is the ability to exert maximal power in the presence of fatigue while sustaining high levels of metabolic stress. Aerobic capacity is the ability to be maximally efficient with the entire body while feeling like you have a flamethrower going off inside your lungs. If you lack either quality, the 1.5-mile bike test will humble you in a matter of minutes. The positive is, you’ll find out which area you need to focus on: If you were able to maintain a solid pace but still didn’t beat 3 minutes and 30 seconds, your anaerobic power needs work. If you shot out of the gates but burned out within the first minute, you need to build up your aerobic
Origin: Tip: The Best Power and Conditioning Test
The Best Exercise for a Smaller Waist
 Here’s what you need to know… Back in the day, bodybuilders were judged on having small waists. And they actually trained using exercises to “tighten” the waist. You can’t narrow the width of the hips, but you can control the width from front-to-back. When Frank Zane was hitting his famous vacuum pose, he was intensely contracting his transverse abdominis or TVA. The TVA runs left to right across your midsection, much like a weight belt. In fact, the TVA acts as a natural weight belt. The TVA also plays a huge role in preventing back pain. To train the TVA, start with the supine vacuum, then progress to the quadruped vacuum, the seated vacuum, and then functional variations. How would you like to shrink your waist by performing one simple exercise? Want to know something that’s even cooler? The same exercise that’s going to decrease your waist circumference is also likely to remedy your lower back pain. The V-Shaped Physique Many lifters today prefer the old-school bodybuilding physiques as opposed to the modern day behemoths. A large part of that preference has to do with the sleek waists possessed by those classic, V-shaped bodybuilders. Back in the 70’s, bodybuilders didn’t just think about building individual body parts; they thought about the appearance of the physique as a whole. That’s what bodybuilding, whether recreational or competitive, should be about – creating a visually appealing physique in its entirety. Even Arnold Schwarzenegger, who was a mass monster in his day, had a really small waist. And when I’m talking small waist, I’m not talking genetically small as in left-to-right (narrow iliac crest or hip width). I’m talking about small front-to-back, which is something that is within your control, unlike your bone structure. Guys like Arnold, Frank Zane, and Lee Haney didn’t just stumble on these tiny waists and the incredible ability to hit a vacuum pose from any angle – they earned them. They actually made it a priority in their training and contest prep to work on performing the coveted vacuum. To them, working on pulling in their midsection was every bit as important as working chest and biceps, and I’d argue that we should have a similar perspective. Science of the Vacuum Exercise Let’s geek out a little bit and look at a little science behind this vacuum-thing. When Zane was hitting his famous vacuum pose, he was intensely contracting a muscle we sadly don’t think much about today, which is the transverse abdominis (aka transversus abdominis), or TVA. The TVA, which lies under the rectus abdominis and obliques, is the deepest of the abdominal muscles. It’s a unique muscle because it doesn’t connect to and move bones closer together like most other muscles. In fact, many of its fibers don’t connect to bone at all. Instead, they run across the midsection, hence the name transverse abdominis. So the TVA runs left to right across your midsection, much like a weight belt. And, in fact, that’s precisely one of the primary functions of the TVA, to act as a natural weight belt. When the TVA contracts, it increases intra-abdominal pressure and stiffens the spine. Again, just like a weight belt. But the TVA isn’t just for use when we’re lifting; it also serves to hold our internal organs up and in our abdomen where they should be. Think of the TVA as the anti-distended-abdomen muscle. And that’s exactly why you need to train it! Sleek and Pain Free A tight midsection isn’t the only reason we’re going to pay attention to the TVA. It also plays a huge role in preventing low back pain. In fact, numerous studies show that most people with low back pain have a “sleepy” TVA – one that doesn’t contract when it should. The good news is that studies also show that your sleepy TVA can be woken up via exercise, and that doing so will quite possibly reduce or eliminate your back pain. Training the Transverse Abdominis It makes sense to start with the easiest, most basic version of the vacuum exercise – or as it’s known in the clinical world, the “abdominal drawing-in maneuver” or ADIM. Given that you’ll get the assistance of gravity, the supine (face up) version is where we’ll begin. Supine Vacuum Start by lying on your back with your hips and knees flexed such that your feet are flat on the floor or bed. Next, exhale as much air as possible. This raises your diaphragm and, much like an empty stomach, allows for maximum contraction of the TVA. Lastly, pull your navel in as close to your spine as possible. The more your navels draws in, the more the TVA is contracting. In the beginning, try to hold the vacuum for about 15 seconds or so on each set. As with any exercise, you’ll want to progress over time. Work up to holding the vacuum for 60 seconds each set. Now, don’t let your inability to hold your breath keep you from doing these longer sets. Take small breaths as needed. Start with three sets and, over time, work up to five sets if you’re serious about getting results. By the way, to
Origin: The Best Exercise for a Smaller Waist
The Best Squat You’re Not Doing
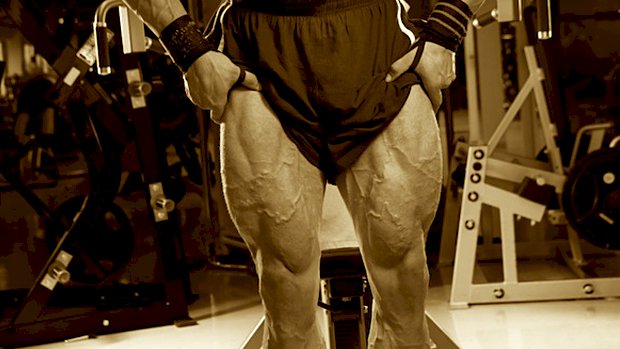 Here’s what you need to know… Landmine squats are the solution for lifters who can’t squat correctly because of joint pain or mobility problems. For novice lifters, landmine squats teach proper squat form. For veteran lifters, they’re gentler on joints so you can augment your heavy back squats with landmine squats without repercussion. The arc of the bar travels back as you squat down, so you have no choice but to sit back and stay upright. Doing so builds and strengthens the quads. The Problem With Squats Squats are hyped-up as the king of leg exercises, but that only applies to a very small percentage of lifters: ones who actually squat well and ones who aren’t injured. Most lifters actually suck at back squats, at least initially. Mobility restrictions or their own anthropometry makes it tough to squat with an upright torso. As a result, the movement ends up looking like an ugly good-morning-squat hybrid. Even those with good form find back squats to be problematic when they have lower back, knee, or shoulder issues. Front squats are an option, but many find it tough to hold the bar, and it takes a lot of practice to get the hang of it. Learning to squat correctly is worth the effort, but trying to add heavy loads to an exercise you can’t do well is asking for trouble. The Landmine Squat Solution Landmine squats teach the squat pattern, so they’re an excellent way to work towards being able to do back squats and front squats. They’re also a great alternative for those who can’t perform regular squats because of injury. Start with one end of the bar in a landmine unit, or if you don’t have a landmine, just put one end of the bar in a corner using a towel to pad the bar so you don’t scratch the wall. If your gym has 45-pound plates with holes in them, you can also put a plate flat against a wall and put one end of the bar in one of the holes. From there, hold the other end of the bar against your chest and squat down and try to touch your elbows to the tops of your thighs or just inside your knees, depending on the width of your stance. It’s important to set up with the bar against your chest instead of away from your body so that you maintain an upright torso and don’t have to rely solely on your arms to hold the weight. The Goblet Squat Comparison Compare the landmine squat to the goblet squat. They’re similar to goblet squats in that they’re anteriorly loaded, but they’re better for teaching a good squatting pattern because the bar moves in a slight arc. Take advantage of that arc to help reinforce the pattern of sitting back into the squat and maintaining an upright torso – two things people struggle with most when it comes to squatting well. Since the arc of the bar travels back as you come down, you have no choice but to sit back, and you’re also forced to stay upright lest the bar jam into your sternum. Notice that the landmine squat allows the lifter to stay much more upright with far less forward knee travel, making it more joint-friendly for the knees and lower back while still crushing the quads. The landmine squat also allows for far greater loading than goblet squats, meaning it’s not just a teaching tool but a viable way to build strength and muscle if you load it up. Landmine Box Squats Here’s what a landmine box squat looks like as demonstrated by UFC athlete Brendan Schaub. It can also be helpful to perform landmine squats to a box or low bench that serves as a depth gauge. A box or bench will also act as a reminder to sit back into the squat, which is especially useful for folks who tend to come too far forward rather than just sitting back and engaging the hips. Just make sure to set up close to the box so that your calves are just in front of it or even lightly touching it. When and How to Use Them Combined with a heavy dose of mobility work, they’re a perfect gateway to regular squats and front squats to groove the pattern. For lifters looking to increase the volume of their lower body training, try landmine squats as an adjunct to regular squats since they’re a lot easier on the joints. Most people can’t tolerate doing heavy squats more than 1-2 times a week, but you could augment traditional squats with 1-2 days of landmine squats to train the squat pattern and work the quads without beating up the lower back and knees. For lifters who can’t do traditional squats because of injuries, landmine squats are a good alternative. Before you scoff at the idea, try doing them heavy and see what I mean. Landmine squats are a great option for taller guys who struggle to stay upright and have trouble targeting the quads with traditional squats. Doing 10-20 after you’ve completed your heavier leg work will blast your quads into
Origin: The Best Squat You’re Not Doing
Tip: Metabolic Brownies – The Best Recipe Ever
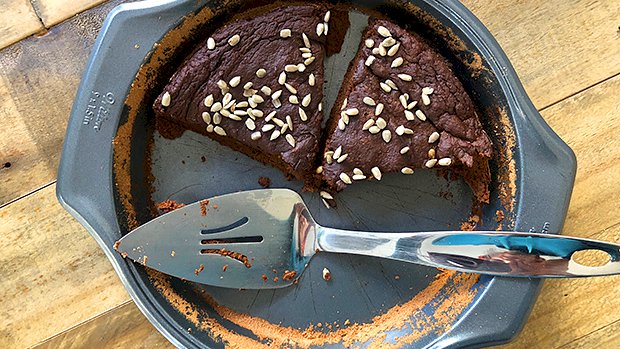 Pumpkin is a great way to add a ton of moisture to your desserts without a ton of calories, and the flavor can be masked fairly easily. It doesn’t have to taste like pie or overpriced lattes. And sure, as lifters we can afford the extra calories, but wouldn’t it be nice to have a generous portion, one that actually fills you up, without topping out on your allotment for the day? You can with this. Metabolic Drive Protein Brownies Ingredients 1 can of pumpkin, 16-ounces (not pumpkin pie filling) 1 cup chocolate Metabolic Drive® Protein (or 3 heaping scoops) 1 cup Splenda 2 tablespoons unsweetened cocoa powder 1/4 teaspoon salt 1/4 teaspoon baking soda A pinch of coarse ground salt Option: Nuts or seeds to sprinkle on the top Directions Preheat the oven to 350. Mix all the ingredients together. Get a medium-sized pan. (I use a round 9-inch cake pan.) Spray it with coconut oil, then dust it with protein powder to keep the brownies from sticking. Spoon the batter into the pan and distribute evenly. Lightly sprinkle the top with nuts or seeds (if using) and the course ground salt. Bake for about 18-20 minutes or until done. Cut it into 6 pieces, and enjoy! Nutritional Information Per Slice Calories:88 per slice, without nuts/seeds Fat:1 gram Carbs:9 grams Protein:11 grams
Origin: Tip: Metabolic Brownies – The Best Recipe Ever
