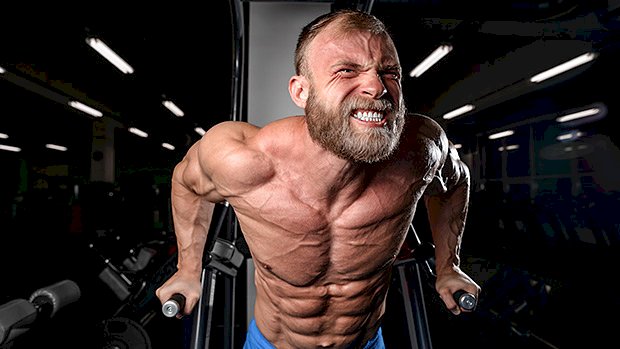
 1 – Add Some Instability Work… At the Right Time There’s a time and place for everything and that includes using some instability training for the chest. Here’s the only rule about instability training: Make sure you do your stable movements first so that your chest is pre-fatigued before you hit it with something unstable. If you haven’t tried it before, use the “hanging band technique.” If you don’t have a specialized bar, you can double up some loop bands and add kettlebells or plates, as seen below: Alternatively, you can use an unstable base of support by doing push-ups off a stretch band: You’ll find yourself struggling to maintain stability from four different directions (up, down, forward, and backward). 2 – Stop Counting Reps on Accessory Exercises After you’ve already finished your heavy barbell or dumbbell bench workout and are ready to move on to accessory movements (flyes, push-ups, banded exercises, machine work), use a rep range that actually makes you lose count. I’m not saying you need to be doing sets of 85, but high reps are your friend. If you’re strictly counting out sets of 6 or 8 reps on these exercises, you’re not going to build your chest much. Get some blood into the muscle bellies for once so you can get that insane pump you’ve only read about. Use these high-rep accessory exercises as a way to ease up on the shoulder joints, take advantage of superior isolation, and groove the movement patterns for efficiency. 3 – Use Cables for Flyes The classic dumbbell flye is perfectly fine, as long as you realize it forfeits a piece of your force curve. Remember, the chest fibers run in a generally horizontal fashion. When you hold on to a pair of dumbbells, the force angle follows that fibrous path – in theory at least – because of the movement pattern, but in truth, the force angle is directly downward, bearing on the shoulder joint. In other words, you’re attempting to do a horizontal movement using a relatively vertical load. To clarify, let’s exaggerate a bit. Imagine you were going to try flyes with 100-pound dumbbells. There’s a high chance you couldn’t perform a deep flye movement with that kind of weight because it’s just too heavy for the pattern. But, you COULD hold them there at the top of the lift for as long as you want because that position doesn’t stress the actual muscles. However, when you switch that force angle to a horizontal one – in the form of a cable flye where the cables are trying to pull your hands apart rather than the dumbbells simply pressing downward – it can act as a game changer for your activation levels. Not only does this better match the direction of the pec fibers for better quality reps that use more of the force curve, it also makes it much easier to keep good form, even when you’re losing steam. The video gives a demo of conventional incline cable flyes, but also shows an easy way to extend a set by simply converting the flye into a cable press to get some help from the triceps. 4 – Stop Ignoring Push-Ups Whether you want to do them one handed, two handed, using rings, a suspension setup, or with your feet elevated, the classic push-up affords too many benefits that many other movements can’t deliver. There just aren’t many people who are really good at push-ups who don’t have a great chest. That says something. Here are some distinct advantages that push-ups offer: Push-ups are healthier for the shoulder joint. They allow the shoulder blade to move around the ribcage as the movement progresses. This movement matches the upper arm’s change in position – scapulohumeral rhythm. Without it, we’d have gummy shoulders. This is particularly important because conventional bench press patterns force you to pin your shoulder blades back. Consequently, you don’t get a chance to train that healthy scapulohumeral rhythm as much as you need to. Push-ups help engage the serratus anterior, a muscle on the side of the torso that engages when the shoulder blades protract. Developing that muscle can keep your shoulders healthy AND really help finish off an impressive V-taper. Proper push-ups create plenty of time under tension that can’t be duplicated with other exercises. You’ll understand that when you crush repeated sets of 40. You shouldn’t be afraid to make a whole workout out of push-ups. You haven’t “graduated” from them just because you’re strong enough to press 300 pounds. Look at it this way: If you can’t do a set of 35 unbroken push-ups, then you’ve got work to do. No one should get to the point in their fitness where having proper control over bodyweight staples goes to shit and they no longer possess the strength or endurance to do them properly. Try This: If you really want to cook your chest, try super-setting push-ups and bodyweight deep dips. Do 12 reps of push-ups and then do dips to failure and see how many rounds you can get done in 25 minutes. When your chest and triceps are ready to pop out of your shirt, you can DM me
Origin: The 4 Best Ways to Reignite Chest Growth
Tag: Best
The 7 Best Strength Exercises You Don’t Do
 Getting stronger requires more than just adding plates to the same three lifts. It requires some actual thought when it comes to exercise selection. Here are the seven most strategic lifts you’re probably not doing. We’ll go over what they target and how they’ll make you stronger on the big three. 1 – Belt Squat Targeted Muscles: Quads How It Helps: If your hips shoot up and your chest falls forward during the squat, this can help prevent that. Strength development occurs primarily as a result of neural adaptations (1). Heavy-load resistance training produces greater strength gains when compared to low-load resistance training (2). Unfortunately, training at high intensities generates significant fatigue which can become an obstacle and even lead to overreaching if left unchecked (3). When we look at primary exercises where the lower body plays a major role, like the deadlift and squat, a significant contributor to fatigue is axial loading (4). Axial loading is where your spine is under a compressive load such as a barbell squat. However, the belt squat allows you to bypass axial loading. This makes it an excellent exercise for developing strength because you can maintain high intensities without generating nearly as much fatigue when compared to a barbell squat. 2 – Floor Press Targeted Muscles: Chest, shoulders, triceps How It Helps: Ever get stuck at the midpoint of the bench press? This’ll help with that. The sticking point on the barbell bench press for most lifters occurs at the midway point (about 6-8 inches off the chest). It’s a common problem. During the typical powerlifting setup, your back is arched and you use leg drive, which generates an impulse force to rapidly develop momentum to initiate the lift. This is great in competition where you need to use every advantage, but in training we can eliminate these benefits strategically to improve bench press performance. The floor press forces you to remain flat and doesn’t allow for leg drive. And since the bottom end of the floor press and the sticking point of your competition bench press are generally the same, you can train your sticking point directly while simultaneously increasing your raw strength. 3 – Reverse Hyper Targeted Muscles: Low back, hamstrings, glutes How It Helps: Guilty of rounding the low back during deadlifts? These have your back. The reverse hyper was introduced by Louie Simmons. It’s gained popularity, but there are still a surprising number of people who are unaware of this exercise. Strength athletes generally train movements to build strength, not muscles. But this can become a limiting factor. For example, if an athlete’s quads can generate 600 pounds of force but his or her low back can only brace 400 pounds, the rate-limiting factor is the low back. This is where adopting more of a bodybuilding approach can be highly beneficial to specific athletes. The reverse hyper directly trains your glutes and hamstrings but primarily targets your low back (5). Training your low back can improve your ability to brace during heavy squats and deadlifts. An additional upside is that the exercise has a low fatigue cost and actually has restorative properties due to the decompression that occurs during the movement (5). 4 – Safety Squat Bar (SSB) Squat Targeted Muscles: Quads and core How It Helps: Hips shooting up during the squat? Chest falling forward? Here’s an exercise that’ll help prevent it. This is an effective variation of the low-bar squat. A common error many lifters make is the chest-fall pattern: their hips shoot up and their chests fall forward as they stand up with the weight. It almost looks like a good morning. This is most often associated with weak quads. But a SSB squat distributes load differently than a traditional low-bar squat which alters the torque requirements. Because of your upright position, the SSB squat requires more torque from the knees compared to a standard low-bar squat (6). So this exercise puts you into a more quad-dominant movement pattern to preferentially train your deficiency. Because you can’t grip the bar as you normally do, your upper back isn’t as tight, so this exercise also increases your upper back and core strength. 5 – Band Pressdown Targeted Muscles: Triceps How It Helps: This is another preventative exercise for those whose bench press gets stuck at the midpoint. Supplementary work for strength development is often written off because it’s not specific. Big mistake. Increasing your muscle fibers’ cross sectional area directly relates to increased force production (7). And since the triceps play an important role in the bench press, they often require additional work. To understand the benefits of the band pressdown over other triceps exercises, we need to understand torque. Torque is a twisting force that tends to cause rotation (8). This diagram shows the action of a triceps pressdown. The linear force (the external load of the cable
Origin: The 7 Best Strength Exercises You Don’t Do
Tip: Best Deadlift For Leg Size & Back Health
 You’ll need a dual-adjustable cable machine like the one in the video. Something like a Cybex Functional Trainer or a Keiser Functional Trainer would work. You’ll also need a bar-style cable attachment. (If you don’t have one of these attachments, you’ll see a workaround below.) The attachment should be set just off the floor. Pick it up and step back a foot or two, which will change the angle of pull from the cable. Engage your lats, push your hips back, and allow the bar to travel in toward the cable machine. Once your hamstrings have gone as far as they can handle, return to the start position. Just think of it as a traditional RDL, but you’ll be forced into a slightly different movement to compensate for the direction of the cable. If you don’t have access to the type of cable attachment shown, here’s an effective way to do it using a barbell. Combo Hamstring RDL Here’s a closer look at how the cable is attached to the barbell using a common handle. (Ankle attachments will also work.) When using the combo (cable and barbell) version you’ll also need to account for the extra weight of the bar. This adds another element to the exercise, where on top of the more horizontal cable load you’ll also be adding to the vertical. You can add weight to the bar here, but keep in mind how this’ll affect the overall profile of the exercise. There are some merits to doing this, but for now let’s stick to the exercise in question where the majority of weight is coming via the cable stack (two cable stacks, technically). Why They Work Due to the cable angle, the exercise is designed so that your hamstrings are likely to give out well before your back does. Your hamstrings are taken into a fully lengthened position under load, while your low back will feel like it’s on vacation. Theoretically, there’s very little sheer or compressive force coming through your lumbar region, while there might even be a little traction of the spine as you reach into the bottom position (depending on the height of the cable). These Romanian deadlifts are anything but an ego lift. They prioritize tension through the targeted muscle. This is good news if size is your priority. When it comes to hypertrophy, your muscles don’t give a damn how much your ego is lifting. Tucked away by layers of connective tissue and skin, they’re blind to what goes on outside. They do recognize tension though – and you’ll get plenty of it with this exercise. You’ll also notice that as your toes get pulled into the floor (resisting dorsiflexion), your calves will become more active. This co-contraction of the gastrocnemius adds to the effect and will make things even harder for your hamstrings. Programming Try these in place of your regular deadlifts as a way to vary the training stimulus or work around a tricky back. They’re also a useful alternative to exercises such as 45-degree back extensions, reverse-hypers, pull-throughs and the like. Sets and reps should be
Origin: Tip: Best Deadlift For Leg Size & Back Health
8 Secrets For Building Your Best Upper Chest
 While many lifters get decent mid and low-pec development, it’s rare to see a truly filled-in upper chest. When it comes to aesthetics, the upper pecs are a game changer. Here are eight things you need to know (and do) to build yours. 1 – Check Your Ego at the Door The biggest reason guys lack upper pec development? They turn chest day into ego day. Flat bench pressing gets all the love because they can use more weight. But if you’re serious about reaching your pec potential, you need to put your ego aside and focus on incline movements – even if you train in a public gym and you currently suck at inclines. Upper pecs are a tricky area. Unless you won the genetic lottery, just emphasizing incline pressing may not be enough. 2 – Hit BOTH Parts of Your Upper Pecs When people think about the upper pecs, they only think about the clavicular portion of the pectoralis major. But there are TWO major portions. The clavicular part originates on your clavicles and run almost parallel to your anterior deltoids. When doing incline presses, many lifters mistakenly use the same grip and style they use for flat bench presses. However, research shows that one great way to emphasize the clavicular portion of your pecs is to use a narrower grip when doing inclines (1). This brings your elbows in and gets your shoulders moving in the direction of your clavicular fibers. Note: Don’t bring your elbows in all the way; this will place stress on the anterior delts. If you use a barbell, use a shoulder-width grip and focus on squeezing your hands together as you press the weight to increase the recruitment of your pecs. You can also do this with dumbbells and your arms at a 45-degree angle: This elbow tuck position is so powerful that you may not even need to use an incline. Research shows that simply doing flat bench press with a reverse grip lights up your clavicular fibers (2). The downside of the reverse-grip bench press? You move your arms into external rotation. While it works, it may not be optimal because the pecs assist in internal rotation. As a result, a better approach is to press with dumbbells (off floor or bench). With dumbbells you get the same elbow position at the bottom as a reverse-grip bench press, but you can internally rotate your arms as you press up for max pec recruitment. The other part of your pecs that’s often forgotten is the upper sternal portion. If you look at the pec anatomy, you’ll see sternal fibers running all the way up to the top of your sternum. If you look at the line of pull of these fibers, you’ll see they’re still pulling your arm across your body. If you only press with your elbows tucked, or a steep incline, you might miss this part. To develop the upper sternal fibers, you need a low incline and a wider elbow position. Note: If you have shoulder problems, or experience pain pressing this way, don’t do it! However, if you want to give it a go, here are some tips that’ll help hammer your pecs while sparing your shoulders: Don’t force the elbow flare – maintain a slight elbow tuck. Remember, you’re on a slight incline. Flat bench pressing with wider elbows is riskier for your shoulders because your shoulders are abducted (out to the side) and internally rotated. This puts you in a position of shoulder impingement. But when you use a slight incline, you externally rotate your arms which moves you out of that shoulder impingement position. Stop when your elbows are in line with your shoulders. This is where most people naturally stop anyway. Also note that the distance between the dumbbells and your shoulders will vary depending on your arm length, so stop looking at the dumbbells and start looking at your elbows. 3 – Find YOUR Optimal Bench Angle If you’re trying to build your upper chest, the angle matters. If your bench angle is too high, your upper pecs will drop out and your anterior delts will take over. What’s your optimal angle? Research shows that a bench angle of about 30-45 degrees may be best for hitting your upper pecs (3). However, before you pull out your protractor, you should know that this study was done with only 14 subjects. That leaves us with the question, “What about individual variation?” If you look carefully at a bunch of different people, you’ll notice significant variance in chest cavities (sunken, flat, barrel, etc.). How can people with different chest structures press on the same bench angle and expect the same muscle activation? The optimal angle for you might be higher or lower than the next bro at your gym. To find your best angle, try this test: Attach a light band to a rack or post at about eye level. Keep the band tension very light. Grab the band and raise your hand overhead. Place your opposite hand on your upper pec of the raised arm. Draw your hand in until it’s at or just past the midline of your body. Slowly lower your hand. Stop the movement when you feel your upper pec light up. Turn to a side mirror and
Origin: 8 Secrets For Building Your Best Upper Chest
The Best Squat You Haven’t Tried
 Get Lumberjacked! If you struggle with squat depth, if your wrists, elbows, or shoulders hurt, or if you feel like you’re falling apart before leg day even started, try the lumberjack squat. Though similar to the goblet squat, it offers the benefit of being able to go heavier. Here’s what it looks like: If you’re familiar with landmine squats you may be confused about why I use a bench for these. The bench minimizes the risk of getting hurt while picking up and putting down a heavier load. And it prevents you from tiring out getting into position. You don’t want picking up the bar to be the hardest part of the work set. You might think the bench setup isn’t worth it. Well, you’d be wrong. Try it and you’ll quickly figure out how comfortable the starting position feels. It’s safer too. Setting up in this way also helps standardize squat depth, and it makes for an easy way to bail out if you need to. It’s not necessary to train to complete failure, but if you’re going to then the lumberjack squat makes it easy to do so. The Setup Get a landmine attachment ready. Whether it’s fixed to the floor or a rack attachment doesn’t matter. One thing not to do, though, is to use the corner of your gym. With the loads you might get up to, it’ll likely drill a hole through the wall. It’s also less secure. Use a standard length 7-foot Olympic bar. Even most beginners can handle the load of a 45-pound bar quite comfortably. And because of the fulcrum, you’re not truly handling the full weight of the bar anyway. Get the bar up into place. You CAN just whip the bar up into position, but a smarter approach would be to use a bench (or box) like it’s shown in the video. That way there’s no twisting or jerking of your back and no awkwardness getting into position. Mind the starting height. If you’re tall, you can use a plyometric box or even stack a few plates on the bench to get the perfect height. A standard gym bench could be suitable. As a 5’11” lifter, the bench height works well without any adjustments. If you’re shorter, you can use a step with risers to get the correct height. You can also use smaller plates on the landmine. It’s up to you to figure out what’s best according to your frame and squatting anatomy. The Execution Like conventional squats, your foot position can vary depending on your own anatomy or what you’re looking to emphasize (more on this later). At the bottom, try to drive your knees out with your elbows and keep your feet flat on the floor. Get set, get tight, and start your first rep by overcoming the inertia of the weight in the bottom position. As you fire out of the hole, you’ll move slightly forwards. The landmine will determine the angle, just make sure you keep the bar close to your chest throughout (cupped) and don’t let it inch down. You’ll probably find you need to stand further behind the bar than what you initially thought. There’s a sweet spot, but don’t worry, you’ll know when you’ve got it. Make sure you’re staying tight throughout and take a deep breath on every rep – breathing out on the upward effort. Once you’ve nailed the setup, add some load. Providing you don’t have tiny hands and a horrible grip, you’ll be able to handle some respectable weight, typically more than a goblet squat would allow. Here are a few ways you could use this variation: For Athletic Strength, Add a Band As you approach the top of the rep, the tension drops a little. This means that while it’s harder in the bottom position, as you reach full extension it gets easier. To accommodate for this and even out the strength curve a little, use a resistance band. A band will encourage you to fire through it, while also accelerating you on the way down. Because of the slightly more horizontal nature of this squat, it’s a great option for athletes looking to develop more horizontal force. Pick the load according to your goals, although this can be a good option to improve strength-speed (high-load power output and rate of force development). For Intensity, Do a Drop Set To add intensity to your lower body session, drop sets work well here. The lumberjack squat setup makes it easy to strip plates as you go. In the video you’ll see a single drop-set, but feel free to add multiple drops for some extra nastiness. Only someone with a sadistic side will enjoy these. You’re welcome! To Emphasize the Quads, Wedge the Heels Lumberjack squats work well when combined with a heel wedge. This might take a few tries to get right. For most, the heel wedge would be level with the end of the bar when stationed on the floor. Adjust accordingly though. The heel wedge will increase quadriceps’ activity and allow an even greater depth over a variety of foot placements. You can go super narrow to hit the outer quads a bit more (vastus lateralis) or take a wider toes-out stance to hit more of that teardrop (VMO). Programming Lumberjack squats could be used as an alternative to conventional squats if you’re
Origin: The Best Squat You Haven’t Tried
The Best Damn Cardio for Natural Lifters
 Figuring out the best way to train for muscle growth and strength is already complex. And it gets even more complicated when you add cardio to the mix. You’ve probably heard or read statements like these before: “Fasted cardio will eat into muscles!” “Low intensity cardio will make you look like a marathon runner!” “Cardio after lifting will negate your gains!” We’ve reached a point where we’re almost scared of doing cardio. We’re afraid of losing our hard-earned muscle. Well, don’t look to “enhanced” bodybuilders for applicable advice. Their use of anabolic drugs counteracts any drawbacks that cardio could have on muscle mass. But don’t throw the baby out with the bath water either. Cardio remains a tool that can help us get leaner and healthier. Let’s look at the best and worst forms of cardio for the natural lifter. Cortisol is Key Cortisol has a significant correlation with muscle mass, albeit an inverse one: the higher someone’s cortisol production is, the harder time he’ll have building muscle and gaining strength. In fact, a higher cortisol level has been correlated with a drop in strength in older individuals (1). And while producing it is necessary for proper human function, too much can kill your gains. It may do so in a few different ways… It can increase muscle catabolism. Cortisol will lead to a breakdown of the tissue to make amino acids that can then be transformed into glucose to be used for energy (gluconeogenesis). That’s one of the main functions of cortisol. It’s not a self-destruct function, but rather, a function designed so that you’ll have fuel when you need it. It may inhibit the immune system. This is important because muscle damage repair (important for growth) is driven by the immune system. By inhibiting the immune system, cortisol can slow down muscle repair and impair growth. It can increase levels of myostatin. Myostatin plays a big role in how much muscle your body will allow you to build. The more myostatin you have, the harder it is to build new muscle. So that means, by increasing myostatin, cortisol can once again diminish muscle growth. An enhanced lifter can handle a lot more cortisol with less negative impact on muscle growth because of the exceedingly high levels of anabolic hormones in his body that can counteract (to an extent) excess cortisol production, at least when it comes to muscle growth. But a natural lifter wants to avoid producing too much cortisol from his cardio work. As such, the best damn cardio for the natural lifter is the one that can deliver results with the least amount of cortisol being released. Two Things Cortisol Does During Training Cortisol has many purposes during a workout. The most important are: It mobilizes energy. It will free up stored glycogen, fatty acids, and even break down muscle tissue to have energy available to fuel muscle contractions. The more energy you need to mobilize, the more cortisol you’ll release. Of course, since the goal of cardio is often to lose fat, you do need to force the body to mobilize some fuel. But too much might offset the fat-loss benefits. It gets us amped up. It increases adrenaline levels by increasing the conversion of noradrenaline into adrenaline. If you need to get amped up, motivated, or are facing something that’s perceived as stressful, you’ll produce cortisol. Doing a high volume of cardio will lead to high cortisol levels and so will pushing to an extremely high intensity level. It helps us maintain blood sugar levels. If blood sugar levels are too low, cortisol and glucagon are released to bring it back up. Why is that important? Because if you exercise in a fasted state, you’ll increase cortisol to a greater extent, especially if you need to mobilize a lot of fuel. “Yeah, but I train fasted and it energizes me!” Of course it does. Go back to what I just wrote – cortisol increases adrenaline levels. Feeling energized is the byproduct of jacking up adrenaline. And while it might make you feel good in the short term, it can do more harm than good if you stay like that for too long or produce it too often. So we have three elements that raise cortisol: Volume or burning a boatload of energy Pushing yourself to the limit Training fasted The Worst Types of Cardio for Natural Lifters The worst types are those that combine a high level of one element or a combination of elements, increasing cortisol above what’s necessary for fat mobilization. 1. Fasted Interval Training Why pick on fasting? Well, I’m not. Taking a 45-minute walk on an empty stomach in the morning is fine, but doing intense intervals fasted in the morning is not. In the first case, sure, you’re fasted (which is one factor to release cortisol) but the intensity is very low (taking a walk can even be calming) and the energy expenditure is low too. A 45-minute walk doesn’t require much glycogen mobilization and doesn’t have a big caloric expenditure. While it’s fasted, the total cortisol output will not be
Origin: The Best Damn Cardio for Natural Lifters
Tip: The Best Way to Use Caffeine
 It’s rare that PhD-types look at a bunch of studies and come out with some specific recommendations. They could demonstrate how a bunch of cats – when held upside-down from a height of two feet and then dropped – landed on their feet a thousand times in a row, but they still wouldn’t jump to any conclusions about how the 1001st attempt might turn out. Hell, you could waterboard the PhD’s to force a bit of kitty conjecture out of them and the best you could expect is for them to glug out a couple of terms like “sample size!” or “lack of controls!” That’s why this recent paper written by some-time T Nation contributor Dr. Brad Schoenfeld and colleagues seems a bit unusual. They conducted a review of the effects of caffeine supplementation on powerlifters and actually offered some useful, concrete recommendations on dosing, timing, and other factors that could benefit not only powerlifters, but also regular lifters and athletes of all kind. What They Did Caffeine is the popular drug of choice of competitive athletes – not because it’s the best ergogenic drug by any measures, but at least partly because it was dropped from the World Anti-Doping Agency’s list of within-competition banned substances. Powerlifters especially love it, though. As proof of their love, caffeine levels in urine samples of powerlifters and weightlifters in general have been found to be significantly higher than those of athletes from other sports. It’s no wonder since the drug can improve maximum strength by 3-4%, which, in the powerlifting world, might mean the difference between winning your weight class and being the guy who’s chosen to scrub out any suspicious stains from the other competitors’ singlets. Caffeine’s status and effectiveness obviously piqued the interest of Schoenfeld and his scientist friends as they scoured through nearly every study on the subject and filtered out some amazingly specific and useful advice. Here are some of the highlights from their paper: Caffeine Performance Caffeine may improve maximum strength from 3-4%. The evidence pertains specifically to the squat and bench press, but there’s no reason it wouldn’t apply to the deadlift, too. Caffeine definitely has positive effects on strength, but may also be useful for attenuating any fatigue-induced decline in muscle strength. Caffeine Dosing Optimal dosing is 2-6 mg/kg, although individual experimentation is needed. Repeated dosing may work better for competitions that are longer than two hours. This practice, using smaller doses of caffeine (2 mg. per kilogram) before each event, may maintain steady plasma caffeine levels. Caffeine Timing If using caffeine capsules, take them 60 minutes prior to event. If using cola or coffee, drink it 40 minutes prior to event. If using caffeine chewing gum, take it 10 minutes prior to an event. Caffeine Habituation and Withdrawal Lifters who habitually ingest a lot of caffeine might experience less of a strength boost from pre-competition doses. As such, they might want to consider a dose of at least 3 mg per kilogram or higher before a competition. The ergogenic effects of caffeine seem to attenuate after 20 days of consecutive use. This suggests that powerlifters might think about ingesting caffeine only before highest intensity training sessions or competitions to maximize performance. A common practice among powerlifters to maximize the effects of caffeine is to stop all caffeine consumption one week prior to competition and restart on the day of the competition. Too bad the literature doesn’t support it. Besides, caffeine withdrawal can lead to headache, fatigue, decreased alertness, and a depressed mood. It would work better, on competition day, to use the higher doses suggested above, in addition to limiting caffeine ingestion in general (morning coffee, coffee pick-me-ups) on the day of competition. How to Use This Info While Schoenfeld and the other scientists had powerlifters in mind when they compiled this info, anyone who isn’t restricted by the typical PhD’s unwritten code of silence would probably deduce that the findings probably hold true to lifters of all kinds. Training legs today and hoping to set a new PR in weight or reps? Pop a few pieces of caffeinated gum 10 minutes before your workout. The Military Energy Gum (MEG) sold on Amazon contains 100 mg. per Chicletty-looking piece. That means that a 200-pound lifter would need to pop two pieces before a workout to hit the low end of the scientists’ recommended dosage (2 mg./kilogram). Plasma levels of caffeine would peak quickly (with the gum) but would start to wane within an hour or
Origin: Tip: The Best Way to Use Caffeine
Tip: The Best Foods for Sexual Health
 The Manliest Meal Here’s a scenario for you female types: You meet someone you kinda-sorta like at the gym and you agree to meet him at the Outback Steakhouse for dinner. You, the bench-pressing, deadlifting, 100% woman that you are, order the Melbourne Porterhouse, cooked so rare you can put your ear to it and hear the sounds of the Australian prairie. But instead of asking for some equally bovine entrée, your date just orders the salad and nothing else: a plate full of lettuce, radishes, and carrots, accompanied with some small grouping of blueberries and strawberries. Now be honest. Didn’t your thighs suddenly clench tightly together? Didn’t an old, weather-worn sign proclaiming that “This here billabong has gone completely dry” suddenly pop up in front of your female parts? There’s no way you’d sleep with this, this… herbivore, right? He’s obviously a low-testosterone hamster, or rather, since you’re eating “Aussie” food, a gerbil, right? Well, get ready to be served a big Bloomin’ Onion of irony, missy, because a new study shows that your fruit-salad munching friend is more likely to be able to achieve and sustain a strong erection than the steak-eating guy who skimps on the plant food. Blue Berries Inversely Related to Blue Balls Researchers from the University of East Anglia and Harvard recently published the results of a large, population-based study in which they monitored over 50,000 men over the course of 30 years. The men were periodically asked about their ability to achieve and maintain an erection, tracking back to 1986. The study found that those who regularly ate foods rich in certain polyphenols (e.g., anthocyanins, flavanones, and flavones) had improved sexual function and were far less likely to suffer from any kind of erectile dysfunction. Foods that contain these particular polyphenols and that were prevalent in the diets of strong-erection men include blueberries, cherries, blackberries, and radishes. Encouragingly, the results were seen from eating what lead researcher Aedin Cassidy described as “just a few portions a week.” Strong Heart, Strong Penis It’s well known that certain polyphenols – anthocyanins and flavonoids in particular – are associated with a reduced incidence of diabetes and cardiovascular disease, and generally speaking, a good heart equals a good erection. After all, it’s all about hydraulics. So it stands to reason that if dietary polyphenols prevent or slow down the development of these diseases, you ipso facto get better erections. Of course, there are likely other mechanisms involved, too. Certain anthocyanins can activate the enzyme AMPK, which affects nitrous oxide systems, which in turn control the intensity and duration of erections. How to Use This Info It’s clear that ingesting certain polyphenols, most notably those found in blueberries, strawberries, blackberries, radishes, red wine, apples, pears, and citrus products, can improve erections and help prevent erectile dysfunction. Exactly how much you’d have to eat requires further study, but it looks like you could easily duplicate the benefits experienced by the men in this study by adding a handful of blueberries to your cereal or protein shake a few times a week. Alternately, you could go the supplement route to make things even easier. Indigo-3G® is an anthocyanin product that was designed to increase insulin sensitivity, but it’s also about the most concentrated form of the anthocyanins available and should go a long way in fortifying sexual function. Likewise, the product Superfood, which is a freeze-dried preparation consisting of 18 different fruits and vegetables, contains abundant amounts of the polyphenols singled out in the erection study. Oh, one more thing, and it goes back to the beef-tongue-in-cheek opening of the article: Steak eaters would have at least one turgid leg up over people who only ate polyphenol-rich foods and not animal flesh. The meat eaters get lots more vitamin B12 than non-animal flesh eaters in general, and B-12 is essential to strong erections. The take-to-bed message regarding erections is this, though: A strong and hale erection is indicative of overall health. It’s the flaccid canary in a coalmine, and if your canary is dead, failing, or flailing, start by shoring up your nutrition with polyphenols (and maybe even some more animal
Origin: Tip: The Best Foods for Sexual Health
Tip: The Best Deadlift for Glutes
 Most lifters have always assumed that the Romanian deadlift (RDL) was a tad better for the glutes and hamstrings than the conventional deadlift (CD) because the quads (specifically, the rectus femoris) play such a big role in the latter. It was a forgone conclusion, like how Eggos are better than English muffins, but no real-deal scientists had ever bothered to compare the two lifts – at least not until some researchers from Western Michigan University looked into it. What They Did The scientists found 21 men with at least three year’s experience with both the CD and the RDL. Each subject had a spider web of needles and electrodes affixed to their rectus femoris, biceps femoris, and gluteus maximus. The lifters then alternated between performing RDLs and CDs, using 70% of their one-rep maximum on both. They all used standard form on both of the lifts, with one exception: While the typical RDL range of motion usually comes to a halt when you start to feel a mild stretch in the hamstrings (which generally happens when the bar travels just south of the knees), the participants in this study were asked to at least attempt to lower the bar to the floor, flexibility permitting. What They Found To no one’s surprise, the CD evoked a much stronger response in the rectus femoris than the RDL – almost double the EMG percentage peak. The researchers also found that the CD caused significantly greater EMG values in the glutes, but this is where we have to take a brief side bar, your honor. Scientists have an entirely different definition of the word “significant” than lay people. In science parlance, significant is kind of a weasel word that just means the amount was large enough to be noticed, or large enough to matter. It’s closely related to the term “statistically significant,” which means a difference that’s unlikely to be caused by random chance. However, if you said you had a significant amount of sex last night, it would likely mean something far different than an amount of sex that, when compared to the amount of sex you normally had, was unlikely to be caused by random chance. So while the CD evoked a “significantly” greater response in the glutes than the RDL, the difference in EMG value in normal, non-science language was just a smidgeon, a duck snort that probably doesn’t matter in the long run. And while the CD came out on top with biceps femoris activation, too, the difference here was even less than we saw with the glutes. In short, the CD definitely caused the rectus femoris, or predominant quadriceps muscle, to work a lot harder. As far as the biceps femoris (the predominant hamstrings muscle) and the glutes, the amount was pretty much a wash between the two lifts. How This Info Might Change Your Training The real eye-opener in this study is just how much the CD relies on the rectus femoris, which presents a potential problem: A lot of us split our leg training as part of a push/pull workout, doing quad dominant movements (like the squat, leg extensions, etc.) on one training day and then doing hip-dominant exercises (deadlifts, glute thrusts, etc.) on another. Since the CD recruits the rectus femoris so heavily, incorporating it into a push/pull workout is problematic. Let’s say your push/pull workout includes squats on “push” day and CD’s on “pull” day. That means you’re working the quads twice as often as you intended. Given this study and the results described in this article, it would be much more logical and efficient to keep the squats in your push workout but replace the CD with the RDL in your pull workout. The glutes and biceps femoris recruitment is virtually the same as with the CD, but you’re getting minimal involvement of the rectus femoris. Max Glute and Biceps Femoris Recruitment with the RDL If you’re going to do RDLs instead of CDs, I suggest you make them count and do them on the Smith machine, as T Nation contributor Paul Carter suggests. (He prefers them to barbell RDLs because the stability afforded by the machine allows you to sit back farther.) Paul also suggests you do them with with a 5-second eccentric to further accentuate the targeted glutes and biceps femoris. To really maximize recruitment, slap a couple of step platforms underneath the bar and stand on them. This will allow you to extend the range of motion (provided your spine is flexible enough). A couple of sets of 10 should more than do the
Origin: Tip: The Best Deadlift for Glutes
The Best Damn Cortisol Article Ever
 Cortisol is like the boogeyman. To scare lifters away from doing extreme things, we tell them that cortisol will eat their gains. While there’s some truth to that, it’s not the whole picture. Believe it or not, there’s no hormone in the body whose purpose is to destroy the body. Cortisol has many key functions, but sometimes the hormone causes a little collateral damage when it comes to looking good naked. Let’s take a closer look. The Functions of Cortisol I call cortisol the “readiness hormone” rather than the stress hormone. Its main purpose is to make sure you’ll be capable of facing any potentially threatening situation. It increases wakefulness, focus, energy, and drive. It does so by raising adrenaline. Cortisol increases the level and activity of an enzyme called Phenylethanolamine-N-methyltransferase (PNMT). This enzyme converts noradrenaline into adrenaline. It’s through this action that cortisol increases adrenaline, which has a direct impact on your state of mind. It increases heart contraction strength and rate. This helps with oxygen transport to muscle and the clearance of metabolites. This is also done via the increase in adrenaline. It increases muscle contraction strength. This is the third impact of increased adrenaline. It mobilizes stored energy. It does so to keep you from running out of fuel when you’re fighting a sabre-toothed tiger or fleeing from it. This is a non-selective process, meaning that all potential energy sources can be broken down and mobilized by cortisol: muscle and liver glycogen, fatty acids from body fat, and amino acids from muscle tissue. It helps you maintain stable blood sugar levels. It increases blood sugar when it’s too low (along with glucagon and growth hormone). It inhibits the immune system. This happens so you’ll have more resources to fight the enemy. Just like in Star Trek when the captain would say, “Divert all available energy to the deflector shields” in the midst of a battle, the body does the same when cortisol tells the body it’s facing danger. For example, during times of fight the immune system will be inhibited. As soon as cortisol goes down, it’ll be brought back to full force to repair the damage from the battle. Note: You can’t dissociate cortisol from one of its functions. When it’s elevated, all of the six things above will happen. So, cortisol is actually quite necessary. It’s essential to have a boost in cortisol when you’re fighting a tiger, deadlifting a PR, or trying to tackle a running back. But if it stays elevated for too long it can have negative effects. Let’s take a look at how that affects our muscle growth, fat loss, recovery, and well-being. Cortisol and Muscle Growth When cortisol becomes chronically elevated it can severely hurt muscle growth via several mechanisms: It directly increases muscle breakdown. The amount of muscle you build depends on the difference between protein breakdown (catabolism) and protein synthesis (anabolism). If you increase protein breakdown (which cortisol does) it becomes a lot harder to be in a significantly positive balance. It decreases nutrient uptake by the muscles. This makes it harder to shuttle amino acids to the muscle to build new tissue and restore muscle glycogen stores. It increases myostatin. Myostatin is a myokine (protein) released by the muscles which limits muscle growth. The more myostatin you produce, the less muscle you can build. By increasing myostatin, chronic cortisol elevation will limit your potential for growth. Over time it can decrease testosterone levels. Testosterone and cortisol are both made from pregnenolone. If you overproduce cortisol, you can decrease the amount of available pregnenolone that would otherwise make testosterone. It slows muscle tissue repair. Repairing damaged muscle tissue after a training session is heavily dependent on the immune system. Chronic cortisol elevation weakens the immune system making muscle damage repair less efficient. Note that after a workout, protein synthesis is elevated above baseline for 24-36 hours (although significantly only for 24-30 hours). This is the timeframe you have to repair the damage and add new tissue. If your immune system is weak, it might take you the full duration just to repair the damage you caused. This means you don’t have time in that enhanced state to add muscle. It’s a predicament that can make muscle growth a very slow process. Cortisol and Fat Loss If you’re familiar with coach Poliquin’s body composition analysis approach (biosignature, bioprint, metabolic analytics) you know the system claims that excess cortisol leads to abdominal fat storage. But if you remember what the functions of cortisol are, you might see a contradiction here. After all, one of the functions of cortisol is to mobilize stored energy (including fat), not store it. Cortisol is, in fact, a fat loss hormone, at least when produced in a pulsatile manner. But that doesn’t mean chronic cortisol can’t
Origin: The Best Damn Cortisol Article Ever
