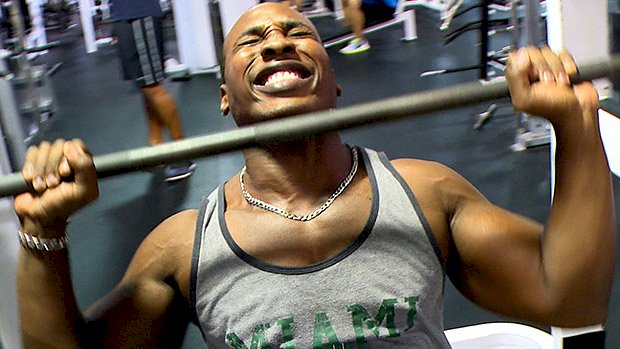
 Lift hard for long enough and you’ll eventually have some joint pain. Whether it’s the knee, shoulder, lower back, or wrist, something will probably flare up. Now, you could pop some pain killers and grind through it until your flare-up becomes a real injury… or you could do the smart thing and manage your injury. If you’re ready to check your ego, use some of these strategies. Increase Your Volume and Decrease Weight Your muscles may be able to take heavy daily lifting, but that doesn’t mean your joints can. Dropping the heavy lifting and increasing your reps will not only give your joints a break, it’ll allow your nervous system to recover while you shift focus towards muscle growth. The amount of effort you put into your workouts doesn’t need to change just because you’re going lighter. Taking shorter rests and increasing your reps will create more metabolic stress which will lead to greater hypertrophy. Also, higher reps will get the heart pumping hard which provides extra blood flow and circulation to your cranky joints. Partial Reps Partial reps create more time under tension and emphasize the “pump” when lifting. Limiting your range of motion to the middle two-thirds of your lift and avoiding the lockout will relieve excess strain on your joints. As an example, here’s the neutral, close-grip incline press: Use Bands as Upper-Body Assistance This can prevent excessive stress at the end range of motion on your pull-ups and push-ups. They’re a great way to add both higher volume and partial reps while allowing your body to be in constant motion for your calisthenics exercises. Banded Partial Push-Up Banded Partial Pull-Up Even if you’re capable of repping out 50 push-ups or 20 pull-ups, bands push your volume even higher and keep a smooth muscular contraction throughout your sets. Deload Your Spine for Lower-Body Work If you feel like you’ve shrunk a couple inches after compressing your spine with heavy squats, it may be time to deload. You can still work the squat movement without all the spinal compression. One of the best ways is with the belt squat. The belt squat takes the spine out of the equation because a belt is placed around the hips and the weight is applied from the waist down. No belt squat machine? Rig together your own variation. One way to do it is to use a couple straps, a hook, some boxes, a weight belt, and a heavy kettlebell or two. Kettlebell Belt Squat Ideally, keep your butt pushed against a wall. This will provide extra stability and allow you to use your glutes and hamstrings to a greater
Origin: Tip: How to Lift with Angry Joints
Tag: Angry
Tip: Got Angry Knees? Squat Like This
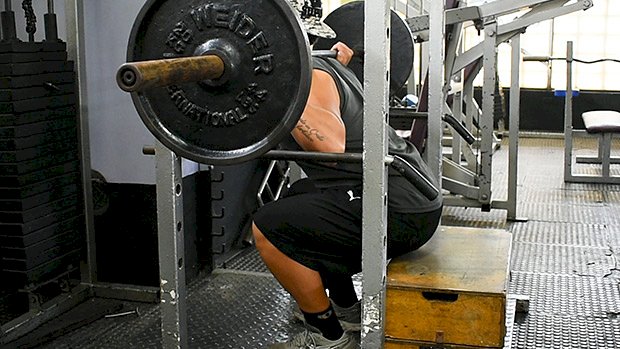 Got achy knees? Give the box squat a try: Set up a box or bench allowing parallel squat depth. Go a little higher if you’re still feeling knee pain, but don’t let it become a way to use too much load through a miniscule, restricted range of motion. If you’re able to use a greater ROM pain-free, go for it. Parallel tends to be a safe starting point for most people. “Grip” the floor firmly with your feet. Torque and rotate your hips externally to pull the knees into alignment with your hips and toes, creating a strong arch. Foot stance varies by individual, so find one that allows comfortable movement and the best range of motion. Keep in mind that the feet don’t need to be placed symmetrically – not everyone has symmetrical hip joints. Aim for a placement that allows you to feel the leg muscles evenly. Maintain external rotation of your hips through the entire rep. This should prevent your knees and ankles from collapsing inward, which would place greater stress on the knee joint and ACL. Maintain vertical shins by sitting back into your hips onto the box. A common issue here is poor ankle dorsiflexion. This can be immediately addressed by elevating your heels with squat shoes or a wedge, but is better managed with ankle mobility work for long-term resolution. By sitting back farther than a regular squat, we reduce the shear force, potentially alleviating the pain. Take a big breath and flex your abs hard to lock in that air and maintain a neutral spine. Brace your core all the way around your spine. Sit in a controlled manner onto the box without disengaging your core or legs and avoid rocking backwards to create momentum for the positive, or lifting, part of the rep. Use a controlled touch or brief pause. For added challenge, sustain a longer pause before the positive rep. Keep the movement strict and avoid failure, which would increase the likelihood of further aggravating your angry
Origin: Tip: Got Angry Knees? Squat Like This
