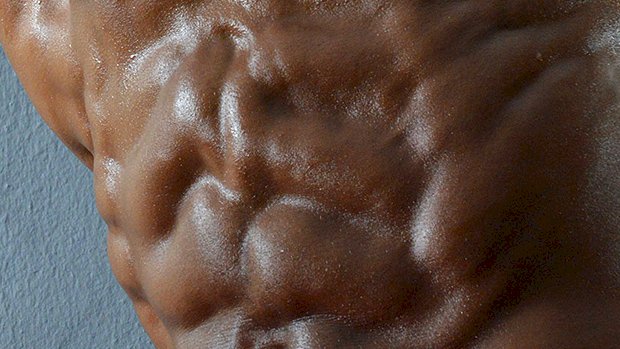
 Take two groups of guys and have them do back squats. Both groups will use the same weight, bar position, foot position, and do the same number of reps. Now, how can you make one group get much greater activation in the core musculature? Answer: Change how the weight is loaded. This leads to drastically different training stimuli. Unstable loading is getting more popular. It’s usually accomplished by hanging weight on the bar with bands (see video below with Joel Seedman) or by using a specialized “wobbly” bar. Let’s take a look at a new study on unstable loading. The Study Fifteen resistance-trained men performed 3 sets of 10 back squats at 60% of their 1RM under two conditions: stable and unstable load. The stable load was a just a normal barbell load. The unstable load had the weights suspended by elastic bands from the barbell. Subjects were able to freely choose their stance. EMG of the biceps femoris, rectus abdominis, erector spinae, external oblique, rectus femoris, soleus, vastus lateralis, and vastus medialis were recorded. (EMG records the activity produced by muscles.) Peak ground reaction forces were also recorded. The Results EMG of the biceps femoris, erector spinae, rectus femoris, vastus lateralis, vastus medialis were not significantly different between stable and unstable loading. So your back and quads won’t see any activation differences. But the EMG of the rectus abdominis, external oblique, and soleus were significantly greater in the unstable group. The peak ground reaction forces generated were significantly lower in the unstable load compared to the stable load. What This Means Unstable loading produced far greater core activation at the same level of submaximal loading. An increase of 85.7% in the rectus abdominis and 13.1% in the external oblique was seen. Also, a 72.2% increase in muscle activation in the soleus (the calf muscle used for balance and stability along with plantarflexion) was observed in the unstable loading trial. If you want to increase core activation, try loading the weights on the bar with bands, but be very conservative when choosing a starting weight. The unstable loading adds a significant level of difficulty. Note: Because of the mild decrease in peak ground reaction force, unstable loading shouldn’t be used for explosive work because it decreases peak force generated. On top of that, common sense tells us that rapid movements of heavy weights swinging from elastic bands is an injury waiting to
Origin: Tip: The Core Squat
Category: mysql
Tip: Ramp Up Your Prowler Training
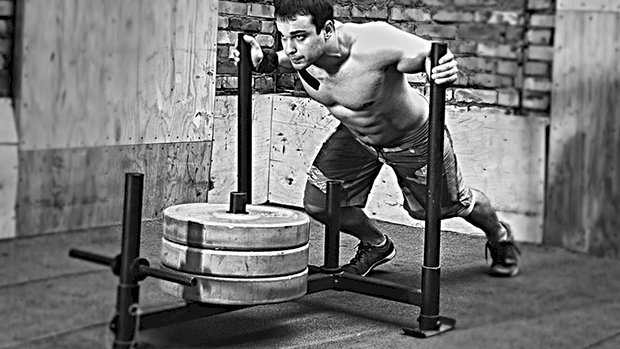 There are variables when it comes to sled pushing, like the height of the handles, the height of the pusher, and whether you push the sled with straight arms or bent arms. Since the bent-arm style usually involves a slightly more upright torso position, it tends to create a shorter stride length than when you push on the handles with your arms extended. Most people can push more weight on the Prowler-style sled with the bent-arm pushing style, so the weight-load you use can influence your arm position. When you’re pushing heavier loads for shorter distances or durations, you may want to choose the bent-arm position. Conversely, when you’re and pushing the sled for longer distances or durations with lighter loads, you may want to go with using the straight-arm position. Straight Arm vs. Bent-Arm Sled Pushes Here’s how to take advantage of this straight arm/bent arm distinction and get more out of your Prowler work: Straight-Arm, Then Bent-Arm With Same Weight: Take advantage of the fact that the bent-arm position is slightly easier because of the reduced range of (stride) motion. You can increase your work volume by extending a set of pushes by switching from the straight-arm version to the bent-arm version when fatigue starts to set in. Straight-Arm, Then Bent-Arm With Heavier Weight: Do 2-3 sets of straight-arm pushes. Then do a few more sets of bent-arm pushes using a heavier load for roughly the same distance or duration. Bent-Arm, Then Straight-Arm With Lighter Weight: This is the reverse of the previous strategy. Do a few sets of pushes with bent-arms, followed by a few more set with a straight-arm using a lighter weight. In this scenario, the bent-arm sets are done first using heavy loads for shorter distances or durations. You then do the straight-arm sets with lighter loads for longer distances or
Origin: Tip: Ramp Up Your Prowler Training
Tip: Methods vs. Mechanisms. Know the Difference
 What’s Your Main Goal in the Gym? Think of your primary goal. Now, how are you going to achieve that goal? There are two steps: Seek out others who were successful in reaching that goal. Next, isolate the behaviors and/or methods that these people have in common, rather than what they did differently. (That last part is crucial.) Fat Loss Goals A great example of this is fat loss. If you look at 100 people who lost a significant amount of weight, perhaps some of them used Weight Watchers, some went low carb, while others focused on eating “clean” foods. At first glance this seems confusing, but if you dig a little deeper you realize that all these people found a way to consistently eat fewer calories long enough to achieve their weight loss. In this example, there are various methods, but only a single mechanism. If you need to drop some fat and you’re debating whether or not to go vegan or use intermittent fasting, for example, do some serious thinking about which method you’re more likely to do consistently. Does that mean that all weight-loss methods are equally effective? Certainly not, but a “less effective” method that you’ll do is preferable to a more effective method that you won’t (or can’t) do. Training Goals You might notice that some successful bodybuilders use bro-splits while others use a push/pull split. Some use lower reps, others high reps. Some use mostly free weights, others focus on machines. Some use forced reps, others don’t. If you focus on these various methods, however, you’ll be blinded by the fog that prevents you from seeing the underlying mechanisms of success: brutally hard work for long periods of
Origin: Tip: Methods vs. Mechanisms. Know the Difference
PR in 2 Weeks, Guaranteed
 3 Practices to Boost Your PR Great programming is vital. But in the quest to build a stronger squat, lifters get too wrapped up in sets and reps and loading schemes. We sometimes forget about the basics, like creating tension and stability, and doing an effective warm-up that doesn’t waste time. Here are three things that could lead to a new PR after just a couple of weeks. 1 – Warm-Up With Movement, Address Restrictions Later The purpose of the warm-up has been muddied and confused. If general fitness is the goal, then doing mobility circuits and some foam rolling before you work out is fine. But if the goal is to build high levels of strength and muscle, then a warm-up like that can be excessive and even counterproductive. Although mobility circuits may make you feel good, research shows that dynamic movement drills (resembling the movement planned for that day) aimed at increasing tissue temperature is the deciding factor in increasing performance. This just means we need to move through a complete range of motion with some resistance or load repeatedly to warm up and prepare the body for lifting. We don’t need to work on achieving new levels of mobility. Warming up the posterior chain for heavy pulls can be as simple as spending a minute or two unlocking and extending the hips with a resistance band pulling on you. Posterior Chain Warm-Up Attach the band to something behind you, step through it, pull it all the way up, and do 40-60 slow controlled movements where you just touch your end range of flexion. Other methods to get all the tissues in the body warm are medicine ball slams and loaded carries or pushes. Here’s a favorite warm-up circuit that takes about 30 seconds and will get you ready for a hard lift. 30 Second Dynamic Warm-Up The modified Hindu press-up done at the start helps warm the entire upper body and also touches the limits of thoracic extension, while the kneeling medicine ball slams prepare you for any overhead movements. The plate push can be done on any mat or towel that will slide on your gym floor. It’s used to make sure the hips, trunk, and the rest of the lower body are prepped for the intensity of training. As for the foam roller and long list of mobility drills, save them for after. The workout will reveal where you need to focus those efforts anyway. 2 – PAP the Proven Way Post-activation potentiation, or PAP, is basically anything done before an activity that improves performance in that activity. Jumping or doing plyometric drills before going for a 1RM on the squat would be an example. Evidence shows this is possible because PAP improves rate of muscle contraction, but like so much in strength and fitness, the volume needed to actually improve instead of fatigue is specific to the lifter and something he has to discover on his own. If used properly, PAP can help you PR, but just throwing a bunch of shit at the wall isn’t going to cut it. Instead, here’s a cheat sheet based in reality, research, and science: Doing max effort jumps before maxing with weights can help, but the movement has to be similar. For example, a max vertical jump or jump squats could improve a squat while a maximal broad jump could improve a deadlift. For the vertical jump, there’s no need to jump up and touch a marker. Just descend into a quarter squat rapidly and try to touch the ceiling, raising your arms above your head and stretching out your body as long as possible. Rest a couple of seconds between each jump to make sure you jump as high as you can. Likewise, there’s no need for a marker for the broad jump. Just jump as far out as you can and rest between each attempt. Less is usually more. Novices should only do 1-2 sets of jumps while more advanced lifters may need 2-3 sets. Neither needs 5 jumps per set. The more stressful the jump, the less volume you need. For example, depth jumps expose the body to very high stresses, so you don’t need to do more than one set of 5. Less stressful jumps would need 2-3 sets of 3-5 reps, include box jumps and tuck jumps. (Tuck jumps are stationary jumps where the lifter jumps as high as he can, brings his knees to his chest, and then brings his legs back down before he lands). To make use of PAP, do a general warm-up, then do 5-10 minutes of some dynamic movement drills that include squat movements. Then, perform your max PAP jumps with the recommended volume according to your ability level and training age. After that, start your warm-up and ramp-up sets until you start hitting singles and going for that new max. Make sure to go for the new max within five minutes of your PAP jumps. Unless you did too many ramp-up sets or rested too long between them, the magic should start to happen in that 3-5 minute range. 3 – Start From The Bottom Coaches often give sermons about tightness and posture at the top of the squat after the bar is walked out. Despite their best efforts, many lifters who may be tight and rigid at the top still look
Origin: PR in 2 Weeks, Guaranteed
Tip: Get a Great Workout in Half the Time
 More Volume in Less Time Training volume – the amount of work you do in the gym as measured by exercises, sets, and reps – is key for muscle growth. And if you’re looking to maximize training volume in a short amount of time, agonist-antagonist paired-sets may be your new best friends. Agonist-antagonist sets involve doing a set of an exercise for one muscle or muscle group immediately followed by an exercise working the opposite muscle or muscle group before taking a rest. Think bicep curls paired with tricep extensions, no rest between. Or leg extensions for quads paired with hamstring curls. This study examines the differences between agonist-antagonist training versus a traditional training routine. The Study Researchers recruited 15 recreationally trained men with an average of 3.5 years of training experience. After 10RM testing for the wide-grip seated row and bench press, subjects came in for two sessions in randomized order: agonist-antagonist paired-set training or a traditional training routine. Here’s how each workout looked: Agonist-Antagonist Workout After a warm-up, the lifters did as many reps as possible (AMRAP) at their established 10RM load for bench press followed immediately (10 seconds later) by maximum reps at their established 10RM load on the wide-grip seated row. They then rested two minutes and repeated the pairing three times. Traditional Workout After warming-up, the subjects did three sets of AMRAP at their established 10RM load for bench press with two minutes rest between sets. Then they did three sets of AMRAP at their 10RM load for wide-grip seated row with two minutes between sets. EMG was recorded for the pecs, lats, biceps, and triceps. Volume load for each exercise and workout time was recorded. What They Found Workout time was about half in the paired set group: 8.5 minute average versus 16 minute average. Total volume for the bench and wide grip seated row was higher in the paired-set session compared to the traditional training session. The fatigue index calculated from the EMG (based on greater levels of activation) was greater for pecs, lats, biceps, and triceps during the wide-grip seated row in the paired-set group. What This Means This study shows you can cram more volume into less time using agonist-antagonist sets, at least for bench press and rows, while getting more recovery time between working the same muscle groups. Rest time between like sets in the paired-set group was about 170 seconds (about 50 seconds more than the traditional sets). This is because of the 10 seconds to switch exercises, the time it took to complete the other exercise, and the given two minute rest. The increased rest time for muscles may be what lead to the increased training volume. Nonetheless, being able to use agonist-antagonist sets to increase training volume in a shorter amount of time than normal training may be helpful to anyone who has limited training time. And it’s an effective workout. Give it a try the next time you’re in a time
Origin: Tip: Get a Great Workout in Half the Time
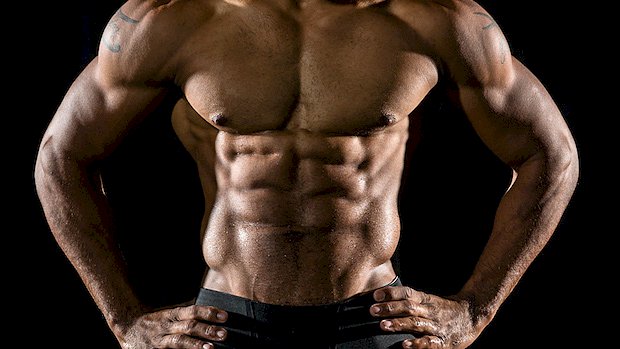
Growth Factor Chest Training
 Here’s what you need to know… To make a muscle grow, put it under constant tension for 50-70 seconds. This technique mimics the benefits of occlusion training. Occlusion training deprives the target muscle of oxygen during lifting and increases the release of growth factors in a muscle. The growth factor workout is a series of complexes that place your pecs under constant tension. You’ll use several flye and press variations. Contract the pecs. Focus on squeezing at the top. Don’t just go through the motions. Muscle Growth: The Short Version To build a muscle, make it release local growth factors. How? By keeping it under constant tension for 50-70 seconds. This does two things: A lot of lactate and hydrogen ions will accumulate inside the muscle. The muscle will be put in a relative hypoxic state – not enough oxygen enters the muscle which becomes oxygen-deprived. The result? Muscle growth is triggered. Growth Factor Training Growth factors are substances such as insulin-like growth factors (IGF-1, IGF-2) and mechanical growth factors (MGF) that have a very high impact on protein synthesis (muscle building). Stimulate the release of these in a muscle and you’ll build it. Studies have shown that growth factors are stimulated mostly via an accumulation of lactate/hydrogen ions inside the target muscle as well as depriving the target muscle of oxygen during lifting. The latter was found when doing studies on occlusion training: performing sets where blood flow to the muscle is greatly reduced by wearing a compressive cuff. Doing so diminishes oxygen transport to the muscles as well as the clearance of metabolic waste (lactate/hydrogen ions). Sets under these conditions have shown a similar hypertrophy response even when very light weights were used compared to regular, heavier sets. Researchers found that the main contributing factor was the release of growth factors. But you don’t have to create an occlusion with a pressure cuff to get the same effect. When a muscle is either tensed (flexing) or stretched, blood entry inside the muscle is greatly reduced. Less oxygen gets in and less metabolic waste is taken out, which creates the same effect as occlusion training in regard to the release of growth factors. How to Mimic The Effects of Occlusion To mimic the beneficial effects of occlusion training, keep the muscles contracted for 50-70 seconds. Out of those 50-70 seconds, spend as much time as possible with the muscles being flexed. So it’s not just about doing the exercises for the duration required, but about focusing on keeping them under tension/flexed throughout. Sure, you could simply perform one exercise for 50-70 seconds non-stop. But there are several reasons to do compounded exercises in one set: It’s easier mentally. You can maintain better focus (after doing an exercise for more than 30 seconds it’s easy to lose focus). It allows you to hit a greater variety of muscle fibers. You can use a bit more weight overall for each exercise (since you have fewer reps of each than you would if you only did one exercise for the same duration). First, Heavy Work Start the chest growth factor workout with a “heavier” exercise that’s still in line with the growth factor way of thinking – longer time under tension – but doesn’t require all the principles (constant tension, constant focus on the pecs). The whole upper body benefits from training heavier on the bench press, and doing so will “turn on” the pecs which will make the subsequent pump work more effective. One method is a multi-contraction drop set. It requires some specific equipment: light resistance bands and Mark Bell’s slingshot. I find this to be the best option but I’ll provide other ones for those who don’t have these tools. Bench Press First do 5 reps with added band resistance. Then remove the bands and immediately do 5 more reps. Then put on the slingshot and pump out as many reps as you can. Do 3 sets. If you don’t have access to a slingshot and bands here are two options you can use: Option 1 5 reps bench press, then as many top-half bench press reps as possible (going down until elbows are just above 90 degrees). Then hold the top position, squeezing the pecs for 15-30 seconds. Option 2 5 reps: Bench press, close-grip 5 reps: Bench, mid-grip 5 reps: Bench, wide-grip Take 10 seconds between each step. Growth Factor Work Complex 1: Press Medley Start with a medley that will blow up your pecs in only one set. This is brutal work even though light weights are used. It’s a long complex, so pay attention! Here’s the whole thing, then I’ll go through the individual elements below: 8-10 reps: Incline dumbbell press, reverse grip Max reps: Incline dumbbell press, regular grip (same weight) Max reps: Push-up, feet elevated Max reps: Flat dumbbell press, reverse grip (same weight) Max reps: Flat dumbbell press, regular grip (same weight) Max reps: Push-up The reverse grip dumbbell press is a great way to hit the upper
Origin: Growth Factor Chest Training
Tip: The Biceps Exercise for Powerlifters
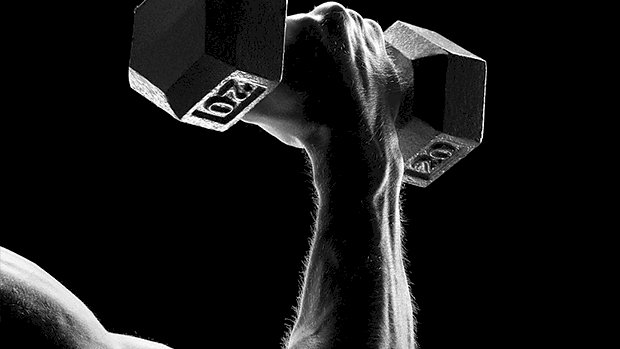
 Most big-three guys – strength athletes who focus on the squat, bench, and deadlift – don’t think they need bicep work. But having strong forearms and biceps will help the bench. How? These muscles stabilize the elbow joint. Neglecting bicep work is a great way to end up with horrible elbow pain, which is a common occurrence, yet they seem to not know why. Hammer curls, done the right way, will prevent this. Strict Hammer Curl Now, these aren’t the swinging-dick hammer curls you see a lot of guys do at the gym, where they use ultra-heavy dumbbells and get almost no tension on the biceps and brachialis. Instead, do these with the dumbbells started on the front of your legs. This prevents cheating at the start of the movement, which means all of the tension gets hogged by the forearms, brachialis, and biceps. To add some pain to it, do sets of 30
Origin: Tip: The Biceps Exercise for Powerlifters
Tip: The Weirdest Way to Leg Press
 Let’s turn the Smith machine into a lying leg press machine. You’ll need to set the pins or safety catches here so that the bar is resting on them at the bottom. It will need to be high enough for you to wedge yourself underneath the bar, but low enough so that you’re getting a decent range of motion. No three-inch rep stuff. Smith Machine Leg Press Try this: Start with a hard set of 10, take some weight off, and immediately do another hard set of 10. Repeat that one more time and find your safe
Origin: Tip: The Weirdest Way to Leg Press
Does Soy and Soy Protein Feminize You?
 Back in 1999, I got an email from someone who said he was a scientist that worked for Archer Daniels Midland, the giant global food-processing corporation whose mission it is to sprinkle the world knee deep in soybeans. He wrote to tell me about how some of his research had shown that soy contained chemicals that acted like estrogen and could affect the reproductive systems of human males, thereby reducing sperm counts and reducing testosterone levels. As is commonly done by evil corporations everywhere, Archer Daniels Midland squelched the research. Whether he really worked at the conglomerate and whether ADM really did suppress his research, I don’t know, but regardless, he wasn’t the first scientist to report that soy had negative effects on mammalian reproductive systems. Prompted by his email, I wrote Bad Protein, probably one of the first mass market articles to talk about any possible adverse effects to men from eating soy. Since then, as you’d expect, the bodybuilding subculture, along with bio-hackers, nutritional chemists, and enlightened nutritionists, have long debated the health effects of soy, especially soy protein. Most of the former are at least suspicious, if not downright terrified, of soy, while most of the lay public, thanks in large part to the marketing strength of ADM and other companies in the soybean business, continues to regard all-things-soy as synonymous with health. But it’s been almost 20 years since I wrote that groundbreaking article and a lot of the people who used to condemn soy have forgotten what it was about the grain that got everyone so lathered up in the first place. In fact, most modern-day articles don’t even mention the possibility of an association between soy and male reproductive health. So is soy still “bad protein”? It’s time to take another look at it and see if it deserves a second chance. Someone’s In My Parking Spot The concern with soy is that it contains plant chemicals known as isoflavones that function as endocrine disrupters. These isoflavones are genistein, daidzein, and glycetein. There’s also a fourth – equol – but it doesn’t occur naturally in soy; instead, it’s a particularly potent metabolite of daidzein that only shows up in 33 to 50% of humans who possess the particular bacterial strain necessary for its conversion (1). These isoflavones can affect mammalian cells in two ways. They can either bind to high-affinity, highly specific cell receptors in the cell nucleus, which in turn attach to DNA that leads to protein transcription. In effect, they act just like estrogen, albeit a weaker version. Alternately, they can simply bind to these receptor sites and sit there, preventing real estrogen from getting its normal “parking spot,” thereby preventing it from initiating protein transcription. You don’t want the first scenario to happen, particularly if you’re a male. At least that’s the theory. The thinking is that estrogen, or something that acts just like a weaker version, can be responsible for a host of “feminizing” effects. It can also make it harder to put on muscle. Of course, if you’re a male who has high levels of estrogen in the first place, you wouldn’t mind if any of these isoflavones stole estrogen’s parking spot because they’re weaker than real estrogen. The isoflavone would prevent the real, stronger, estrogen from binding and initiating protein transcription and you’d miss out on possible side effects like additional body fat, gynecomastia, possible BPH, and reduced sperm counts and testosterone levels. If, however, you have a low level of estrogen in the first place, the comparatively anemic activity of the weak estrogen could nevertheless lead to some of this undesirable estrogenic activity. Does It Really Feminize You? What’s the Research Show? We’ve known that isoflavones can cause reproductive disturbances in mammals since 1946 when it was discovered that sheep that grazed on red clover (which is high in phyto, or plant, estrogens) were infertile. Scientists made a similar observation about 20 years later when cows that were stall-fed red clover were also found to be infertile. Soon after, captive cheetahs on a soy-based diet turned out to have the same problem. Fertility was restored in all three cases when the isoflavone intake was reduced. There have also been innumerable experiments on mice and rats, most if not all showing that dietary isoflavones led to reduced fertility, reduced sperm counts, and reduced testosterone levels. Granted, most of these studies involved amounts of genistein that were probably five times more than a human would get through food, but they need to be taken seriously because, as Heather Patisaul, a soy researcher at North Carolina State University, explains, “Our reproductive system and the rat reproductive system aren’t that different. The same hormones are involved.” Some of the human studies showed similar problems. In one study of 99 men, the men who’d eaten the most soy in the
Origin: Does Soy and Soy Protein Feminize You?
How To Do One-Arm Pull-Ups
 Here’s what you need to know… You need to be strong enough to do 20 pull-ups in order to master the one-arm pull-up. Also, don’t be too fat. Practice a one-arm hang after your regular workouts. Work up to dead hangs with each arm for 30 seconds. Progress to one-arm lat-ups. Elevate your body a few inches by depressing your shoulder blade down and retracting it toward the spine. To overcome sticking points at the top and bottom, use bands. The final step is to use a small kipping motion to cheat and overcome inertia. From there progress to the strict version. You Have to Want It The one-arm pull-up (OAPU) is the holy grail of bodyweight strength exercises. It’s a feat that very few accomplish in their lifetime, but that’s mostly because they don’t want it badly enough. Like all difficult things, you have to set your mind to it. It’s not going to be easy and it might take you a few months. How long it’ll take you to learn depends on the following factors: Strength: Your current level of relative upper body strength matters the most. If you can’t do 10 normal pull-ups, you’re going to have to work all that much harder to do OAPUs. Body fat: Simple physics. The more body fat you have, the harder it’ll be to one-arm your carcass to the bar. Drop at least below 13%. Body type: Upper-body bodyweight exercises are usually easier for people with lighter legs. A lot of people tell me that this factor applies to me since I’m a below-the-knee amputee, but before you jump to conclusions, keep in mind that my prosthetic leg weighs the same as a normal leg! The Basics: 20 Pull-Ups If your goal is to perform a one-arm pull-up, you should first be able to do 20 conventional pull-ups with perfect form. Two basic points to keep in mind when doing pull-ups: Bring the chin above the bar. A pull-up only counts when you touch your chest on the bar. Don’t let your head sink between your shoulders, either at the top or the bottom of the rep. Some people take this last bit of advice to extremes. There’s no need to over-retract and depress the hell out of your shoulder blades. Just avoid hanging passively on your ligaments. Here’s the right way and the wrong way: Once you can do 20 conventional pull-ups, move on to the following progressions. 1 – One Arm Dead Hang A lot of people tell you to start doing weighted pull-ups at this point. Wrong. Opt for specificity instead of intensity. How long can you hold a one-arm dead hang? It might sound easy, but most people are surprised when they find out how much they lack in one-arm dead-hang strength. One of the reasons that one-arm dead hangs are important is that your body tends to twist around your grip during a one-arm pull. You need to practice and attain stability with a hang to make the transition to doing OAPUs a lot easier. >Tip: For stability, extending your free arm away from the body and bracing your core helps control this involuntary twisting movement when you’re hanging from one arm. Sets and Duration Start by adding 3 sets of single-arm dead hangs to the end of your workout. Go easy on the frequency for the first two weeks, otherwise you’ll be flirting with elbow pain before you know it. Ideally, start by doing these twice per week. After three weeks, progress to three times a week. Your goal is to be able to do at least a 30-second dead hang with each arm. Don’t worry, improvement comes fast. Continue doing your regular pull-ups during the rest of the week. Do three sets, three times a week. 2 – One-Arm Lat-Ups From a one-arm relaxed passive dead hang, while keeping your elbow locked, elevate yourself by depressing your shoulder blade down and retracting it toward the spine. Your body should elevate a few inches as the scapular retractors and lats contract. “Put your shoulder blade in your back pocket” is the cue to remember. Your goal is to be able to do three sets of 5 reps with each arm. 3 – Assisted One-Arm Pull-Ups As you get closer to doing an OAPU, you’ll face two major challenges: Getting stuck at the bottom – moving from dead hang to elbow flexion. Getting stuck at the top – pulling yourself all the way up after your elbow passes 90 degrees flexion. Fix these sticking points by using an elastic band that applies a resistance that’s about 30-40% of your bodyweight. For example, I weigh 163 pounds and I use a 55-pound resistance band. Slip the band around your pull-up bar and grab the band with your free hand as close to the bar as possible. Once you can do 3 sets of 8 reps, grip the band 4 or 5 inches lower. Continue doing this until you can do 3 sets of 8 reps and gripping the band about 20-inches lower – or about the distance of you elbow to the tip of your index finger – from the top position. Cheat Your Way Through It Using momentum to get your first OAPU is essential in the beginning. I’m not a fan of kipping pull-ups, but it’s okay to kip as a beginner and when performing certain new bodyweight exercises, like the OAPU.
Origin: How To Do One-Arm Pull-Ups
