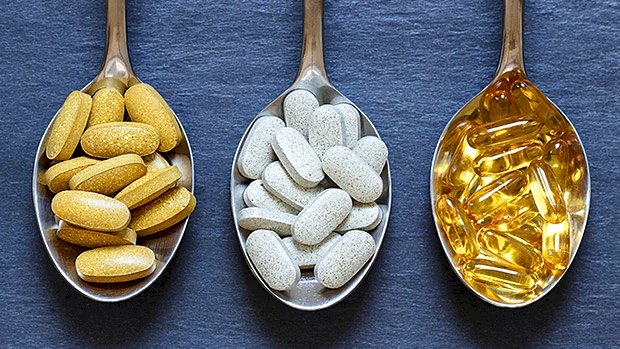
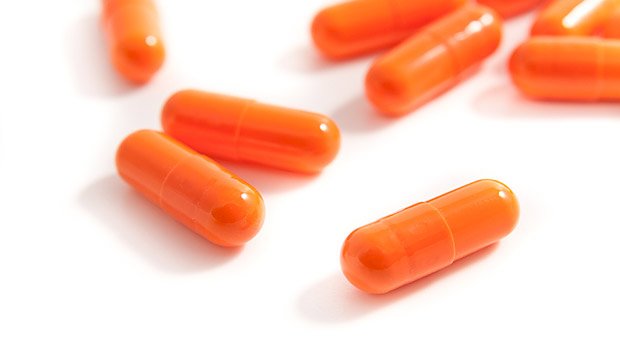
 You know how important calories and macros are to health and performance, but what about all the little micronutrients that rarely get talked about? Is it even important to worry about that crap if you’re pounding a metric ass-load of protein, have your nutrient timing nailed down, and are smashing an adequate amount of fruits, veggies, and healthy fats? It might be. It probably is. Actually, yes, it is. And the major plot hole in the dietary landscape is this: You literally can’t cover your micronutrient needs through food alone. Poor Soil, Poor Food I’ve been guilty of telling people to get all of their micronutrient needs through their diet. And in theory, that’s how it should work. But there are some legitimate issues with this. The food we have access to today isn’t as nutritionally robust as it was decades ago. When the USDA compared nutrient values from the fruits and vegetables from the 1950’s to those available in the late 1990’s, they found significant declines in protein, vitamin C, calcium, phosphorus, iron, and vitamin B12 (1). It’s also been postulated that there have been significant declines in zinc, magnesium, vitamin B6 and vitamin E, but since those weren’t even studied in the 1950’s, there’s no way to know exactly how much they declined. Highly intensive farming has caused a depletion in soil nutrients, which means the crops aren’t as nutrient dense as they were generations ago. Combine that with new breeds of crops that grow larger, have better climate adaptability, and are more pest resistant in nutrient-depleted soil and, well, there you go. So what’s an athlete to do about being micronutrient deficient? And is shoring up your micronutrient gaps really that important? Sorry, But You’re Nutritionally Screwed Even if you’re buying grass-fed, wild caught, cage-free everything, you’re still probably not going to be covering all of the micronutrient bases, especially if you’re a truly hard-charging athlete or lifter. And since you’re probably NOT buying all grass-fed, wild caught, cage-free everything, then you’re almost assuredly micronutrient deficient in some areas, and probably more than you think. Over a decade ago, the Journal of the International Society of Sports Nutrition scanned seventy diets from both active and sedentary people and all of the diets fell short in meeting even the lowly recommendations of the RDA (2). Now consider the case of an athlete that’s actually on a hypo-caloric diet. He or she will be eating less volume of foods that are already lacking in micronutrients. In effect, they’re actually doubling down on creating micronutrient deficiencies. Let’s pretend for a moment that you could get food from 1959 that was far more nutrient dense than the food you have access to today. Even if that was a viable option, you’d still need to choose from a vast array of food selections to cover your bases. That would be very difficult for someone who’s trying to lose fat and also trying to meet their macro needs while also staying in a hypo-caloric state. Round and round we go. The point is, relying on foods to eliminate micronutrient shortcomings isn’t really viable and certainly isn’t going to be efficient. In short, this is an area where supplementation really wins over food. True story, boss. Just Take a Multivitamin? I honestly can’t believe people still take multivitamins. Without citing a zillion studies that show multivitamins really offer up zero health or performance benefits, can we just use some common sense here? Do you really believe one horse pill is going to magically shore up all of your micro deficiencies? Taking high quality vitamins and minerals separately could be an answer. That would also require that you get blood work done to see where you’re lacking and then figuring out an amount to fix your particular deficiencies. But who are we kidding? You’re not going to do that. The next best and easiest course of action is to just assume you’re deficient in the following nutrients. Most of us are. Vitamin D Virtually everyone is lacking in this hormone. Yeah, I wrote “hormone” because by definition, that’s what Vitamin D really is. And there are a lot of reasons why the great majority of people are deficient in it. Most foods don’t contain very much of it, and everyone is scared as shit of the sun. Apparently, they think if you’re out in it for more than a few nanoseconds, your skin bursts into a carpet of melanoma. That’s truly unfortunate because, well, it’s not true and second, your body needs sunlight in order to synthesize Vitamin D. That’s kind of important because your body uses it to regulate your immune system and produce insulin. Ideally, you’ll get both regular sunlight exposure (at least 15-20 minutes a day) and Vitamin D through the diet, but even if you do, you’ll still most likely need to supplement with it as well. Go with at least 1000 IU every day (3,4), probably more in the winter. Iron Note that I’m not talking about full-blown
Origin: Where Food Fails Us
Category: mysql
Tip: Why Evening Training is the Worst
 People often ask why training in the evening is such a bad thing. Wait, is it? Yep. It has to do with cortisol production. Training spikes cortisol. So let’s look at what cortisol does. Its main function is putting your body in the best possible state to face danger or stress. It mobilizes stored energy, increases wakefulness, and shuts down the immune system momentarily so you have more energy for the muscles and organs, which are needed to face the stress. It also amps up the brain, mostly by increasing the conversion of noradrenaline to adrenaline. The ideal cortisol cycle is high in the morning and low in the evening. The cortisol spike in the morning is what makes you wake up (when you wake up on your own). The cortisol spike also increases adrenaline levels, which assist in waking you up too. Then, as your cortisol decreases in the evening, it puts your autonomous nervous system in parasympathetic mode – also known as rest-and-recover mode. That allows you to fall asleep more easily, recover better, get more time in deep sleep, and have a higher production of growth hormone. If your cortisol stays elevated in the evening, it’ll be much harder to fall asleep and get quality deep sleep. That’s why training in the evening isn’t the best choice. Let’s say you do train at night regularly and have restless sleep as a result. This may lead to chronically elevated cortisol, which is bad for your gainz, bro. First because cortisol increases protein breakdown. The amount of muscle you build is a function of the difference between protein synthesis (anabolism) and protein breakdown (catabolism). If you break down more it’ll be harder to add muscle tissue, especially if you’re a natural lifter. Then there’s the impact on myostatin. Myostatin is a myoprotein that plays a role in how much muscle your body will allow you to carry. The more myostatin you have, the less muscle you can build. Well, cortisol can increase myostatin and inhibit muscle growth. It also decreases the rate of muscle glycogen resynthesis – storing glycogen in the muscles after you used it up during training – delaying recovery. For all of these reasons, the more you can spike cortisol from training in the earlier part of your day, the more you can respect the natural cycle of your body and the better you’ll recover. Enhanced lifters have fewer problems because steroids decrease the action of cortisol significantly. But natural lifters need every advantage they can get. Who Can Get Away With It? Now, some people can actually pull evening training off: those who fall asleep easily even if they’ve had a killer workout two hours prior. Normally these guys have either a high level of GABA or a high level of serotonin, allowing them to shut their CNS down as soon as the workout is over, putting them in parasympathetic mode. Ingesting your carbs in the evening (post-workout) can also help lower CNS activation and decrease cortisol if you train at
Origin: Tip: Why Evening Training is the Worst
The Yearly Test: 5 Ways to Access Real Progress
 Once you’re a seasoned lifter, tracking your progress can be challenging. It’s not as simple as adding 5 more pounds on the bar every week anymore, and odds are, you cycle through your lifts to help avoid overuse injuries and keep fresh. So monitoring progress from lift to lift is like comparing apples to oranges, which can make it difficult to know if you’re truly getting better. The solution? Test yourself periodically with a variety of markers comprehensive enough to give you feedback that matters. You likely want to build muscle and strength while being fit and healthy. This means there are more factors to consider than just one-rep maxes on the big three. Sure, if you’re a competitive powerlifter, then your absolute strength on those matter most. For everyone else, there are other qualities to measure and see where they stack up from one year to the next. What Qualities Should You Test? Strength It can be broken down into absolute and relative categories. Absolute strength is going to be the maximum amount of force you can apply, like a max lift. Relative strength is your strength compared to your size, like what you’d demonstrate during pull-ups or any bodyweight exercise. Muscle How much muscle are you carrying in relation to your bodyweight? This is as simple as getting a body fat test using calipers, bioelectrical impedance, Bodpod, or hydrostatic weighing. While they all have varying degrees of reliability, you’re looking for trends, so just use whichever tool is most readily available to you and stick with that to see how your body composition might be changing. Health Health means the absence of disease, and since we know keeping a relatively lean physique reduces disease risks, this gets covered to a large degree in the body fat test. Yearly blood work is also a good idea, but that’s outside our scope here. Fitness This is a term more open to interpretation. You could think of it as your ability to perform specific physical tasks. Michael Phelps was fit to swim but not to win the Tour de France. For our purposes, let’s think of it more in terms of conditioning. The specific activities you like to do could influence the way you test your conditioning and determine what events you’re fit for. But I’m a big fan of the 10/10 test (we’ll get into the details in a bit). It isn’t a sprint and it’s not a pure endurance event, but falls somewhere in the middle, making it a good bet for most people. The Five Tests Here are the tests you should give yourself each year (the week of your birthday is a good time) to know whether your training is yielding real results or if you just spent the whole year spinning your wheels. You can do them all on the same day if you’d like, or just do them all within the same week. Keep track of your results so you have something to compare to next year. 1 – Bench Press: Bodyweight x Max Reps One-rep maxes are great, but if you gain a bunch of weight, even if it’s not all lean mass, you’re also likely to increase your bench. If you gain 20 pounds and bench 10 more pounds than you did when you were lighter, does that really make you better? A better way to look at this is by taking your current bodyweight and lifting it for max reps on the bench. This will help you do a better job of assessing your relative strength, and you can make sure any mass you gain (or lose) positively impacts your performance. 2 – Chin-Up: Bodyweight x Max Reps Strength relative to your bodyweight wins out here. If you get too fat, your chin-up numbers are going to drop. If you add lean mass, it shouldn’t negatively impact your chins. In a perfect world, your number of bodyweight chin-ups would exceed the number of bodyweight bench presses you could do. This would help with shoulder health and indicate an adequate strength balance. If your chin-up numbers are less than your bench numbers, it’s a sign you need to focus more on pulling than pressing and/or review your diet and lose some fat. 3 – Front Squat: 3RM No battery of tests would be complete without a max strength test. You could make an argument that this should be a deadlift or back squat, but here’s why the front squat is a better option: Front squats are self-limiting; you either nail it or you dump the bar. When it comes to testing your back squat and deadlift, you can still complete less than perfect reps, which can skew your comparison from one year’s test to the next. You’re looking for real improvement, not how much you can cheat to improve your numbers. If you’re on the platform in competition, it’s all about winning, so hell yeah, do what you need to complete the lift. When it comes to testing yourself to see if your training has been productive, there’s no room for risk. Besides being self-limiting, you need a lot to go right to front squat heavy: ankle mobility plus a strong lower body, trunk, and upper body to keep tension and maintain a clean front rack. It checks a lot of boxes, which makes this the best
Origin: The Yearly Test: 5 Ways to Access Real Progress
Tip: Test Your Stability in One Minute
 There are three things you need to know: Most lifters skip crucial developmental exercises. Having range of motion doesn’t matter if you can’t control it. Chasing numbers before stability is a fast track to injury. I’ve lost count of the number of lifters I’ve met over the years with back and knee problems. Why so many? Because people can’t control themselves without using weight. Wait, what does that even mean? It means that most lifters get so caught up with increasing their numbers and getting stronger on paper, that they completely neglect the strength it takes to control their own body weight. This takes stability, and they have no idea they lack it because they never test it, which isn’t that hard to do. The Lunge Test Now, I’m not inventing some new-fangled “one exercise to fix all” here. This is a lunge, done slowly. So what’s the significance? All the lifters that come to me with long-term back or knee issues can’t do it. Even with impressive totals on their main lifts, they struggle to do one controlled rep on each leg. Can you do it? The Steps Set up by doing a lunge first so you know where to comfortably keep your feet. Extend both your knees so your legs are straight. Over 30 seconds, lower yourself down to the bottom of the lunge, keeping a consistent speed. Tap your knee gently to the ground while maintaining tension. Rise up slowly, taking another 30 seconds until your legs are straight again. Repeat on the other side. Tips and Reminders If it’s not challenging, increase the range of motion required by elevating both feet on plates or boxes. Remember, the purpose of this exercise is to have full control through complete range of motion. If you suddenly speed up a bit to avoid a certain position then that’s where your weakness lies. You may not completely lose balance or drop all the way to the floor, but if at any point you lose the consistent slow speed you can’t count that as a completed rep. Now take it a step further. Aim for 5 reps minimum on each side with no problems. If you can’t complete them, you’ve got your work cut out for you. Just add it to your warm-ups for a while and you’ll master it. Advanced Version The elevated version isn’t essential but it’s a nice way to improve your overall hip mobility and push that stability further. Don’t be afraid to push your body with more stability exercises. You’ll get that same satisfaction of being able to do something a lot of others
Origin: Tip: Test Your Stability in One Minute
Tip: Take This to Stay Lean After Dieting
 Being lean, really lean, is usually a transient state as all severely restrictive diets eventually come to an end. On one hand, the end of a diet is good. You get to laugh deliriously as ice cream dribbles down your chin. Plus, it gets easier to put on muscle. But the bad side is that your V-taper starts to soften, blur, and spread out until it’s kind of a U-taper, which really isn’t a taper at all. Recent research, though, suggests that taking curcumin after a calorie-restriction diet is over might limit the amount of fat you regain, even if for some reason you stop training, too. What They Did This was a rat study and before you say anything, rat studies are just fine, thank you. Their physiology is similar to ours and you can carefully monitor their every waking and sleeping moment because they live in cages with wheels and are housed in scientific institutions. You can’t do that stuff with humans. They’d object. And they’d probably turn their noses up at the exercise wheel and insist on one of those stupid, over-priced Peloton bikes where some virtual coach who’s likely impotent from riding so much browbeats you to pedal faster. Anyhow, scientists took rats and split them into two groups. One group was on a calorie restriction diet and had 24-hour access to one of those rat-iconic running wheels. The other group didn’t have a wheel and they got to eat as much as they wanted. After 3 weeks, the trained rats were divided into three groups. The first group was terminated immediately and the second and third groups had their running wheels locked and were reintroduced to ad libitum (as much as they want) feeding for a week. Additionally, one of these groups received a daily gavage (force feeding) of curcumin (200 mg/kg) while the other group received placebo. What They Found When the rats no longer got to exercise and were given as much as they wanted to eat, body mass naturally increased, accompanied by a 9 to 14-fold increase in epdidymal, perirneal, and inguinal adipose tissue. In other words, they got tubby in all the places one doesn’t want to get tubby in, but all of these increases were attenuated in the curcumin group. Furthermore, the curcumin-fed rats had a much more favorable insulin curve and much lower C-reactive protein (a measure of inflammation) than the non-curucmin group. The researchers concluded that, “…results indicate the curcumin has a protective effect against weight regain and impaired metabolic control following a successful period of weight loss through diet and exercise, perhaps via inhibition of glucocorticoid action and inflammation.” How to Use This Info Most people, upon cessation of a diet, probably don’t abruptly revert back to previous bad eating habits. Instead, they’d gradually relax their previously Spartan diet and slowly start to put the pounds back on until they woke up one morning and found that they’re not just pudgy again, but have a renewed sense of self-loathing. Even so, there’s ample reason to think that curcumin would work equally well in preventing post-diet fat gain in humans. Of course, the human evidence on this particular aspect of curcumin is largely unexplored, but empirically speaking at least, curcumin does seem to keep the pounds at bay. One eyebrow-raising aspect of the rat study was the amount of curcumin administered. The dosage was 200 mg/kg, which translates to 18,000 mg. for a 200-pound person. That’s about thirty-six 500-mg. capsules per day. An amount that large would cause your tears, sweat, urine, and feces to be colored a kind of initially pleasing but ultimately frightening Day-Glo orange. Don’t freak out, though. There’s an easy solution. Plain old unadulterated curcumin is notoriously hard to absorb for rats and humans alike, so the researchers had to overdose the rats to ensure they got a therapeutic dosage. If the researchers had instead added piperine (a black pepper derivative) to the curcumin, they could have increased absorption by up to 2,000 percent, thus negating the need for such humungous doses. In fact, you’d only have to take a couple of Biotest® curcumin/piperine capsules a day, which is quite a bit more manageable than 36 a
Origin: Tip: Take This to Stay Lean After Dieting
Tip: Bodybuilder Cheesecake – The Recipe
 Cheesecake isn’t the most physique-friendly of foods, but we can fix that. No, this recipe isn’t really low carb or low fat, but it’s a huge improvement over the conventional version. Think of it as a cleaner, gains-building treat. With a base made from oats, and a filling sweetened by Metabolic Drive® Protein what more could you want? Here’s how to make it. Ingredients For the base 1 Cup rolled oats 2 Tablespoon natural honey 2 Tablespoon softened grass-fed butter 1 Heaping tablespoon natural crunchy peanut butter 1/2 Teaspoon cinnamon Few pinches of salt For the filling 3 Scoops vanilla Metabolic Drive® Protein 2 Whole eggs and 1 egg yolk 21 Ounces light cream cheese 5 Ounces fat-free sour cream Topping 1 cup raspberries or strawberries Zero-calorie strawberry syrup, or no sugar added strawberry jelly Extra peanut butter if desired Directions Preheat the oven to 350 degrees Fahrenheit (180 degrees Celsius). Line a 9-inch springform pan (see photo) with baking paper or foil. In another pan over low heat, gently melt the butter, peanut butter, and honey. In a bowl combine the warm syrup with the oats, cinnamon, and salt. Mix well. Pour the oat mixture into the springform pan and press firmly to the edges. Place in the freezer to help it set fast while you make the filling, or keep it refrigerated for 30 minutes. Add all the ingredients for the filling to a food processor, a good blender, or just use a hand mixer until smooth and creamy. Pour the filling mix into the now-set crumbly base. Throw in half the raspberries or strawberries. Leave some for topping. Bake for around 40 minutes. This cheesecake will cook a little darker than a traditional version, so look for a golden top with some wobble left in it. Allow it to cool fully before finishing with the jelly and a few more berries. Add a drizzle of peanut butter if you’d like. Refrigerate for at least a few hours to allow it to set fully before enjoying. If you’re counting, here’s the macros and calories for the whole thing: Calories:2724 Carbs:193 Fat:122 Protein:136 Fiber:26 Try to divide that up into more than two
Origin: Tip: Bodybuilder Cheesecake – The Recipe
Question of Power 5
 Complete Pec Development Q: My pecs won’t grow no matter how strong I get on the bench press. What gives? A: I know the feeling. I naturally had great shoulder strength and development early on, and that tended to translate over into virtually all of my pressing (flat, incline, overhead, etc). The drawback? Because I was delt-dominant, my chest lagged behind. There’s always going to be some muscle groups that will be subpar compared to others, no matter how much specialization you do for them. But I do believe in giving everything the ol’ college try. So let’s talk about some principles you should be adding to go from being bird-chested to pectacular. (Totally cheesy, but I’m rolling with it.) 1. Train chest early in the week or whenever you’re fresh. This shouldn’t be an issue with most gym bros. Monday is International Chest Day, after all. 2. Get the chest out in front. With all pressing and flye movements you need to set the scapula deep into retraction and depression. Think about getting the shoulders down into your back pockets, and keeping the sternum high. When you look at this from the side, you’ll see that the pecs get into a deeper stretch, which will increase their activation, and you’ll reduce the involvement of the anterior delts. A little “hack” here is to use a foam roller or rolled up towel in the middle of your back in order to facilitate a deeper setting of retraction. The towel is a pretty strong reminder to hold it there as well. 3. Push to the centerline of the body. This can be an internal cue to help establish better mind-muscle connection for the pecs as well. In all of your pressing, think about moving the arms to the centerline of the body to maximize pec activation and shortening. For a lot of guys who press in order to “train the movement” for strength, they simply press straight up. But if you want to get the pecs to contract as hard as possible during a press – and you do for hypertrophy purposes – then think about driving the hands towards the center of your torso. The external cue for this, if you’re pressing with a bar, is to think about bending the bar in half so that it would end up in a “U” shape. Just make sure you hold that deep scapula retraction and depression to bias the pecs in the pressing. Don’t let the shoulders roll forward at any time. 4. Know that leanness matters. There’s no “inner pecs” really. That’d be the sternal area of the pecs. And here’s the real reason why a lot of guys think they need more mass in there: they carry too much body fat to see the separation between the pec muscles. If you want that bad-ass pectoral “split” that runs down the middle, then don’t be fat. 5. Understand arm angles for complete pec development. The pecs have three different areas: the clavicular pec or upper chest where the fibers are attached to the clavicle; the sternal or middle portion of the pecs that attach to the sternum; the abdominal head of the pectorals which originates from the external oblique, often called the lower chest. If you want to bias a certain area of the pecs, you need to be aware of the angle of the humerus to the pecs themselves. This, and not the angle of the bench, will dictate what area of the pecs is the most activated and doing the brunt of the work. Sternal Pecs You hit this area more when the arms drive from the side of the body to the centerline of the torso. Upper Pecs You hit this area more when the arms drive at a 45-degree angle upwards, towards the centerline, in relation to the torso. Lower Pecs You hit this area more when the arms drive towards the hips and the centerline in relation to the torso. Prioritize movements based on what area of the pecs you’re trying to bias over the others. 6. Stress the pecs at different lengths. Not all movements stress the pecs equally in the range of motion. An incline press or flat press stresses the pecs maximally at the mid-point in the range of motion. A dumbbell flye places the greatest amount of torque on them in the bottom position where they’re maximally lengthened. And a pec-deck or cable crossover tends to stress them more in the fully shortened position. It’s a good idea to stress the pecs through all of these different ranges so that no fiber is left behind. So how would this look in program design? Day 1 Hit the sternal pec area: Do the dumbbell bench press for two drop sets of 8/8/8. Take the first 8 reps to failure Reduce the weight Take another 8 reps to failure Reduce the weight Take another 8 reps to failure Repeat one more time Hit the upper and lower pecs: Superset the low-to-high cable crossover with dips. Do 8-10 reps on cable crossovers to failure Do as many reps as you can on dips with bodyweight Repeat one more time Day 2 Hit the upper pecs: Use an incline dumbbell press, barbell press, or Hammer Strength incline press (shown in video). Do 10-12 reps to failure Rest 60 seconds Then try to get half the number of reps you
Origin: Question of Power 5
Tip: The Strength Test Real Lifters Can Pass
 Lead Photo Credit: Daniel Bernhardt The 1RM Trap-Bar Deadlift Test As a serious lifter, you should be able to pass this test: Set up a trap bar with 2.5 times your bodyweight. Now, get one good rep. That’s it. So, a 200 pound man should try to hit a 500 pound trap-bar deadlift. Trap-bar deadlifts aren’t inherently “better” for testing strength than traditional squats or deadlifts, but they have a number of unique benefits. Squats are mostly knee-dominant, with some help from the posterior chain. Deadlifts are mostly hip-dominant, with some help from the anterior chain. There’s definitely overlap between the two, but it’s hard to determine who’s stronger: a guy with a 500 pound squat and a 400 pound deadlift, or a guy with a 400 pound squat and a 500 pound deadlift. A trap-bar deadlift can settle the debate. It’s a hybrid movement that combines the best of the squat pattern with the best of the hinge pattern. Rather than focusing on one side of the body, it requires a great deal of strength from both the posterior and anterior chain. On top of recruiting the entire musculature of the lower half, trap-bar deadlifts require significant upper back and grip strength. Plus, no lift translates more directly to overall athleticism and performance like the trap-bar deadlift. For example, a vertical jump requires exerting maximum force into the ground, which is exactly what it takes to lift a maximally loaded trap bar off the floor. Can’t Do It? Make trap-bar deadlifts your primary strength focus on lower-body days. Squats and conventional deadlifts obviously help, but nothing boosts your trap-bar deadlift more than the lift itself. Heavy singles, sets of 3-5 reps, and dynamic effort sets with bands or chains will go a long
Origin: Tip: The Strength Test Real Lifters Can Pass
6 Uncomfortable Thoughts About Exercise Form
 Yes, I know, you’re a stickler for perfect form. Aren’t we all? It’s only the other guy who has crappy form! But are you sure you understand what perfect form actually is? I’m not, and my lifting and coaching career spans 30 years. Let’s break down this topic. Warning: You may feel uncomfortable, but hopefully that’ll provoke some thought. 1 – There’s No Such Thing as Perfect Form To start with, the very word “perfect” implies an unreachable standard. Perfect technique doesn’t exist in the real world. Bottom Line: Avoid the word “perfect.” These terms are more useful when describing exercise form: acceptable, competent, safe, efficient, optimal, improved, good. 2 – Perfect From Isn’t Always Pretty Paradoxically, optimal technique can sometimes look really ugly, and vice versa. The late, great Konstantins Konstantinovs comes immediately to mind. Arguably the greatest deadlifter of all time, “KK” pulled 939 pounds with no supportive equipment whatsoever, not even a belt. Here’s the kicker, though: KK lifted with a such a pronounced rounded spine, your own lumbar region aches Pavlovian style, in the same way that your mouth waters when you vividly imagine chomping into a fresh lemon. No credible coach would teach, recommend, or condone KK’s lifting technique (including me), yet he could pull your best deadlift max with one hand. And I can find no evidence that he ever suffered from back pain. No, KK didn’t die in the gym. Instead, he purportedly met his demise at age 40 in some type of underworld gang incident. Bottom Line: Start with the established rules when it comes to proper technique, but don’t be afraid to improvise if textbook form causes pain. And don’t be too quick to criticize other lifters (especially if they’re successful) if and when their technique doesn’t meet your preconceived notions. 3 – Good Form Doesn’t Guarantee Safety Sorry, but good technique doesn’t eliminate the possibility of injury, nor does bad technique guarantee injury. Can you actually define what “injury” means? The best definition comes from T Nation contributor Dr. Stuart McGill: “Injury occurs when external forces exceed the tissue’s ability to withstand them.” So even if you could define and use “perfect” technique, you’ll be injured if you put too much weight on the bar or simply exert more force against a load than your tissues can tolerate. This gives rise to at least three under-appreciated truths: If you progress your training gradually enough for your tissues to successfully adapt to them, you’ll avoid most common injuries – even if your form truly sucks. Adequate training variation reduces the likelihood of overloading any given tissue too frequently for successful adaptation to occur. If you do suffer an injury, simply resting the injured tissue(s) should be the cornerstone of your rehab strategy. Anecdotal evidence confirms this hypothesis: We all know lifters who remain relatively injury-free, despite using super-sketchy technique, and we’ve also seen lifters with beautiful technique suffer serious injuries. Bottom Line: While good technique won’t guarantee your safety, it’ll nevertheless stack the odds in your favor. 4 – Good Technique is Personal Although there are certainly well-established principles that dictate proper technique (for example, during any type of pressing, your hands should always remain directly above your shoulders), optimal technique varies considerably from individual to individual based on their unique anatomy, injury history, and so on. Here’s one example: During the conventional deadlift, conventional wisdom dictates that at the start, your hips should be higher than your knees. And while I agree with this recommendation, there’s considerable wiggle-room in terms of exactly how high your hips should be at the start of the pull. A tall lifter with long femurs, “iffy” knees, and a strong, healthy low back might do best with a higher hip position than the textbooks would suggest. On the other hand, a lifter with more advantageous levers, healthy knees, strong quads, and/or lumbar issues would be better served starting with relatively lower hips. In another example, many old-school, grizzled lifters will roll their eyes in utter contempt if you don’t squat deep enough to leave a stain on the carpet. However, deep squatting isn’t always compatible with different people’s leverages, past injuries, or circumstances. Certain types of bony hip structures don’t permit deep squats without significant lumbar flexion, which exposes the lumbar spine to serious injury risk. Similarly, short/tight Achilles tendons or ankles would require considerable forward lean during a deep squat, which may also expose the low back to unnecessary risk. Finally, some people’s unique characteristics preclude safe performance of certain exercises, even if perfect form could be identified and implemented. As one example of this, lifters with “Type III” acromions or who have significant thoracic kyphosis
Origin: 6 Uncomfortable Thoughts About Exercise Form
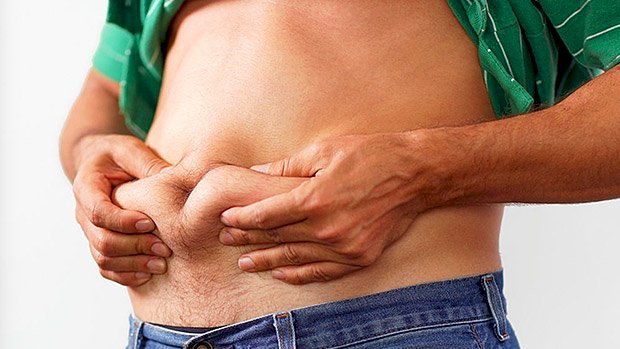
Tip: The Body Fat Percentage Factor
 Don’t Bulk Until You’re Ripped Ideally, you’d want to start a bulking cycle when you’re incredibly lean – single digit body fat. Working from an environment with less adipose tissue means less inflammation and usually a better hormonal profile – better nutrient partitioning due to insulin sensitivity and less estrogen (fat cells are highly estrogenic). But most people don’t want to do that in the real world. Guys get a hint of upper abs first thing in the morning, swear they’re at 9% body fat, and want to start “packing on the gainz!” Well, gear down there, big rig. The difference in being kinda lean and being truly peeled is like the difference between whizzing around the local go-kart track and being on the Nuburgring in a Viper ACR. Yeah, you’re on a track in both, and technically in a “race car,” but it’s just not the same. Since most guys never truly get ripped, they often end up in Skinny-Fat Land. This is where the majority of confusion about whether to bulk or cut comes from. When you’re skinny-fat, the scale usually says “runt” but the mirror says “doughnuts.” If you’re a total newbie (or have less than a year of really intelligent training experience) and you’re more than 18-20% body fat, then you’re in luck. No really, you are. Because then you’re in that rare period of time where you can lose fat while building a decent amount of muscle at the same time. Get into a minor caloric deficit and focus on banging out rep PR’s on the big lifts. If you’re skinny-fat but in the 12-15% body fat range, then focus on eating a maintenance intake of calories or a very slight surplus, and then bang out the rep PR’s. The common denominator? Getting stronger in the growth-producing rep ranges (8-20), and putting on more muscle. The underlying problem with looking skinny-fat really isn’t the degree of body fat. It’s the lack of muscle underneath it. A guy that’s 16% body fat who has a lot of quality muscle underneath will look fairly jacked. And that’s the difference between him and the guy suffering from skinny-fat disease who weighs 177 who’s also 16% body fat. Muscle cures a lot of
Origin: Tip: The Body Fat Percentage Factor
